Into Fangorn is one of those quests that you tend to forget about. It didn’t really stand out at the time, as a lot of players were struggling to capture Mugash in the previous scenario. Since the Dunland Trap was released soon after, this quest didn’t get much attention. That is not to say that this quest is to be forgotten though. With the Ent trait becoming ever more popular, more players might want to have some tree vs tree action. This quest provides that along with the brand new Hinder keyword that delays your progress:
Into Fangorn
Yes, the one with the Baby Groot as encounter set symbol
- Found in: The Voice of Isengard deluxe expansion, quest 3
- Official difficulty: 6
- Community difficulty: 4.3
- Encounter sets: Into Fangorn, Weary Travellers, Ancient Forest
- Quest cards: 2/3
- Play if: You have a questing deck that needs to prove itself, you are not a big fan of combat, your deck lacks a defender, you want to battle something else than Orcs and Dunlandings for a change.
- What is different about this quest: Mugash objective, Hinder keyword, Huorn enemies, quests reset.
- Solo or Multiplayer?: I would say this quest is pretty doable in true solo or with 2 players. Adding more people will make you reveal even more cards, making it more likely that you don’t get control over Mugash at the end of stage 1. This puts you on a long track down Fangorn Forest. The quest scales between 2 and 3 players as well, and with location lock being a genuine threat, I would advise doing this one solo or two-handed.
- Can I run Side-Quests for this scenario?: I wouldn’t recommend it if you are trying to beat this scenario as fast as possible. The time keyword on the stages requires you to quest hard against the main quest each round. Hinder will also keep removing progress, so it is imperative that you quest against the main quest rather than going to side-quests. Only on stage 3 will you have time to slow down and explore some side-quests.
Hinder Keyword
This quest has the unique Hinder keyword that really changes the way this scenario plays out. A lot of people are not familiar with the keyword, so I shall describe it and its effects here in short. Enemies with the Hinder keyword do not make attacks against the engaged player during the combat phase. They are also not dealt any shadow cards. The combat phase is not entirely skipped though, as players are still allowed to attack the enemies. This makes the combat phase a lot easier and gets around some of the big stats on these enemies.
The second part of the Hinder keyword is that the players will have to remove X progress tokens from the current quest (that counts side-quests as well) and the active location. X is the number of enemies with the Hinder keyword engaged with all players. This happens at the beginning of the combat phase. Progress is first removed from the current quest, and then from the active location if there are more progress tokens to remove. If there are no progress tokens on the quest or the active location, nothing happens.
The enemies with the Hinder keyword will still have abilities that trigger at the beginning of the resource phase. This is a bit of a weird point in the regular round for effects to take place, so remember to trigger them.
The Quest
Setup
The players search the encounter deck for the Edge of Fangorn location and the Mugash objective. Mugash gets attached to the Edge of Fangorn as a guarded objective that must be rescued for stage 1. Then, the players must reveal X additional cards, where X is the number of players minus 1. In true solo, this effect adds no cards to the staging area.
Some cards are better to reveal than others, so here is a short list of cards that you might want to see at this point in time.
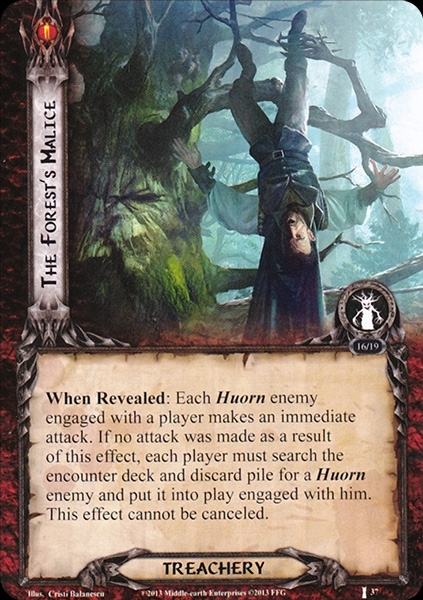
- The Forest’s Malice: Great to get out early as this will prevent you from taking potential attacks from Huorns later on in the game. The Hinder keyword will limit your progress faster though.
- In Need of Rest: Horrible condition attachment that you will love to see whiff
- Low on Provisions: Not a lot of characters yet in play
There are actually more bad cards to reveal than good ones, here is a short list of them.
- Off Track: Almost guarantees that you lose Mugash
- A location: They all make travelling to Edge of Fangorn more difficult
- Turned Around: You will have to remove a time counter, which may prove important later on.
When every player besides the first player has revealed a card, the players can start their first turn.
Quest card 1: Into the Woods – Time 4, 9 quest points
The objective of this quest stage is simple: Travel to Edge of Fangorn, claim Mugash, place 9 progress on the main stage. All three of these requirements must be met before the Time counter on the quest reaches 0. At that point, the players lose control over Mugash or he gets removed from whatever is guarding him. He is then shuffled into the encounter deck and the players are forced to proceed to stage 3, bypassing the second stage.

The first thing that players must do is to travel to Edge of Fangorn. Since it is immune to player card effects, the players are unable to place progress here, nor can they travel to it by means of a West Road Traveller. The first time they can travel here is during the Travel Phase of the first round. In order to safely travel here, keeping everything in mind, the players should keep at least 1 hero back during questing. In case an Ancient Forest pops up, they can pay the travel cost. Alternatively, they can use Thror’s Key in order to blank the Ancient Forest. During the first quest phase, players should be able to place at least some progress on the main quest. This will serve as a buffer which prevents players from losing the third checkmark of this stage.
When travelling to the Edge of Fangorn, the players will have to pay the travel cost on the location in order to make it the active location. This means that they will have to pull out 1 Huorn enemy for every two players in the game (1-2 players: 1 Huorn, 3-4 players: 2 Huorns). The players will have the option of 3 different kinds of Huorn. I tend to take the Dark-Hearted Huorn, as this early in the game, players can stomach threat easier than attacks or direct damage to characters.
During the next round, it will be vital players clear the active location. If Turned Around is revealed, remove a Time counter at all costs. You cannot afford to return the active location as that will cause you to wait for an additional turn. Better to get Mugash early. Players should keep at least 1 hero ready at this point in order to claim the objective. For the rest, more willpower will see you advance through the stage perhaps this turn. Regardless, it is advised to commit as much willpower as you can to meet the quest points on stage 1. Once you have cleared the Edge of Fangorn, it gets added to the victory display and Mugash is placed in the staging area, free of encounters. Players can now exhaust a hero to attach Mugash to that hero. All that you need to do now is to make the 9 progress on the quest card, and you will have survived the first stage.
If you manage to run out of time before you get the required progress or before you can claim Mugash, the players will have to trigger the Forced ability on the main quest. This instructs the players to shuffle Mugash into the encounter deck, regardless of what is guarding him (encounter card, players or if he is in the staging area). The players then skip the second stage and immediately progress to stage 3, no matter the progress on stage 1. This is the same mechanic as Into Ithilien, so I guess the two quests share more than a name.
Quest card 2: Escape from Fangorn – Time 4, 12 quest points
This is the quest stage that you want to be at. Either you advanced from the first stage directly or you have taken a detour via stage 3. Regardless, you will have to make a mad dash to the finish if you want to complete this scenario. This stage will require you to keep control of Mugash and make the 12 progress on the quest before time runs out. This will require insane amounts of willpower, but it can be done. Try to make all of the progress in one push, to prevent progress from being removed because of the Hinder keyword.
At this time, you will also likely have encountered a bunch of locations that are buffing each other. You will likely have to travel to a couple just to prevent the threat in the staging area from getting out of hand. Heart of Fangorn or Ancient Forest will be good destinations, as it will remove a lot of threat from the staging area and keep your characters ready.
You will also run the risk of losing Mugash (again) due to the time keyword running out. Off Track will be the biggest contributor to this, as it is a very annoying treachery if it is attached to a big location that you can’t explore yet. This will force the time keyword to go down even further, giving you little spare time to put the progress on this quest. If the 4 time counters are removed before the players have placed 12 progress on the stage, the same effect as on stage 1 triggers. Mugash gets shuffled into the encounter deck and the players are forced to go to stage 3. This can be frustrating, even more, when the players have already been to stage 3 before this. On the bright side, the encounter deck will have been thinned a lot by this point, so there is a big chance that players will encounter Mugash early.
The requirements to defeat this stage are to have the 12 required points of progress on the main quest and to have control over Mugash. If the players are in compliance with these two criteria, they have won the game. The players have now delivered Mugash to Saruman and are sent on a second errand to Tharbad. This will lead them into a Dunland Trap, which will be the next scenario in this cycle.
Quest card 3: The Angry Forest – Time 3
If everything goes to plan, you should never find yourself at this stage. if you do, that means that Mugash is somewhere in the encounter deck and must be found in order to progress to stage 2. This stage is where you might consider exploring some side-quests, to get in a better position against the encounter deck. Explore Secret Ways and Delay the Enemy are great options to reduce the threat in the staging area and to reduce the number of engaged Huorn enemies. Rally the West will be a great tool to increase the willpower on your heroes for the big quest push on stage 2.
This stage will require you to find Mugash again. Hopefully, the encounter deck at this point is running low on cards, making it easier to find Mugash. To “help” you even further, the Time keyword on this stage will allow you to discard the top 5 cards off of the encounter deck when all time counters have been removed. Each player must then choose an enemy or an objective from those discarded cards, and reveal it into the staging area. This will trigger the Guarded keyword on Mugash if he is among the discarded cards. This effect has the potential to whiff or in the worst case, it will reveal enough enemies for each player to add to the staging area. This will make it even harder to win against the scenario, as that increases the progress removed on the stage because of the Hinder keyword. This cycle will repeat itself until the players finally find Mugash and can claim him.
The other part of this puzzle is to make enough progress to advance. While the quest stage does not have any printed quest points, players can still make progress on this stage. When they do make progress, if there are at least 6 progress tokens on the main quest, and Mugash has been recaptured, the players can go to stage 2 and try to make it out of Fangorn forest.
The Encounter Deck
Global
- The encounter deck for this quest is very thin, at only 33 cards in Normal mode, and 23 in Easy mode

- Shadow effects are quite rare and 36% or 39% between the two modes
- Average threat on cards revealed is again low, averaging at around 1.3 and 1.4 between Normal and Easy mode.
- The Doomed keyword is not present in this quest, yet players may get a high threat because of the Dark-Hearted Huorn
- Surge is actually quite rare, and can only be found on Off Track
- There are a number of treacheries that remove Time counters: Turned Around and Off Track will make you remove more time counters than 1 per round.
- Immunity:
- The Forest’s Malice cannot be cancelled
- Edge of Fangorn is immune to player card effects.
- None of the Huorn enemies can have attachments
The statistics above are for the entire encounter deck without the Edge of Fangorn and the Mugash objective, as those generally don’t end up in the encounter deck. The low shadow effect percentage is nice, but actually quite useless. Since the enemies don’t attack you, they aren’t dealt shadow cards. Only the Angry Huorn and attacks made by cause of the Forest’s Malice will deal shadow cards. The rest of the encounter deck is split fairly equally, with treacheries being slightly more common than locations or enemies. This makes Wingfoot a bit unreliable in low player counts unless you use scrying effects.
Objective

Mugash is not the quiet captive that you had hoped him to be. Though he is not an enemy in this quest, he is quite tricky to get a hold off if players lose him. He will be guarded by an encounter card when he gets revealed during stage 3, so players should first explore the location or kill the enemy to which Mugash is attached (or it is attached against Mugash, no idea on the order here). When free of encounters, players can claim Mugash by exhausting a hero. It is therefore wise to keep at least 1 hero ready in case Mugash gets free of his encounters.
Once attached, Mugash is neither helpful nor hindering. Instead, he is just a passive attachment that has no further abilities. It should be noted though, that he will leave your control whenever the attached hero takes damage. This becomes a problem when dealing with the effects of Low on Provisions or In Need of Rest. I would advise that you put Mugash on your attacker, as defenders can take damage from attacks, and questers might get removed because of In Need of Rest. Use damage cancellation to prevent that hero from taking unwanted damage. If the hero does take damage or leaves play, Mugash is returned to the top of the encounter deck. This will mean that you can reveal him next turn and will have to trigger his Guarded keyword. This also means that you might reveal him as a shadow card if you are engaged with an Angry Huorn. Use cards like Shadow of the Past, in that case, to prevent having to cycle through the encounter deck again. You don’t have time for that.
Enemies
The encounter deck has new enemies that are unique to this quest. The Huorn enemies are very tough enemies with a huge stat line. However, their attack values don’t come into play a lot since all the enemies have the Hinder keyword. All enemies have abilities that trigger at the beginning of the resource phase. The Huorn enemies are also all immune to attachments, so don’t bother with traps.
- Deadly Huorn: This Huorn is deadly indeed. While it has the lowest attack value and a medium pool of hitpoints, I find the forced ability on this enemy to be the most annoying. You will have to deal 3 damage to a single character you control if this Deadly Huorn is engaged with you during the resource phase. This will kill all but the strongest ally (unique Ents, unique Eagles, and Istari (AND BROK IRONFIST!)) and will also take a lot of heroes down with it as well. Damage cancellation and healing are very important card mechanics to bring with you when you are engaging these Huorns. Try to avoid damaging the hero who is guarding Mugash as well, as that will return Mugash to the top of the encounter deck. Chumping will be a viable strategy when dealing with this Huorn, though you must be careful to not run out of willpower allies at that point. Using hitpoint increasing cards like Bill the Pony, Hardy Leadership, and Ent Draught will allow your characters to survive the 3 damage more often, as long as you can heal the damage. This will also be a great enemy for any dedicated Gloin deck.
- Dark-Hearted Huorn: This is my favourite option to pick if I am instructed to take out a Huorn enemy thanks to the effects of Edge of Fangorn or The Forest’s Malice. This enemy has the lowest engagement cost of all Huorns, and will, therefore, engage a player during the same turn it is revealed. It has 4 attack which can be handled easily by some defensive allies in case the players have to resolve The Forest’s Malice. The 4 defence is a harder nut to crack, but using defence reducing abilities like Rivendell Blade and Marksman of Lorien will allow you to place damage more consistently. The 5 hitpoints on this enemy are the lowest among all enemies, but just enough to prevent you from bouncing Gandalf into play and dealing with it. If you are unable to destroy the Dark-Hearted Huorn before the resource phase, you will have to raise your threat by 2. This ability will stack with other copies of this enemy that is also engaged with you, so you must be careful and kill as many of these trees as possible before you threat out. There are no other effects in this scenario that raise your threat so you will be fine for a while. Adding threat reduction will help in the long term to keep your threat low enough to avoid other Huorns or from threating out.
- Angry Huorn: This enemy is the toughest and the most brutal Huorn among all three enemies. It has the highest base threat, attack, and hitpoints, and you will have to deal with that 5 attack stat more often than with other Huorn enemies. That is because this enemy makes an attack against the engaged player at the beginning of the resource phase. For this attack, the enemy is dealt a shadow card and will resolve its attack like any enemy would. The good thing about this attack is that all of your characters will be ready to defend. In order to defeat this enemy, you will have to deal a total of 12 damage to that enemy. This can be difficult to muster if you are also prioritising willpower at this point. Direct damage can only get you so far, but it will allow you to slowly chip away at these trees.

Locations
The forest of Fangorn is the setting of this quest. All locations have the Forest trait, which helps some Silvan cards. The forest tends to close in around you, as a lot of the locations boost each other. This creates a web of trees that can quickly lead to location lock.
- Edge of Fangorn: This unique location starts off in the staging area with the Mugash objective attached to it. Travel to it as soon as you can to take control of Mugash. This location has already been covered more in detail during the review of stage 1. It is not a prerequisite to moving on to stage 3 since you can just leave it in the staging area and accept the fact that you will not be taking the short route through Fangorn. However, its Forest trait will make it harder to clear, as other locations will buff it while it is in the staging area.
- Tangled Woods: It is quite easy to get tangled in these woods, as this location proves. On its own, this location is a 2/4 location which adds a passive ability to all Forest (so all full stop) locations in the staging area. This passive ability gives all locations an additional Travel effect that requires the players to exhaust a hero in order to travel to any location. Fortunately, this ability does not stack with other copies of Tangled Woods, else players would be exhausting a lot of heroes to meet the Travel cost. This additional effect will become annoying when applied early in the game, which makes Edge of Fangorn gain this travel effect as well. Poor timing can lead to the players being unable to travel to the locations, as all of their heroes are exhausted. On top of this, this new travel effect on Edge of Fangorn is immune to player card effects. There are a couple of ways you can avoid this location and its passive ability (which also buffs itself). First off is Thror’s Key, which blanks this location, nullifying the passive ability it grants other locations. A second copy will still add this, but at least you have 1 location less to worry about. Second, since the passive is a travel effect, you can use Thror’s Map, West Road Traveller, and Ghan-Buri-Ghan in order to travel to locations without paying the travel cost. Note that this does not hold true for Edge of Fangorn since it is immune. Finally, you can clear this location in the staging area to get rid of its effect. 4 quest points may take a while, but it is not impossible to achieve in a dedicated location control deck.
- Ancient Forest: This is the real problem location of the encounter deck, as it will buff all other locations. While there is at least 1 copy of Ancient Forest in the staging area, all Forest locations (including itself) gains +1 threat and +3 quest points. Luckily, this effect does not stack with other copies of itself, which would have made the location lock even more difficult. The +1 threat can be an annoying buff to all locations and is hard to keep track off. The 3 progress points that each location gains will also hinder any form of placing progress into the staging area. You will be able to blank this location with Thror’s Key until a second copy pops up. Otherwise, you could travel to it in order to get rid of the buffs. Travelling will not only get rid of its own 3 threat but will get rid of the buffs on the other locations in the staging area.
- Heart of Fangorn: Here is another location you would want to blank when it comes up. The Heart of Fangorn location will provide players with a hard limit where they can only ready 5 characters during the refresh phase. The players can choose these characters themselves, but it will ultimately lead to some tough decisions between heroes and useful allies. This location has defeated a lot of Ent decks trying to get going. Good cards to counter this effect will be characters with build in readying effects (Gimli, Boromir, Quickbeam) or attachments that ready characters. Pop a Grim Resolve while this location is in the staging area, and everyone will love you. This location shuts down a lot of swarm style decks that cannot ready their characters. However, it only requires 3 progress tokens to clear so you could avoid its ability by travelling or clearing it with location control cards.

Treacheries
The treacheries will actually be the most common sight (statistically speaking) in this encounter deck. They deal with removing time counters, dealing damage, and allowing the engaged Huorns to attack the players.
- The Forest’s Malice: I have mentioned this treachery a lot during this review, and that is not without reason. This treachery is awful when timed poorly, as it will break the normal cycle of the round. When this treachery is revealed, players must resolve immediate attacks from all engaged enemies. All the Huorns gain shadow cards and make attacks against their players. To make matters worse, this treachery cannot be cancelled by any means. This will mean that players are forced to defend the attacks unless they can cancel the attacks themselves. Note that Feint and such won’t work for these attacks, as they are made in the quest phase. Instead, try using The Wizard’s Voice or Out of Sight. These events are more rare, but will save you from extra attacks. I personally tend to quest big and leave a chump blocker ready to take the hit if needed. Getting multiple copies of this treachery is also pretty bad, as you are not likely to defend the same enemy twice. If there are no enemies engages with any player, all players search the encounter deck for a Huorn enemy and put it into play engaged with them. Again, I often go for the Dark-Hearted Huorn, as it is in my eyes the least harmful of the bunch. Your opinion may differ depending on your playstyle and type of deck you are running.
- Turned Around: This treachery gives the players the choice to either return the active location to the staging area or remove a time counter from the quest. This choice depends on many factors, like the stage you are at, the number of remaining time counters on the stage, and whether or not you have Mugash under your control. During stage 1, it is vital that you clear Edge of Fangorn, so there is no returning that to the staging area. Remove a time counter if you can. On stage 2, the opposite is true. Here you will want to keep your time counters, no matter what. Removing an active location might result in making more progress on the active quest, so that would be great. On stage 3, I would say to keep the active location in the slot and remove the time counter. This way you can explore the location, and run out of time sooner, finding Mugash quicker. Note that this effect is an either/or phrasing, so if you have no active location at the time this treachery is revealed, you are forced to remove the time counter. If you don’t want either option, you can always cancel the effects on this treachery if you have the option.
- Low on Provisions: Swarm decks beware! This treachery is devastating if players are controlling a lot of characters. This treachery will force players to distribute X damage among their characters where X is the number of characters they control. Ent decks love effects like this, but an upstarting Outlands deck might struggle with such a treachery in the early game. Getting multiple copies of this without healing will slowly but surely kill off your characters, so be careful with this treachery. You do have the option to cancel the effects if you are unable to take more direct damage on your characters. Remember to not damage the hero guarding Mugash, as that will return him to the top of the encounter deck.
- Off Track: Here we have probably the treachery that you would like to cancel the most. Off Track will attach itself to a location in play (staging area or active location) as a condition attachment. That location gains +2 quest points and will gain a passive ability where the players must remove an additional time counter at the end of the refresh phase if that location is still in play. This treachery can cut your time in half if you cannot clear the location fast enough. My advice will always be to attach this to the active location, as you might be able to clear it during the same round. If you manage to avoid locations during your playthrough, the treachery becomes a whiff altogether. The card will still surge though, so remember that. The condition attachment can only be 1 per location, so if you reveal multiple copies of this and there is only 1 location in play, the later copies just surge. Definitely try to cancel this effect if you can, it will save you a lot of time and can prevent you from going to stage 3.
- In Need of Rest: Yet another condition attachment treachery. This time, the treachery targets one of the questing heroes. That hero gets removed from the quest and gains the condition attachment. Whenever a time counter is now removed from the stage, that hero suffers 1 point of damage. This condition attachment will require decent healing to overcome. There are also other ways around it. This includes removing characters from the quest with Don’t Be Hasty, committing characters after this effect triggers with Hobbit Pony or Late Adventurer, getting rid of the attachment with condition removal or just plain treachery cancellation. Committing no heroes to the quest will also force this card to whiff, so if your allies can handle questing, this can be a great strategy to avoid this nasty card.

Tips and Tricks
- Bring willpower. This fact cannot be overstated. Chances are that you will be facing a lot of threat in the staging area thanks to location lock. To make matters worse, the Hinder keyword will continue to get rid of any progress you do make. Bringing more willpower to the quest will help you to beat the stage before Time runs out.
- No need to keep defenders back. If you can spare a chump blocker for any untimely The Forest’s Malice, you can save a hero slot for another big quester. Eowyn and Galadriel are excellent options.
- All the enemies and all the locations share the same traits with each other, Huorn and Forest. This makes a Rossiel deck very easy to set up. Her willpower setup is made even easier since Edge of Fangorn gets added to the victory display without needing to play Leave No Trace.
- Damage cancellation can be vital to keeping Mugash attached to a hero. Consider bringing cards like Honour Guard or Close Call to prevent having to detach Mugash and resolving his Guarded keyword again.
- Discarding Mugash as a shadow card can be a real pain. So the same advise as The Dead Marshes holds: bring ways to return him to the encounter deck if he does end up in the discard pile. This can include cards like Shadow of the Past or The End Comes. This will save you precious rounds of gameplay and can prevent you from getting frustrated with the quest.
- Leave your Trap decks at home, none of the enemies can have attachments. It is time for the forest to snare you. That’s a different kind of Forest Snare than what players are used to.
- Condition attachments are actually a common sight in this encounter deck. Off Track and In Need of Rest are tricky cards and should be removed if you are able to. Try to include cards like Power of Orthanc or ally Elrond in order to survive these attachments.
- Healing will be important as well. There are some direct damage effects that will leave your characters damaged. Effects like Deadly Huorn and Low on Provisions will tear through your characters if you can’t heal them in time. As stated before, damage cancellation will also be a good mechanic to bring in your deck.
- There are a bunch of treacheries that are very much worth it to cancel. Off Track and The Forest’s Malice, in particular, can ruin your game. Bring A Test of Will for the majority of the treacheries. The Forest’s Malice cannot be cancelled, even by the Door is Closed. Chumping or cancelling the attacks will allow you to survive this terrible treachery.
Playthroughs
- Progression style, 3 players (Grief deck!): https://www.youtube.com/watch?v=DK78b_qUysE
- Progression style, 2 players: https://www.youtube.com/watch?v=AGrntMwPbcQ
So concludes the Voice of Isengard Deluxe scenarios. The players are now set on a journey through Dunland. This means a lot of card draw punishment and a couple of hateful moments in the history of this game. Next up I will be doing another one of my favourite quests in this cycle: Celebrimbor’s Secret. The Dunland Trap will have to wait until I find the courage to delve deep into that nightmare of a quest.

Actually, I don’t think you can Feint any attacks from The Forest’s Malice, as it’s a Combat Action…
I’m enjoying the series!
LikeLike
Thanks for pointing that out, I’ll see to it that it gets patched. Glad you are enjoying the articles!
LikeLike