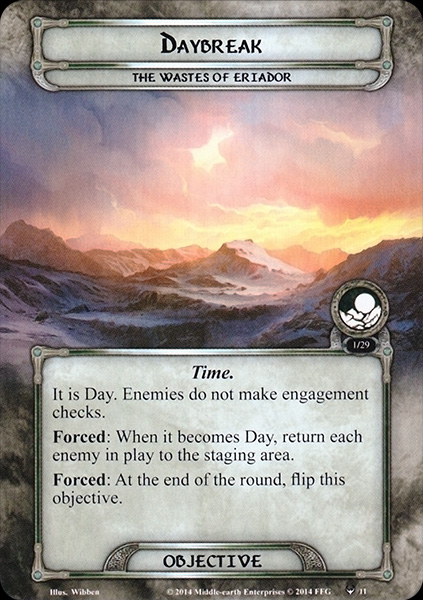
The Wastes of Eriador has always been my favourite quest from the Angmar Awakened Cycle and Lost Realm Deluxe box. Given that this is, together with Ered Mithrin, my favourite cycle, it ranks pretty high on my list of overall favourite quests. This is just one of these quests where theme and mechanics work so perfectly together to create a very enjoyable experience. There’s a day/night objective in this quest that flips every round and changes the rules of the game. During daytime, enemies don’t make engagement checks, while at night, progress can’t be placed on the current quest. So you want to quest with most of your characters during day to make a lot of progress. While at night, you need to “rest” and hold characters back to protect against the unavoidable attack by wargs. All of this gives the quest a very unique and memorable rhythm and really gives you the feeling of playing through multiple nights and days.
I also like that this quest is on the harder end of things, which shouldn’t be surprising, giving that the designers recommended using the day/night objective in different quests to make them harder. I think the main reason is that the objective reveals an encounter card whenever it flips to night, which is especially a problem in solo play. However, this quest isn’t much better with higher player counts because the Foul Weather encounter set from The Lost Realm returns, and with it, some horrible treacheries that deal damage around the whole table.
First attempts
Considering all this, a solo deck has to bring a lot of things to the table. You need a good general deck that can handle basically 1.5 encounter cards each round, has both strong questing and combat capabilities, and you will also need healing, so we probably want at least one Lore hero.
Matt mentioned in his article that he used a Trap deck to defeat this quest, and the combination of the Lore sphere and good combat tricks make this seem a good fit for this quest, which has a lot of enemies. Cause it’s one of my favourite archetypes and doesn’t work against every quest, I thought why not try it as well. I brought my favourite Damrod/Pippin/Mablung hero-line up… and lost terribly on my first attempt. I just kept revealing locations for the first two rounds, and with rather low willpower, I couldn’t make it through the initial active location, Shrouded Hills. So I quickly abandoned the Trap-strategy. While I think you can certainly win against this quest, it doesn’t seem optimal for this series where I want to maximize my winning chances and have a chance to handle whatever the encounter deck throws at me.
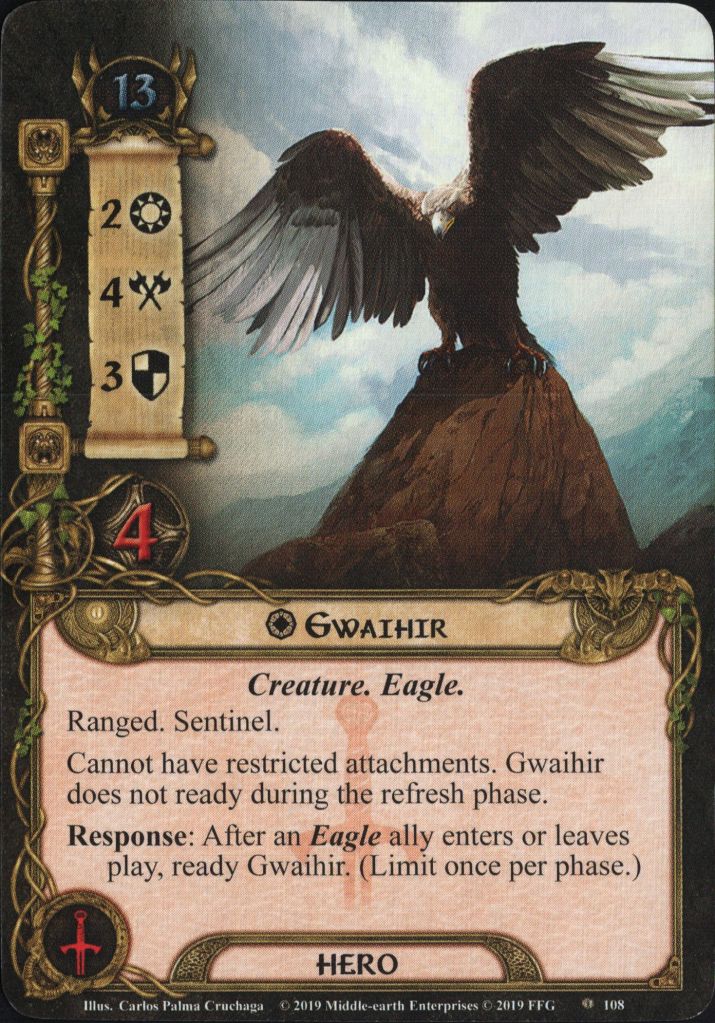
I like the idea of a Lore/Tactics line-up, and so I next brought my Eagle deck with Radagast/Gwaihir/Mirlonde. Both Radagast and Gwaihir have “not exhausting” or readying abilities, so they can help with both questing and combat against multiple smaller enemies. This worked well in the early game, but then I encountered two problems: The first was Cold from Angmar, a condition encounter card that blanks the text boxes of damaged characters. While this is actually a benefit regarding Gwaihirs passive text (he can now ready at the end of the round), but losing the readying ability on both him and Radagast is just horrible, and my healing cards couldn’t keep up with the damage from the encounter deck. The other issue was my threat level that already started at 30 and on stage 1 gets increased by one more point whenever it becomes night. So I hit 50 before I even made it to stage 2. I made another attempt switching Mirlonde with Lore Aragorn, adding some starting threat for a reset of my threat later on, but the result was the same.
I, however, liked Loragorn here, giving access to healing with the Lore sphere and threat reduction, so I paired him with his “Three Hunters” Partners: Leadership Gimli and Spirit Legolas. While they are also high threat heroes with readying abilities, their main advantage over the previous deck comes with their spheres. Spirit gives access to cancellation against treacheries like the aforementioned Cold from Angmar and also more threat reduction, especially in combination with good old Sneak Attack/Gandalf. The deck performed actually quite well with solid questing, readying for combat, and enough answers to the threat raising and direct damage. I got two wins and had things pretty much under control on my third attempt, making it to stage 3, where the encounter deck decided to go crazy.
The encounter objective flips to night when you advance, revealing a White Warg. There was a Blood-thirsty Warg in the staging that made an immediate attack, but for all of that and the Pack Leader that gets added at stage 3, I had calculated and still could have defended. However, the shadow for the immediate attack was a copy of Sudden Darkness, which pulled another Warg enemy from the discard pile that would make another attack and force me to exhaust one more character for the Pack Leader. At this point, I knew I had to kill a hero, but I still might have been able to manage that. But another White Warg as a shadow effect in the combat phase meant yet another additional attack, which meant I was completely dead.

In hindsight, I think I could have stopped the run-through here, accepted a 2 out of 3 win rate, and say that no deck could handle such an unlucky turn of events. However, somehow I was hooked to try again and go for a perfect win rate, and even if it was only to luckier encounter deck draws. I also saw a way forward to mitigate the number of Shadow cards I had to reveal…
The deck
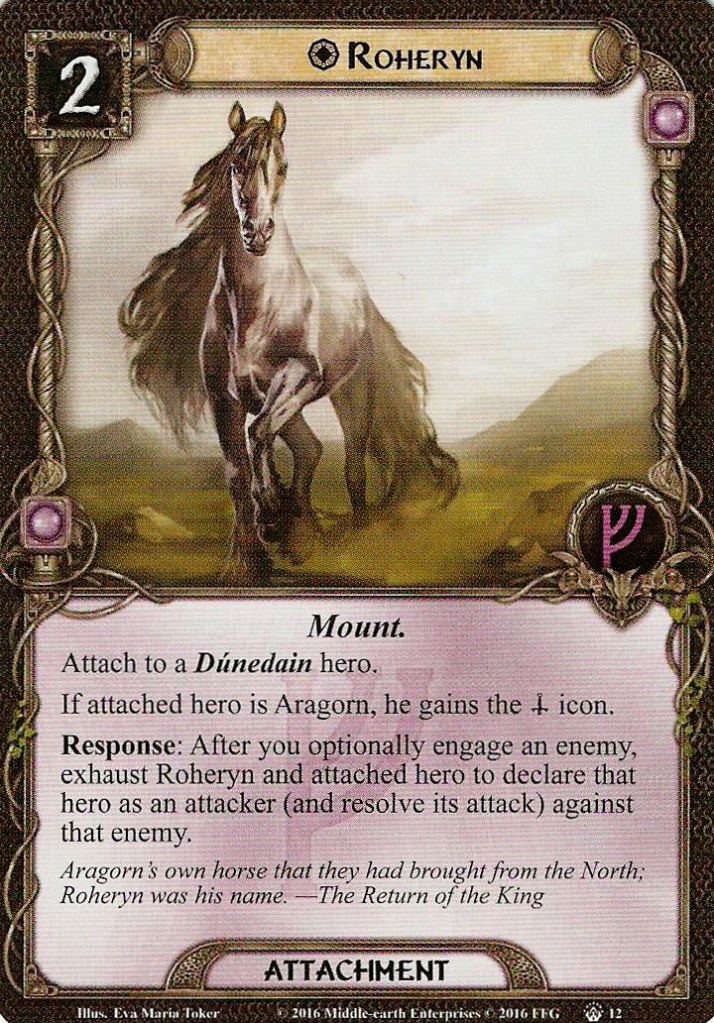
I had already brought Aragorn for all those last attempts, and I had to come to this point to remember about one of his toys I didn’t use: Roheryn. It’s the Aragorn attachment I probably have used the least, but it seems rather strong for this quest. This trusty horse allows you to make an immediate attack against an enemy you optionally engage (which is easy to control at day time). Because these Wargs are rather squishy, you can kill most of them before they even attack and resolve their nasty shadow effects. That also meant my other heroes didn’t have to help as much with combat, so I focused the deck more on making the Roheryn strategy work consistently and ended up with the following:

Aragorn is really the focus of this deck. The other heroes are in here to provide the resources and card draw to get Roheryn and attack bonuses on him quickly. Their abilities aren’t essential after setup, so you don’t mind blanking them with Cold from Angmar. Denethor acts alongside Amarthiul as a defender in the early game and can tank the Pack Leader later on when he has a Gondorian Shield (Roheryn gives a tactics icon if you were wondering how we play it). Gildor is questing all the time.
You should mulligan for Roheryn or Heed the Dream; that way, you can play for full effect with Denethor’s Ressources. So you are then guaranteed to get the horse out turn 2, often with a Dagger of Westerness or Dunedain Mark to boost Aragorn’s attack. The other attachments are his willpower-boosting toys, although Celebrian’s Stone goes on Gildor. The allies are our usual questers, the one I rarely use is Galadriel, but she is very helpful in getting our key attachments out. The events are mainly for card draw and resource generation; with Aragorn covering your threat, you can use Sneak Attack/Gandalf to deal damage if you end up with more than one enemy in a round.
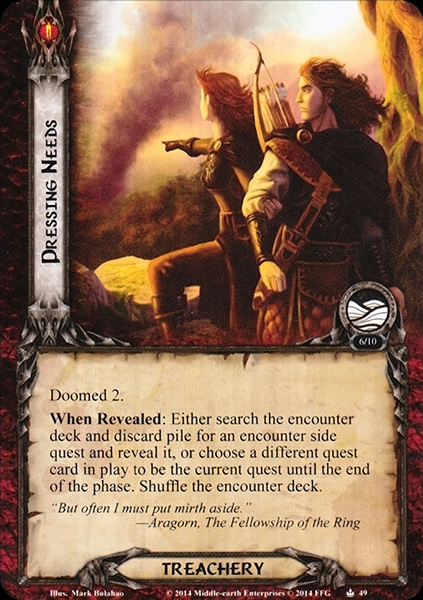
With this deck, I was able to breeze through the quest two times. As I had hoped, Aragorn, with Roheryn and attack boosts, handled combat pretty much on his own. The encounter effects of Warg’s Den and Blood-thirsty Warg force you to engage enemies directly so you can’t “trample” them, but in those situations, I could block with Denethor, Gandalf, or a chump blocker. My questing power, in the beginning, was a bit slow, staying on stage 1 for multiple rounds and using Aragorn’s threat reduction there. But I managed to prevent location lock, and once I got a couple of allies that were boosted by either Sword that was Broken or Faramir, I could make it to the next stage in 2 rounds of questing. In one game, I even cleared both encounter side quests, which meant that Pressing Needs whiffed because I could neither grab a side quest nor switch to a different one, something that never happened to me before.
Combat got a bit more interesting for the final stage, where I had to fight the Pack Leader alongside other Wargs. But at that point, I had enough characters out that I could exhaust for the forced effect of Pack Leader and attack back, so I took him out in a single round of combat.
I couldn’t find my attack boosts in my third run, so Roheryn wasn’t doing much at all. I still managed to win somehow, having some lucky encounter draws with 2 copies of Biting Wind at Nightfall that whiffed because there were no characters committed to the quest at that point to deal damage to. But given my bad luck on the earlier run, I gladly take that, and with it, a perfect win rate.
Adjustments
The one card I would take out of the deck after these games is Wingfoot. There are treacheries and locations that pull out enemies, so I didn’t want to risk committing Aragorn to the quest and staying exhausted if I got an enemy without revealing it. I guess this fits even in a thematic way cause you don’t have to use the fastest feet if you could also ride a horse. A card I would consider including is Gondorian Fire; if you get Steward of Gondor on Aragorn, he can pile up resources that you can use for a big attack boost with Roheryn. Otherwise, I’m pretty happy with the deck and will name it “The Rider in the Wastes.”

Conclusion
Regarding general deckbuilding, I want to emphasize this time the importance of knowing the card pool. There are so many different toys available to players now that the game is completed that it’s easy to forget those you don’t play that often as I did with Roheryn. To learn about and keep remembering the card pool, build and play different decks and look at those from other players. You might be surprised what gems you can find in the card pool that don’t look as powerful at first glance.
Playing this quest was a lot of fun; getting addicted to it till you manage to build it consistently is always a good sign. It was pretty hard but didn’t feel as unfair as my last playthrough against Fortress of Nurn. Definitely, don’t be afraid to bring power cards here; you will need them to handle all the different challenges this quest poses. I also now want to try out the designers’ recommendation to use the day/night objective on different quests, maybe even start a saga run-through that way.
With two pretty hard quests out of the way, I’m looking forward to playing something easier, and the next quest from the cycle, Escape from Moun Gram, seems like a welcome break. I might be able to leave some power cards in the binder for once and try something more unique and thematic.
