For many of us, playing with four players is something that might only happen on special occasions, if ever. Some people are fortunate enough to have a local group of friends who play this game as well and are able to meet up on a semi-regular basis to play together. Some others may be able to organise these games online, whether over Octgn, Zoom, DragnCards, or some other medium, which can make things easier to plan. But trying to arrange a window in the schedules of four people can be challenging to say the least, and the stars might only align every now and then, even after the era of isolation. But as I’ve already alluded to in previous articles, this is a social game, one that encourages and facilitates the fostering of friendships and relationships through shared experiences and challenges, and so if ever you can play with three friends in this game, it would be no bad thing to do.
Of course, once you have four players in any given quest, you do find yourself with a whole new set of challenges. For one thing, deck coordination is needed in higher player counts, not only to avoid running afoul of the ‘unique’ rule. Also, give your fellows some warning before you turn up with a hero Gandalf deck, but also to establish and confirm the roles each deck will be fulfilling. Now it is perfectly possible for any number of players to turn up, and each brings a general-purpose deck, again accounting for any unique cards, and beat whatever quest they happen to be up against. But you will probably have a better chance if you are able to coordinate your decks and fulfill prearranged roles within your Fellowship, such as questing, defense, or location management. You see, while you and your friends will be able to play more cards between you and have a better action economy and synergise between your decks, the encounter deck will also become more powerful. During staging, for every player in the game, an encounter card is revealed, and according to the mathematics of the game, this gives the encounter deck more chances to set up their own combinations and synergies, reveal surging cards, and throw cards at you that scale up with the number of players in the game. A four-player game will see more cards thrown at you than during any other game, even as you yourself are able to throw more cards down on the table. This is the game firing on all cylinders, and to be fair, sometimes the engine can struggle a bit, but it is glorious to behold. Here are my suggestions, and again these are only suggestions for what might be the best quests to play with four players. As always, I have endeavoured to pick no more than one from any given cycle because I realise not everyone has everything, but I hope most people have access to at least one of these.
Return to Mirkwood
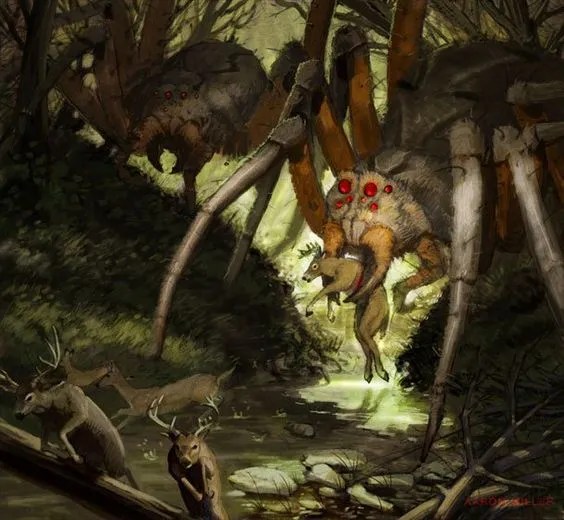
I have said it before, and I’ll say it again: the Shadows of Mirkwood cycle is the tutorial for this game. Each quest explores facets of how the game as a whole will challenge you and teaches you how to handle them. When you see that you are looking for objectives in the encounter deck, you will take Shadow of the Past in your deck because you lost too many Signs of Gollum to shadow effects in Hunt for Gollum. When you notice an encounter deck packing lots of direct damage, you will take extra healing or damage cancelation because Journey to Rhosgobel has burned you too often to forget. This quest here is designed around teaching the players about multiplayer, preferably with as many players as possible so you can pass Gollum between you all, avoiding as much as you can of the detriments that get associated with guarding the wretch for as long as possible. And there are a lot of detriments. Whoever is guarding Gollum has to raise their threat by an additional 3 points each turn, in addition to having treacheries target them and quest effects punish them. This quest is in a strange place where the effects for guarding Gollum are so punishing that having more players to spread this out eases the burden on any one player, but this is held in tension with the fact that more players means more punishing effects are being revealed, and so it will be worse for the player guarding Gollum on any given turn. Every single encounter card in the Return to Mirkwood encounter set targets the player guarding Gollum, so it falls to the other players to shore up and protect whichever of their fellows is guarding Gollum on any given turn.
Players can each bring a generalised deck, but when the quest throws every enemy at the player guarding Gollum, they will likely be overwhelmed by the sheer number of attacks. Having at least one team member with Sentinel defenders is a must-have so that they can soak up the attacks each turn. And you need to have someone who can consistently kill off the enemies that are throwing themselves at you before they build up too much, so a player with decent Ranged attackers would be helpful as well. But it’s not just enemies that are impeding your progress, as there are plenty of treacheries and locations here too, so again it will fall to another player to bring enough willpower to counter at least four encounter cards a turn. Of course, this player won’t be able to defend themselves in combat, so this is where the Sentinel player comes back in again. This quest requires players to work together and cover each other’s weaknesses, or the whole endeavour will fall apart. If the player guarding Gollum is eliminated, then the whole team will lose the game, and this is the player the encounter deck is throwing all of its efforts at. The team of four players will stand or fall on their weakest link, so be prepared to look out for each other.

Foundations of Stone
If you’ve been in this game for any amount of time, you will know of this quest as the first one that forces players to split up and have to face their own individual staging areas. That’s right, the second quest I’m recommending for four players is one that splits you apart from each other. You start off together, making your way through the tunnels of Moria as a unit, supporting and strengthening each other with your united efforts. Then when things transition to the second act of the quest, you are suddenly and violently swept away from each other, and each is left to fend for themselves at the roots of the Misty Mountains before hopefully finding your respective ways back to each other and escaping to the higher levels. So why this quest? Why a quest that actively separates the very players you had been hoping to play with on that occasion? Well, one eminently good reason is that it is one of the few times where players are encouraged to bring generalised decks, as each must fend for themselves and get through one quest stage without any aid from anyone else. Everyone must be able to handle their own questing and combat; their decks must have sufficient card draw and resource acceleration so as not to stall out. This seems like it just flies directly in the face of what I was just saying above about how players had to be able to work together to survive but hear me out. I would suggest that Foundations of Stone is the next quest that instructs players in multiplayer games and is the successor to Return to Mirkwood in that regard.
In any session of this game, you never know if, or rather when, things will go catastrophically wrong, and the group loses a hero or even a player. An untimely Sleeping Sentry might wipe half your board, or Savage South could remove the lynchpin of your deck and cause the whole thing to start the long process of implosion. There is a multitude of things that players can do to counteract these devastating effects, but in a game with four players, it is almost inevitable that some will slip through your armour and hit you where it hurts. Foundations of Stone forces players to confront that reality and to do so in the most existentially horrifying way this game has been able to manage. What if you lose your teammates, all of them? Do you have enough in your deck to pull through? Do you have enough in yourself to recover from the most devastating blow you could suffer, losing everyone around you with whom you had pledged to help each other and see each other through to the end? You are now alone, lost in the dark, and there are monsters beyond your ken in this place. This quest forces players to realise that for all they can, tune their decks to work with one another in perfect synchronicity and harmony that can all be snatched away in an instant, and they still need to be able to stand on their own two feet. And then players learn this key lesson, the need to be able to cooperate with each other without being codependent on each other. Or, to put it another way: always plan for the worst.
There is another, more light-hearted reason to go for this quest when you have four players: it is a very good choice for pick-up games. Because no player can predict where they will end up, and each player must survive a quest stage by themselves, it works best if each player has a general-purpose deck that they might have expected to take up against any quest. This situation especially lends itself to occasions where players have had no opportunity to collaborate or discuss their decks with each other and are going in blind with each other. It is also a very fun, well-crafted quest that tells a story and has narrative beats that are palpably visceral. You feel the danger, you feel the isolation when your companions are separated from you, and that makes the joy and relief of being reunited all the more satisfying, and all this is realised all the more keenly when there are more of you with whom you can share the experience.

Across the Ettenmoors
So I hear you liked Conflict at the Carrock? Well, how would you like having to deal with all the Trolls in the North trying to eat you? That is what you’ll be up against in your journey across the Ettenmoors (so named for the Old English word ‘Eoten’ meaning ‘Giant,’ from which Tolkien also names the Ents) as your party navigates their way from one hiding place to the next. This is the central premise of the quest, navigating the moors from one Safe location to another to seek respite from the trolls that would otherwise assail you. Different Safe locations give the players different boons, whether it is card draw, healing, or resources, as well as returning all enemies to the staging area, preventing engagement checks and blanking the text box of each treachery revealed during the staging step in which a Safe location is active. The other pillar on which this quest stands are the five Side Quests that can be found in the encounter deck, at least two of which need to be explored to get past the first stage and an additional one is revealed at the start of each new quest stage. This means you will be confronted with at least four of these Side Quests, each with their own detrimental effect, be it preventing the healing of your characters, increasing the cost of your cards, or decreasing the engagement cost of enemies so that they may come down and attack before you are ready. And so there is constant tension between the demands of the main quest and the detriments imposed by the side quests, and players will need to consider where to focus their efforts.
And this here is the draw of the quest: what should the players as a group do? Where should their efforts be focused? What may cripple one deck might be of no concern to another deck, which in turn may struggle under the weight of a side quest that yet another deck might suffer no affliction from whatsoever. Players will need to discuss with one another what the best course of action will be to benefit the party as a whole as opposed to one player over the other. While this quest is certainly not the hardest one in the cycle, take care never to neglect the needs of one player for too long, or else you may run the risk of seeing them fall. And in a scenario filled with as many trolls as we have here, you will need every player in order to take them down as soon as possible, so you cannot afford to leave anyone behind.
Flight of the Stormcaller
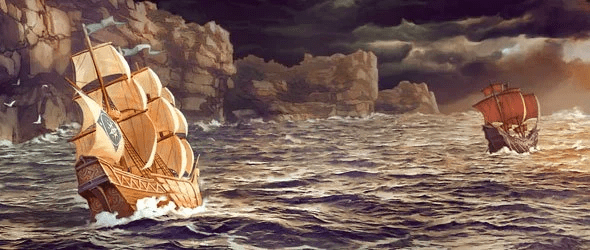
While players were introduced to the Sailing mechanic in Voyage Across Belegaer, this was the quest that made everyone sit up and pay attention to the Dreamchaser cycle. This was the quest that demonstrated to the world just how far the LotR LCG mechanics could be stretched and that there was still further to go. The poster child for the entire cycle and still regularly ranked as one of the players’ favourite quests, Flight of the Stormcaller. One of the best quests in the game, mechanically, thematically, and experientially and is best enjoyed with as many friends as possible, all while breaking out your worst pirate accents.
This quest features two staging areas: one for you and one for the Stormcaller, the Corsair ship you are trying to chase down. You start on Stage 1A, the Stormcaller on Stage 2C, and it is a race now to see whether the Stormcaller can escape before the players overtake it or sink it. At its core, this is a ‘chase scene,’ such as you might see in a film or TV show. Master and Commander especially comes to mind. Players need to come out of the blocks swinging with their willpower and their Saling capabilities, and the more players you have then, the greater overall consistency your decks will have. We’ve talked about this before, but if one player’s deck isn’t getting started, their companions can patch up the holes with their own efforts, if able, or help jump-start it with some shared card draw or resource acceleration. Players need to keep up the pressure, or they will swiftly be left behind. However, if players advance before they are ready, they will not be prepared for the spike in difficulty that comes about when players share a staging area with the Stormcaller, so a balancing act needs to be maintained until the opportune moment.
The reason this quest is on this list is not for any mechanical reasons, though that would be cause enough on their own. In this quest, every card tells a story. Unlike land-bound quests, which could see you travel the vast distances from the Enchanted Stream to the Mountains of Mirkwood and the Brownlands in three turns, all while facing the same Hill Troll bashing your faces in each and every turn, the ever-changing geography of the sea means that one moment your ship could believably be in Calm Waters one moment and then trying to avoid Jagged Rocks the next and that Corsair Skiff is still doggedly shadowing you. The transiency of the ocean plays beautifully into the unpredictability of the cards being drawn, the cruel capriciousness of the sea reflected in the whims of the encounter deck. You never know when Ossë may throw a Raging Squall at your flotilla, so beware when you take to the high seas. Also, the art in this quest especially is outstanding; you could take out the quest to play and end up spending your whole time just admiring all the different pieces of art.
Wrath and Ruin

The Vengeance of Mordor cycle seemed to have a habit of taking old quests and retooling them, turning them up to eleven in the process. Danger in Dorwinion did it with Steward’s Fear, and Challenge of the Wainriders respun Flight of the Stormcaller and Race Across Harad. Here we see the reconstruction of Assault on Osgiliath, and this quest does go some way in fixing many of its primogenitor’s missteps. No longer can players accidentally win on the first turn; instead, they will be in this battle for the long haul. The treacheries that can hamstring your entire board state have been excluded, and instead, a much greater degree of consistency is involved. Now, this is not to say this quest is any easier, far from it, but it is far more consistent, even-handed, and fairer if such a quality can be attributed to an inanimate deck of cards.
This quest revolves around the idea of capturing different parts of the city, which players do by exploring locations. Once a location is explored, it is placed under the players’ control, and players need to control more locations than are in the staging area in order to either advance to the next stage of the quest or travel to the final location needed to finish things off. Not a problem, I hear you say. We’ve got a pair of Northern Trackers and a Rhovanion Outrider, each with a Map of Rhovanion; we can demolish the deluge of locations that are sure to come. Well, I’m afraid not. It is true that locations will come out thick and fast, but you are prohibited from placing progress in the staging area. Players will need to bring as many location manipulation tricks as they can to ensure this does not devolve into a trial of mental endurance on the level of Nin-in-Eliph or Ghost of Framsburg. Take cards such as Mariners Compass or West Road Traveller with The Evening Star to do as much as you can to explore more than one location each turn. Encounter deck manipulation will be invaluable in stemming the tide of locations, as will treachery cancellation to stop your progress from being undone more than you can help. And you will also need to bring enough willpower to overcome the mounting threat in the staging area brought on by the bottleneck of the active location. And in the midst of all this, you will have the armies of Thane Ulchor being brought to bear against you, so combat capabilities cannot be neglected either.
So this all begs the question: why on Arda is this quest on this list? Well, I will freely admit, and earnestly warn, this is not an easy quest. This is a rather hard quest, in fact, and its difficulty will only be exacerbated by having four players, turning the intensity of the quest up to eleven. Things will get frantic, intense, and even overwhelming as you all struggle to keep pace with the relentless onslaught of the encounter deck. This is the closest representation of urban warfare in Middle-Earth or anywhere else that this game can provide, slowly acquiring one location after the next, pushing against a relentless current of encounter cards until you finally make headway. It is a challenge, and it will almost certainly require multiple attempts. But this quest walks the line of being difficult without being absurd. This avoids the ridiculousness of Assault on Dol Guldur, Battle of Carn Dum, or Fortress of Nurn, where you need a deck as tuned as fine as a razor to begin to hope that you can compete with the encounter deck while still providing a substantial challenge. And the sweet taste of victory, when, and I say ‘when’ not ‘if,’ will taste all the sweeter when shared with those with whom you have shed your blood, sweat, and tears over this quest with.
Mines of Moria / Escape from Khazad-Dum

If, on the other hand, you would prefer to test yourself against the devices and stratagems of your friends, this is the competitive strain of our card game. Here each player, or team, must construct an encounter deck for their opponent to face down, as well as put together their own decks to battle the encounter deck put together by their opponent. This will require a bit more preparation than a normal game as you figure out how to make your encounter deck synergise as best as you can to waylay your opponent, slow them down as much as possible, and allow you to complete your quest ahead of them. Because this is what these competitive versions of the quest amount to, a race in which the fastest team wins. Once you have both MoM and EfKD, you will have a choice of two quests to pick from, either one that starts with a boss fight and finishes with a drawn-out final stage; or one that begins relatively gently but escalates to the mother of all boss fights featuring Durin’s Bane. You are able to construct the encounter deck from a choice of 140 encounter cards, from which you may choose 35 to construct the encounter deck. There is an easy way, shuffling in seven different encounter sets together, or a more complicated, nuanced way, by going through the prospective encounter cards and individually picking them out in accordance with a set of simple rules and points values.
On the face of things, there are between about 527.3 sextillion or 1.2 decillion different combinations, allowing for duplications as there are a few cards to choose from with multiple copies. I’m not good enough at Maths to figure out what the exact number is, but this is all before we factor in the number of specific cards we need to include (location, enemy, treachery), the fact that you can have up to three copies of each non-unique card and the points values of the different cards we can include. The point of all this is to say that there are functionally an infinite amount of encounter decks you can put together, though, in practicality, there are perhaps half a dozen generally different styles that you can use on your opponents:
- Swarm (get out as many encounter cards as possible as fast as possible, flavoured with Goblins or Spiders)
- Bomb (a focus on a handful of larger enemies overwhelming defenders with higher attacks, flavoured with Trolls or Nameless Things)
- Distraction Carnifex (a bit of both from the above, supplemented with Uruk or Werewolves)
- Location Lock
- Choke and Cripple (a focus on Treacheries specializing in targeting the player)
- Build and Juice (a focus on Locations and Treacheries specializing in boosting other cards in the encounter deck).
Now, these are just the names of the archetypes that the author likes to use; they are not prescriptive or even recommended. And these archetypes are certainly not mutually exclusive; the vast majority of encounter decks put together by choosing specific cards will use between 1.5-2 of them. Or, ignore the above and use whatever cards you think would be cool to have together.
This is one of the major draws of these competitive quests; it adds more deck-building to your deck-building game. It’sIt’s like going to get a burger and having it with a double patty; it is more of what you like. And the satisfaction you get out of your encounter deck facing off against your opponent will correlate with how much effort you put into it. The reason why I have included these quests here, as opposed to the previously released Two-Player Quests article, is because when you have two players opposed against each other, then only one encounter card is to be revealed each turn. For the constructed encounter deck to properly shine, more encounter cards need to be revealed, and so more players are needed, hence two players on each team. If you have more folk with more constructed encounter decks, scale it up to suit your taste, but you really need at least two players on each side for this scenario to truly shine. This certainly isn’tisn’t for the newest players, but for those who want a double dose of deck-building or who want to prove their prowess against a friend or foe, these are the quests for you.
Murder at the Prancing Pony
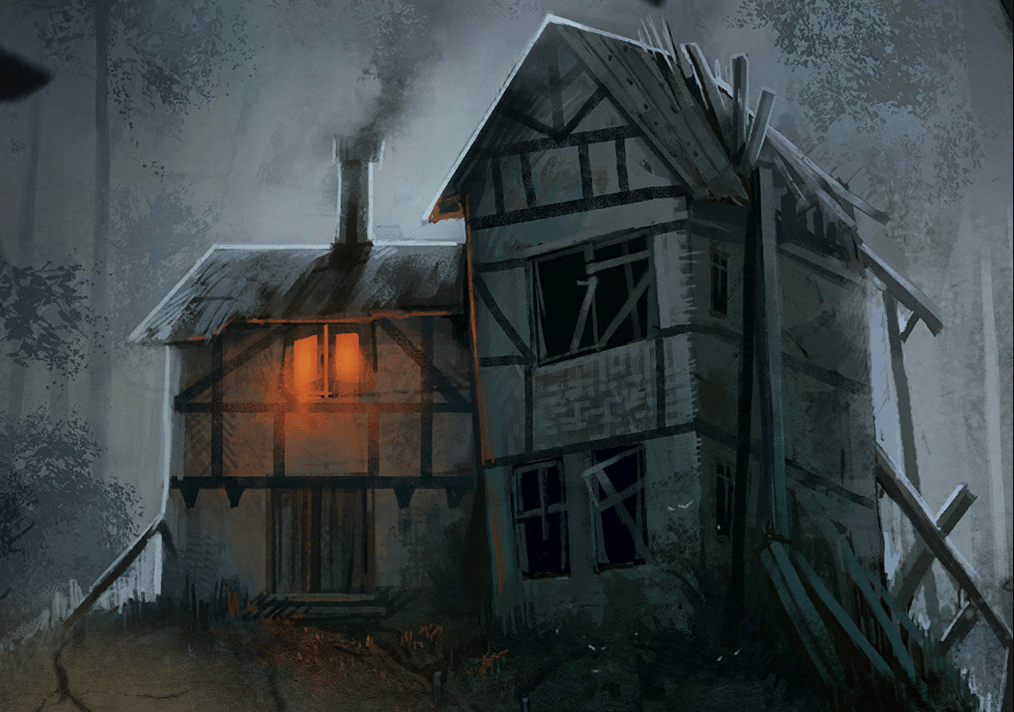
It has been said, though, by whom I forget, that the most enduring form of storytelling will be the ‘whodunnit.’ The fact that Agatha Christie is reportedly the best-selling author after Shakespeare speaks in favour of this opinion, the persistent popularity of Sherlock Holmes. The key to this evergreen status is the ability of the ‘whodunnit,’ or the mystery story, to break the fourth wall. Reach through it and drag the audience into the narrative as if it is a well-written story. There are no clues deliberately kept back from the audience; they are compelled into trying to puzzle out who the culprit might be along with the detective, spy, or private investigator, involving them in the unfoldings of the plot from the very beginning. The unknown, the mystery, and Shrodinger’s Box, all must be unlocked and resolved one way or another. So it is with this quest, one of the most enduringly popular in our catalogue, where we are tasked with solving a mystery, uncovering clues until we can determine who the culprit is and where they are hiding. Just like our heroes, we do not know the answer, and we will begin each game not knowing who we are looking for as they are randomly determined at the beginning of each game. And so, every time we play the quest, we will be telling a new story and uncovering a new mystery.
Now to an extent, there is a new story in every quest, with different tales being told with each new order of the encounter deck. There are quests with a greater degree of variation in them that will determine how they play out, like quests with randomly determined quest cards, such as Foundations of Stone, Voyage Across Belegaer, and The Crossings of Poros. There are also quests with randomly determined Objective cards that can often result in different victory or endgame conditions, such as The Steward’s Fear, The Mumakil, or Danger in Dorwinion. With Murder at the Prancing Pony, players have more agency in revealing which Objectives they need to overcome as you can decide how deep to dive into the Clue Deck by choosing which locations to explore and investigate. Now a word of warning, some healthy threat reduction is recommended for this quest at the best of times; this will be doubly so with four players. Combat is not overly taxing, there are a few locations, so some control or management of these would not go amiss, but threat management will be your primary challenge here. But this is not a quest you go to for a deck-building challenge. This is a quest that will have you and your friends engaged with one of the most atmospheric and narratively rich experiences outside the Saga Campaign as you all guess who the culprit might be, where their hideout is, and how to adapt your strategy according to how the story unfolds.
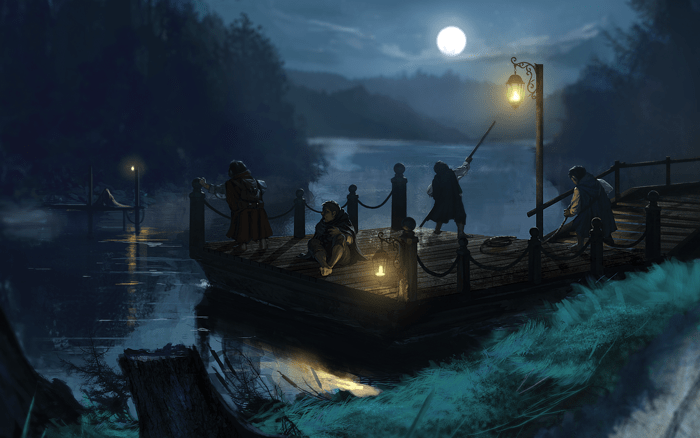
A Shadow of the Past
Or, if you wish, be part of the retelling of one of the most famous and iconic stories of all time as you retread the steps of Frodo Baggins and his companions. The opening quest of what some players consider the single best expansion in the game, of the wider Magnum Opus of this game as a whole, Shadows of the Past, is a near-perfect blend between mechanics and theme. And it’s a good thing, too, if there was ever a quest that needed to be designed well, that needed to be smooth and evocative, without it being too much of a challenge for new players while still being satisfying for veterans, it is the first quest of the Saga Campaign. This is the reason why it is so easy to start a Campaign as the start of a near-flawless run of quests because the first step is always such a joy to take. If there is any single quest that would be the one to convince anyone to get into the game, it is this one.
I suggest this as a four-player quest for two reasons, therefore. The first is because I think that four players is truly the apex of this game. The encounter deck is firing on all cylinders, able to get out as many cards as possible for the maximum effect and to wreak the most havoc upon the players. While solo can be hard because you must rely upon only yourself to overcome the encounter deck, four-player is more challenging because the encounter deck holds nothing back. At the same time, the players together are able to synergise their decks together to be greater than the sum of their parts. The game performing at peak capacity is perhaps the fullest way to experience a Saga Campaign, where the game operates at its best. Which of us has not relished the thought of the running battle under Amon Hen, defending Helm’s Deep, or fighting on the Pelennor with three other comrades struggling alongside you? And, of course, there is the climax of the Campaign, the climax of the game itself perhaps, as the players seek to distract the Dark Lord for as long as possible at the Black Gate while, at the same time, another guides Frodo on his last steps up Mount Doom to complete the Quest of the Ring. As a cooperative game, this is the apex of the experience as three players fight to their proverbial death to buy as much time for their comrade as possible. But the first step towards that, the very first one on that road, begins with this quest, A Shadow of the Past, in the safety of Bag End.
The other reason I suggest this quest for four players is that this is the best quest to introduce a group of prospective new players. The focus on locations with only a handful of enemies makes this a relatively relaxed quest, though the enemies themselves are both iconic and powerful enough to inspire the appropriate level of respect deserving of the Nazgul. As long as the introducing player brings along some location control, however, your newer players will have no real, unavoidable issues with this quest. Remember, it was playtested, assuming there was only a copy of the Core Set and this expansion to pull cards from, so its difficulty level will have been adjusted accordingly. And as I have said, this quest is nearly peerless in evoking the scenes from the books that it is trying to depict and translate into a card game format. I suppose the only concession is the idea of between four and twelve heroes following Frodo about the Shire, along with however many allies you decide to take tramping along behind. But in any case, this is the ideal way to show people the potential of this game, using the opening of a story they are already familiar with and inviting them to take the next step along the road with you.
Conclusion
It is a truth universally acknowledged that a LotR LCG player in possession of time and cards must be in want of a playing partner. While this game can be played by yourself, at its heart, this is a social one, with experiences, tales, and stories that are to be shared, if not in the making, then in the telling. It will take more effort to organize, more preparation to manage your decks, and more time to actually play the game itself, but it is always a worthwhile endeavor. Regardless of which quest you go for, you will all enjoy yourselves and be the better for it. From Passage Through Mirkwood to Fortress of Nurn, from Massing at Osgiliath to Escape from Khazad-Dum, from We Must Away, Ere Break of Day to Mount Doom and beyond, together, four players can overcome the worst the forces of Sauron can throw you.

What a great article! Thanks for taking the time to write it. It makes me wish I had another 3 players around, but in the meantime, there ae some quests there that I haven’t played in a long time…hmm…
LikeLike