A huge thank-you to Joseph Forster (bgamerjoe) from the LOTR Deck Test blog for writing the very first guest article. Be sure to check his blog out at https://lotrdecktest.wordpress.com/ where he analyses submitted decks against some scenario’s. For his recommendations on Conflict at the Carrock, see the bottom of this page.
The first time you blindly advance to stage 2 in Conflict at the Carrock has probably stuck with you! The quests in the first cycle tend to focus in on a certain element of the game and this 2nd adventure pack of the Mirkwood cycle highlights the boss fight, except instead of one boss you get 4, Louis, Rupert, Morris and Stuart. This quest is bound to leave players with some lumps and bruises and hopefully some great tales of victory.
Conflict at the Carrock
- Found in the Conflict at the Carrock adventure pack.
- Rated at a 7 difficulty level by FFG and currently rested at 6.3 by the community on the LOTR Quest Companion.
- This quest uses the Conflict at the Carrock, the Wilderlands and the Journey Down the Anduin encounter sets.
- 2 quest cards
- Play if: you want to experience a dramatic battle against some hefty trolls.
- Unique elements of the quest include interesting engagement mechanics, rewards for keeping threat low and rewards for careful and precise questing.
- Solo or Multiplayer? Since there are 4-6 nasty trolls that you will have to face, more players generally makes this quest easier, but it is certainly viable as a solo quest provided you bring the right type of deck.
- This quest is the perfect quest for player-sidequests, although it can make it too easy if you choose to play a lot of them.
The Quest
Setup is simple with the unique Carrock location added to the staging area. This location is immune to player cards and will become the active location as soon as quest stage 1B is completed. All 4 unique trolls are also removed from the deck along with 4 of the 5 Sacked! treachery cards. After those cards are removed you shuffle 1 additional Sacked! card back into the deck for every player in the game.
Stage 1 – Grimbeorn’s Quest 7 Progress Points
Spoilers ahead!
The first stage is a bit of a trick. The only effect on the quest forces the Carrock to become the active location as soon as the 7th progress is added to the quest card. The standard strategy for stage 1 is to carefully quest to make minimal progress for several turns so you don’t progress to stage 2 until you have some cards on the board and feel ready to handle all 4 unique trolls one way or another.
Carefully questing can be trickier than it sounds since the encounter cards range from all the way from 0 to 5 threat. In a four-player game, you could reveal up to 16 threat worth of locations or down to just a couple threat if you reveal treacheries, some gentle locations or the Grimbeorn objective ally. If you over quest, you’ll be forced to face the trolls sooner, but if you under quest, you face the possibility of raising your threat which may spell disaster for you when you reach stage 2. This is where sidequests can almost break the quest. With another quest card in play, players don’t have to worry about the possibility of moving on to stage 2 before they’re ready. As long as you have a sidequest to quest against, you can safely build up your board without fear of unexpectedly advancing to stage two and running across the troll party. The nightmare version of the quest prevents this “cheat-code” by forcing you to put one progress on the quest every turn if no progress was placed during the quest phase. It’s always good to see the Grimbeorn objective come up early on stage one so you have a chance to earn him and enlist his aid against the trolls later in the game. Grimbeorn is actually a “canon” character and he’s mentioned in the Fellowship of the Ring at the Council Of Elrond. He is the son of Beorn and shares the shapeshifting ability of his father. Gloin reports that Grimbeorn is the “lord of many sturdy men” who keep the land between the Mirkwood and the Mountains clear of Orcs and wolves.
Stage 2 – Against the Trolls
When this stage is revealed all 4 unique troll enemies are added to the staging area and the fun begins! This quest stage only needs 1 progress to complete but you can’t complete it if there are any trolls in play.
Your best chance of success here is to selectively engage one troll at a time so you aren’t swarmed and so all their punishing effects down trigger at once. Each unique troll has an engagement cost of 34 so you should aim to start this stage well below that number unless you have brought a super combat deck that fights tons of enemies better than it quests.
If you don’t engage all the trolls, you may face a staging area with an excessive amount of threat in it for a few turns if you have let any locations build up there.
Once you destroy all enemies in play and put one progress on the quest card, the players win the scenario.
The Encounter Deck
- The encounter deck contains 52 cards including the unique trolls, the Carrock location and the 5 Sacked! treacheries. The deck is split into 19 enemies, 13 treacheries and 20 locations. Only 16 enemies 10-13 treacheries and 19 locations will begin the game in the encounter deck.
- 20 cards have shadow effects ranging from +1 attack to negating the defender’s entire defensive stat which can be devastating!
- The single copy of Wolf Rider is the only card in the deck with the Surge keyword and his shadow effect will make sure you’ll see him during the game.
- There are no Doomed cards in the deck, but the 3 copies of Frightened Beast can increase your threat by massive amounts if you aren’t careful.
Objective Card
Grimbeorn the Old is a stout ally and can really help you survive the trolls’ first attack. He is expensive to gain as he takes 8 leadership resources to bring him to your side as an ally, but he can potentially defend against all 4 trolls in a turn. With a defence of 3 and 10 hitpoints, he will withstand several blows from the trolls, but his biggest strength is that he doesn’t exhaust to defend against troll enemies! The trolls’ basic 4 attack wouldn’t put much damage through his defence, but while the Carrock is active, the trolls attack for 5 and while any player is engaged with Morris, all trolls get another +1 attack! It would be nice to be able to buff his defence a little, but with no trait but “ally,” most attachments aren’t viable for him. Cards like ally Arwen, Ent Draught, Honor Guard and Narya keep him alive longer and he can be healed to extend his life as well. Grimbeorn‘s hitpoints run down fast if he’s defending against trolls with 6 attack, but he’s still worth earning if you can spare the resources. If you don’t happen to be running Leadership heroes there’s a location that will let you spend any resource as a Leadership resource and bring this Werebear over to your side.

Enemies
The enemies are varied and interesting in this quest.
The smallest enemy in the deck is the Wolf Rider. He surges which is annoying but he’s even worse as a shadow card. If revealed as a shadow card, he engages you, attacks, then returns to the top of the encounter deck if the players don’t kill him by the end of the combat phase!
The other super-annoying enemy is the Warg which we all know and “love” from Journey Down the Anduin. He can take forever to actually kill if his forced effect constantly returns him to the staging area. Direct damage like Gandalf or Hail of Stones can be a quick way to finish off this plague of an enemy.
The Misty Mountain Goblin is one of the most generic enemies in the deck but with an engagement level of 15, even the sneakiest of Secrecy decks will have a hard time avoiding him. He removes a progress from the quest every time he attacks which can actually be a good thing if you’re trying to camp at stage 1 for a few turns. With only 2 attack, 1 defence and 3 hitpoints, the Misty Mountain Goblins is pretty easy to take out.
The tiny Goblin Sniper can either be an extremely fortunate draw in the early game or a troublesome draw later in the game when more enemies are in the staging area. He’s usually not too brutal in this quest, but if you’re concerned about him or play to leave enemies in the staging area, either bring some healing to counteract his sniping or some direct damage.
In addition to the 4 unique trolls, 2 copies of the generic Hill Troll are included in the quest. Effects in stage 2 have the potential to increase his already high stats of 1/6/3/9 to even uglier levels, so it’s good to defeat them and add them to the victory display during stage 1 if you can manage it. Nothing is worse than fighting a pitched battle against 4 big trolls and having another bigger troll join the party! He has the potential to attack for up to 10 during stage 2 so don’t let him hang around unless you have tons of willpower and a safe low threat level.
The last enemy from the Wilderland encounter set is the Marsh Adder which contributes 3 threat to the staging area if you don’t engage him but raises your threat by 1 each time he makes an attack. With 4 attack and 7 hitpoints, he’s no slouch, but he’s not the biggest enemy in the game. If you can reduce his defence by 1 with an effect like T Aragorn or Rivendell Blade, you can just discard him with the Straight Shot event card.
The only non-unique enemy in the Carrock encounter set is the Muck Adder. While he has low stats and doesn’t look like much of a threat, he can cause major grief if Sauron wills it. If he ever damages a character that character must be discarded from play. With only 2 attack, he doesn’t look too dangerous, but there is that shadow card that removes the defender’s defence stat so be careful when defending with a hero or valuable ally. With 0 defence he can be removed with Straight Shot as well.

This brings us to our charming troll friends, Stuart, Rupert, Morris and Louis. These English names are obvious imitations of William, Bert and Tom which Thorin and Co meet in The Hobbit. Each of these trolls has an engagement level of 34 so if you’re playing solo, do everything you can to prevent yourself from engaging all four at once. Each has a punishing effect when engaged with a player and if you’re engaged with all four at once, you’re unlikely to survive more than a round or two even if you have the defenders to withstand their onslaught. Either keep your threat low or at least try to prevent one or two from engaging with cards like Fresh Tracks, Advanced Warning, Noiseless Movement or Ranger Spikes. These trolls aren’t immune to player cards so Feint, Coney in a Trap, Andrath Guardsman, Entangling Nets, and Forest Snare can also help you in the fight. With a base level of 4 attack, these trolls aren’t the worst trolls in the game, but they often come in attack at 6. The Carrock location gives all trolls +1 attack and defence while it’s active and the effects on the trolls themselves can buff them to another +1+1 bring them to 6 attack, 4 defence and 10 hitpoints. If at all possible, avoid engaging all 4 trolls at once!
If you aren’t forced to engage all of them at once, you will need to decide which one to engage and dispatch first. While engaged with you, each troll has a special ability. When Rupert attacks, you must shuffle a Sacked! treachery back into the encounter deck. While Stuart is engaged he gives all trolls +1 defence (in addition to the possible +1 the Carrock gives the trolls). While Morris is engaged with any player, he gives all trolls +1 attack (in addition to the Carrock’s +1). Louis might be the worst! He makes each troll-attack raise your threat by 3 as well! If you’re forced to engage all 4 at once, that means you have a potential threat spike of 12 points just from their attacks!
If I have a way of stopping an attack (Feint etc), Louis might be a good troll to kill first. Then you won’t have your threat skyrocketing while you try to deal with the large enemies. Then I like to destroy Morris so their attack doesn’t get too intense. The order in which you decide to kill them will likely depend on what kind of deck you’ve brought to the quest. As you destroy trolls, you can discard one attached “Sacked!” treachery if they are in play.
While the Hill Troll is added to the victory display after you destroy it, the unique trolls don’t have victory points so they’re discarded a may come back up during the quest phases if you recycle the deck at the wrong time or if the game goes long.
Locations
We have some of the core set standards here. The East Bight is 1 threat, takes 6 quest points to complete and forces you to travel there when you have the option to travel. This is a good location to see in the early game to give you a buffer so you won’t complete quest card 1 too early. It can be a pain in the late game if you’ve cleared the Carrock and want to get rid of one of the higher threat locations. If you don’t want to have to quest all the way through the 6 travel points, you could use something like the Mariner’s Compass to swap it out for something that’s easier to quest through.
The Brown Lands is almost the mirror-image of the East Bight. With 5 threat it can disrupt a quest phase if you reveal it with any other higher threat card. It automatically “explores itself” when you travel to it and cards like Northern Tracker, Asfaloth and even the Rhovanian Outrider can easily explore this location from the staging area.
We also have the Banks of the Anduin, one of the gentlest cards in the game with 1 threat, the progress points, no shadow effect. It’s an easy card and it returns to the top of the deck when it’s explored letting you either plan for the next quest phase or be sure that the first enemy has no shadow effect during the combat phase.
The Gladden Fields is the other high threat location and it raises your threat by an additional point during the refresh phase. With 3 progress points needed to explore, it’s a good one to knock out in the staging area if you can. You shouldn’t have to deal with it again since it will be added to the victory display.
Two of the non-unique locations in the Carrock encounter set have beneficial effects as well. Apparently Grimbeorn the Old likes to hang out in his Bee Pastures! When you travel to this location you can search both the encounter deck and discard pile for Grimbeorn and add him to the staging area.

The Oak-Wood Grove lets you convince Grimbeorn to join your forces more easily. As noted earlier, you need to spend Leadership resources to gain him as an ally. While this location is active, resources from any sphere can be spent as Leadership resources.
The most deadly location in this encounter set is the River Langflood. It’s fairly harmless during stage 1, but it quickly balloons to 5-6 threat during stage 2 when the trolls appear. If you have more than 1 of these locations in the staging area when you progress, you may have trouble questing successfully and getting off the Carrock. these locations appear pretty frequently since there are 4 copies in the deck but you should really Clear these locations as promptly as possible. Thror’s Key could turn one into a harmless 2 threat location. If you don’t have other location control, the new Heirs of Earendil event could discard this event for a mere 3 threat added to one player’s threat dial.
Treacheries
The signature treachery of this quest is Sacked! These Condition Attachments attach to the first player’s heroes and make them nearly useless. “The attached hero can’t attack, defend, commit to a quest, trigger their effects or collect resources.” This treachery can’t even be cancelled so bring your condition removal cards! Miner of the Iron Hills is the only core set option but a complete collection has options like Power of Orthanc, ally Elrond, Athelas and the “almost released” (as of 1/26/18) Bulwark of the West.
Not only is Sacked! bad, but this next treachery makes it even worse! The morbid Roasted Slowly treachery discard all heroes with Sacked! attached and then you get to shuffle Roasted Slowly back into the deck. This is the treachery to save your cancellation for (if you’re unable to keep your heroes out of the sacks).

The other treachery that’s worth saving your Test of Will for is A Frightened Beast. In solo play, it can be fairly harmless if you keep your staging area clean, but it has the potential to raise each players threat by massive amounts, even ending a game halfway through a session. You have the option to cancel this treachery by discarding a Creature ally so options like Eagles, Bill the Pony and the Riddermark’s Finest are good allies to bring along. Also a bit morbid… “Sorry Bill but you’re just making too much noise!”
In general, this quest should be easier in a four-player setting but Massing at Night can help the encounter deck catch up if the players have gained the upper hand. It reveals one additional card for each player in the game. While playing solo it just replaces itself, but in a larger game, it can be worth cancelling. Its shadow effect can make an attack spiral out of control in a larger game as well.
The last card in the deck to cover is Despair. It can be a very encouraging card to draw while at stage two since it can give you a couple more turns of safety before advancing. It doesn’t hurt while at stage 2 either since you don’t need more than 1 progress on the final quest card. The shadow on this card negates the defender’s defence stat, so hope you draw this during the quest phase and not as a shadow card!
Strategies, Tips and Tricks
Sidequests work really well in this quest. Almost too well in fact! Don’t overdo it or you might give yourself too big of an advantage, but if you’re itching to play Thurindir or play some of those shiny new sidequests that some of the newer quests don’t give you time for, this is your opportunity. Double Back, Prepare for Battle, Send for Aid, Gather Information, Explore Secret Ways and Scout Ahead will all give you good results here. Keep Watch, one of my favourite sidequests won’t help much since it only nerfs non-unique enemies and all the worst enemies here are unique.
Keep your threat low. Elrond’s Counsel, The Galadhrim’s Greeting, Double Back, Well Warned, Galadriel etc. You’ll be thankful for any threat reduction that can keep you below 34, especially if you’re playing solo or even two player. Staying below 30 will keep you safe from a random Hill Troll that may come out of the encounter deck as well.
Try to have either some scrying like Henamarth Riversong or some flexible willpower. Any ability that can change your final willpower number after the staging step will be helpful during stage 1. Protector of Lorien, Song of Hope, Elrond’s Counsel, Hobbit Pony, Rosie Cotton, Galadriel with Nenya, Don’t be Hasty and any other effects that can bump your willpower up or down before the quest resolution will give you an advantage. Cards like Radagast’s Cunning can also help manipulate your quest resolution to a satisfactory number.
Make a plan for defending against the trolls. You have several options since you can enlist Grimbeorn, build up a “super defender” like Beregond, or even chump block with some Snowborn Scouts since there aren’t any shadow effects that punish chump blocking. If you’re planning to defend with a hero, plan for defending attacks that start at 6 and could get boosted up to to 7 or even 8 for the generic Hill Troll. Also, remember those 2 copies of Despair that can entirely negate the defender’s defence. Make sure both copies of that card are in the discard pile or have some shadow cancellation or discard in hand.
Have a plan for killing the trolls. This is obvious, but you should really have at least 9 attack available from the first turn you spend in stage 2. With 9 attack, you can at least knock out half the hitpoints of troll and kill it on the second turn. With 13-14 attack you can take down a troll in one stroke. If you go with the low-threat strategy, the Dagger of Westerness is solid and if you go with sidequests, the Legacy Blade will be your best option. If you included a lot of resource acceleration to make sure you get Grimbeorn, Gondorian Fire might be a good way to roast some troll. Nuclear options like Straight Shot and Fierce Defense won’t work well here since the worst enemies are all unique.
Location control is your friend. These early game locations have fairly few progress points (with the exception of Brown Lands) so a little location control will go a long ways. Even just Glorfindel on his horse will be enough for a 2 player game to keep the worse of the locations out of the staging area.
Final Thoughts
The Conflict at the Carrock was the biggest baddest boss fight out there when it was released. Anyone exploring this quest for the first time will likely find themselves in a world of hurt if they haven’t looked through the quest before playing. There are many more options in the modern card pool for working around the challenges presented in this quest so it can feel fairly easy if you build for it, but the quest can still combo on you and you just might end up with a troll fist to the face no matter which deck you bring!
If it becomes too easy on standard mode, the nightmare cards are truly horrific! It adds removes Grimbeorn altogether, adds four more ‘”little” trolls, replaces all the unique trolls with tougher version and adds a two-headed super boss at the very end! Each troll gets stronger as you kill off trolls which makes for great pacing if you can keep up with it.

Decks to play vs Conflict at the Carrock
Seastan’s Single Core Set Solo
.
Pipe Power. Smoke Yourself Thin vs Conflict at the Carrock
Playthrough
- Progression style, 2 players: https://www.youtube.com/watch?v=AIYN9M7uSwQ
- True solo: https://www.youtube.com/watch?v=7GndsLMUy4E
- Modern cardpool, 2 players: https://www.youtube.com/watch?v=bsPThUukTa8
Notes:
- You will be unable to bring the hero version of Grimbeorn the Old to this quest. His objective ally version is unique, thereby not allowing you to also play the hero.

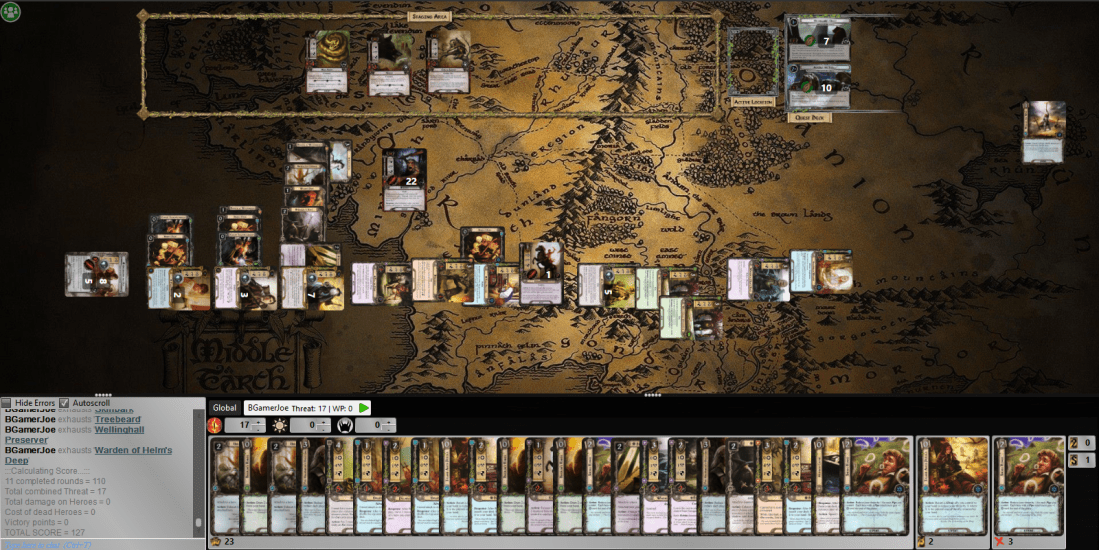
Really like this analysis, almost makes me wants to play the quest again. I really like the screenshot at the end where you beat the quest, your card draw was on point! Hope we see more of this in the future
LikeLike