I know this is not in sequence, but I had to jump (to) the shark! The Drowned Ruins is, for many players, a moment in the cycle where they can take a break, slowly build up their board state, and then rush through to the end. In the original version, nothing is stopping you from taking 10 turns exploring any side-quest you have, gathering an army of allies, and buffing all their willpower before you ever touch an Underwater location. To put an end to this the Nightmare version adds more pressure on your decks to go Underwater before you are comfortable with it. And once you have explored one Underwater location, things will only get harder for you. So let’s dive (heh) into this harder version of The Drowned Ruins!
“Why am I hearing the Jaws theme song in my LOTR game?”
you, half a turn away from being eaten alive by this scenario’s sharks
Nightmare The Drowned Ruins
- Found in: The Drowned Ruins Nightmare pack, NM Dreamchaser cycle, pack 4
- Size: 15 new encounter cards, 4 new Grotto cards
- Increase in Difficulty?: Yes, being forced to go to an Underwater location ahead of time really makes this quest more difficult. You will be facing bigger locations that might take additional time to clear, which will trigger effects at the end of the quest phase. There are also more dangerous enemies than the handful of Undead and small creatures from the base version.
- Fixed Loopholes: Captain Sahir now makes an attack against each player, which means that players no longer have time when to advance to stage 2. This attack was usually cancelled with a Feint from anyone at the table, but getting an attack against everyone seems more fair to me. Players are now also unable to stay in Grotto locations for a long time, building up their decks before they make the decision to go underwater. The encounter deck will now often force you to go Underwater, whether you like it or not.
- New Mechanics Introduced: Nothing too new, but a heavier focus on the double-sided locations of this quest. Players are now also punished for already having Underwater locations in the Victory Display, making enemies stronger. More effects also trigger whether or not the active location is Underwater.
- Play this scenario if: You like a challenge to hold your breath for as long as you are at an Underwater location. You want to give this quest some teeth (in the form of a shark).
- Solo or multiplayer?: I lean towards multiplayer for this quest since you will need a lot of willpower to get through these Underwater locations. It can be done in solo with effects like Untroubled by Darkness and Faramir, but you will have an easier time doing that in higher player counts. Go for an even number, though, since 3 players will struggle with that additional Grotto location in the staging area at the start of the game.
- What to look out for: Being forced Underwater and not being able to play allies and attachments. Big enemies that will require some dedicated defenders, swarming enemies that will keep resurfacing. A lot of negative effects whenever you have an Underwater active location.
New Rules
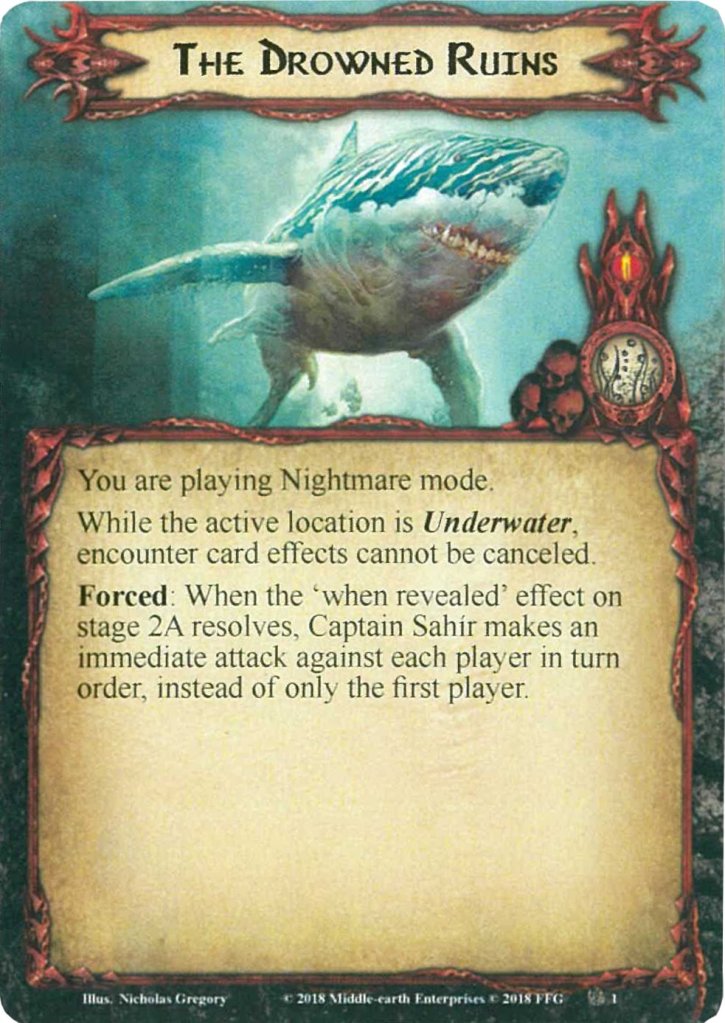
There are two new rules on the Rules card that you will have to keep in mind. One is a passive that will prevent the players from canceling any encounter card effects when they are Underwater. This mostly prevents them from playing A Test of Will to ignore some nasty treachery. But I can also see you wanting to cancel the effect on Submerged Dead with something like a Dúnedain Lookout. Unfortunately, this rule prevents any of that. You will either have to be above water to cancel cards or just forsake your ability to cancel altogether. It’s tricky to remove this from your deck, but with you being underwater half of the time, it’s better to invest in cards that you can actually play.
The second effect only triggers when the players advance to stage 2 and Sahir makes his attack. Traditionally, he would only attack the first player before running away with the sword you find in the temple. But in higher player counts, that attack usually didn’t mean much. It could be canceled by anyone, or there was someone with a solid Sentinel defender. Well, now you have to endure an attack from Sahir to each player in turn order! This greatly increases his damage potential (in multiplayer), and each player should be prepared to handle this attack. You likely just came up from an Underwater location, so your forces are unlikely to be at full strength. Luckily, you don’t have to worry about giving Sahir any resources since he will vanish as soon as his last attack has resolved.
New Setup

The setup for this quest is mostly unchanged. No additional cards are added to the staging area, though your staging area could look a little different than in the normal version of this quest. This is because you start with 2 locations from the Grotto deck in the staging area (3 when there are 3 or 4 players). Since there are 4 new Grotto locations in the deck, you could start with any one of those in play at the beginning. While this changes nothing about the initial setup, it will change your approach to the first few rounds. Getting hit with Sharp Precipice at the beginning of the game will jack up your threat if you decide not to travel here immediately. This can quickly ruin your chances of staying under the engagement cost of some of the new enemies, making the opening of your games a lot harder. Start with Overgrown Passage in the staging area, and you’ll be looking at a lot of threat early on. Travel here quickly without going Underwater, and your progress will be slowed as your heroes cannot receive resources. A tricky start either way and I hope you don’t get duplicate copies of these locations in the staging area to start with.
The rest of setup remains the same. Shrine to Morgoth is set aside for the second stage. Sahir joins the first player as an objective ally, and Na’asiyah joins the last player as an objective ally. Remember that these objectives will continue to switch each round!
Cards removed
The following cards are removed from the encounter deck and the Grotto deck to make space for the new Nightmare cards. Make sure you take out the correct double-sided locations!
- 1x Cursed Caverns / Twisting Hollow (To make way for NM Grotto cards)
- 1x Undersea Grotto / Dark Abyss (To make way for NM Grotto cards)
- 2x Throngs of Unfaithful (Replaced by Submerged Dead as the token “swarmy enemy”)
- 2x Soulless Cadaver (Easy enemy)
- 2x Drowned Cave (Replaced by Flooded Caverns)
- 3x Into the Abyss (Effect of this trechery did very little, Jagged Cavern now discards your hand)
- 1x Tangling and Grasping (Relatively easy treachery)
- 2x Cave Eel (Replaced by Great Shark)
- 2x Sea-scorpion (Replaced by bigger enemies)
The Quest
The format of the Nightmare version of this quest might be very similar to the regular version, but gone are the days that you can take 10 turns before you explore your first Underwater location. The new Grotto cards are going to appear at some point, and the new Pit into the Depths treachery can suddenly force you Underwater. All of this puts a lot more pressure on the players, something that was somewhat needed to bring this quest in line with the difficulty of the rest of the cycle.
Going Underwater is now a much bigger deal, as there are more effects that will trigger whenever you go Underwater. Enemies get tougher, shadow effects will trigger more often, and the players are cut off from the support of their deck. The inability to play allies or attachments will seriously impact the rhythm of this game as the rounds go by. You are still able to put allies into play through events like Sneak Attack and AVGT, but since you are sometimes pulled Underwater, whether you like it or not, you might not be prepared for this situation. This can leave you horribly outmatched by the strong enemies that this quest has to offer and will get worse if you are unable to clear the active location during the next quest phase. Staying Underwater too long is a death sentence, making treacheries like Powerful Undertow more trouble than in the original version of the game. Add to this the fact that treacheries can no longer be canceled while Underwater, and you have a dangerous time ahead of you whenever that active location flips over.
I would advise spending a couple of turns above water to quickly build up your deck. If you are playing a Forth, the Three Hunters deck, you would ideally want to stay above water as long as you are on the A-side of the contract. The B-side gets you a lot more willpower, and you won’t need to play as many attachments anymore. During this time, save your cancelation for Pit into the Depths, and try to avoid traveling to Sharp Precipice until the threat becomes unmanageable. This should give you time to kill as many enemies as possible, though the Eels and Sharks will remain in the staging area, waiting until you finally dip your toe into the water.
Side-quests still work well for stage 1 of the quest, as you will likely get the 15 progress on the main quest well before you clear 3 Underwater locations. Rally the West and Send for Aid are great quests to explore as it will help with your willpower. You will also want to slot in a Double Back into your deck in order to lower your threat after an unfortunate Sulfur Cloud or the continuous increase from Sharp Precipice. You will find that the 3 Underwater locations will probably be decided for you by the encounter deck instead of by your own initiative, so savour every moment above the water to build up a sizeable wall of willpower before diving down.

You will notice that this quest does punish you for stalling, so once you have cleared your first Underwater location, you should likely rush the other two as well before either the threat takes you down, or the increased stats on enemies kill off your board. Staying 1 turn above water between Underwater locations will help you to replenish your board, but you might come across cases where you are going to be Underwater for a couple of turns on end. As long as there is no active location with the Underwater trait in the active location slot by the end of the quest phase, you should be fine.
Once you reach stage 2, remember that Sahir will attack every player in this Nightmare version. I have already explained a lot about this, but you can easily anticipate the attack since you know when you are going to advance. Once the attack is over, you only get a single planning phase before you are permanently underwater. Use this turn to play any card you have left, and try to put the focus towards threat reduction and willpower boosts. You can still beat this quest stage in a single turn but will need a sizeable buffer in case Pit into the Depths lowers everyone’s willpower or Sulfur Cloud blocks progress. You are likely above 40 threat at this point, so even a single Powerful Undertow can really screw you over, as you’ll take +5 threat immediately. If you lose players because of this, you are probably going to lose right at the finish.

If you do manage to keep a threat around 35-40 and throw every willpower boost you have into this final quest phase, you will have a decent chance of making it out. Take too long at this stage, and your chances decrease. Now, being permanently Underwater will make enemies more deadly, and you will be unable to refuel your boardstate with new allies and attachments. Perhaps you can last another turn if the encounter deck doesn’t reveal too many enemies, but that luck won’t last long, in my experience. Continue to focus on boosting willpower and lowering your threat with events so that you can cling on to hope for as long as possible. In any case, it is going to make for a pretty dramatic conclusion to this quest!
The Encounter Deck
Global

- The encounter deck starts at 31 cards thick
- The chances of hitting a shadow card are 58.1%. Most effects only trigger when you are Underwater
- The average threat per card in the deck is 1.19 threat/card. This is lower than you’ll experience due to the large number of treacheries in the deck. In reality, the threat will end up being higher since treacheries like Ancient Depths add threat indirectly to the staging area
- Note that while Jagged Cavern is the active location, the first treachery revealed each round gains surge. On top of that, Sulfur Cloud will surge if the active location is not Underwater.
- Powerful Undertow has Doomed 3, and Jagged Cavern will give the first treachery Doomed 1 as well. Add to this the various other ways to get additional threat (Sulfur Cloud, Shrine to Morgoth, Sharp Precipice), and you’ll want to include some threat reduction!
- Immunities
- While you are Underwater, encounter card effects cannot be canceled.
- Shrine to Morgoth is immune to attachments and cannot go to the staging area.
- Cave Eel and Great Shark cannot be engaged unless you are Underwater.
- Great Shark also cannot take damage unless the active location is Underwater.
- The effect on Ancient Depths cannot be canceled.
Due to many of the locations being in the Grotto deck and not the encounter deck, the dominant card type for this quest will be treacheries, especially since some enemies will stick in the staging area for a while. This is also relevant for Jagged Cavern, as there is a good chance you’ll trigger that +1 threat and Surge each turn you have it active.
Enemies
The new enemies help a lot to sell the vibe of being underwater. New undead try to drag you down, and a big shark also patrols these depths. Best be careful!
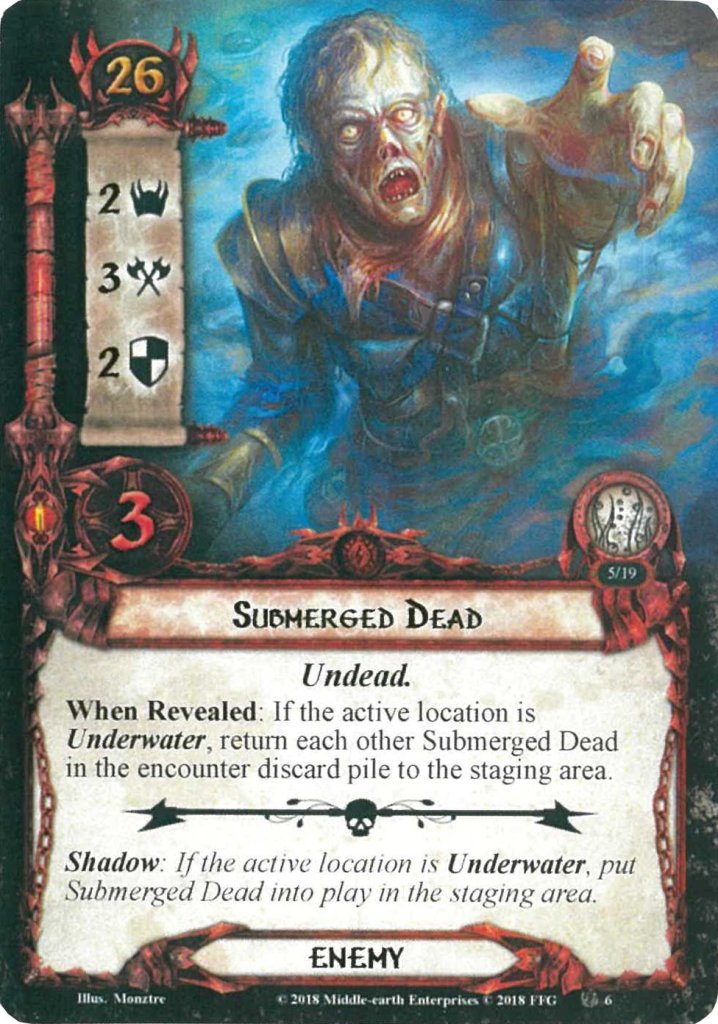
- Submerged Dead: Remember those swarming Undead enemies from the Angmar Awakened cycle? Well, they’re back and can swim now! This enemy is relatively weak but will tie the players up by constantly reviving itself with the When Revealed effect. This checks to see if the players are currently Underwater. If they are, all copies of Submerged Dead are brought back from the encounter discard pile and placed in the staging area. This can suddenly spawn 4 enemies to deal with after you have likely dealt with them a few turns prior. Because of this respawning nature (as well as their respawning shadow effect), I would suggest keeping all copies of Submerged Dead in play. Dunedain decks will be best suited to handle the constant attacks, but even without that archetype, you should be able to handle a 3-attack enemy engaged with you. This strategy really only works in higher player counts, with each player taking one or two copies of this enemy to sit engaged with them. In solo, I would suggest bringing some Forest Snares so that you can trap some enemies permanently. One thing to note is that the When Revealed effect cannot be canceled since it will only trigger when you are Underwater, and the rules forbid you from canceling encounter card effects during that time.
- Great Shark: There he is! This was quite the meme when the pack first released, as players didn’t expect to be fighting sharks while underwater in their LOTR-themed game. But this is certainly an enemy you are going to encounter in this quest, so it would be in your best interest to pay attention with this enemy around. To begin with, this enemy will only engage players while they are Underwater. These sharks aren’t any good on land, much like the Cave Eels from the base version of the quest. They likewise return to the staging area at the beginning of the encounter phase if the active location does not have the Underwater trait. What is different is that the sharks can also not be damaged while the players are out of the water. Instead, the Great Shark will sit in the staging area, adding 4 to the total threat of the staging area at the beginning of the game. This will get higher and higher as the game progresses since this enemy gets +1 attack/defence/threat per Underwater location in the victory display. That means that during stage 2, this will be at least a 7/7/7/6 enemy. That is going to be a lot of work to get through, so let’s discuss strategy. 7 defence will be hard to crack, and with you being underwater when this enemy is engaged, you won’t be able to play chump blockers or boost your characters with attachments. Instead, you will have to rely on events to prevent this enemy from attacking or reduce the defence/hitpoints of this enemy. Direct damage is an obvious answer to this enemy, as it allows you to avoid the high defence stat towards the second half of the game. Alternatively, you can also send this enemy back to the staging area with Radagast’s Staff so that you do not have to deal with the big attack. You likely won’t be able to hit the shark back at that point, but maybe you can lure it into a trap like Entangling Nets or Poisoned Stakes to slowly bring it down over time. It’s a big enemy, and you will have to find ways to deal with it quickly. The Great Hunt could deal with it while you are out of the water, since it will straight-up discard this enemy. But there might be juicier targets for that event waiting in the staging area.
- Undersea Cave Troll: Juicy enemies like this Troll, perhaps? Players often forget this is included in the deck because they are distracted by the shark, but the Troll can pose a bigger problem in the early game. 7 attack and 10 hitpoints are what you’d expect from a Troll enemy, and on top of that 7 attack, you also get a rule for excess damage dealt by him. Should you take more damage than there are hitpoints on your defender, you must discard a resource from one of your objective-allies or from a hero you can control per damage dealt. Note that you only lose resources on one character, you do not have to make up the difference if you still have excess damage left over after discarding all resources from a hero/objective ally. Aside from that, this is a pretty basic enemy for a Nightmare quest. Surprisingly, it does not interact with any of the quest’s mechanics, so it is almost as if this enemy belongs to a different quest. Try to take care of this enemy as quickly as you can, since that 7 attack will be dangerous if left unchecked. Trapping this Troll with a Forest Snare would be ideal, then you can just ignore it for the rest of the game. Alternatively, if you do decide to kill this Troll, remember that he can go to the Victory Display upon defeat. It ensures that you only ever have to face this enemy a maximum of 2 times in the game.

Locations
This is a quest all about locations. Two new double-sided locations are added to the Grotto deck, and a new single-sided location is added to the encounter deck to replace Drowned Cave.
- Flooded Caverns: This will be the only location in the encounter deck that can be revealed during the quest phase. It replaces the Drowned Cave in this regard but still holds the same mechanics in place. This is an Underwater location without the ability of being flipped over, and it does not have a Grotto-side. While it is in the staging area, it adds 2 threat to the total, as well as the threat of any active location that has the Underwater trait. This will stack with multiple copies of Flooded Caverns in the staging area, making it troublesome if you have a 6-threat Jagged Cavern as the active location. You could bypass this added threat with something like a Thror’s Key, which is decent tech against this location. You can also choose to go to this location once you have the option to travel. This is tricky, though, as you will be Underwater and will have to clear 6 quest points before you complete this location. This is far fewer quest points than the double-sided locations, but it is balanced out by the fact that this location does not go to the victory display upon completion. I can think of very little reason to travel here, as it does not progress your game in any way, plus you are still unable to play ally and attachment cards. Better to clear this location in the staging area if you can, or ignore it. Should you travel here and are unable to clear it before the end of the quest phase, you will be forced to put an Underwater location from the victory display into the bottom of the Grotto deck. This will reset your progress and will make stage 1 take a lot longer. Another reason to avoid traveling here!
- Overgrown Passage: This new Grotto location can be in play as soon as setup has been completed, so take your time to get to know the sneaky ways in which this location tempts you to go Underwater ahead of time. With 5 threat, you will struggle to make much progress on stage 1B or even on any (Underwater) active location. As such, it will be tempting to travel here to get the threat out of the staging area, especially if multiple copies of the Passage are in the staging area, blocking even more progress. However, when you travel here, you will have the option to flip it to its Underwater side. This is a 50/50 shot between ending up at either Jagged Cavern or Submerged Crawlway. There is no telling which it will be, unless you already have a copy in the victory display. If you choose to not go underwater at this point, you will be stuck with the passive effect that will prevent heroes from gaining resources as long as Overgrown Passage is active. This is a bummer since you will need the resources during the turns you are out of the water to play allies and attachments. This location will block any resource-gaining effect from player cards, as well as the regular resources you get at the start of each turn. Between that and the risk of Pit into the Depths flipping the location at any point, it would be wise to clear this active location as soon as possible. Making progress through card effects or during the combat phase will help to get rid of the passive, allowing you to earn resources again ahead of the next planning phase. This should also be the focus if you end up flipping back from the Underwater location to the Overgrown Passage since you will have to replenish any forces lost during your time underwater.
- Sharp Precipice: The other new Grotto card that you will have to face is far more pressing. It will demand to become the active location and immediately force you Underwater, which is pretty uncomfortable in the early game. The stats on the Grotto location aren’t horrible for a Nightmare card, with just 2 threat and 3 quest points. The problems arise when you look at the two Forced effects on the card. To begin with, if you are forced to travel and decide not to go to a location named “Sharp Precipice,” you have to raise the threat of each player by 3. Since this is Nightmare mode, it will also stack between the two copies of this location, making it brutally difficult to get a good footing if you start the game with both copies in the staging area. But even later in the game, having to raise your threat because you prefer to travel somewhere else can get you into the engagement range of some pretty formidable enemies. Threat reduction is recommended if you are going to ignore this location for a while. And I do recommend staying clear of this location for a while if you can stomach the threat. That’s because of the second Forced effect that will force you to flip it over to the Underwater location when you travel here. This cannot be avoided like the other Grotto locations where flipping is optional. The best strategy for this location is to slap a Thror’s Key on it as soon as one comes out (hopefully not during setup). That way, you just have an easy 2/3 location that you can avoid for a while until the other comes out. Otherwise, the only time that this location is easy to deal with is if you have flipped back from the Underwater side in the turn after you’ve traveled here. At that point, there is not much stopping you from exploring it and putting it back in the Grotto deck for a while.
- Jagged Cavern: This is the first of two new double-sided Underwater locations in the Nightmare deck, and it actually has a pretty reasonable number of quest points to overcome. Only 8, whereas others go as high as double that! The 6 threat on this location is troublesome, though, especially if you have a Flooded Caverns in the staging area since that threat will be added to its total. Ancient Depths is also an awful encounter card to combo with this location, though you will at least know that you won’t need much willpower to get through this location if you decide to travel here. While the Jagged Cavern is the active location, the first treachery revealed each round gains Doomed 1 and Surge. The Doomed 1 isn’t that bad since you are unlikely to spend more than one turn here. The Surge can be troublesome, though this is a perfect staging ground for the Minas Tirith Lampwright to show his quality! If that fails, the worst you get is one additional encounter card, which scales in favor of playing with more players. An added benefit is that Sulfur Cloud won’t raise everyone’s threat too high, and you might still get through this location. Should you fail to clear this location before the end of the quest phase, then each player must discard their hand of cards. This greatly reduces the options you have to recover your boardstate after being underwater for so long unless you are playing a Noldor deck. Both Galdor and Erestor decks won’t mind this too much. For most other decks, you will want to hang on to your cards for a while, so it is paramount you clear this location in one go. If you don’t, you always get the option to flip back to the Grotto side and perhaps try again later.
- Submerged Crawlway: A lower threat but double the quest points of the Jagged Cavern, making this Underwater location a much bigger hurdle to overcome with willpower. This is definitely a location to clear later in the game when you have your willpower-boosts on the table. Once you end up at this Crawlway, you must deal each enemy an additional shadow card at the beginning of the combat phase. This is dangerous since there are enemies that can swarm players in this quest, and both enemies and shadow cards get worse if you are Underwater. This will end up being a tough combat phase for your fellowship, followed by a hectic quest phase to get out of this place. Should you fail to clear the Submerged Crawlway in one go, then you will be forced to search the encounter deck and discard pile for one enemy per player and add them to the staging area. I would suggest to always go for copies of Submerged Dead from the discard pile since they would go to the staging area anyways if another copy shows up. You also get the chance to flip back to the Grotto side of the location. If you do this, you will have an easier time dealing with the enemies before attempting to go underwater again. If you stay underwater, you will have to deal with more enemies that all get additional shadow cards, so it will be tricky to come out on top. Being able to discard shadow cards or cancel attacks can be life-saving when this location is active!

Treacheries
Walking around in these grottos is a dangerous affair. You can suddenly find yourself submerged underwater or barely able to see a way out of the water. Remember that cancelation of these treacheries is not possible while you are underwater, making them even trickier!
- Sulfur Cloud: Let’s get the easy bit out of the way first. If you are not underwater at the moment that this treachery hits, it simply surges, and you can move on. However, since this quest forces you underwater more often than in the regular version of the quest, there is a fair chance you will be hit by the full force of the treachery. And it is an interesting effect for sure! Players have to choose a number as a group and raise each player’s threat by that number. No more than double that number worth of progress may be placed on any Underwater locations for the rest of the phase. This is basically an effect with Doomed X, where you get to decide how high the number goes! The value will really depend on your situation, though I recommend to at least go high enough so that you can clear the active location. Otherwise, I would suggest going for 0 and simply accepting that you are not making progress this turn. Getting hit by both copies of this treachery back-to-back is a really tragic occurrence, and can see players gaining double digits worth of threat in a single round, often ending their game. This is especially true during stage 2, where you will want to make as much progress as possible on the Shrine to Morgoth in order to not have to raise your threat any further. Threat reduction could be a valuable tool in mitigating a loss so close to the finish line.
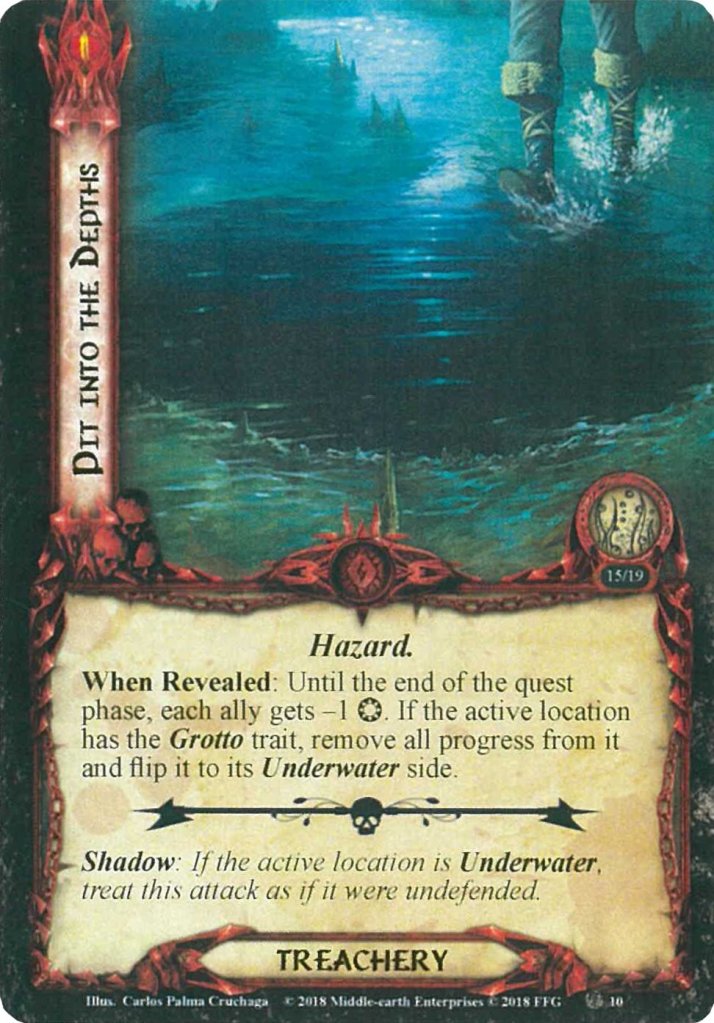
- Pit into the Depths: This is a very thematic treachery. One moment, you are walking around like nothing is the matter, and after making one wrong move, you are suddenly underwater. When this treachery is revealed, all allies will get -1 willpower, which can significantly impact your progress that turn. If you were already underwater when this treachery hits, there is a fair chance you are not going to make it through the active location because of this. If you were above water, and the active location has the Grotto trait, you will now be forced to remove all progress from it, and flip it to its Underwater side. If this hits while you are not prepared, you won’t clear the location and will likely have to deal with the effect on the location at the end of the quest phase. If you are above water, this is definitely one worth canceling. If you are underwater, you can’t cancel the effect, but you can try to overcome the -1 willpower to allies by playing various willpower-boosting effects. Another important note here is that heroes are not affected by this treachery. If you are getting most of your willpower from your heroes, you might still be able to clear the active location this turn, but it really depends on your deck. The shadow effect on this treachery can also be lethal, as it will treat the attack as if it were undefended. Get this on a boosted shark or on the Undersea Cave Troll, and you are saying bye-bye to one of your heroes if you are underwater.

Tips and Tricks
- Dwarves make for surprisingly good swimmers. All locations are also Underground, giving Dwarf decks a distinct advantage against the locations. Untroubled by Darkness will do wonders, but even Ever My Heart Rises, or Bombur would be worth including in your deck!
- Remember that you have both Sahir and Na’asiyah for this quest’s first stage. While you are Underwater, you can’t use your resources to play allies or attachments, but you can still pass resources to them. For Sahir, that even gives him additional willpower to help you in the quest phase.
- Be prepared for Sahir’s attack, even if you are not the first player. You will know exactly when he attacks, so have an answer ready to go. It would be a shame to lose an ally (or worse, a hero) to his attack if it can be anticipated. The attack also happens when you are not underwater, so shadow effects are greatly diminished.
- Threat reduction is going to be important in this quest. There are plenty of new ways to get a lot of threat, and losing the final round due to threating out to the Shrine to Morgoth is one of the worst ways to go. Favor of the Valar can protect you from this, but load up on The Galadhrim’s Greetings and Double Back as well to give you enough space for an unexpected Sulfur Cloud or if you have to avoid Sharp Precipice for a while.
Playthroughs
The following playthroughs were found of this quest in NM mode. It’s not many, but hopefully, it helps to see the mechanics of this quest in action.
- True solo, Outlands deck: https://www.youtube.com/watch?v=07Dcy1_p7f4
With this excursion to the middle of the cycle over, we will be returning to the chronological order again with Raid on the Grey Havens next. That one might take a little bit longer to write since the quest is made so much more difficult in Nightmare mode. Oh well, I did NM Dol Guldur, I can do this!
