“They were like great figures seated upon thrones. Each had three joined bodies, and three heads facing outward, and inward, and across the gateway. The heads had vulture faces, and on their great knees were laid clawlike hands. They seemed to be carved out of huge blocks of stone, immovable, and yet they were aware: some dreadful spirit of evil vigilance abode in them. They knew an enemy. Visible or invisible none could pass unheeded. They would forbid his entry, or his escape.“
– The Return of the King, The Tower of Cirith Ungol
The Mountain of Fire was the last Saga expansion for Lord of the Rings: The Card Game and the climax to the story. After the epic Battle of Pelennor Fields, the Forces of Sauron will be confronted in two very different ways: through a great battle against the never-ending hordes at the Black Gate and through the covert actions of Hobbits, making the last trek across the wastelands of Mordor towards Mount Doom, so the Ring can be destroyed forever. It is easy to forget that these are not the two only scenarios in the box – that before Frodo can make that last leg of the journey, we have to free him first. Following the battle against Shelob, Frodo was injured and captured by orcs. It is now up to us to free him from the top of Cirith Ungol, a great tower filled with orcs and guarded by the mysterious watchers. An impossible task, it seems… Unless the orcs start fighting amongst themselves!?
The Tower of Cirith Ungol
- Found in The Mountain of Fire Expansion
- Official Difficulty: –
- Community Difficulty: 7.3
- Encounter sets: The Tower of Cirith Ungol, Orcs of Mordor, Deep Shadows
- Quest cards: 3
- Play if: You want a quest where enemies appear and disappear in unpredictable ways. You want to watch enemies fight among themselves.
- What is different about this quest?: Enemies can damage each other. The staging area can fill and empty quite quickly. The encounter deck will sometimes help you! You have a boss that flips between being a location and an enemy.
- Solo or Multiplayer?: You get an extra enemy each round in stage 2, which is harder for a solo player to manage. If everyone manages their threat, higher players can keep enemies in the staging area, increasing the chances that some will subsequently disappear. The quest can be quite luck-based and can therefore feel a bit arbitrary. This does not mean that it isn’t fun, though!
- Can I bring Side Quests for this scenario?: Yes, there are several options for doing side quests – especially during stage 1 if you are waiting some rounds before traveling to the Watcher location, where no progress is needed on the main quest.
The Quest
Setup
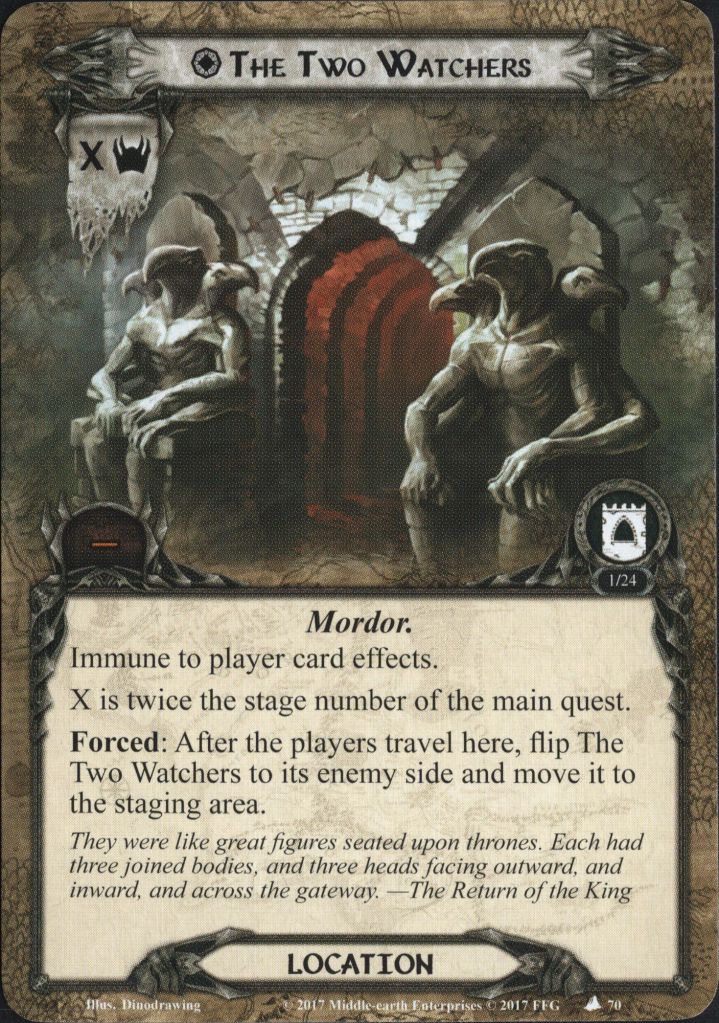
We begin by setting Shagrat aside, out of play. We will get back to him later. Then we add The Two Watchers to the staging area. Keep in mind that the card is double-sided, so you may have sleeved it accidentally. It is added location-side up. It is a unique X threat location, where X is twice the stage number on the main quest. It is immune to player card effects, and after the players travel there, it will be flipped to the enemy side. We will get back to that one in a bit.

Then we add The Topmost Chamber – another unique location, with 1 threat that requires 1 progress to clear. The players cannot travel there unless 18 progress are on stage 2B, and to travel the players must add Shagrat to the staging area. It is also immune to player card effects, so there is no way to mitigate this cost. The first player loses control of the Ring-bearer and places him face-up under The Topmost Chamber as a Guarded objective (meaning that the players will regain control of the Ring-bearer once the location is cleared). Then, the first player adds Last of the Company to a hero they control, and attaches The One Ring to them. Last of the Company grants the Ring-bearer trait and the Fellowship sphere and states that the controller cannot lose control of the First Player token. It has an action where you can exhaust the One Ring and raise your threat by 1 to choose an enemy, granting the enemy -X threat, where X is the attached hero’s willpower until the end of the phase. This can be quite handy, as the staging area can get quite crowded.
If we play Saga mode, we have some additional housekeeping before we are ready to begin.
- Each player can change heroes without incurring the +1 threat penalty for hero change.
- A Heavy Burden gets attached to the same hero that Last of the Company was attached to, so you have to either raise EACH player’s threat by 1 or exhaust the attached hero at the end of the planning phase. There are a few ways to bypass this heavy penalty: play lots of threat reduction, have readying effects, or attach both cards to a hero that you include for their ability rather than their stats (Pippin in a hobbit deck is a good example of this).
- Once you have attached A Heavy Burden, each player chooses an item boon from the campaign pool (which cannot be Anduril) and sets it aside, out of play. The following items can be chosen: Sting, Mithril Shirt (the thematic choice), Glamdring, Phial of Galadriel, Three Golden Hairs, Lórien Rope, and Leaf-wrapped Lembas. What you choose depends on your build and whether you plan on killing Shagrat later. If you have something you don’t care about, you can decide to let him have it (unless you are creeped out by the notion of him carrying Galadriel’s hair around…)
- You remove each burden from each of the following burden sets: Helm’s Deep, The Road to Isengard, and The Passing of the Grey Company. Crucially, you do NOT remove the Wraith on Wings you added after Pelennor Fields. They will be back to haunt you, making the quest substantially harder, even though it thematically is a bit of a weird inclusion.
- Lastly, you flip the card and set it aside. It contains additional instructions for Stage 3A, which we will get back to once we get there.
Then we flip the quest card.
Quest Card 1B: Pass the Two Watchers (0 progress)

The first thing we see is that each non-unique location gets -1 threat and cannot leave the staging area (you cannot explore the tower before you get in!). This means that we can care slightly less about locations, but beware – while you may be capable of questing over a bunch of locations in stage 1, things will get much harder in stage 2. We also learn that this stage cannot be defeated while the Watchers are in play and that if the Watchers are enemy side up, then they are considered to be engaged with each player. The quest card has 0 quest points, meaning that it will advance as soon as the Watchers leave play. This also means that this is a good time to play side quests!
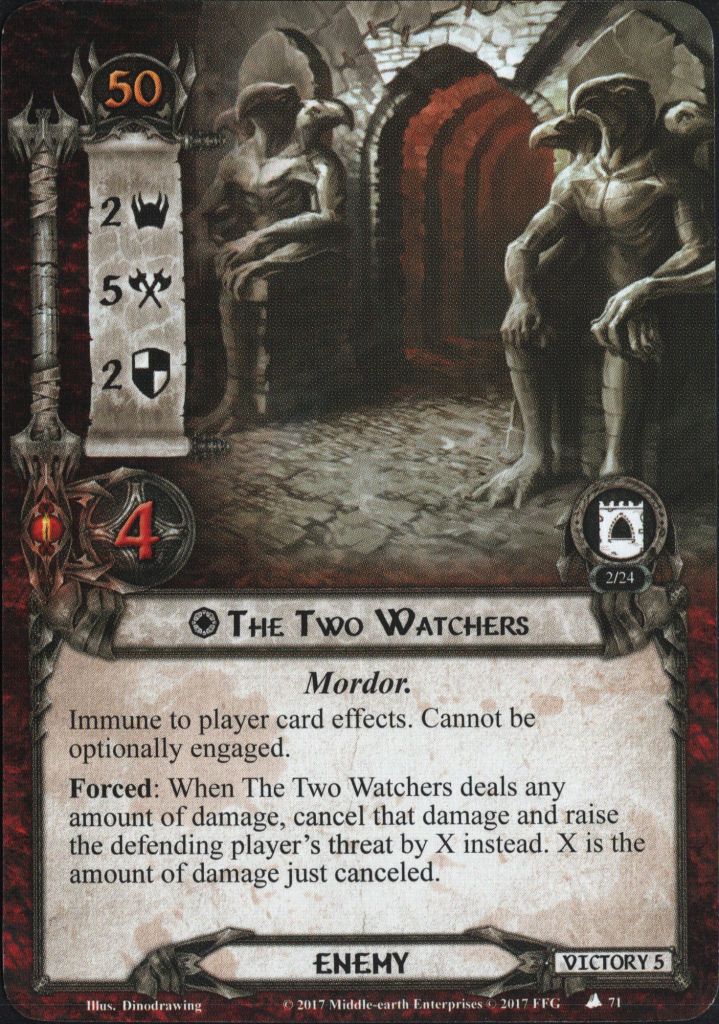
As we noted during setup, the Watchers do not have a printed quest point value on their location side. Instead, it is flipped after the players travel there. Then it becomes an enemy with engagement cost of 50, 2 threat, 5 attack, 2 defense, and 4 life. A surprisingly light enemy at this point in the game! It is immune to player card effects and cannot be engaged, but as we saw on 1B, this is of little importance – it is considered to be engaged with each player at this stage. The 5 attack looks intimidating, but it also has a Forced effect: When the Watchers deal any damage, cancel that damage and raise the defending players threat by the amount. So the Watchers deal no damage, but they can raise your threat by a significant amount. Is this problematic? It may be at the next stage, which contains a lot of enemies. If one person at the table starts getting close to 40 threat early, they will have to deal with a lot of enemies. As we will learn at the next stage, this quest sometimes rewards you for leaving enemies in the staging area, so it may be worth considering to stay low in threat.
Ideally, you want to spend one or two turns getting set up and getting enough characters or attachments out that you can take one hit from the Watchers (blocking at your leisure) and then take them out the second they flip. You should ideally be ready to fight when you advance, so get your attack strategy rolling. This should not be too much of a problem, especially given the enemies you have fought on your way to this scenario. If you have a character (or group of characters) who can reliably deal 6 damage, you are in a good position for the next stage. If you play with a dedicated defender, which is always a good idea, you may be able to tank the Watcher’s attack for multiple turns, but remember that you cannot clear locations, so they will potentially just pile up, especially at higher difficulties. Add the Wraith on Wings to the mix in Saga, and threat can climb. Especially in multiplayer, the staging area can get really busy. Another good tip for this stage is to play threat-lowering events. It is always beneficial to Sneak Attack Gandalf or play Elrond’s council. If you play thematic, you are probably running Hobbits in this quest, so The Shirefolk is another good option. If you leave enemies in the staging area, they might take care of themselves during 2B. And once the Watchers are gone, that is where we’re going…
Quest Card 2: Fighting in the Tower (18 progress)
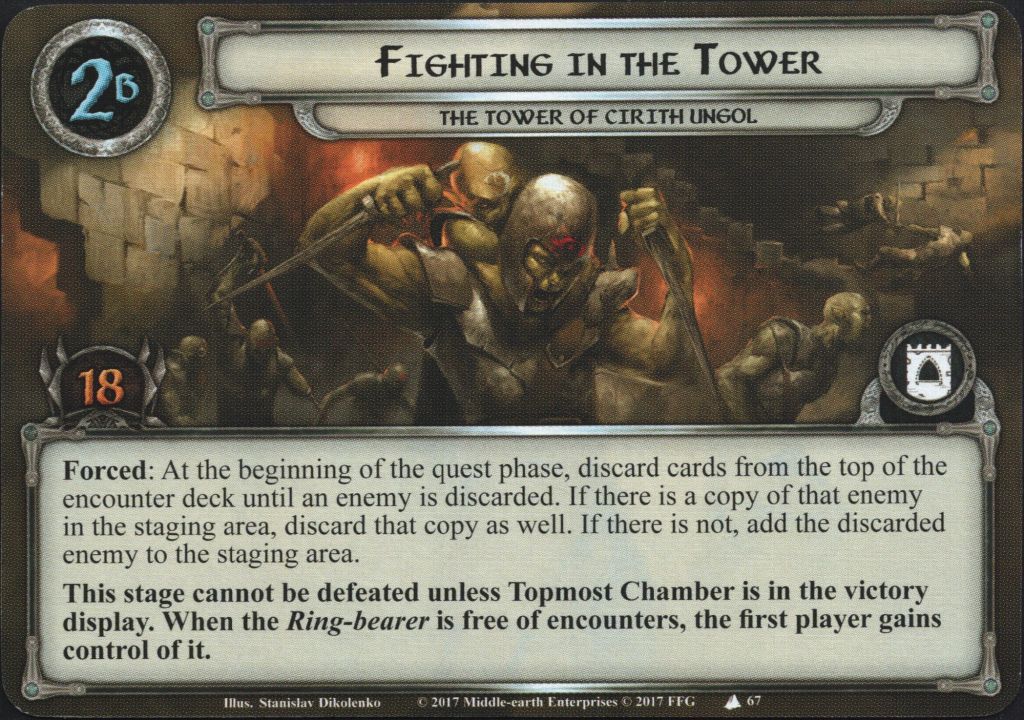
When revealed, you shuffle the discard pile into the encounter deck and discard cards until X enemies are discarded, where X is the number of players in the game. These are added to the staging area, meaning effects like “Surge” and When Revealed effects will not trigger. Then, the card is flipped to 2B. It states that the stage cannot be defeated until the Topmost Chamber is in the victory display. When the ring-bearer is free of encounters, the first player gains control of them. Remember, we cannot travel to the Topmost Chamber unless there are 18 progress on 2B, so you first have to place the progress, and then you can travel and clear it. This is fairly straightforward. Where it gets weird is the Forced effect on the card, stating that at the beginning of the quest phase, you discard cards until an enemy is discarded. If there is no copy of the enemy in the staging area, the enemy is added to the staging area. But if there is already a copy in the staging area, that copy gets discarded due to infighting.

The orcs are fighting amongst themselves! This effect is a ton of fun and can cause some very swingy games. It incites keeping a number of enemies in the staging area, making secrecy and low-threat decks very attractive. This is why you don’t let the Watchers drive your threat into the higher end during stage 1B. It is hard to predict what this effect will do – technically, you can scry the encounter deck, but you will more or less have to do it every round, so try to enjoy the ride instead. As we can see, several of the encounter cards will have similar effects, sofortunes can change rapidly. Use the chaos to your advantage and keep a steady questing pace, placing the required progress. If you managed to clear the Watchers, someone at your table has the capability to fight – use it to your advantage. In Saga, you will also need it to clear the Wraiths. Use attackers to clear enemies that would start engaging due to threat, or to trim the staging area if it gets too clogged. But the main priority should be to quest, remove locations, and work your way up towards the Topmost tower. Once you travel to the Topmost tower, Shagrat is added to play.
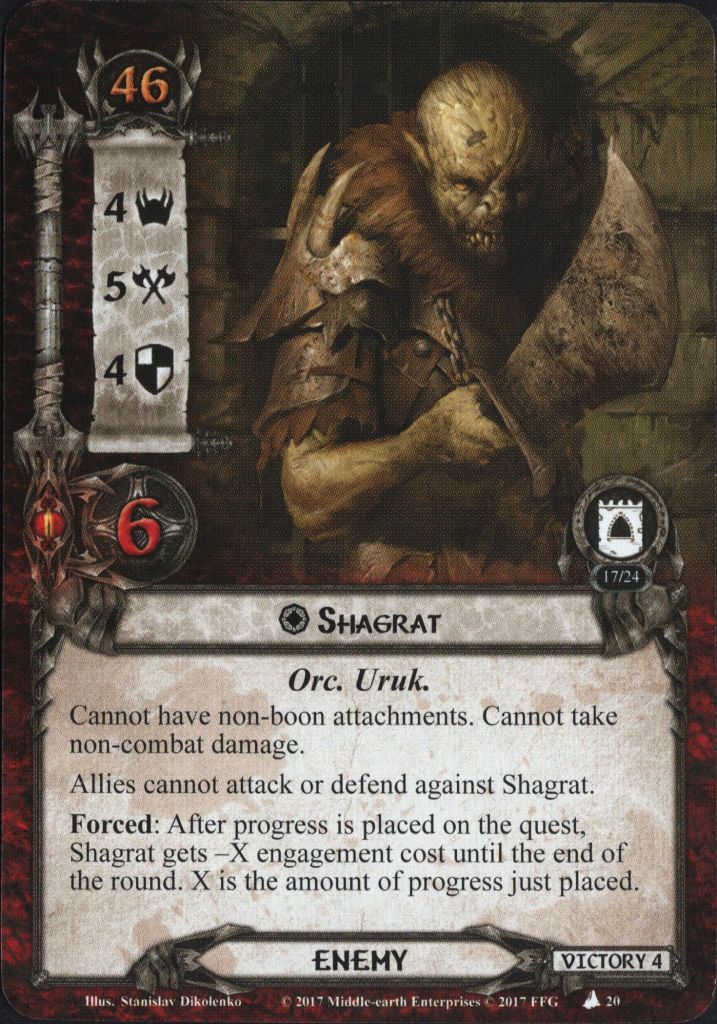
Shagrat has an engagement cost of 46, 4 threat, 5 attack, 4 defense and 6 hit points. He cannot have attachments and cannot take non-combat damage (so no sneak attack blast!). 10 combined defense and hit points is already not trivial, but this is nothing compared to his next effect: Allies cannot attack or defend against Shagrat. He is very much your heroes’ problem! Unless your threat is getting dangerously high, you should have a choice when to engage him – but there is a caveat. Whenever you place progress on the quest (not on any locations!) Shagrat gets -X engagement cost, where X is the number of progress placed. So, if your threat is starting to climb, Shagrat might notice you. If you run a low-threat Hobbit deck or a secrecy build, this might never be relevant for you. But it can get dicey if your threat is in the late 30s. In a non-saga run, you could just leave Shagrat alone if your threat level is low enough, and you can quest over him. If you are sufficiently set up for it, you could theoretically take down Shagrat before advancing to stage 3A, but this requires some finesse. You could run a high-attack Voltron hero (say, a Legolas with double Rivendell blades and some kind of attack bonus) and take him down in the first round of combat, blocking him with a strong defender or using some kindof Feint tech. It is more likely that you will need to weather his attack for a few rounds and pile on some damage. This is where things can get easily out of hand. More attacks means more chances to draw nasty shadow cards, and the occasional ping of damage can cost you a hero. A good (and thematic ) option is Sam Gamgee with Rosie Cotton, Hobbit Cloak, and Fast Hitch. Of course, classical defenders like Beregond will work as well. You can also leave Shagrat for now until you are ready to deal with him. He will add extra threat, but unless his 4 threat locks you completely out of questing, you should be able to place the final point of progress you need and continue to stage 3A. If you can, try to keep the staging area clear – at higher player counts, you will reveal a few encounter cards, meaning that if the staging area is busy now, it may get out of control later, and the Watchers are about to do a dramatic return, and they are angry. Nevertheless, when Topmost Chamber goes to the victory display, the first player gains control of the Ring-bearer, and advances.
Quest Card 3: Escape from Cirith Ungol (12 progress)
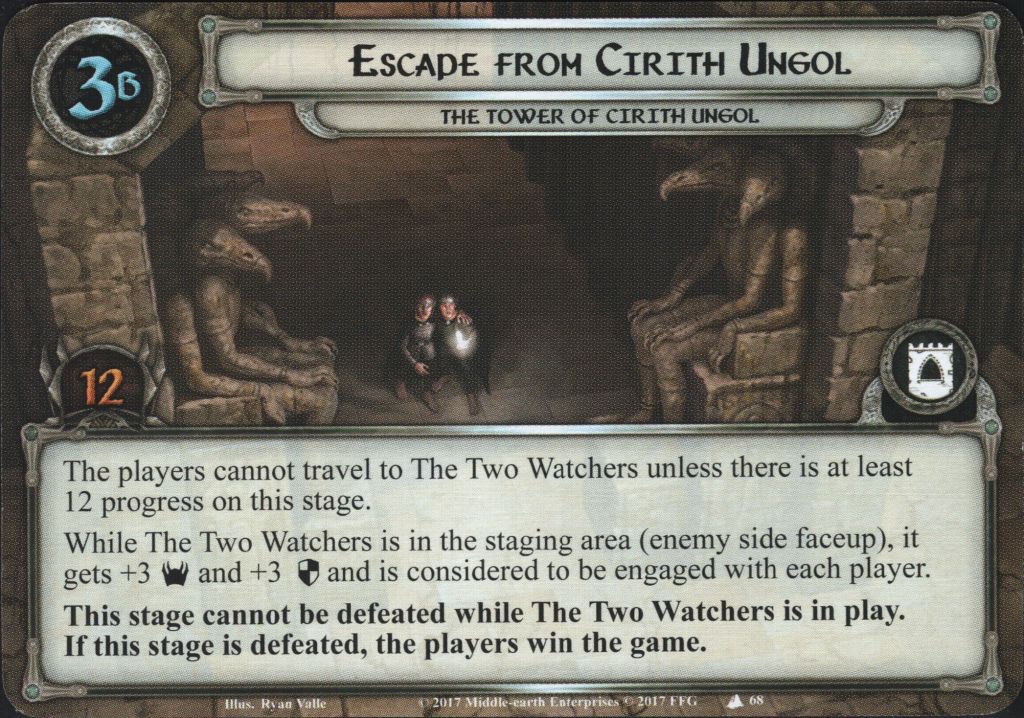
When this stage is revealed, Last of the Company is added to the victory display, and The One Ring is attached to the Ring-bearer, who is subsequently exhausted. The First Player moves the Two Watchers from the victory display to the staging area (location side face-up), and each other player reveals an encounter card. So you can potentially get a few enemies you have to deal with here or locations that will make questing difficult. If you play sage mode then you have some extra things to do before flipping to 3B: you take all the set-aside item boons that were chosen, and attach them to Shagrat as Guarded objectives. Guarded means that Shagrat must be defeated to claim them! When Shagrat is defeated, each boon is returned to its owner’s hand. Furthermore, you attach A Heavy Burden to the Ring-bearer instead of the hero with Last of the Company. Then, the card is flipped to 3B.

3B states that you cannot travel to the Watchers unless 3B has 12 progress on it. Furthermore, while the Two Watchers are in the staging area with the enemy side face-up, they gain +3 threat and +3 defense and are considered to be engaged with each player. The stage cannot be defeated while the Two Watchers are in play, and when the stage is defeated, the players win the game. So you need to place 12 progress, travel to the Watchers, deal them 9 points of damage, and victory is yours. If you plan to Alpha quest, remember Shagrat’s Forced ability – if all 12 progress are placed at once, Shagrat gets -12 engagement cost. You need a hero who can take his attack if that is the case. And be careful if you are on the threshold of his engagement cost – the encounter card has a few cards with Doomed 2, so your threat could become higher than you planned during the questing phase. If you play Saga, there is also another angle to consider – if Shagrat is still in play once you win the quest, all boons attached to him are lost. So in a Saga game, you need a strategy for dealing with Shagrat AND the Watchers. Ideally, you want to be done with Shagrat before taking on the Watchers. As stated above, this means either building up a few heroes to be able to handle his attacks while simultaneously dealing him sufficient damage over time to kill him. 4 defense is no easy feat, so it is something you need to devise a strategy for and build up a hero to be strong enough. But we have faith in you! The alternative is to let him have the boons. It is what happened in the story, after all, right? Remember, he is not immune to player card effects, so he can be Feinted while you concentrate your heroes’ attention to him. And other player’s heroes with Ranged can assist in the attack.
If you make it to 12 progress and take on the Watchers, you should be ready to take them out in one big strike once you engage them. Their attack can get dangerous if your threat is high enough, but you should not be too afraid to take their attack undefended, as they just increase your threat, and you are about to win. Once you place the final point of damage on the Watchers, you have won, and Frodo and Sam are ready for Mount Doom.
The Encounter Deck
Global
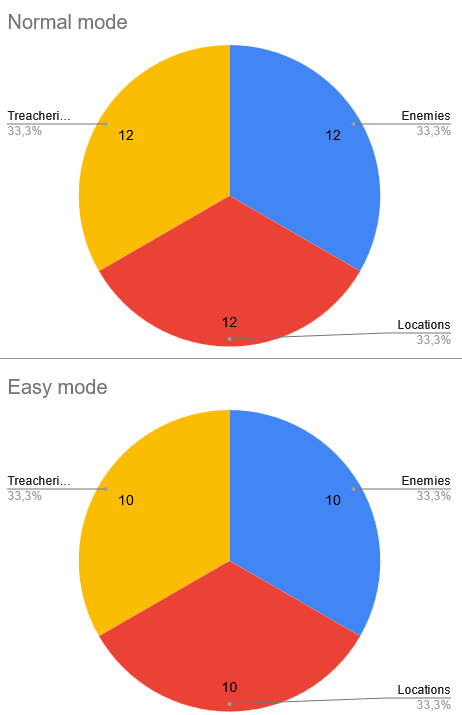
- The encounter deck consists of 36 cards (30 on easy).
- 24 cards have shadow effects on Normal giving a shadow risk of 67%. The risk is similar for easy mode, where 20 cards have a shadow effect.
- The average threat of cards revealed is in the low end, with 1.42 for Normal and 1.5 on Easy. Threat ranges between 0 and 3, which is also unusually low for this point in the saga.
- Doomed 2 is present on 2 cards on Normal and 1 on easy (Deep Shadows).
- Surge is present on 3 cards on Normal and 2 on easy (Orc of Mordor).
- Peril is absent in this scenario!
- Archery is present on 3 cards (Snaga Archer).
- Immunity:
- Shagrat and Gorbag cannot have attachments, and Shagrat cannot take non-combat damage.
- Allies cannot attack and defend against Shagrat
- Topmost chamber is immune to player card effects
Enemies

- First of the gang is this scenario’s mini-boss Gorbag. He is present in a single copy in Normal and absent in Easy mode, which should be a tell that he is not very nice. 3 threat, 4 attack and 3 defense with 5 hit points means that he takes some attack power to take down. An engagement cost of 36 means that many decks will have to take on Gorbag from mid-game if they are not running a low-threat build. Gorbag cannot have attachments, so no trapping shenanigans. After Gorbag engages, it makes an immediate attack. So this one needs a dedicated defender or two chumps. Taking down Gorbag can, therefore, require some dedication. As the encounter deck is more likely to cycle in this scenario due to the effect on 2B, your chances of seeing Gorbag in the wild may be higher than you think. It can be an annoying distraction that consumes resources that could be better used elsewhere. However, it does have Victory 3, so once you defeat it, it is gone. As a shadow card, it grants an additional attack, which is never nice, especially if it is added to Shagrat. This is a card where shadow cancellation may come in handy.
- Next, we have Wounded Uruk, present in three copies regardless of difficulty. 2 threat, 3 attack, 2 defense, and 4 hit points means that this is an enemy in the easier end, which can be blocked by heroes that aren’t dedicated defenders in a pinch. The Uruk enters play with 2 damage, making it even easier to kill. However, the first swing it makes is more tough – after Wounded Uruk engages you, it gets +2 attack until the end of the round, meaning that the first attack will likely have to be taken by a chump or a strong defender. An engagement cost of 34 means that many decks will have to engage this orc the moment it appears. Try to keep your threat under 34 during stage 2 so you can avoid it. It has a BRUTAL shadow effect – it grants +1 attack for each damage on the attacker, which is problematic for other Wounded Uruks and can be disastrous for a Shagrat about to die. This is potentially a shadow effect you should cancel and hold on to a cancel to counter.
- Orc of Mordor is an annoying Surge enemy that is easy to kill but can eat away at your resources. It is present in 3 copies on standard and 2 on easy. 1 threat, 3 attack, 1 defense and 3 hit points means it is an easy kill that rarely deals too much damage, until it suddenly gets a major shadow boost. As indicated above it has Surge, and after you engage it, you exhaust a character you control. This can mess up your expected combat round, especially if you are carefully managing your resources to confront Shagrat. As a shadow card, you also exhaust a character you control. How big of a problem this is depends entirely on your board state. I am often happy to see these appear from the Forced effect on Stage 2B, as this bypasses the Surge effect. An engagement cost of 28 means that most decks will have to engage these when they appear.
- Snaga Archer is a tricky enemy that can cause you a lot of damage if left unchecked. Three copies, regardless of difficulty, means that it is a frequent sight. 2 threat, 4 attack, 2 defense, and 3 hit points make it a hard hitter that is somewhat easy to kill. It has archery 2, so if left unchecked it will hand out damage every combat round. When you engage it, it deals 2 damage to a character you control. This should not be a major problem, but if you are concerned about it because you play few characters, consider adding some more healing. The archery damage can become problematic over time. An engagement cost of 44 means that it often has to be engaged optionally, which can be a bit of a trick – you are often tempted to leave it in the staging area until you realize how much damage it has dealt to your characters. As a shadow card, it grants +1 attack, or +2 if the defending character is damaged. +2 can often be problematic, so be mindful of this card’s existence when picking a blocker.
- Uruk Soldier is the beefiest non-unique enemy in the deck. Three copies for both difficulties, with 3 threat, 5 attack, 2 defense and 5 hit points. 5 attack is no laughing matter, especially given the attack boosts we have seen above. An engagement cost of 38 means that many decks will have to engage it mid-game, and leaving it can make questing difficult with 3 threat. I like leaving it in the staging area for as long as possible because the 7 attack required to kill it can take a few rounds unless my deck is rolling, and because there is no better feeling in the world than one of these being discarded by the Forced effect on stage 2B. When you engage it, your threat is raised by 2, which can be dangerous but often doesn’t matter too much. As a shadow card, it punishes chump blocking, as it grants +1 attack and returns the attacking enemy to the staging area if the attack destroys a character. During 2B, returning an enemy to the staging area may be an unexpected boon.

Locations
- Our first location is a bit of a tricky one, as it works against our strategy of leaving enemies in the staging area. It isthe Echoing Passage, present in 3 copies on Normal and 1 on Easy. 3 threat and 5 progress to clear makes it a substantial obstruction towards progress – having to over-quest by 3 can be harsh, and 5 progress to clear is easily a round worth of questing in solo. But it is the effect on this location that can get out of hand – it gets +1 threat for each enemy in the staging area. This can lead to a massive threat dump in the staging area, easily 6+. This can more or less instantly location-lock you. When it is the active location, it grants +2 defense to each enemy, making it difficult to clear enemies and damage Shagrat. It is a location it can be beneficial to blank or travel to through various location management tricks. It has no shadow effect.
- Next, we have Bloodied Courtyard, present in 3 copies regardless of difficulty. 3 threat and 4 progress to clear makes this a mid-tier location in terms of stat severity. However, it is a somewhat helpful location – while it is the active location, it deals 1 damage to enemies when they enter the staging area. I interpret this to include effects that send enemies back to the staging area, so an Uruk Soldier as a shadow card could theoretically ping an enemy for the final point of damage. To travel there, each player raises their threat by 1. This is rarely backbreaking, but as we all know, sometimes that single point is what spirals things out of control. It has no shadow effect.
- Winding Stairs is another helpful location, present in 3 copies regardless of difficulty. When Winding Stairs is the active location, each enemy gets +10 engagement cost, which can give you the breathing space you need to avoid enemies piling on. 3 threat is no to be trifled with, but at higher player counts, I can see the value of keeping one of these in the staging area and traveling to it if the staging area gets very crowded. To travel there, each player must exhaust a character. In solo, this will often be trivial – a lot of us like to keep a spare chump in case an enemy gets an additional attack – but to coordinate this with 4 players may require some setup. However, this is often a location I am happy to see enter play. It has no shadow effect.
- Finally, we have Torch-lit hall, also present in 3 copies regardless of difficulty. 2 threat and 3 progress makes it the easies location in terms of stats. However, it comes with a price – after the players travel to Torch-lit Hall, they must discard cards from the encounter deck until an enemy is discarded. If a copy of this enemy is in the staging area, that copy gets discarded. Otherwise, you add the discard enemy to the staging area. The Keen-eyed Tooks among you may notice that this is the effect from stage 2B, with the crucial difference that you choose to trigger this through travel. Keep in mindthat this is not a Travel cost, and card effects that let you ignore Travel effects will not avoid this effect. I often keep this location in the staging area and quest over the 2 threat, and if the staging area starts getting crowded, I will travel. I hope this will snipe away some of the enemies already there or add a new target for the stage 2B effect. Sometimes, this backfires spectacularly, but let’s live a little! If the encounter deck starts running thin, you will have a pretty good idea about what is left in there, so you may be able to deduce what is coming (or peek through scrying effects). In that case, this can be a precision strike. Use it to your advantage. The card has no shadow effect.

Treacheries
- The first treachery is present in 3 copies and is Orcish Howls. It deals one damage to each enemy in the staging area (nice!) and subsequently grants +1 threat to each enemy per damage on them (not nice!). You should cancel this one if you have a bunch of enemies, particularly Wounded Uruks, that already enter play with damage, and this would either fail your questing spectacularly or halter your momentum when you are about to clear a key location or stage. But this will be highly context-dependent. If this is +3 threat for a round and a bunch of pings, that’s great! It is worth noting that if no enemies are in the staging area, Orcish Howls gains surge. As a shadow effect, it is also quite amusing if context-dependent – if you are engaged with another enemy, you resolve the attack against that enemy. Infighting is a big problem in Cirith Ungol! A fun, thematic shadow effect.
- Drawn to the Ring is present in 3 copies on Normal and 2 on Easy. While it looks ominous, it is a bit of a soft-ball in this particular scenario. The first player must choose to either exhaust the One Ring and reveal an encounter card or discard cards until an enemy is discarded and put that enemy into play engaged with them. So, it basically becomes another card, and you will have some control of what this card will be. I have yet to have this card backfire spectacularly in this scenario. As a shadow card, you discard a non-objective attachment, which can be bad if you lose your key attachment. Cancel the shadow effect if this would wreck your engine.
- Deep Shadows is present in two copies on standard and a single copy on Easy mode. Doomed 2 brings everyone’s threat level up, and When Revealed, each player must choose either discard their hand of a minimum of 3 cards (gross!) or reveal an encounter card. In solo, this is a no-brainer – eat your threat and reveal another card. In four-player, this can lead to a deluge of encounter cards and is well worth canceling. Some decks won’t mind chugging their hand once set up – I played a Fellowship deck that didn’t really need more cards once setup. But for decks like Silvan decks, this is not really an option and something you either need to cancel or just accept. As a shadow card, this is a classic, which grants an additional attack after this one.
- Lastly, we have Evil Vigilance, which is present in three copies for both difficulties. When revealed, each player must choose to either discard a questing character they control or raise their threat for 1 pr questing character. This may be something you cancel, depending on the context. Outlands and Dwarf decks can easily quest with +10 characters, so they will often have a character to throw and move on. A Three Hunters deck will just take 3 threat and move on. This card makes it beneficial to have a low-cost ally that can be thrown away in a pinch. But the ultimate choice comes down to your deck and your board state. As a shadow card, it is well worth canceling, as it grants a +1 bonus to attack and reveals an encounter card if the attack destroyed a character. Chump block at your own discretion.

Tips and Tricks
- I keep recommending it, but Far-sighted is the gift that keeps on giving to me. Unsure whether I should engage this or that enemy during 2B? Scry to figure out if I get to discard one of them next turn.
- Keep your threat low if you can. You want options on when to engage enemies. Consider picking heroes with low starting threat to stay under the radar for as long as possible. It goes without saying that Hobbits work wonders here.
- Remember that you don’t have to kill Shagrat if you don’t care about the boons he is taking. The next scenario requires your full focus, so you may not have time to play them anyway. It is worth considering, and besides the loss of cards, you aren’t really punished for letting him go.
- In contrast to the previous Frodo scenarios with beefy Nazgul enemies lurking in the encounter deck, there is not a lot of punishment for using The Ring in this scenario. This means that once you free Frodo, you can use his ability without much consequence unless you pull Drawn to the Ring.
- Remember that last of the company has an ability you can activate if you are a few points of progress short. I tend to forget it exists.
- Deciding when to travel to the Two Watchers is a pivotal moment in this scenario. Don’t rush ahead – make sure you are set up.
Playthroughs
- As always, Cardboard of the Rings has several playthroughs. The Thematic Saga and Chad’s campaign. Chad forgot to add the Wraith on Wings, so he made a corrected playthrough
- LOTR LCG Solo also had a progression video (OCTGN)
- There is also a nicely produced video by One Stop co-op shop
- Carl Swanson also had a number of videos for the scenario: normal, normal, thematic and as part of his nightmare saga
- Warden of Arnor had an OCTGN video for Line Unbroken
- Wandering Took also had an OCTGN playthrough
- Onidsen had a video ominously called “Death in the Tower of Cirith Ungol”
It has been a long and hard road and Mount Doom is in sight. But before we can make our way across the wasteland, we must turn our gaze to the Black Gate. It sounds like there is quite the commotion there…
