This quest is the perfect cross-section of the Dream-chaser cycle; it just misses some Uncharted locations. But aside from that, it has it all. Sailing, a boss-fight at sea, Corsair enemies stealing resources, and all culminating in a final showdown with Sahir for like the 7th time this cycle. But in the Nightmare mode, he got a new sword that might swing things in his favor.
The quest is very thematic as you first chase the Stormcaller to Umbar. You eventually crash your fleet and have to quickly gather your crew together as you infiltrate the capital city of the Corsairs. New locations and enemies in the Nightmare mode will make it tougher to make progress, and Sailing will be tricky as well. You are going to have to face a lot of big enemies in this quest, so pack your combat tools for this one!
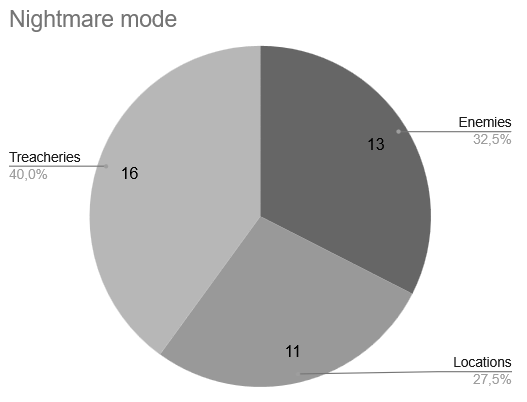
Nightmare City of Corsairs
- Found in: The City of Corsairs Nightmare pack, Dream-chaser cycle pack 6.
- Size: There are two encounter decks here, one for stage 1, and the other for stages 3 and 4. Some cards will travel from the first deck to the second, but the rules card will inform you on this. The first encounter deck (Coast of Umbar) and 10 new encounter cards. The second encounter deck (City of Corsairs) has 9 new cards, of which one objective will immediately go onto Captain Sahir.
- Increase in Difficulty: Yes, this is a more difficult version of the quest. It is spread thin though, as not all Nightmare cards will be present at every stage. So you might get a very similar experience as with the Normal version of the quest, save for the occasional Nightmare card thrown in.
- Fixed Loopholes: Sahir will be getting more resources thanks to the Sword, enabling his multiple attacks each combat phase. It will also make it more difficult to deal damage to him. In the past, players would just chump him and lose no resources, but that has been fixed.
- New mechanics introduced: The Cursed Sword will grant Sahir more resources if he kills enemies, allowing him to stay Indestructible for longer. New ship wheel icons will also trigger secondary effects when they are revealed during sailing tests. Heavier focus on stacking resources onto Corsair enemies in this quest.
- Play this scenario if: You want to conclude the Dream-chaser cycle in style. You are up for a challenge and want to experience both sailing and regular questing in Nightmare mode but only have time for one game.
- Solo or multiplayer: You are going to need some additional players for this one to help with combat and sailing. Stage 1 is difficult to balance otherwise, and in solo you can struggle to either make enough progress or to destroy the Stormcaller. During the final fight, you will also need more players to help out with the various attacks that Sahir makes against you.
New Rules
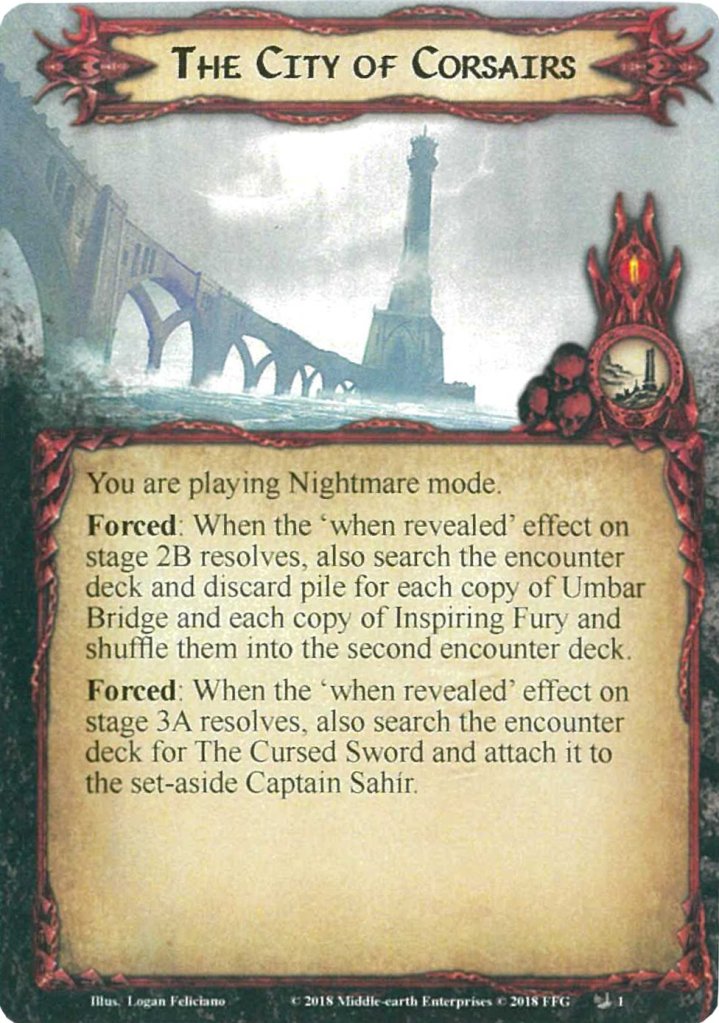
The new rules aren’t passive effects to keep in mind all the time, but will trigger during the transition from sailing to regular questing during stages 2 and 3. Setup for stage 1 will be discussed in the next chapter, but there will be two Forced effects that need to be remembered so that certain Nightmare cards also move with the encounter deck when it swaps.
The first of these triggers happens when the When Revealed effect of stage 2B resolves. You must now also find all copies of Umbar Bridge and Inspiring Fury (2 copies each) and put them in the new encounter deck. If any copy of Umbar Bridge is in play (as the active location or in the staging area), it will remain there. It is not an Ocean location, so it will not be discarded. The rest of stage 2B’s effect will occur as normal.
The next trigger is immediately after transitioning to stage 3A. Sahir will be set aside for the final confrontation, but you should search the new encounter deck for The Cursed Sword objective and attach that to Sahir. It will help his boss fight in the final stage, but you do not have to worry about it during stage 3B, as it will only come in with Sahir once you reach the final stage.
New Setup
While there are no special instructions on the front of the rules card, there is some on the back. With this quest having 2 separate encounter decks, there are also two sets of Nightmare cards that will be shuffled in at the right time. Take a good look at the encounter card symbol on each of the cards before shuffling them into the right encounter deck. Then, set the City of Corsairs encounter deck aside, and only play with the Coast of Umbar encounter deck for the first stage of the game. You do shuffle in all the other regular encounter sets as well, as per usual. Note that only 1 copy of Scouting Ship from the Voyage Across Belegaer is added out of the entire encounter set. The rest is not used. Also, do not use any of the NM Voyage Across Belegear encounter cards for this scenario. I think you could get it to work, but you would only make things more difficult for yourself. Players also take out all the non-Ship enemies and create the Corsair deck with them.
After all those encounter decks have been built, setup continues as usual with the players picking their ships, the Stormcaller being added to the staging area, and either one or two copies of Southern Belfalas being added to the staging area.
Cards removed
- 2x Corsair Infiltrator [2 hitpoints made this a pretty easy enemy to deal with]
- 2x Fog Bank [Easy location to avoid combat for a while]
- 2x Starlit Sea [Easy location with a Ship’s wheel icon to help during Sailing]
- 2x Scouting Ship [1 copy remains, the others are too easy for Nightmare and are replaced by the Patrol Ship]
- 2x Serpent’s Tail [Just adding a shadow card to each ship is not really Nightmare levels of difficult]
- 1x Streets of Umbar [Some copies still remain, but players tend to just travel here and avoid the extra resources on Corsairs.]
The Quest
The basic structure of the quest remains the same as with the original quest. There are essentially three acts to this quest: A sea-act, the transition, and a city-act. This does culminate in the final boss fight, but for the encounter deck, nothing changes between stages 3 and 4.
The Sea
The sea portion of the quest shouldn’t take too long, as long as you make up your mind on how you want to progress from there. Clearing all quest points on stage 1B will be difficult as there are fewer Ship’s Wheel icons on cards to sail successfully. The new sailing cards also trigger additional effects if you want to count those symbols, making it more likely that you will be off-course for most of the time you spend on this stage.
The alternative is to clear the Stormcaller enemy. This is made a little easier by the knowledge that your ships do not need to last until the end of the game, though I do advise you to try to reduce the damage you take with them. This damage will be redistributed among your characters in stage 2, and you can find yourself outnumbered really fast if you end up with 10+ damage on your ship. Still, it will be the most consistent way to clear this quest, as you can forgo sailing. This will nullify the effect of the new Nightmare locations, as well as the reduction in engagement cost for the Patrol Ship. Staying at the worst heading won’t do you much good either, but you will have a turn or two before you reach that state.
Not minding the heading also will allow you to keep the Stormcaller engaged with you at the end of the round, preventing it from adding 2 threat to the staging area total, and triggering its Boarding keyword again once you re-engage it. 6 defence and 18 hitpoints is a lot to clear, but you won’t need large attack stats for Sahir later in the game, so it is ok to use your Tactics Eowyn or Black Arrow early on. The sooner you reach the shores, the better state your ships will be at, and thus your characters at stage 3.
Transition
This is the shortest act of the quest, but it does include some housekeeping that you have to do carefully. Otherwise, you will end up with a boat floating down the streets of Umbar. When transitioning to stage 2, either via destroying the Stormcaller or by making enough progress on stage 1, a few things happen. Most of this is the same as in the normal version of this quest, but the Nightmare version has some additional steps that are described on the new rules card that came with the version of this quest. On top of everything that happens on stage 2B, players must find each copy of Umbar Bridge and Inspiring Fury from the encounter deck and discard pile. Note that any copies of Umbar Bridge that are in play will remain in play. The copies that are not in play are shuffled into the new encounter deck for stages 3 and 4. Remember to also shuffle in the new Nightmare cards for the City of Corsairs, except for The Cursed Sword, which will remain out of play until stage 4.
City
Stage 3 is a fight through the streets of Umbar as you try to reach Sahir. There is nothing special here in Nightmare mode, besides the new cards that might appear after they were reshuffled into the new encounter deck. The main focus here is on giving the Raiders as many resources as they can, so that their abilities are worse than you might remember from the normal mode. Direct damage or killing them before they can attack with events like Quick Strike, will give you the best opportunity to limit the impact of the increased number of resources.
Important to note is that you should try to clear stage 3 with as few cards in the staging area as possible. Stage 4 will add more enemies and a powerful location to the staging area, so it would be best if there isn’t much up there. That way, you can still make enough progress on the Shattered Monument as soon as you travel there in stage 4.
Once you do reach the final stage, you will have to have Sahir enter play with The Cursed Sword attached to him. For more details on what the sword does, check the card’s overview later in the article, but in short, it will prevent you from chumping unless you want more resources on Sahir (you don’t want more resources on Sahir; he will attack more often and soak more damage that way). When you reach stage 4, you should also add 1 enemy per player to the staging area and each Raider enemy gets 1 resource on them. The new Nightmare enemies are not ideal to add for this effect. The Loyalist hits quite hard and will be a third of the way towards making those attacks be undefended. The Patrol is also annoying to have, as they will further boost resources on Raiders in play if they are left in the staging area. This will likely boost Sahir, as he quickly becomes the enemy with the most resources. Only if you are able to engage the Patrol immediately while also handling Sahir, should you consider taking it. Otherwise, just stick to the regular enemies from the normal version of this quest.
During stage 4, priority should go to clearing the Shattered Monument immediately to prevent Raiders from being immune to player card effects whenever they have at least 1 resource on them. 8 progress is all that takes, so it should be possible to clear in a round or two if you managed to keep an empty staging area. While you try to clear that location, focus your attention on Sahir and limiting the number of resources he accumulates from various sources. He will be making additional attacks against the first player upon reaching 5, 10, 15, etc resources on him, and those attacks hit hard. The new sword he has will also prevent you from chumping, unless you want him to get more attacks in. Firing off every way you can damage Sahir (especially once the monument is gone and you can target him with events/attachments) will quickly drop the number of resources he has. He will eventually run out of steam after that initial sharp increase, and you will be able to finish him off.
With that, you have cleared the final Nightmare scenario in chronological order. A real accomplishment if you have cleared all of them in progression style. But even without that, this is a really hard quest to beat, so you deserve credit for disarming Sahir of his sword and beating this scenario!
The Encounter Decks
Global – Coast of Umbar

- There are 24 encounter cards in this initial encounter deck, of which, 8 are Nightmare cards
- Shadow chances are 45.8%, which isn’t low, but it is less than half of the cards. Some shadows also only trigger when a Ship or a Raider attacks, so it might not go off every time.
- Average threat per card is quite high at 2.38 threat/card. This is mostly due to the low number of treachery cards in the deck, and several cards having 4-5 threat each.
- There are nine total Ship’s Wheel icons in the encounter deck at the start of the game, with a tenth sitting in the staging area. 4 of these cards will do something special when revealed during a Sailing test.
- Surge appears on both copies of Inspiring Fury, but it can also trigger off of Battle-hardened in case there are no engaged non-Ship enemies in play.
- Doomed is not present in this first encounter deck, though you might still have to raise your threat for Walls of Umbar.
- Archery will appear on the two copies of Corsair Warship if it is in the staging area.
- Immunity
- Corsair Warship cannot be damaged while it is in the staging area
- All ships cannot have attachments
- The shadow effects dealt to an enemy through the Inspiring Fury shadow effect cannot be cancelled.
These stats do not count the Corsair deck, the Stormcaller, and one copy of Southern Belfalas, which are put in the staging area at the start of the game. Despite this, there are still a lot of enemies in the encounter deck, which will all have the Boarding keyword to drag out even more enemies when they engage.
Global – The City of Corsairs
- The encounter deck greatly increases in size to a total of 40 encounter cards at most.
- Shadow chances are slightly higher at 52.5%, just above that 50/50 split. Most shadows will interact with resources on enemies.
- Average threat per card is reduced thanks to more treacheries and relatively low threat on the Corsair enemies that were excluded from the previous encounter deck. You can expect 1.55 threat per card revealed.
- 2 cards will actually surge when revealed, with 7 additional treacheries surging if their effect cannot be fully triggered.
- Doomed does not appear on any cards in this encounter deck.
- Immunity
- The shadow effects dealt to an enemy through the Inspiring Fury shadow effect cannot be cancelled.
- The Cursed Sword cannot be discarded by player card effects
- Each Raider enemy with at least 1 resource on it is immune to player card effects as long as The Shattered Monument is in play
This breakdown does not include Sahir, The Shattered Monument, or The Cursed Sword, since those will be out of play until stage 4. It also does not take into account that players must fill the staging area with an enemy and a location each upon arriving at stage 3. The City of Corsairs location has a variable threat that was not taken into account during the average threat calculation, since it can range from 0 to 10+, depending on the number of resources on Corsair enemies.
Objectives
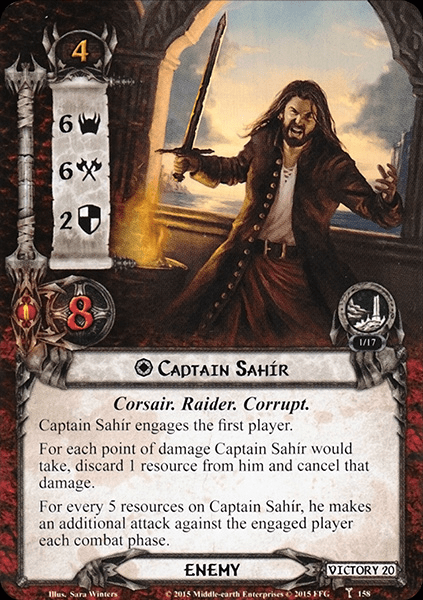
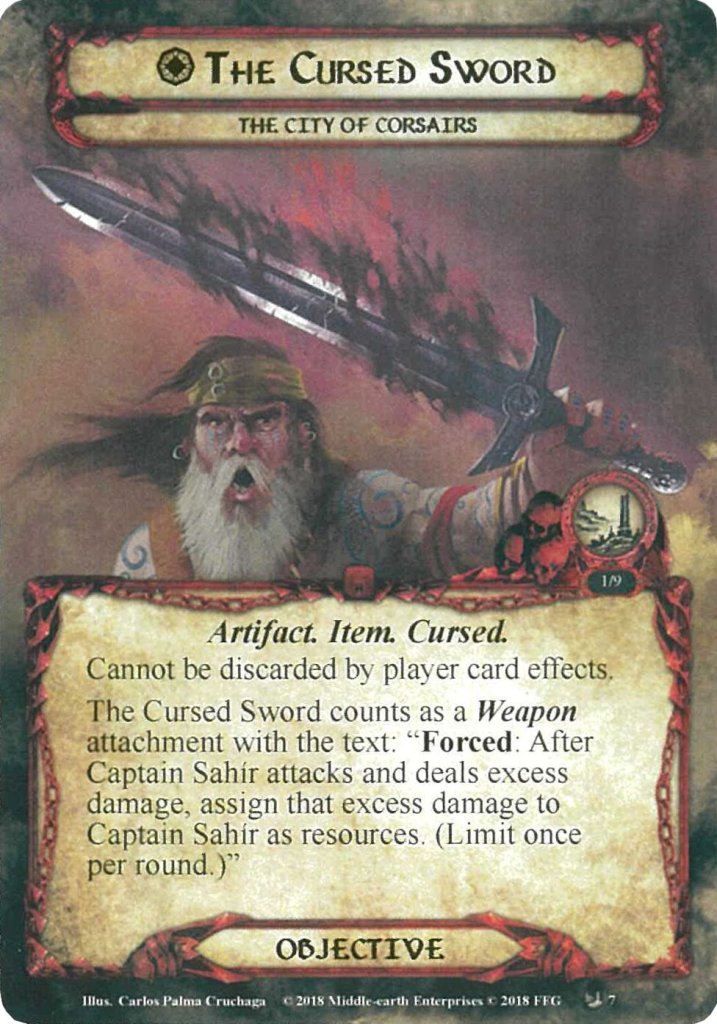
- The Cursed Sword: It’s not often that we get an objective in a Nightmare pack, but this helps Sahir’s boss battle to become even more dangerous. It’s also a thematic win, as this sword was in the chest that was uncovered during The Drowned Ruins scenario, where Sahir betrays you. The Sword is set aside, out of play during the first part of the game, entering play attached to Sahir once you reach stage 4. This attachment cannot be discarded by player card effects and will act as a buff to Sahir, where he will have another source of resources. In Nightmare mode, whenever Sahir attacks and deals excess damage (damage beyond the hitpoints of the damage-receiving ally or hero), that excess damage is instead dealt as resources to Sahir. This dissuades the players from using chump-blockers for the final fight, though you can still defend attacks from other enemies than Sahir with this method. This is also limited to once per round, so that other players may have an escape hatch in case Sahir attacks multiple times per round. If this limit didn’t exist, you might get caught in a loop where Sahir’s ability to attack several times would be fueled by more resources received from the sword. The Sword will likely trigger this additional effect more often, but at least not infinitely. There is no real strategy to this card, aside from “Don’t Chump”. Players cannot interact with the sword, and once Sahir is defeated, the game ends. Just don’t forget this sword adds an effect to Sahir, and you should be good.
Enemies
There are new enemies for the Corsair deck, there are new Ship enemies, and there are new Corsairs strolling around Umbar for you to fight. Lots of new enemies, none of which are too easy.
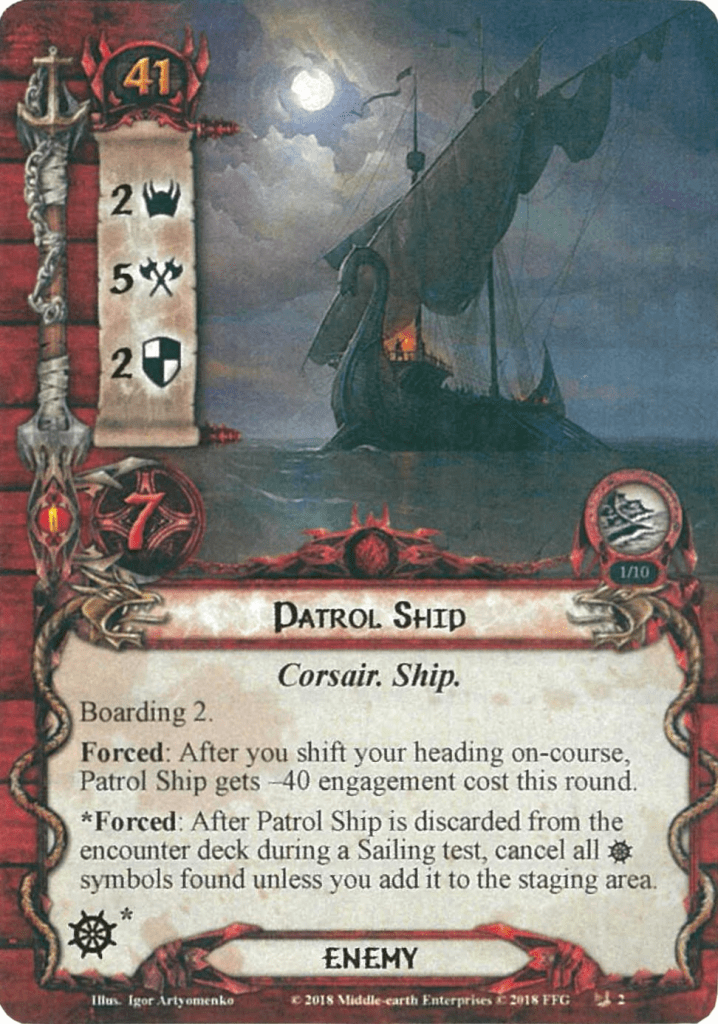
- Patrol Ship: Replacing the regular Scout Ship is this new Patrol Ship. It has relatively low stats for a Nightmare Ship enemy, but it makes up for that by being pretty annoying to deal with, especially early on. Boarding 2 means that this ship will drag out 2 cards from the Corsair deck, and that will probably happen a lot earlier than you might expect. That’s due to the regular Forced effect on Patrol ship that will reduce the engagement cost of this ship to 1 if the players shifted their heading on-course this round. You are now not being punished for being off-course, but for actually attempting to make progress on the main quest card. This will result in earlier engagements and a distracting enemy, taking away whatever attack power you wanted to throw at the Stormcaller. If you do not see a Patrol ship in play, there is still a threat of one appearing during the Sailing test. If the Patrol Ship is revealed during the Sailing test, all Ship’s-Wheel icons are going to be cancelled that round unless you add this enemy to the staging area. If you are forgoing questing successfully and want to clear this stage by damaging the Stormcaller, then it would be a relatively easy choice to skip this Sailing test after revealing this ship. However, if you are dead-set on making progress this round, you will have to add the Patrol Ship to the staging area, though you do get to count its Ship’s-Wheel icon. Remember that if you cleared this Sailing test, the Patrol Ship will get -40 engagement cost and will be coming down this turn. One final note is that the Patrol Ship does not have the “Cannot have attachments” text that all other Ship enemies have. You can do with this information what you want, but dragging this Ship into a Forest Snare will ensure that you have an easier time passing Sailing tests. Remember to clear this ship from play when transitioning to stage 2.
- Corsair Loyalist: This Corsair enemy might not look that scary at first glance, but you’d be surprised how often these Raiders can get 4 resources in a heartbeat. The stats on the Loyalist are decent, sporting high threat and a decent attack stat that not all allies can immediately defend against. The problem lies in her ability. Whenever the Corsair Loyalist has 4 or more resources, all attacks made by it are considered to be undefended. On the bright side, it frees up a defender. On the downside, it will kill your heroes quite quickly, and shadow cancellation is going to be a must-have. The threat of this enemy does not matter too much, as it will be revealed from the Corsair deck for the Boarding keyword at stage 1. During the city-portion of this quest, the Loyalist will likely have an engagement cost lower than the player’s threat, so you only have to stomach the 4-threat once. Cancelling its attacks is going to become a necessity, as heroes don’t like being hit for 4 direct damage over and over again. Try playing traps, using Quick Strike to get ahead of the enemy, and drop a Gandalf‘s worth of damage on them to be done with the problem.
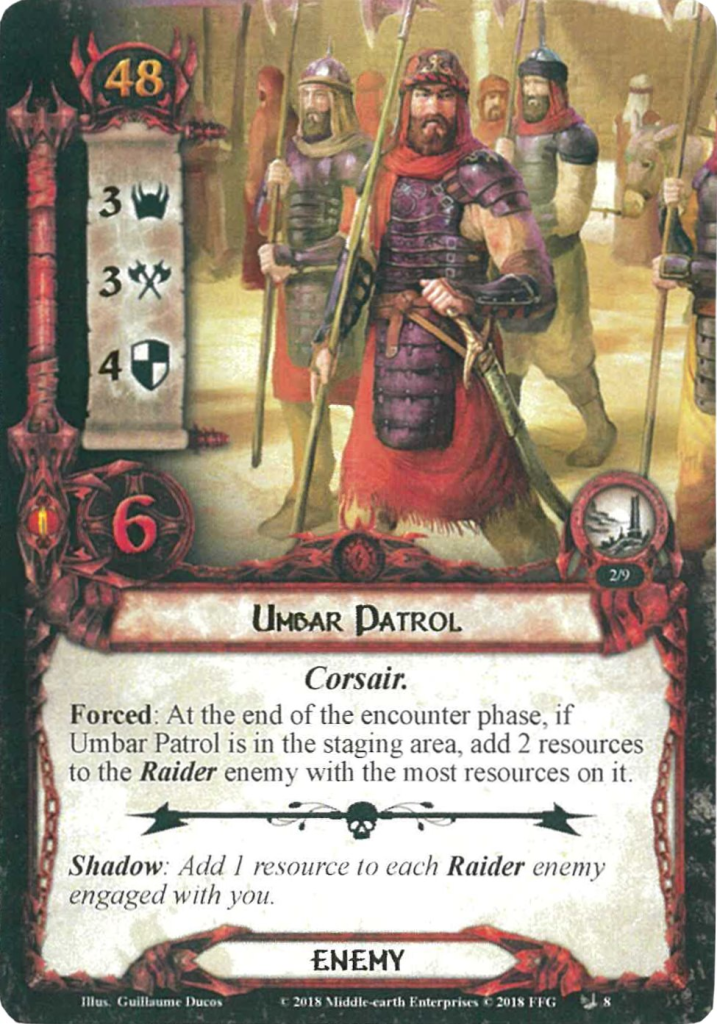
- Umbar Patrol: Important to note here, the Umbar Patrol does NOT have the Raider trait, so it is not an eligible target for various treacheries and shadow effects. It does not interact with the resource mechanic that the other enemies use, so read twice when dealing resources to this enemy. The stats of this Patrol are not as bad as the security in Ulfast, but with 4 defence and 6 hitpoints, it will take some effort to bring them down. Luckily, you can opt to leave them in the staging area, as their engagement cost is 48, almost the highest it will go in non-Dire quests. 3 threat can be overcome by questing hard, though you will have to deal with the Patrol soon. At the end of each encounter phase, the Patrol will add 2 resources to the Raider enemy with the most resources on them as long as the Patrol is in the staging area. This will stack with several copies sitting in the staging area, so it is going to be in your best interest to deal with this enemy before others grow to immense sizes and kill your fellowship. As the Umbar Patrol is not a Raider enemy, they are quite predictable during combat. No resources to buff their stats and almost no shadows that interact with them. As long as you can overcome their high defence and hitpoints, you can clear this enemy and prevent other enemies from growing too large.
Locations
There are only 2 new locations for the Nightmare version of this quest, both starting in the first encounter deck. Only the Bridge will move on to the city portion of this quest, along with all the regular city locations.
- Walls of Umbar: The only good thing I would be able to say about this location is that it has a Ship’s Wheel icon to help during sailing tests, but even that comes with a caveat… At least this location only appears at stage 1 and is removed after you are stranded in Umbar. With 5 threat, this location will greatly hinder your progress during the initial sprint to make enough progress on the quest card. If the threat wasn’t enough reason to make this the active location as soon as you can, there is also a passive effect that will have a player raise their threat by 1 for each ally committed to the Sailing test. It is still the early game, but those small threat increases will be felt many rounds from now, as this is quite a long quest. Luckily, there is no travel cost, and the 4 progress required to clear this location is well worth it. The downside of not having this location in the staging area is that it might pop up during the Sailing test. It will count towards sailing successfully, but notice the asterisk next to the icon. This will force each player to raise their threat by 1 for each ally they have committed to that Sailing test. This usually only targets the first player, but can just push you above the engagement cost of some ships for the following encounter phase. Best to travel here when you can, and have some early options available to lower your threat.
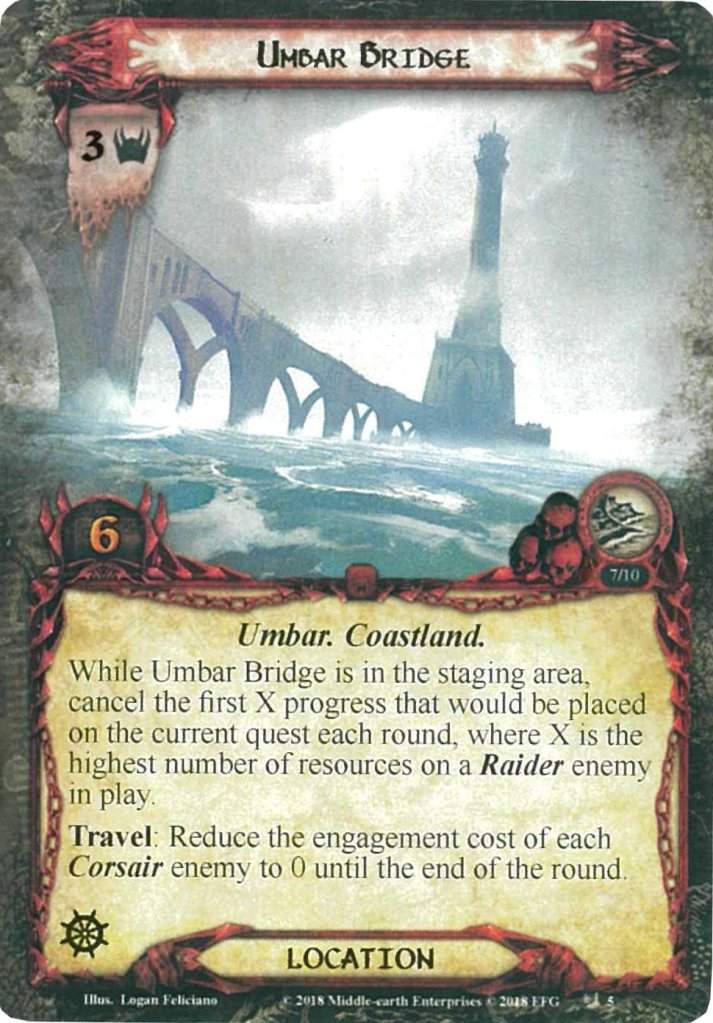
- Umbar Bridge: Unlike the walls, the Umbar Bridge will be encountered during the “at sea” and “on land” sections of this quest. While you are at sea, this is not a bad location to reveal during the Sailing tests, as it comes with a Ship’s Wheel icon to pass the test. You also avoid having this location sit in the staging area for a while. If you do reveal this location normally, and it ends up in the staging area, it will act as a big buffer for your progress. Not only will it add 3 threat to the staging area total, but it will also prevent the first X points of progress that would be placed on the current quest each round. X will be the highest number of resource tokens on a single Raider enemy in play. During stage 1, you might not have that many Raider enemies in play yet, but at the later stages, this will drain a lot of progress from the quest cards. Not the active location though, you will still place progress there first, before you would cancel progress for the Bridge. This is an annoying passive to have in play, and will prolong your quest a few turns if you aren’t prioritising willpower. You can solve this a few ways. The first will be to kill any Raider enemy with a lot of resources. This can restrict the passive to only steal 1 or 2 points of progress each turn. You can also travel to this location, though that will come at the Travel cost. This lowers the engagement cost of each Corsair enemy (both Ship and Raider) to 0 for the rest of the round. This hinders Hobbit decks and will mess with your plan for engagements that round. But if there are no enemies to engage, it’s a good time to travel here. It will immediately stop this passive effect (unless another copy is in the staging area), and you will have to clear 6 quest points before being rid of the Bridge for a while.
Treacheries
There are three new treacheries in the quest, one starts in the first encounter deck and will move over to the second half of the quest where it is joined by the others.
- Inspiring Fury: Please note that this treachery will transfer during stage 2 between the two encounter decks, so you will be seeing this treachery a lot. The active text is pretty mild at first, but the venom lies in the shadow effect. The treachery will surge and will attach itself to the enemy in play with the highest attack strength. Keep in mind that various enemies will get attack buffs from resources on them, so look beyond just printed attack. As a shadow card, this treachery will force you to shuffle the encounter discard pile into the encounter deck (thereby guaranteeing that there will be enough shadow cards), and you then deal 3 additional shadow cards to the attacking enemy. This is on top of the shadow card that would be dealt to them at the start of the combat phase, so 4 in total, not counting Inspiring Fury. During the attack, shadow effects cannot be cancelled. This treachery has 2 copies, so it is possible that you hit a second copy of this treachery, dealing an additional 3 shadow cards to the enemy that was already hitting for a lot. If shadow effects increase attack, deal more resources to the attacking enemy, or have that enemy make an additional attack, it can often lead to a character dying to the attack. If the treachery is dealt as a shadow card, remember which enemy has it, and try to kill it pre-emptively. You can also engage it, cancel the attack, and it will lose the shadow card at the end of the round. This allows you to save A Test of Will for other treacheries that might hit harder. Also note that the shadow effect on Inspiring Fury will grant itself immunity, so you cannot cancel the shadow effect. The best you can do once it is dealt as a shadow is to use effects like Shadows Give Way or Gandalf’s Staff to discard the shadow effect.
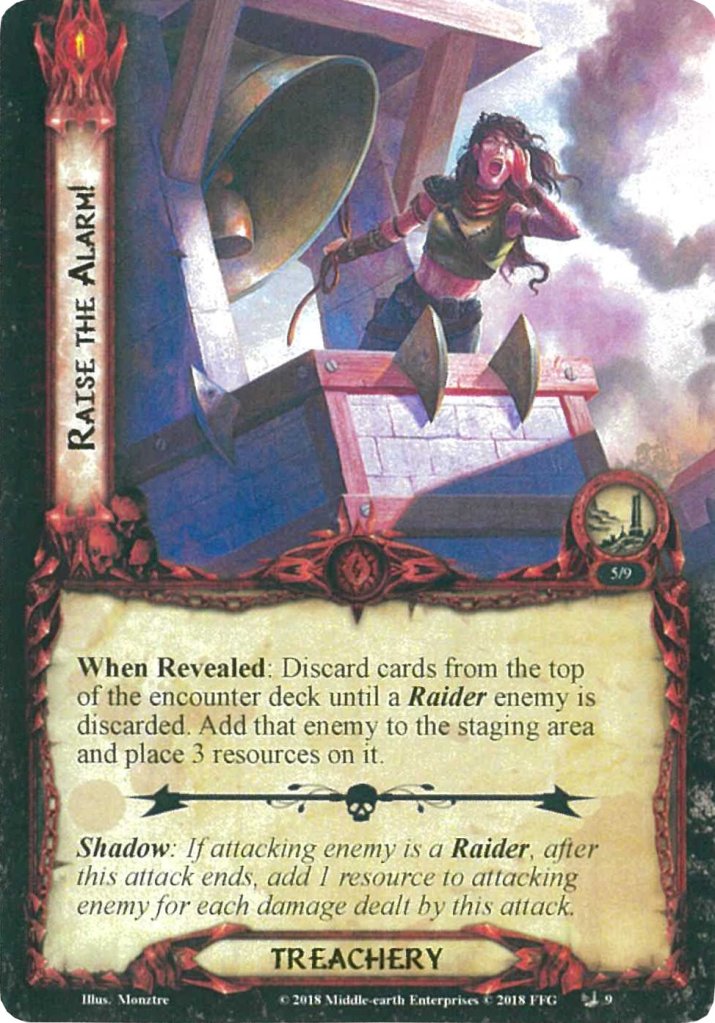
- Raise the Alarm: The impact of this treachery varies a lot depending on the player count and the enemy you receive from it. It adds the top Raider enemy of the encounter deck to the staging area and puts 3 resources on it. In a solo game, this creates a pretty tough enemy for you to overcome, but in higher player counts, it will be a lot easier to clear the enemy coming down from this treachery. It doesn’t scale with the number of players, and you could get lucky with the enemy that receives the 3 resources. Do note that it has to be a Raider enemy, so Umbar Patrol is not a viable target. The best-case scenario is that you hit a Corsair Loyalist with this treachery and manage to kill it before another resource is added to their pool, before their attacks become undefended. The other enemies will all get stat buffs and will therefore be more difficult to defend and/or kill. I do not feel that this treachery is worth cancelling, since it doesn’t surge and only replaces itself with a buffed enemy. If you are doing well in combat, an extra enemy won’t hurt too much.
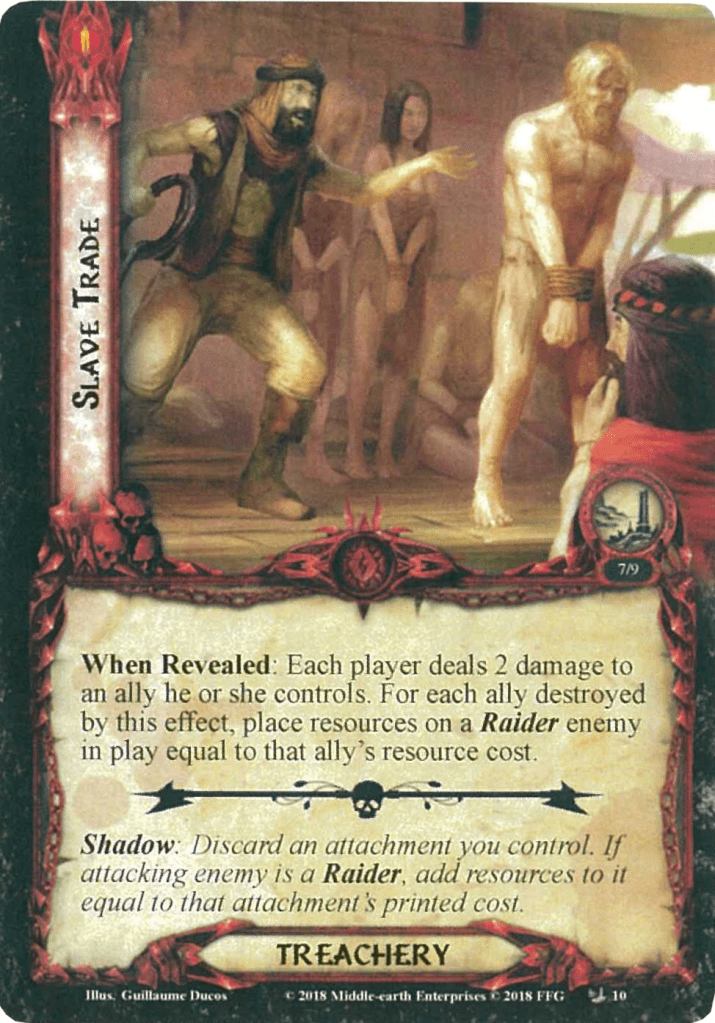
- Slave Trade: Pretty brutal art for an LOTR game, but I suppose this is the Corsairs of Umbar we are fighting, and they were known for these things. This treachery will deal damage to your allies and sell them as slaves if they happen to be destroyed by that damage. The proceeds from the sale will go into the pockets of the corsairs you are fighting. In practice, each player needs to do 2 damage to a single ally they control. For each ally that is destroyed by this effect, a Raider enemy in play gains resources equal to that ally’s cost. Note that Umbar Patrol is not an eligible target for this effect. This treachery can whiff on several factors, but can be brutal in the wrong circumstances. Ideally, your allies survive the hit by having 3+ hitpoints, or you cancel the damage through other means. If you do have to sacrifice an ally, try to go for one of the lower-cost ones. 0 cost allies are ideal in this situation. Also, if no Raider enemies are in play, you can still lose the ally, but no enemies will benefit from it. Also, be careful with the shadow effect on this card. It will do a similar effect but with attachments instead, which can become a costly loss. Always have a 0-cost attachment ready to discard for this effect.
Tips and Tricks
- Take your time to read through stage 2 and 3A to figure out which cards to put out of play and which to shuffle into the new encounter deck. You don’t want to suddenly have to make a Sailing test in the final confrontation with Sahir.
- Think about your strategy going into this scenario for stage 1. You can advance either by making progress or clearing the Stormcaller. Making progress is made more difficult by your having to be on course to do so, so destroying the Stormcaller might be the better choice. This allows you to ignore Sailing tests and reduce the amount of progress you need to make each round. Be careful with other effects for being off course, and ensure you are still clearing active locations!
- Remember that Sahir will be making additional attacks whenever he gets 5, 10, 15 etc resources. This will happen each combat phase, so it is paramount that you clear resources off of him by dealing damage.
- Sahir is going to ignore a lot of damage, but he is not immune to player card effects. Hit him with everything you have to get through his resources. He will be refueling them with various abilities, so you will be fighting a tough fight each round, but you should be able to get through his resources and eventually, his hitpoints!
- It’s an easy card to miss during the transition between encounter decks, but Boarding Party should not be included past stage 1. This card references the Corsair deck, which is completely absorbed into the regular encounter deck during stage 2. Remove it from the game at the same time as the Ship enemies and Ocean locations.
- Patrol Ship doesn’t have immunity from attachments. This is quite odd and possibly a mistake, but you can take some advantage out of this if you are building for this scenario. Ranger Spikes in the staging area will always trap this ship, as all other enemies are immune to them. This allows you to completely ignore the Patrol Ship for the rest of the stage.
Playthroughs
I actually found 2 playthroughs for this quest, which is better than for most of the other quests in this cycle. Again, if new videos are released, I’d happily put them on this list.
- True solo, Outlands deck: https://www.youtube.com/watch?v=H_-iiVHjU8Q
- 2 players, mono-sphere decks: https://www.youtube.com/watch?v=-9bH77rRDas
That’s it, that’s all of the Nightmare Dream-chaser cycle now reviewed and published. Sadly, this is where the developers stopped with creating harder versions of scenarios. There was no more budget for that as the game was scaling down towards the hiatus. It’s also why some of the later scenarios (especially the Vengeance of Mordor cycle) are more difficult. Those would never need a Nightmare version (NM Fortress of Nurn?? NM Mount Doom??? Are you crazy????). There have also not really been any attempts by the community to continue the Nightmare versions for the Haradrim cycle, so this is where those versions abruptly end.
It does not mean that the blog will stop covering the NM versions of quests here. We have skipped over the NM Ringmaker cycle (for reasons that must seem quite obvious), and the NM Hobbit and LOTR Sagas have also not been touched yet. So I suppose I will start with the Ringmaker cycle in 2026 and see how far I get. If anyone is willing to help out with some of these scenarios, it would be greatly appreciated!
