For my first article of this year, I’m interrupting my current deckbuilding series of the Angmar Awakened cycle to write about a quest I played “I-lost-count-of-how-many” times during the last month: The Fortress of Nurn, the final adventure pack of the Vengeance of Mordor cycle and with that, the whole game. There is no scenario analysis for this quest yet, but I want to share my strategy to beat it. Spoilers will be ahead, so if you haven’t played it yet and like nasty surprises, stop reading here.
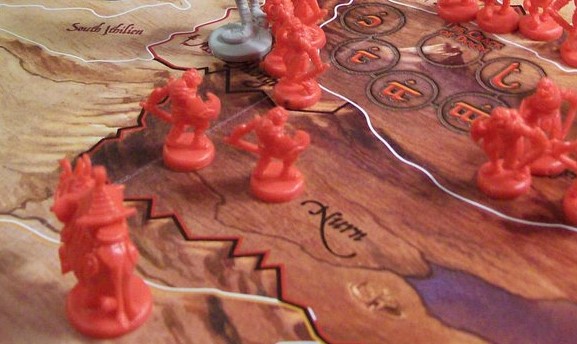
When I first read the name of the quest, I knew I heard the word “Nurn” somewhere in Tolkien’s Legendarium but couldn’t remember where. A couple of days later, I remembered that it was from another board game: That’s this tiny province on the War of the Ring board, where only 2 regular Orc units start the game, and after you normally move them out on the first turn, they become irrelevant for the rest of the game. Surely it can’t be that hard to take it down…
But all my hopes of an easy victory were crushed during the setup of the first quest stage. See, the danger of the quest doesn’t lie in the returning Power of Mordor cards, treacheries that are a straight upgrade on our most hated core set treachery, or a boss enemy that reveals an encounter card while attacking, but rather in the options you have left to face them. The setup of this quest forces you to place 40 cards from your (50-card, no cheesing there) deck under different so-called “castle sidequests,” and you will have to explore them to get them back. Until then, you will be left with your starting hand and the remaining 4 cards in your deck. This is obviously a huge disadvantage for any deck that is combo-oriented or relies on a couple cards because you just might not find them, no matter how many cards you draw. To make matters worse, these sidequests have some terrible effects when you go to them, but you will only see which one when you’ve already chosen, and they also bring out a Power of Mordor card (at least those you can see beforehand).
I normally don’t mind hard quests (I, for example, really like Temple of Doom) and enjoy teching my deck to “solve” them. However, with The Fortress of Nurn, at first, it was different. I mainly like the deckbuilding aspect of this game (I know, surprising from someone who writes deckbuilding articles on a blog) and enjoy it when my cards synergize with each other. Therefore, playing in some way without a deck was a sort of frustrating challenge. To say it oversimplified: What’s the point in building a deck for a quest that I then can’t use? However, having defeated almost every quest in this game, I couldn’t just stop at the last one. And so I sat down and thought of my options to beat this madness.
First Ideas

I first want to talk about the strategies I thought of but didn’t work, either by rules or efficiency. First of all, player setup happens after quest setup, so no tricks like my very first idea to use Galdor of the Havens to build an optimal starting hand. Also, no digging for key master cards with The One Ring, I’m sorry. You’re left with what you get from the quest setup.
The other thing was that I quickly cut all my card draw and resource acceleration from my deck drafts. I realized this when I removed my Daeron’s Runes, normally a staple in all my lore decks. If you’re limited to only 10 cards, every single one has to bring something useful to the table. Card draw doesn’t help when your deck is empty, and likely resources will build up on your heroes anyway while you are trying to complete those sidequests.
This last thought gave me an idea that I kept following until my final decklist. Sometimes you need to realize what doesn’t work to find better solutions. If I have no cards to spend resources on, what about heroes that can trigger abilities with their resources? My first idea was to utilize Grimbeorn, who needs pretty much no setup and can handle combat mostly on his own, while I fill the rest of my deck with questing allies and heroes. However, after some failed attempts, I left this idea because Grimbeorn can’t deal with the initially engaged copy of Ulchor’s Guard on his own on turn one and really gets limited by The Armies of Mordor encounter card. It prevents enemies from taking in the round they engage a player, which is what Grimbeorn does best, killing them straight away when they first attack. Sure, you can pick another Power of Mordor card, but dealing, for example, with a Nazgul or extra threat raise whenever you draw cards is probably even worse.
The resource spending hero of my choice that became the centerpiece of my whole deck and winning strategy for this final and hopeless seeming quest was not a Giant Bear but the little Halfling, Frodo Baggins. What an amazing story that couldn’t fit any better in Tolkien’s world and remind me of one of the key messages in The Lord of the Rings, that even the smallest person can change the course of the future.

There are two reasons Frodo is so great in this quest: Firstly, he gives action advantage: if you can’t rely on the cards in your deck, you want to make maximal use of each of your heroes. While he doesn’t have great stats himself, getting extra usage out of any questing hero can’t be underestimated. Secondly, he also gives repeated threat reduction with a low starting threat, which makes him superior to, for example, Core Aragorn. While the power of Mordor cards really push your threat high, the funny thing is that there is not a single other card in the encounter deck that raises your threat! Therefore, if you have repeatable threat reduction, you can stall in theory an infinite amount of turns if you quest successfully, and I will talk later about how we make use of that. It also lets you pick Covered in Darkness as your first Power of Mordor card because if you make use of the point of threat reduction you’re allowed each turn, you won’t need big threat reduction effects. You also don’t have to worry that those might be buried under some sidequest, and you’ll never see them. I guess that other heroes like Beregond, Fastred, or even Nori could work in a similar way.
The deck
This gives us a starting point; however, there is no way Frodo could have gone through this quest on his own (yet another key message of Lord of the Rings), so who are our other heroes of choice? We want a strong hero with good willpower and combat stats who can benefit from Frodo’s ability, and because Gandalf doesn’t work with an empty deck, we choose Elrond. We can’t really build around Vilya, but he’s a great quester and defender, and his healing and resource smoothing skills are always welcome. Our third hero has to fill the attacking role, and I went with our good old Legolas from the core set. It’s kind of a strange choice because you can’t put progress on the castle sidequests (the main quest is active in the combat phase), but every bit of help working on an active location can make a difference. Also, similar options like Hama or Thorin Stonehelm look far worse, and any other Tactics attacker has a higher starting threat.
I played this hero line-up a couple times, and while questing for 5, readying Elrond back up to defend and swinging back for three is nice to do with just your heroes, it wasn’t quite enough. That initial Ulchor’s Guard needs six attack to kill, and if I revealed more enemies, I was quickly swarmed by them. But what is the most reliable way to get more attack from the start?

Well, we will make use of the contract that comes in this pack, Bond of Friendship, and bring another hero to the table, namely Spirit Glorfindel. He’s an absolute bargain here, who gives us the three attack we need, a large hitpoint pool that can soak an undefended attack, and an extra resource per turn, all for only 5 threat. We only quest with him early on if we absolutely need it because we’re worried about threat, but once we find Light of Valinor, he can quest every turn, and with Asfaloth, we get access to the best location control piece for lower player counts. The other cost is that we have to restrict our deck by the contract rules to only 2 copies per card, but if you can’t rely on them anyway, that’s not such a big deal. The effect of No Quarter even punishes you directly for running multiple copies of the same card. With all that in mind, we just include a lot of simply “good stuff” in our deck that doesn’t lead to crazy combos but can work fine on his own. The following decklist is the result of multiple failed attempts, with constant tweaking of single cards after each one, until I found something I was happy with, winning two out of three games.

The allies in this deck are mostly here as cheap ways to get efficient stats and even more accessible with Elrond. None of them are essential, so I run mostly one copy of the uniques, but there are still use cases for some abilities. Westfold Lancer can get rid of a copy of Guard Dogs in the staging area, Rosie helps us control our willpower, and Treebeard can build up a ton of resources. Two allies you will have to time right: Merry should be saved for a big quest push against location lock or, most of the time, on the final stage. The Wardens of Healing are tricky to play because the sidequest Lethal Counterattack will deal a damage to each of your characters. So you might keep them in hand until you reveal it, but then damage might start piling up on your characters by other effects, and you would rather lose a Warden than Frodo or a bunch of other allies.
The attachments are mainly nice to have but non-essential, although you need some form of defense buff on Elrond to defend the bigger enemies. The Leadership attachments are always a bit challenging to get out because you want to trigger Frodo’s ability every round, but getting out an early Steward of Gondor on Elrond or that Shining Shield to keep him alive might be worth the threat raise.
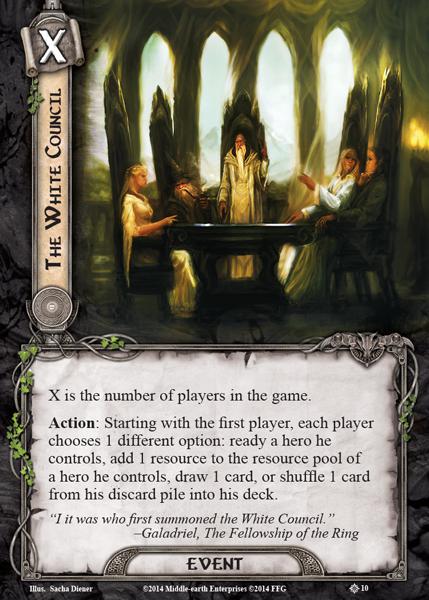
The events are our usual staples, A Test of Will is a key against those horrible treacheries, Elrond’s Counsel can work before you take Covered in Darkness to buy some time, and while Feint doesn’t work against Ulchor and Khamul, it’s still really good against the Olog-Hais and Soldiers of Nurn. Sneak Attack+ Gandalf isn’t as strong as usual because it costs Frodo’s resources again, and the effects are limited. You can’t draw cards from an empty deck, Covered in Darkness will prevent the threat reduction, The Armies of Mordor stops you from bombing an enemy you engaged that round, and the damage can’t be put on the unique enemies either. Still, there will be use-cases, and sometimes it’s just worth it to sneak another blocker or attacker in. The White Council is the card that really shines here more than usual. Reshuffling A Test of Will in an empty deck feels just too good, but I also made use of the readying effect to ready a defender or attacker in a pinch.
Playtesting
Playing this deck will be a slow grind. My victories took 16 and 27 (!) turns, but thanks to Frodo you can afford this. In the early game, you should try to turtle on a sidequest until you have played almost every card available to you and have cleared the board of enemies before moving on to get your next cards and have to deal with another bad effect and Power of Mordor card. It’s tricky because you want to quest successfully every round for Frodo’s threat reduction but don’t want to make too much progress. I made sure I over-quested by 5 (which is almost all the time, enough), and thanks to active locations, I still wasn’t moving too fast. At some point, I had a board state that could handle pretty much every encounter card that came up. Once you have around 10 willpower, +1 defense on Elrond, the only problematic things are basically Olog-Hais, enemy chains that you can’t kill because of The Armies of Mordor, and some Treacheries: Determined Defense can ad 6-8 threat in the late game and will likely result in a threat raise, and Ulchor’s Rage is basically another attack of 6 with surge.
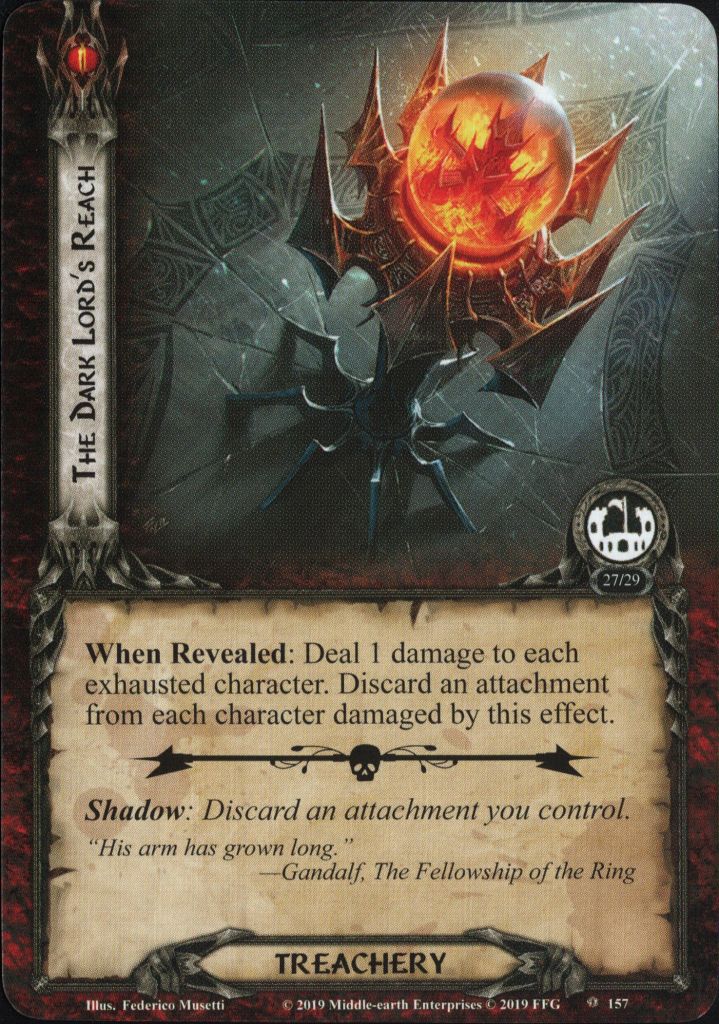
But the biggest problem here is The Dark Lord’s Reach, dealing damage to exhausted characters (and discard attachments, but this normally isn’t a problem because your heroes with attachments should be ready). If you can’t find your healing pieces or Test of Wills, it will ruin your game rather quickly, especially since Frodo only has 2 hitpoints. On my 27 turns game, I was lucky to draw both my Wardens of Healing, so I could sack one to Lethal Counterattack, and the other could keep me from not dying. During my lost game, I lost Frodo at my third quest stage, and with Under the Watchful Eye in play, I had to race to stage 2. But because of that, I wasn’t prepared for the final battle and ended up being killed by Ulchor and multiple other enemies.
My victories showed me that this deck can handle different setups of the Power of Mordor cards. On my first win, it was basically perfect. Under the Watchful Eye was remaining in the deck and would be revealed at stage 2, but therefore, I would hopefully have to eat the threat raise for only a couple rounds. I started with Covered in Darkness (that this deck mostly doesn’t care about it), then took The Armies of Mordor, and finally dealt with Khamul before I blasted through the last stage in 2 rounds. My other victory was a much more problematic setup. Covered in Darkness was remaining in the deck, so I had to pick The Armies of Mordor first, which is annoying but fine if you don’t get swarmed with enemies. However, at stage 2, I was in no position to take Khamul and was sure I would threat out if I already took Under the Watchful Eye. So I had to take the 5 threat in the staging area and the lower threat elimination level from The Tower of Baradur, which I normally try to avoid. At least I had full threat reduction available, and so at the end, I barely made it through with my threat sitting at 44.
Adjustments

After these games, I think I could still improve the deck. Given that this deck mainly loses to the treacheries, you might want to include Halfling Bounders, more healing effects, or even a Fast Hitch to keep Frodo ready and protected from The Dark Lords Reach. I also had extra resources on Legolas and Glorfindel, so you could probably include some more expensive allies. A card that you might cut for them is Rivendell Blade cause it doesn’t work against Ulchor and Khamul, where high attack is needed most. But given the length of my attempts, I don’t want to try this quest again with some minor tweaks, especially because I’m happy with an over 50% win rate.
Conclusion
So how do I feel about this quest? It surely was a better experience than I expected in the beginning. While playing without most of your deck is still annoying, it was an interesting challenge to make sure that every card in your deck does something useful on its own, and you have to think even harder about what you want to include. This is especially true for your hero line-up cause they are the only thing to really rely on in this quest. That also makes Bond of Friendship an amazing contract to bring out here.
Also, I had fun playing and had probably more interesting in-game decisions than in your standard quests, where you sometimes just flood your board with cards. However, I don’t see the greatest replayability value in this quest; given its difficulty, you can’t bring a lot of decks up against it. Personally, I also just had enough of this after those long games. So I’m happy that I defeated this, but I will probably revisit every other quest from this cycle more often (except maybe Under the Ash Mountains).
But next on this blog, I will continue my deckbuilding series, moving from The Lost Realm deluxe into the Angmar Awakened Cycle. The first quest, Wastes of Eriador, is also a hard one, but I’m already excited to build a powerful deck for it that I can fully use.
