I wasn’t quite sure if I wanted to continue this series, but the community has spoken in favor of doing more First Impression articles whenever I get new expansions, so let’s start with this brand new deluxe box that arrived last weeked. The narrative takes us further east than we have ever been before, and mixes up the traditional deckbuilding rules with new cards and mechanics. There’s a lot for me to get into, so I will just briefly cover the player cards, and focus a little more on the quests in this box.
Player Cards
Heroes

The two heroes in this box are two Ring-bearers, which makes sense with the One Ring in this box. A new version of Frodo was very welcome, as his most recent version was from all the way back in the Shadows of Mirkwood cycle. We’ve received some Fellowship versions, but those can’t be used in regular scenarios. A new Leadership Hobbit hero is also very welcome, as Sam is the only one we’ve gotten so far, and he has been dominating the archetype because of it (among other reasons, he’s just very good). Now, with the new Frodo, you can also play ally Sam for cheap, which leads to a free Bill the Pony, and suddenly you have a lot of characters for very few resources. Frodo will be mostly questing during your playthroughs, as he has a decent 2 willpower and an ability that requires him to quest. When committed to the quest, you can spend a resource from Frodo’s pool to ready another questing unique character. This is great for several characters that would otherwise need a readying effect, and will likely just be used for questing heroes with good combat abilities or an ability. But the potential for readying Rosie Cotton and such allies is also there. Besides the readying ability, Frodo will lower your threat by 1 if you manage to quest successfully. This may not seem like much, but it will balance your threat at the same level throughout the game much like how Galadriel has done so in the past. It is a nice extra, and makes Frodo a better hero when it comes to readying than Leadership Aragorn.

The other hero in the box is a lot weirder, and I’m not talking about the character per se. Smeagol is our first double-sided player card, and we all knew that this had to be done if he ever made it to the player card side of this game. He has an incrediably low threat of 3, which is the lowest of all non-Saga heroes in the game (so far). And for that low threat cost, you still get a lot of great stats. A 2/2/2/3 lineup is amazing for that low a cost, and makes Smeagol a very versatile hero. This does come at the price that Smeagol has no synergy with other cards and cannot have attachments, much like Beorn for the majority of this game’s life span. Being in Lore allows Smeagol to have a card draw ability, though you will have to pay for it with threat. When travelling to a location, you may choose to trigger Smeagol’s Response, which allows you to raise your threat by 1 to draw 1 card. This is a fair price for a card, and is a scaled down version of Deep Knowledge, but without Dooming other players. The real cost to playing Smeagol comes with his setup text. This forces you to shuffle 2 copies of the Stinker Treachery to the encounter deck. This treachery flips Smeagol to his Gollum side, losing all tokens. He then engages the first player. Only after you defeat Gollum, he flips back to his Smeagol side and joins his owner, exhausted. A way to avoid having this sudden enemy, is to try and fish out the 2 Stinker cards from the encounter deck and put them in the victory display. Out of the Wild and Scout Ahead are ideal for this. Even just putting one copy in the VD allows you to cancel the second treachery with The Door Is Closed. This prevents you from losing a hero and getting an additional enemy engaged with you (if you are the first player) in the early game.
The One Ring
This one deserves its own segment, as it is a card like no other. We finally get to use the One Ring as a player card. It is an attachment, but has a unique layout, making it a sphereless card (not sure if it counts as Neutral). The One Ring does not count towards your decklimit and is attached to a hero of your choosing at the start of the game. This means that everyone, even Dori, can become the new Ringbearer. The One Ring is restricted and obviously unique. You are not able to use it in saga quests, as that has its own One Ring. It is also immune to non-Master card effects. This includes player and encounter card effects. These Master effects are represented in the box by 3 events that interact with the One Ring. Since the card does not specify an event, it means that we might see a Master-attachment or a Master-ally in the future.

It isn’t all good news when playing the One Ring though, as the Ring will lower your threat elimination level by 5. This cycle will be playing a lot with this level, as the Power of Mordor encounter set can already lower it by an additional 5. Quests like Trouble in Tharbad will also become trickier with the Ring attached. You do get to find a Master card (not the creditcard) as a setup ability, allowing you quick access to the various strong effects that interact with this ring.
The really bad stuff comes when the One Ring leaves play. This means an automatic loss for the entire team. While the Ring is safe from effects that discard attachments, it will be discarded if the attached hero dies or controlling player threats out. This forces you into a corner where you must be certain that the attached hero will continue to live, else all the hard work was done for nothing. The One Ring is a card that will open a brand new Master archetype (hopefully) and we will likely see more cards that interact with it. Do I find it worth it to include this extra loss condition to a deck for the sake of using the Master cards? No, not yet at least. It will be a fun card to see hit the table, but if an unfortunate shadow effect destroys the hero early, that is going to be a sour loss.
Allies

We got 4 unique allies in this box, each from a different sphere. There are 2 Gondor ones and 2 Hobbit ones. Let’s start with the Hobbits, as those are to me the more powerful ones. Merry and Pippin have been staples of the Hobbit archetype with their hero versions for a long time. Giving them an ally version opens up some design space, as you now need other heroes to fill their place in a Hobbit deck. I have used Tom Cotton and Folco for this, but the new Bilbo and Frodo heroes also work. Merry is a 2 cost, 2 willpower ally in Leadership, which is strong enough by itself, especially with 2 hitpoints. However, Merry’s ability is pretty strong, as he boosts the willpower of unique allies by 1 until the end of the round when he enters play. This makes him an excellent Sneak Attack target, which is in sphere. It will require some more unique-ally focussed builds, but the new Fellowship contract makes that work. The boost also lasts until the end of the round, which can be useful in some situations, like the final stage of the Druadan Forest. Merry is a good ally for some quick willpower, and isn’t limited to the Hobbit archetype at all.

Pippin is a 2 cost, 2 willpower ally in Tactics. It doesn’t get much better for that sphere in terms of resources-to-willpower spread. With 2 hitpoints, he will also survive some direct damage, which is great! Pippin’s ability is strong too, as he gets a +2 attack buff when attacking an enemy with a higher engagement cost than your threat. This is standard Hobbit stuff, but is powerful in combination with other buffs and weapons. The real strength of Pippin is that you don’t have to choose between these stats. You can quest with him, and then ready him through his response when you engage an enemy with a higher engagement cost than your threat. This will make him pretty much a staple in many Tactics decks. My personal favourite combo is with Tom Cotton, where Pippin starts with a base attack of 4!

Derufin brings something rare to the Spirit sphere that might have been overlooked, the Ranged keyword. This is quite uncommon in the sphere and gives Derufin some more uses to trigger his ability on. As a 3 cost ally, he has relatively weak stats, although the Gondor trait does help him out a little with access to the synergy. However, I would have loved it if he was actually an Outlands character like he should be. I know Sword of Morthond can grant him that status, but it should have been introduced right from the start. Derufin’s ability is a bit questionable, where you can discard him after he has destroyed an enemy in order to reduce the threat of the engaged player by the threat of the just-destroyed enemy. This reminds me of Spirit Damrod, who had a similar ability with enemies in the staging area. I have not yet played with Derufin, but might include him in a Elrond/Outlands deck with Sword of Morthond to make thim the character he was meant to be. He will also be cool with Tactics Imrahil if you can find him in your deck.

Faramir is on his fourth version already, with his Lore ally version appearing in this box. This ally works well in Trap decks and quests that gives enemies a lot of attachments (spoiler, all three quests in this box do). After Faramir enters play, you may select one non-unique enemy in the staging area. You will have to engage that enemy and may deal 2 damage to it. If the enemy had an attachment (like a trap or guarded card) you get to deal 4 damage instead. You also get the standard stat line for Faramir, which isn’t too interesting, with him being a decent defender, but usually just a questing ally. I do wonder if he is worth his cost of 4, I can imagine people playing his other ally version in favor of this one. But his ability is strong in combination with Tactics Bilbo and guarded cards. You will want to use Sneak Attack on Faramir if Gandalf isn’t an option. He is also a good target to bring in for Elf-stone, dealing damage to enemies just revealed from the encounter deck. He can also trigger the Tactics traps for you, like Followed, as he draws an enemy towards you when he enters play. He isn’t the worst, and definitely a 1-off in my Trap deck, but I fear this might be the weakest iteration of him so far.
Attachment

There’s only one attachment in this pack, as the One Ring was discussed earlier in a separate segment. The attachment in this pack is the Put Off Pursuit condition attachment. This is another toy for Haldan and the Woodmen and is a really awesome way to handle enemies as a Lore player. While we did get the Great Hunt event last pack, this attachment is more affordable. It attaches to the active location and boosts that location’s quest points by 2. This is much like Elf-stone does, only one extra quest point compared to that attachment. This also means that Woodmen’s Path circumvents this extra cost, allowing you to clear the location quicker and trigger the ability on this attachment. That ability allows you to discard cards from the top of the encounter deck until a location is discarded, and you add that location in for a non-unique enemy that gets shuffled back into the encounter deck. This is great for a number of reasons. First, you get to get rid of a non-unique enemy. This includes enemies like the Hill-troll in Journey along the Anduin. Second, as a Lore deck, you are likely more capable to deal with locations than enemies, so that extra location will probably be best. Third, you get to discard cards from the encounter deck, which can get rid of a lot of nasty enemies and treacheries that lie on top. This is an auto-include in my Haldan deck, and will likely be useful in Nightmare quests as well, where non-unique enemies are nastier. It will also be useful for Helm’s Deep, as it extends the progress that the encounter deck needs to clear it, and you get to ditch an enemy for a location once they do eventually clear it.
Events

Other than the 3 Master events in this box, which I will cover later, there is a Leadership event in here as well. The Gathering Storm is another Leadership mustering event that allows you to get your allies out quicker. The Gathering Storm does this by performing a planning action at 0 cost to find an enemy in the top 5 cards of the encounter deck. That enemy gets added to the staging area and will lower the cost of the next ally you play by the threat of that enemy. You then shuffle the encounter deck and the planning phase continues as normal. There are some obvious disadvantages to this card, mainly the fact that you must be able to handle an enemy, and the fact that you have limited control over what enemy you pull. However, you can avoid an enemy’s When Revealed effect through this ability, and you can also use this to trigger a trap right away. Dunedain players can also play a Son of Arnor with this cost reduction, engaging the just added enemy immediately, turning on their synergy. While this card won’t be for everyone, myself included, it isn’t a bad card because you have to reveal more encounter cards than normal. This is a nice strategy for your deck to get a cheaper ally into play. You do have to be capable of defending/killing the enemy quickly, but the new attachment in this Deluxe box can help you with that.

The three Master traited event cards interact with the One Ring and bring something of each sphere to the table for your deck. All events cost no resources, and are neutral cards. Using them does cost 1 threat for the One Ring’s controller and the exhaustion of the One Ring. This means you only get to use these events once per round, and you bring yourself closer to that lower threat elimination level. The first event is The Master Ring, which serves as a direct cancellation of any encounter card just revealed from the encounter deck. You discard that card immediately and have to reveal another card from the encounter deck. Now, of course that new card is going to be worse than the first one you cancelled, but this ability to freely cancel any encounter card is great value! It reminds me a little of the first Fellowship Frodo hero we got, but since you don’t have to shuffle the card back into the deck, it has better consistency.

The second event is the Ruling Ring. This event acts as a Feint for any non-Nazgul enemy engaged with you. This is a good supplement to Feint and other attack cancellation, but does cost you a point of threat, which can lead to more enemies engaging you. The non-Nazgul nod is nice, and means that this card is less useful in scenarios with Nazgul in them (The Morgul Vale, The Temple of Doom, Massing at Osgiliath, etc). This can be a life saving event to use in the early game against a specific enemy. It is only a one-time use per round, so be careful to Ruling Ring the right enemy. It is also a combat action, meaning that enemies attacking in the quest phase cannot be cancelled with this event.

The final event we have gotten up to now is the Ring of Power. At the standard cost, you may ready the hero with the One Ring attached. That hero gains a +1 to willpower, attack, and defence until the end of the phase. The readying is almost as nice as the buffs, but this will make your hero a lot stronger in what they do. The effect lasts throughout the phase as well, meaning that you can attack and defend twice in the combat phase with this event for the boosted stats. It will require some timing, but you can make your hero a lot stronger with this event. It is the perfect tool for Boromir as well, as I’m sure some people are going to put the ring on him.
Contract
Instead of side-quests, we will be getting a new type of player card, Contracts. These cards do not enter your deck and are used to design your deck around. They flip general rules on their heads in favor of more creative deckbuilding. The first contract we receive is the one that the Fellowship made in Rivendell. While no oath was laid on the companions, they are stronger together. These contracts start in play on the A-side, and will flip to the B-side when a certain criteria is met.

For Fellowship, the A-side explains that you cannot play or put into play non-unique characters. This does not mean that you can’t include them in your deck, as you can still discard non-unique Harad allies to Kahliel for instance. (Wonder how they’ll implement Hero Quickbeam in this, as mine is still non-unique…hmmm…). However, it is pretty clear that you should take this into consideration when building your deck with this contract in mind. Other than the restriction of non-unique characters, there is nothing else to worry about at this point. When you control exactly 9 unique characters, you get to flip this card. While I like the nod to the 9 walkers, it is clear that Bill has been forgotten… oh well, at least we get to flip it a little earlier.
The B-side of this card is where you really start to get your benefits. While you can no longer play or put into play any allies (including unqiues), the allies you do have get boosted. That is the real strength of this contract, as each character gets +1 willpower, +1 attack, and +1 defence without anything getting in the way. Even if characters and attachments are blanked by encounter card effects, the buffs still apply. This adds so much value to the allies you bring in and makes them all a bit better in what they do.

This does bring up the question on what characters to bring. Because Galion and Ioreth are free, they can count towards that 9 character goal rather quickly. But their strength comes from their ability or being popped in and out of play. To make things worse, they both cannot attack and defend. But if you were to use big allies like Beorn and OHaUH Gandalf, it would take longer to get the benefits from this contract. You must find a balance between the speed at which you can get the buffs, and the power of your allies. There is a middle ground there, and at that point, you will have a good chance at beating the quest.
Should an ally be defeated while you have the B-side of the Contract active, then it flips back to the A-side, waiting for you to get the team together again. The contract isn’t discarded or anything, so you don’t have to worry that this is a one-time thing. I am looking forward to the deckbuilding options that this will give players.
Another thing I am looking forward to are any future contracts. This can’t be the only one we ever get, so I am curious to see what other rules are broken. We could for instance get a fourth hero, perhaps based on allies in our deck. We could also get a reduction of our deck size but lose our card draw at the start of the round. Or the deck can be doubled in size, but with more cards drawn per round. Threat elimination level is something that is being toyed with as well this cycle, so perhaps that can be changed too. A lot of different deckbuilding tricks can be used here to spice up the construction of decks, and I am looking forward to that!
Scenarios
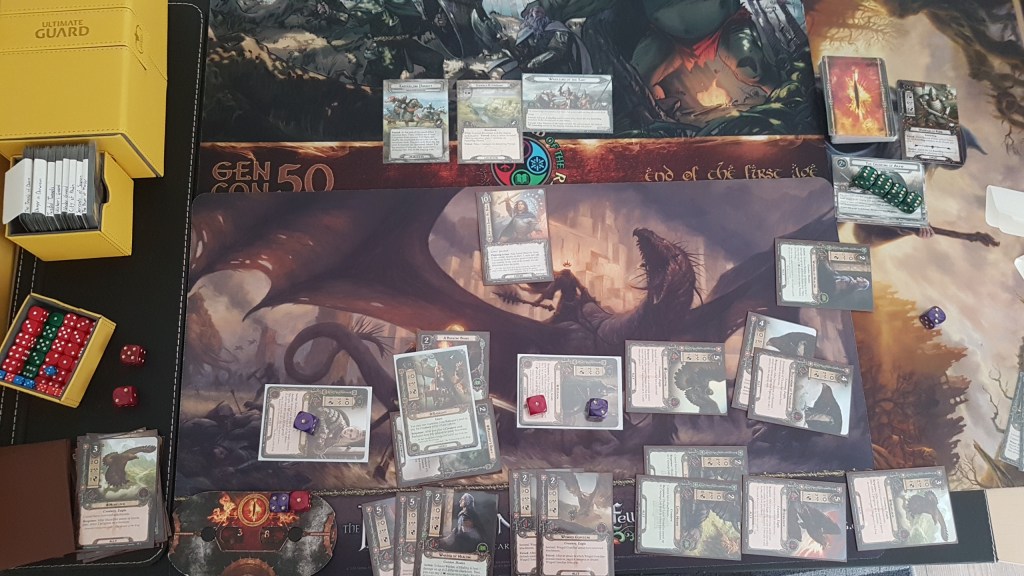
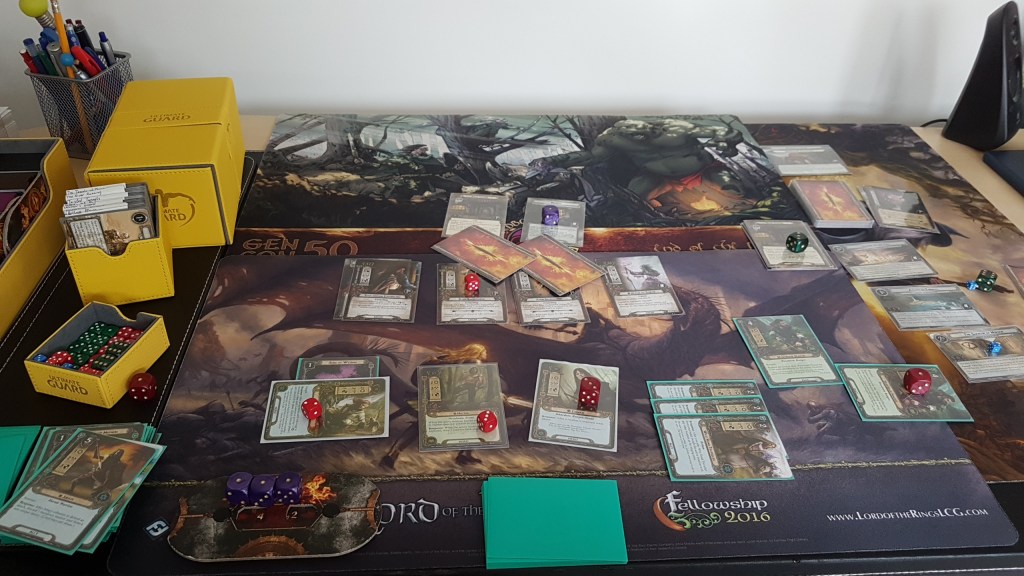
The three scenarios in the Deluxe have you travelling down the Celduin to Dorwinion, where you find the city under a shadow of fear of Mordor. You track down the cult to the Mountains of Rhun, where you confront an old enemy of yours that you left for dead so many cycles ago. I have played all of the scenarios already, and will share my thoughts on them here. These may contain spoilers for the narrative and some gameplay mechanics, so if you want to go in blind, stop reading now and get back after you have tried the scenarios. You have been warned.
The River Running
The first scenario we face in this Deluxe box has our heroes running along the River Running to the Fords of Araw. They are being pursued by the new Easterling enemies, who are some of the most synergistic enemies we’ve seen to date. This is thanks to the Easterling attachments that are introduced in this scenario. These attachments are basic treacheries that attach to enemies, buffing them with Archery, threat, attack, and various other abilities. These treacheries are also brought into play through the enemies themselves, who can fish them out of the discard pile. This synergy with attachments can lead to some enemies being enormous foes to overcome, while they started out as a little whimp. The encounter deck does recycle itself a lot, so enemies you kill will likely not stay dead for very long.
Because enemies in this scenario have so many attachments, player cards that punish this are excellent in this quest. Valour of the North was released one Deluxe too early, as it does great in boosting attack or defence against these enemies. The new Faramir ally also shines in this scenario, as he will often deal 4 damage to enemies without having to rely on traps. The other encounter cards in this set try to punish you by exhausting characters and leaving them exhausted and with debuffs or damage. This reminded me somewhat of Nightmare Passage through Mirkwood. There is also an objective in the staging area, which will bring out more enemies as it gathers resources.
Be sure to kill as many enemies as you can during this scenario, as leaving them in play can see you getting overwhelmed quickly. The final stage includes a side-quest that was previously set aside. Try to ignore this side-quest if possible and continue with the main quest, as beating that will lead to your victory. This is a very fast-paced quest that reminds me of Escape from Umbar, only without the progress removal and extra loss condition. I beat it on my first playthrough with Eagles, but that was mostly thanks to me being able to keep the number of enemies to a minimum.
Danger in Dorwinion
As I had hoped when this quest was first revealed, it is a reskin of The Steward’s Fear. It makes sense that this quest got a reskin, as it ranks among the best scenarios in the game based on several tournaments in the past. Danger in Dorwinion adopts the Plot mechanics and also has the Villain boss-enemy at the end of the scenario, this time called the Cultist. Some encounter cards were also copied and tweaked a little. Secret Cultist turns your strongest ally against you much like how A Knife in the Back did in Steward’s Fear. Only this time, that ally turns into an enemy that you must kill. This really sucks if you have a strong and expensive ally that suddenly turns on you.
The method of progressing the quest is done again through exploring locations and finding clues. This places resource tokens on the main quest, which are required to advance in combination with normal progress. At stage 2, no progress is required, giving you the chance to clear some side-quests that the encounter deck throws at you. These side-quests will impact your games, so be sure to clear them whenever you can.
The biggest threat in this scenario is…well…threat. There are many cards that raise your threat and benefit off of you having raised your threat. This can be in the form of an enemy with buffs, a shadow effect that hits harder, and side-quests that raise your threat even further. Threat management will be a huge deal in this scenario, but that doesn’t mean that combat and location control should go ignored. Location control is very important here, as a lot of cards and quest effects will flood the staging area with locations. The enemies in this quest can also hit hard, and can get boosted by objectives you can find.
This quest is fun, but it can be a slog to get through, especially in multiplayer. The quest has a high replayability factor thanks to 3 different plots, and 3 different Cultists. You also have to be careful with your allies, as they can dissappear from your hand. You can also lose them to Secret Cultist, which is annoying if you just used a Sneak Attack-Gandalf. This quest took the longest for me to clear, and even then, I had to go in 2-handed. Solo is pretty rough for this quest thanks to the transition to stage 3.
The Temple of Doom
Cue the Indiana Jones soundtrack!
I love how this game throws in some pop-culture references here and there in titles of their cards. Much like the first quest card of the Mumakil and the entire Beneath the Sands scenario. With that said, it is the only happy memory you’ll have of this quest, because it can be a punishing one. The quest works with a timer where the enemies within are summoning the power of Mordor. Every turn (or multiple times per turn) a token will appear on a side-quest in the staging area. For every 4 tokens there, a card from the Power of Mordor encounter set gets added to the staging area. These come with additional rules, such as a lower threat elimination cost, or protection for the enemies that just engaged you. There is also a Nazgul enemy and punishment for card draw. It is vital that you work through this quest fast, before the ritual is complete and all of the Power of Mordor cards are in play, as the next ritual would mean that you lose the scenario. This puts pressure on you, and will make the quest harder as you go on. It also means that your performance depends on what Power of Mordor cards are revealed at what point in the game. If your location control is on point but Khamul the Easterling engages you, it will be a very different game than if the Tower of Barad-Dur was revealed instead.
Another mechanic of this quest is the various different quest stages 2. These are shuffled at the start of the game, and all have terrible effects at the start of the quest phase. Some are worse than others though. One is a repeated Savage South that also targets your hand, which is terrible late game, but pretty ok in the early game when you don’t have a lot of quest stages revealed yet. After you have cleared 4 quest cards, Ulchor will start to engage you and challenge you to a boss-fight. Defeating him is not the end though, as the side-quest of the ritual must be cleared as well. This usually comes down to an all out questing rush in the end, which can be pretty enjoyable. Also interesting is how you cannot clear the final main quest card of this scenario. This means that the quest’s effect will last throughout the end of the scenario, which can be brutal if you happen to draw the wrong quest card.
The quest is somewhat inspired by Mount Gundabad, but has a real sense of urgency with the ritual mechanic. You will get a free planning phase at the start that you should take maximum advantage of. Try to get your engine going as quickly as possible, so that you can go through these different quest stage quickly as well. The Easterling enemies in this scenario work like the ones in the River Running scenario, with different attachments making them stronger. I beat this scenario during my first run, but that was mostly due to luck with the order of cards I revealed and the high cost cards in my hand that allowed me to pass one stage in one turn.

The Cycle
Based on the cards we’ve been given in the Deluxe, we can see what sort of situations we may find ourselves in during the new Vengance of Mordor cycle. We already know at this point that the first AP will take place in the capital of Dorwinion again, as it is raided by Easterlings during the night. This makes sense, as there are plenty of city-themed encounter sets in the Deluxe box. There are so many in fact, that I think we might see another city scenario down the line again. Whether that be in Dorwinion again or in another Easterling city remains to be seen, but I would prefer to take the fight to the enemy in an undercover mission in the Rhunnic captial for instance. There will also be more underground action in later quests, perhaps we are going grave-robbing or searching for the Holy Grail to keep with the Indy theme.
We will also keep fighting Ulchor throughout the cycle, as he has his own encounter set. While his actual enemy card will change between scenarios, this is not uncommon for him. We’ve seen the same thing happen with the Lord Alcaron objective ally during the third cycle, and there have been several other cases of this in the past as well. The fact that he has a dedicated encounter set makes me think he might be the final boss of the cycle, or an introductory boss to whoever ranks above him (probably a Nazgul).
As for where the cycle is headed, I really hope we get to see another Sailing quest on the Sea of Rhun, though none of the encounter sets point to that happening. We will get to track through the endless plains again, so a mounted scenario like Race Across Harad would seem logical. As for enemies, there have been no Orcs in the Deluxe, so there is little reason to believe they will make a big appearance during this cycle. The main enemies will be Easterlings and their attachments. This also means we won’t actually set foot in Mordor (yet, perhaps the next cycle), but we might get as far as the Black Gate in the final showdown. This is based on the excellent art on the box, which may tease where this final confrontation will take place.
As for now, I think I will leave my speculations there. We will see how right they are by the time the final AP has dropped (in about a year or so). What are your experiences with this Deluxe, and where would you like to see the cycle go? I hope my thoughts gave you some stuff to think about. I will probably do this again for the following APs, but with a bit more attention to the player cards.


I recently opened this deluxe box and was quite a bit shocked that there is only one copy of the contract.
LikeLike
Correct, there is only one copy of the contract in the Deluxe and probably in the next 6 APs as well. But since it is just one card that you need for your deck, I find it easy to swap it around in case I build more than one Fellowship deck.
The same is true for the One Ring, though that makes sense, considering its title.
LikeLike
It’s fascinating to read your guesses and thoughts about contracts (and the APs) now! You had some good hypotheses in there, as it turns out. And I agree with you that it would have been nice to throw in a Sailing quest on the Sea of Rhun!
LikeLike