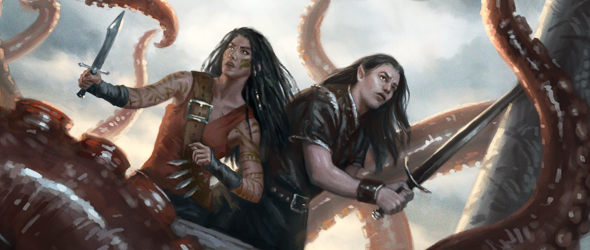
It has been a while since we have had a scenario where there is such a clear break between the first half and the second half of the scenario. Foundations of Stone did this by washing you to the very roots of the Misty Mountains, while the Dunland Trap sprung the trap during the second stage, forcing you to survive until time ran out. The Thing in the Depths is another such quest where the scenario switches it up halfway through. This time, a second encounter set is introduced, and enemies turn to situational allies as you try to survive this assault on the Stormcaller.
The Thing in the Depths
- Found in: The Thing in the Depths Adventure Pack, Dream-chaser cycle 2.
- Official Difficulty: 5
- Community Difficulty: 5.4
- Encounter Sets: The Thing in the Depths, Stormcaller Elite, Corsair Raiders, The Stormcaller
- Quest cards: 3
- Play if: You like a tough quest with a lot of combat right out of the gate, you enjoy a narrative quest where there is a big twist half way through, you are into tentacles (look, I’m not judging or anything).
- What is different about this quest?: Big chance halfway through where Corsair enemies are swapped for Tentacles of the Thing in the Depths, Grapple keyword, enemies turn to objective allies, unique lose condition at stage 3.
- Solo or multiplayer?: With so much combat, a true solo playthrough will be tough, as this quest gives you very little time to set up. It also hits you hard when you try to progress, as you are hit with 2 boss-level enemies if you have been stalling a lot. Higher player counts will increase your chances of survival, but it will also extend the final stage of the quest. I feel like 3 players may be the sweetspot here, but you would have to be the judge of that. I don’t recommend true solo, as it demands too much of a single deck to reliably beat this scenario with.
- Can I run side-quests for this scenario?: Yes and no, it really depends on when you want to go to your side-quests. The first stage will have you stall for a few rounds where you are building up to tank Sahir and Na’asiyah. During that time, no progress can be made on the main quest, so side-quests would be the way to go. Once you have explored the Helm of the Stormcaller though, you definitely don’t want to go to a side-quest, as you now have several tough enemies in play. Stage 3 is more inviting to side-quest decks, as there is no progress to be made on the stage. Don’t expect a lot of progress at that stage though, as the encounter deck will swarm the staging area with high threat cards. So I would argue that you should bring some side-quests with you, but be careful on when to go to one.
- What to look out for: A lot of combat, little time to set up, tricky ways to progress the first stage, location lock at stage 3, Hold Steady exhausting your characters often, a lot of enemies to take down at stage 3, especially for solo players.
The Quest
Setup
This scenario starts off with you splitting the encounter deck given to you in the pack into two sets, The Stormcaller and The Thing in the Depths. If you look closely, you’ll see that there are two symbols on the encounter cards for this pack, which enter play at different times during the quest. The Stormcaller set is shuffled together with the Corsair Raiders encounter set to form the first encounter deck. The Thing in the Depths and the Stormcaller Elite will remain out of play for the time being. The unique Helm of the Stormcaller location gets added to the staging area, as well as one copy of Umbar Raider. Note that this does not scale with the number of players in the game. 1 player adds just as many copies of this enemy to the staging area as 4 players would. This makes the start of the scenario slightly easier in multiplayer. No other cards are added to the staging area, so after a final shuffle of the encounter deck, the players begin their first round.
Quest stage 1: Take the Ship – 4 quest points
We kick off this quest with a battle between your crew and the Corsairs of the Stormcaller. While there are no new Corsair enemies compared to Raid on the Grey Havens, those in the encounter deck can quickly start to pile up and chip away at your resources and hitpoints. This is in large part thanks to the low engagement cost of both the Umbar Raider and the Corsair Infiltrator, meaning that you should be ready in most cases to handle an attack during round 1.

While surviving against the many Corsair enemies that can pop up, you will also start to notice more locations pilling up in the staging area. Be sure to quest hard enough to beat every active location, preventing a lot of location lock problems. The Weather Deck should always be your priority, as it adds a travel cost to every other deck location. You will want to avoid that, so travel there whenever you can. The other locations tend to have abilities that trigger when they are in play, making Thror’s Key some good tech to prevent buffs on enemies. Adding location control to your deck will make it easier to keep the locations in the staging area in check, allowing you to quest successfully every round.
Questing successfully does not mean that you can place progress on the main stage though. It prevents progress being placed on it as long as the players have not yet explored the Helm of the Stormcaller location. This unique location starts out in the staging area, is immune to player card effects, and will bring out the boss-enemies of stage 1 once you travel here. The unique part of this is that you get to decide when you feel that you are ready to take on Sahir and Na’asiyah. You can stall for a while and setup your boardstate, clearing the staging area of other enemies and locations first. However, at the end of each round, if both unique enemies are not in play, they gain a resource. These resources have various effects, as they interact with both their abilities, and with the Helm of the Stormcaller. You do not want a lot of resources on them, as that will make it difficult to survive long enough to clear this first stage. 3-4 rounds would be the maximum I would be willing to wait, but sometimes you can stall for longer if you have a plan in place.
Once you feel confident enough to proceed, the players can travel to the Helm of the Stormcaller. While it only has one printed quest point, it gains one extra per resource on a Raider enemy in play. This not only includes Sahir and Na’asiyah, but also the non-unique Raider enemies that are still in play. Try to either quest hard enough to beat all the quest points on the location, or try to reduce the number of resources on enemies in play. When the Helm becomes the active location, Captain Sahir engages the first player, and Na’asiyah engages the last player (in case of one player in the game, she engages the first player together with Sahir). The player who Na’asiyah just engaged, must discard all event cards in their hand, and give her one resource per event discarded. Careful planning and coordination with your fellowship can reduce the number of resources gained this way by making her engage the player with the lowest number of events in hand. Remember that you can also ditch your events early through effects like Eowyn and Protector of Lorien in order to not have Na’asiyah get the extra resources.

At this point, the players should look to clear the helm as fast as possible. Killing non-unique enemies and lowering the resources on the unique ones can be a valid strategy here. Na’asiyah will lose resources after she has attacked or has been attacked. This lowers her stats as well. Remember that she will discard the events of the next player she engages as well, so ditching cards early for her is a smart move. Making multiple attacks per combat phase through tricks is also beneficial to the goal of letting her lose resources. Grimbeorn is a good hero to use here, allowing you to discard an extra resource during that round. Sahir will gain resources each time he attacks, which can go up to 4 per attack if he destroys a character. In order to reduce his resources, you must damage him. For each damage dealt to Sahir, a resource is removed instead. This also includes direct damage. Both are Indestructible, so even if they have damage beyond their hitpoints, they will continue to make attacks. But the goal here isn’t to kill them, it is to clear the Helm. Once the players have made enough progress on the Helm, they can make the final 4 points of progress on the main quest card. Clearing those final 4 quest points will advance the quest to stage 2.
Stage 1 is all about setting up your boardstate quickly. Be ready to take on enemies and try to beat some player side-quests while building up for the unique enemies. This stage can be tough for the unprepared, but at least you can easily reset if you are defeated this early on.
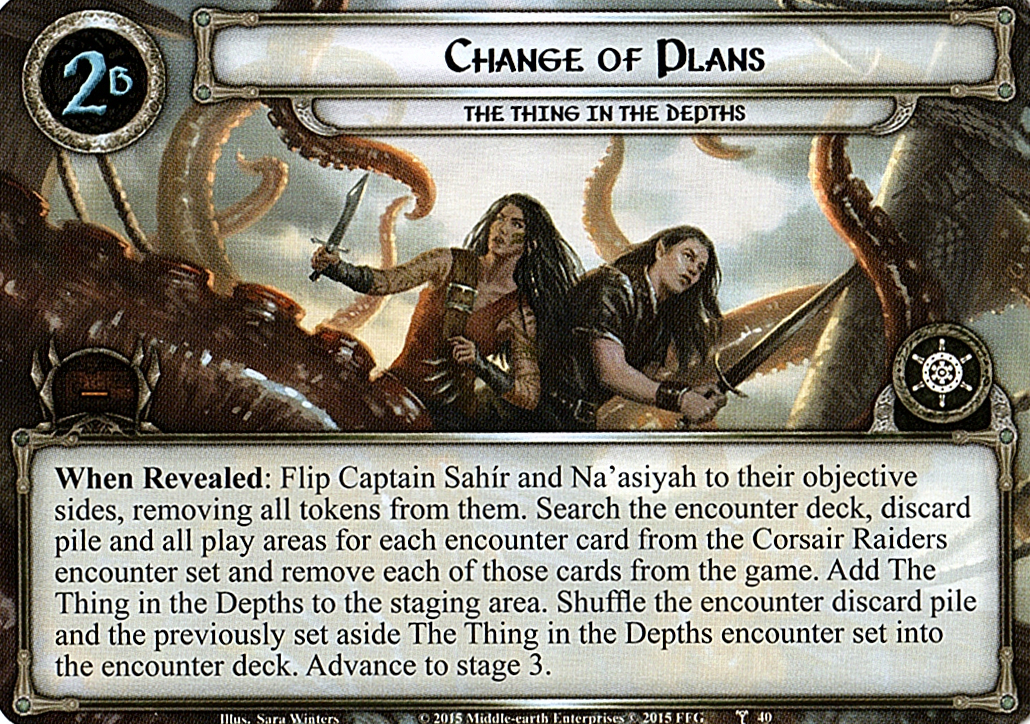
Quest stage 2: Change of Plans
This is the transition stage, where the encounter deck gets new cards, and the corsairs will become allies in need. The A side is purely flavour text that explains the situation you find yourself in. The B side of this quest stage is more interesting. Both the Captain Sahir and Na’asiyah enemies are flipped to their objective ally side, removing all tokens (resource and damage alike) from them. They will enter the control of the player that they were engaged with (first and last player). All cards from the Corsair Raiders encounter set are removed from the game, whether they be in play, in the encounter deck, in the discard pile, or dealt as shadow cards. You don’t get any of the resources on the enemies back, but at least you don’t have to care about the enemies anymore. With the Corsair Raiders encounter set removed from the game, the earlier set-aside The Thing in the Depths encounter set is shuffled into the encounter deck along with any remaining cards from the encounter discard pile. From this new encounter deck, the unique The Thing in the Depths enemy is placed in the staging area, adding 2 threat to the total. When the entire new encounter deck has been shuffled together, the players advance to stage 3 for some tentacle action.
Quest stage 3: Defend the Ship
When the encounter deck has been refreshed and new enemies have been added to that deck, the players will now have to invoke the When Revealed effect on this quest card. It states that the players must discard cards from the top of the encounter deck until one more tentacle enemy is revealed than there are players in the game (2 enemies for 1 player, 5 enemies for 4, you get the idea). All enemies resolve their Grapple keyword at this time as well, before the players may flip this quest card.

Now is as good a time as any to talk about the Grapple keyword, which does not appear in any other scenario in the game (as far as we know at this time). The Grapple keyword represents the tentacles lashing onto the Stormcaller, attempting to carry it to the depths. The keyword appears on all Tentacle enemies, along with a text in brackets. This text tells you to what location this Tentacle will attach. This can be determined by the printed threat of quest points of the locations in the staging area. Note that I say staging area, and not “in play”. This is because Tentacles cannot grapple the active location when they are revealed, they only go to locations in the staging area. If there are no locations in the staging area, the Tentacle enemy gets added like any other enemy would, and does not resolve his keyword. Once attached to a location, the enemy is flipped face-down and is immune to player card effects. It will act as a sort of attachment, but is not counted as one (no South Away tricks I’m afraid). Instead, the card is “grappled” with the location, which is terminology that boils down to Woodmen decks not being able to benefit off of these cards.
While grappled onto a location, the Tentacles are not considered to be in the staging area themselves, and cannot be engaged. The Tentacle will instead add 2 threat to the location it is grappling with. This buff is counted per tentacle, so a location with 2 tentacles on it, counts 4 extra threat to its own threat. Herein will lay the extra loss condition of this quest, which I will get to later. The only way to remove these Tentacles is to either explore the location they are grappling with in the staging area through player card effects (the location itself does not become immune, just the tentacles) or by travelling to the location. When this is done, all Tentacles are flipped face-up and are added to the staging area for real this time. They can now be engaged and count as normal enemies. The Grapple keyword does not resolve again.
Flipping the quest card over to side 3B shows that the players are given an extra ability during the travel phase. If they were unable to explore the active location and it still fills the active location slot, they may switch the location by travelling to one in the staging area. This counts as a normal travel action, so travel costs must still be paid. However, this does help the players in that any tentacles grappling the new location are removed from it and are added to the staging area. The old active location is also returned to the staging area, with all tokens left on it. This allows you some strategy as to not get fully location locked if tentacles are boosting the threat of other locations out there.

The quest does not have any quest points, but the players are instead required to defeat the Thing in the Depths. This enemy cannot be engaged or damaged directly, but is instead damaged when the players hack away at its tentacles and eyes. Whenever the players destroy a Creature enemy, the Thing in the Depths takes damage equal to the threat of the enemy just destroyed. This can range from 1 to 3 damage per enemy defeated, so there will be quite a lot of enemies that you need to cut down before you can claim victory in this quest. This isn’t helped by the fact that the Thing in the Depths also gains more hitpoints with higher player counts, though it is easier to manage these enemies with more players.
A unique loss condition is also in effect during this stage. If ever there is a Ship location with 9 threat at the end of the round, the Thing in the Depths will have destroyed the Stormcaller, and the players lose the game. Remember that threat can be raised by adding Tentacles to the location, raising its threat by 2 per Tentacle grappling with the location. However, players will be able to lower the threat of a location by 1 through the use of Power in the Earth. At least that attachment isn’t completely useless here. In reality, this loss condition means that usually 3-4 enemies on one location will be enough to sink it. Remember that this check only occurs at the end of the round, so players will have the opportunity to travel to this critical location first.
This does not mean you have to travel each round if you don’t want to though. Especially in solo, this can be difficult. This quest tends to swarm you with enemies, and a solo player may get overwhelmed with tough Tentacle enemies during this stage. The encounter deck is also filled with more surging cards with this new encounter set, making it even more difficult to survive. Questing shouldn’t take a back-seat though, as Tentacles can blow up locations in the staging area and will be adding a lot of threat there. Shadow effects and the surge keyword will make sure that more Tentacles will either Grapple or engage you, causing you to take more defences when you are unprepared. This gets a little easier in multiplayer, where one player can deal with placing progress on locations, and the rest can chop away at the Tentacles. There will be a lot of Tentacles that you will have to cut through, but once you get a board state that can survive multiple attacks, you should be ok. You should also be able to kill off some Creature enemies in order to damage the Thing in the Depths itself. This won’t be easy, as the enemies will have a lot of hitpoints. Large combined attacks with Ranged characters and heaps of direct damage should help in killing the enemies. Prioritize those with higher threat, as that gets you more milage towards your goal.
After the players have slogged through killing a lot of tentacles and eyes, the Thing in the Depths should be nearing the end of its life. Remember that it will get +3 hit points per player in the game on top of its 8 hitpoints. Once there is damage on the Thing in the Depths equal to its hitpoints, it slithers back into the deep. This leaves you victorious, but on a battered ship. You capture the remaining Corsairs and join back with your fleet. But the weather and creature have done too much damage to sail back to Middle Earth with. You will have to go back to the island you visited during the Fate of Numenor quest in order to repair the Stormcaller and the rest of your fleet. Who knows, you might also find the lock that is opened by the key that Sahir stole off of Calphon’s dead body.
The Encounter deck
Global
There area 2 encounter decks here that have to be covered individually as they contain different cards throughout the scenario. These decks get swapped during stage 2. Both contain The Stormcaller encounter set, but trade the Corsair Raiders for the Thing in the Depths.
Encounter deck 1
This first encounter deck uses the Corsair Raiders and The Stormcaller encounter sets and is used for stage 1.
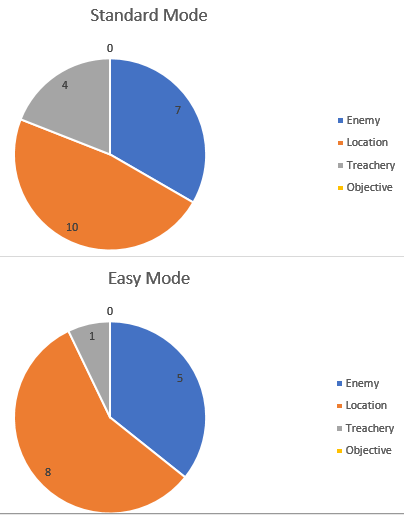
- The first encounter deck is very thin, with only 21 cards in Normal mode, and just 14 in Easy mode.
- Shadow effect chances are roughly the same, with 1 in 3 cards having a shadow effect in both modes
- Average threat per card is relatively high at 1.9 threat per card. This can range from a 0 threat treachery to a 4 threat location.
- There is no surge or Doomed in this part of the encounter deck.
- Immunity
- Captain Sahir and Na’asiyah are indestructable during this stage
- Helm of the Stormcaller is immune to player card effects
These statistics do not count the two set aside unique enemies, the entire Thing in the Depths encounter set, and the Helm of the Stormcaller. These will never enter the encounter deck. The encounter deck is very thin at this point in the quest, so bringing your own encounter player cards will be beneficial to you, as you should be able to get them out quickly. There is a real emphasis on locations at this stage, with very few treacheries in the encounter deck.
Encounter deck 2
This encounter deck is used in stage 3 and uses the Thing in the Depths and the Stormcaller encounter sets.
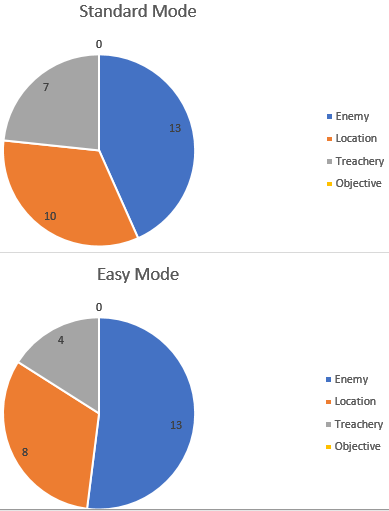
- The Encounter deck has grown to a size of 30 cards in Normal mode, and 25 in Easy mode.
- Shadow effect chances have also gone up to around 72%, with most shadows on enemies causing them to either make an extra attack or grapple with a location
- Average threat per card has gone down to 1.53 threat per card in both modes
- Surge is now a thing in the encounter deck, with Eye of the Beast and the Crushing Arm surging. This makes it that 5 cards in the encounter deck surge.
- Doomed is still not present in the encounter deck. This means that you are able to bring your own effects. But be aware that the staging area can get a lot of threat quickly if you aren’t exploring locations fast enough. This can lead to failing the quest, and raising your threat.
- Immunity
- Eye of the Beast cannot attack
- The Thing in the Depths cannot be engaged and is immune to player card effects
These statistics do not count the Thing in the Depths who will stay in the staging area for the entire stage. Note that the average threat considers that the Tentacle enemies enter play without a location to grapple with. Otherwise they would all be contributing 2 threat to locations in the staging area. The encounter deck has also shifted its priority to a more enemy-focussed layout, which can be important for cards like Wingfoot.
Objectives
The Stormcaller Elite enemies are flipped over during stage 2 and join the player with whom their were engaged with. This removes all tokens from them, including damage and resource tokens. These new allies will have to survive the quest in order for the players to win.
Since both objective allies help you on your quest through the Temple of the Deceived and the Drowned Ruins quests, they have already been covered there in depth. You can check out the articles following the links. The synopsis of these allies is that the more resources they are handed by the players, the better they become.
Enemies
This scenario features two sets of enemies, the Corsairs of the Stormcaller, and the Tentacles from the Thing in the Depths. The enemies are switched halfway through the scenario, so they will be split into two sections for this analysis.
Corsairs
- Captain Sahir: The enemy side of Captain Sahir is one that was encountered earlier at the Raid on the Grey Havens. He automatically engages the first player, so be ready for him and perhaps plan out who will take him on. He has some big stats on him, hitting for 6 which can take out most allies and even a couple of heroes. Having a solid defender ready for Sahir is recommended. If possible, you will want to use Outmatched and/or Followed on him, so you ready your beefy defender and lower the threat in the staging area by 6. Since Sahir is indestructable, you cannot kill him, so he won’t escape from those traps. Sahir will enter play with some resources on him if the players have stalled for a while at the first stage. These resources act as quest point buffers on the Helm of the Stormcaller, so getting rid of them will be recommended. This can be done by damaging Sahir. For each point of damage that he would take, a resource token is removed instead. Sahir can boost this type of defence by attacking. For each attack he makes, he gains 2 resources. If that attack destroyed a character, he gains 2 more resources on top of that. A couple of strategies work well against Sahir. A Forest Snare will allow you to ignore Sahir’s attacks, making him gain no extra resources on top of the ones he already had. You can also ping him with direct damage or do a couple of massive attacks, removing a lot of resources in the process. Remember that Sahir cannot be destroyed at stage 1, so he will remain attacking you until you beat the stage. Once you do, he flips to his objective side, removing all tokens from him, and he joins the first player as an ally.
- Na’asiyah: The enemy side of Na’asiyah is a lot more rare over the course of this cycle, which is a relief for when you are playing the other quests, but not right now. Na’asiyah will engage the last player once the Helm of the Stormcaller becomes the active location. If there is only one player in the game, Na’asiyah engages that player as well as Sahir. This leaves that player swarmed by two high level enemies that can be tough to hold back. When Na’asiyah engages a player, that player must discard all event cards in their hand. Na’asiyah then gains one resource per event card that was just discarded. These resources will buff the quest points on Helm of the Stormcaller, so it would be ideal to have Na’asiyah engage the player with the fewest event cards in their hand. This will require some timing, or strategic uses of Follow Me!. You can lower the amount of resources on her by having her attack or attacking her yourself. While direct damage won’t do you any good, you will be able to remove a resource from her multiple times per phase by counterattacking with Grimbeorn, or by playing Quick Strike (assuming you drew into it after she engaged, since she would otherwise discard the event). All these resources on Na’asiyah also boost her attack and defence stat by 1, making it difficult to hit her early on. This does get easier as her resource start to dwindle, but at that point you should be looking to progress to the next stage. Na’asiyah is Indestructable during stage 1, meaning you can only get rid of her by advancing the stage. Once Stage 1 is completed, Na’asiyah flips to her objective side, losing all tokens from her. She now joins the player with whom she was engaged, and will continue to act as an ally to the last player.
- Raid Leader: From the three non-boss Corsair enemies, the Raid Leader is the toughest of the bunch. He has a high engagement cost, but will add 3 threat to the staging area. When he engages you, you must move one resource from each of your heroes’ resource pools to the Raid Leader. These resources buff his defence, which starts low, but can become quite tough. The 5 hitpoints don’t help a lot either, this enemy is pretty tanky. He also hits for a lot, with 5 attack heading your way. This is more than standard allies can withstand, so either ditch a chump, or have a solid defender in play to prevent a hero’s death early in the game. Attacking this enemy back will be difficult and might require some Rivendell Blades if a lot of resources were stolen through his effect. Players can also use Revealed in Wrath to blank the Raid Leader’s text box and lower his defence if it has really gotten out of control. Direct damage can also be a good tool against this enemy, with Poisoned Stakes being a personal favourite. Thanks to his high engagement cost, he will likely die from the stakes before stealing your resources.
- Corsair Infiltrator: With just 2 hitpoints, the Infiltrator is the weakest enemy on board of the Stormcaller. However, his low engagment cost of 16 can mess with Secrecy and Hobbit decks, which may struggle with an early enemy. Because of his low threat, the Infiltrator is likely to engage early, triggering his action early as well. When engaged with a player, the Infiltrator receives one extra shadow card per resource on him. This can quickly go out of control, as Crew Quarters and Quarter Deck can push the number of shadow cards even further up. A Burning Brand has received an errata to no longer be able to discard this large tower of shadow cards. There are still ways that you can discard these shadow cards, which may be wise, as there are a lot of shadow effects that boost stats of this enemy, making him harder to kill. The perfect defender would be a Gondorian Spearman with a Spear of the Citadel, killing the enemy outright.
- Umbar Raider: One of these start play in the staging area, but more will join him during stage 1. The Umbar Raider has very well balanced stats and can take quite a hit with 2 defence and 4 hitpoints. The engagement cost of 24 makes sure that he will start to engage you early, which will trigger his ability once he starts making attacks. When making an attack, the Umbar Raider gets a resource from one of your heroes’ resource pools. For each resource on the Raider, it gets +1 attack. This buff will be used during the same attack that got him that resource. With there being many ways that the Raider can receive resources through encounter card effects, he can become quite nasty to defend. Because of this, it is advised to prioritize this enemy over the others and try to kill it as soon as you can. In order to not fuel his ability, the engaged player mustn’t control any resources when the Raider makes an attack. Try to spend it all during the planning phase or on events. A quick way to deal with the Raider would be a Sneak-Attack Gandalf combo, dealing 4 damage to the Raider, killing him outright.

Tentacles
- The Thing in the Depths: All the tentacles in this scenario come from one source, and it is this Kraken-like being. The Thing in the Depths will remain in the staging area throughout the entire third stage, as it cannot be engaged. It is also immune to player card effects, meaning that you can mostly ignore this Creature while you are at this stage, except for counting its 2 threat to the staging area’s total. The Thing in the Depths starts with 8 hitpoints, but that will get boosted by 3 for each player in the game, making it at least 11 hitpoints that you must chew through. You do this by destroying its tentacles that grapple with the Stormcaller. Defeating an Creature enemy will do damage to the Thing in the Depths equal to the threat of that enemy. This can be either a Tentacle, or the Eye of the Beast enemy. With an average threat of 2 per enemy, you will be looking at around 6 enemies for a solo playthrough to defeat in order to destroy the Thing in the Depths. For more players, this gets boosted by around 1-2 extra enemies to defeat per player. The Thing in the Depths does not have a defence value since it should never defend a direct attack, meaning that all damage passes straight to its hitpoints. The Thing in the Depths itself can also attack through encounter cards like Lashing Tentacles and the Eye of the Beast. When doing so, it attacks for 5, which is more than enough to kill most allies and even some heroes. Have a defender ready to defend this enemy, and be careful, as it can attack multiple times per phase if you happen to draw into a nasty shadow effect. Defeating this enemy results in your immediate victory.
- Eye of the Beast: Not all encounter deck enemies at this stage are Tentacles. Sometimes the Thing in the Depths pops an eye above the surface to see who has been poking its tentacles. This enemy is rather unique, as it has 0 engagement cost (which is rare for non-unique, non-boss enemies) and no attack value. When this enemy is revealed, it surges, causing players to reveal an additional card from the top of the encounter deck. This enemy will engage during the round it has been revealed, unless the players use some tricks where this enemy does not make an engagement check. When engaged, the Eye of the Beast cannot attack you directly (what’s it gonna do? Blink aggresively?). Instead, the engaged player will be attacked by the Thing in the Depths itself from the staging area. This can be troublesome, as the Thing has a strong attack stat, and you won’t be able to cancel it due to the immunity it has. Instead, you should try to avoid the attack by blanking the Eye’s text box through Revealed in Wrath. This allows you to avoid the extra attack, probably saving you a character. When it comes to counter attacking the Eye, you will be shocked to learn that it has 5 points of defence. This is insane and ranks among some of the highest defence values in the game. Dragons, Ships, and some boss-level enemies share this stat. However, the Eye is pretty vulnerable to direct damage if you cannot penetrate its defence. Have Poisoned Stakes, Bow of Yew, or various other direct damage effects ready to take out the eye. This deals 2 damage to the Thing in the Depths.
- Thrashing Arm: This arm has the highest stats of all Tentacles in play and will be a problem if you don’t deal with it quickly. 23 engagement cost might seem low, but it is actually the highest among non-unique enemies at this stage. When revealed, the Thrashing Arm will attach to the location with the lowest printed threat, raising that location’s threat by 2, like all other Tentacles. When detatched, the Thrashing Arm will add 3 threat to the staging area, but will likely engage before the next quest phase. During combat, it hits for 5 attack, which can be enough to knock out most characters. On the defence side of things, the Thrashing Arm only has 1 defence, like the other Tentacles. However, with 7 hitpoints, it will be a while before you can bring this enemy down. But you really should prioritise this enemy, as keeping it engaged will trigger its ability. This deals 3 damage to a single character you control. Aside from heroes, this will almost always kill a character, as you cannot spread out the damage. You could lower the damage taken by using an Honour Guard, but even then, 2 damage is quite a lot. This enemy is why Silvan decks perform poorly against this quest, as those allies tend to be low on hitpoints. Ents, Dwarves, and Beornings will last longer against this enemy. Try to defeat this enemy as fast as possible, perhaps by even using tricks like Heavy Stroke or Tactics Eowyn’s nuclear option. This will deal 3 damage to the Thing in the Depths, which is a nice reward compared to the other tentacles.
- Grasping Arm: The next tentacle on the list will grapple to the location with the highest printed threat. This means that that location is more likely to reach the 9 threat, causing players to lose. Because of this, the Grasping Arm will be in play a lot as an enemy, as players tend to explore or travel to this location early. With 20 engagement cost, this Arm will engage everyone aside from a Secrecy deck that has managed to stay below 20 until now. When engaged, the Arm will be hitting for 4 attack, which can be blocked by a dedicated defender. The problem with this arm is that it will exhaust an additional character when it attacks, leaving you shorthanded to defend other attacks or to counter attack. Because of this, try to defend the Grasping Arm last if you have multiple enemies engaged. Attacking this enemy back will be easy, as it only has 4 hitpoints and 1 point of defence. A Gandalf bomb will be enough to take care of this enemy, or 2-3 attackers will do the job as well. Destroying this Arm will deal 2 damage to the Thing in the Depths.
- Crushing Arm: While this enemy hits the softest of all, it is a nasty one to reveal and detatch, as it is quite a swarmy tentacle. This can be seen in the surge keyword, which can set up a surge train of this enemy and the Eye of the Beast that is difficult to circumvent. This Arm will attach to the location with the highest printed quest points, meaning that if you are exploring locations in the staging area, this arm will take a while to get out. When detatched from a location though, this arm will make an immediate attack against the first player. This is an arm that you want to keep track off, as multiple Crushing Arms on one location can lead to several attacks coming to the first player at the same time. These attacks will only hit for 3, but it can sometimes be more difficult to defend 3 attacks of 3, than 1 attack of 9. Regardless, this arm will engage the players after these attacks through standard engagement checks, as it only has an engagement cost of 17. While engaged, there are no extra rules to keep in mind. It will take 6 attack in total to kill the Crushing arms, which will deal 1 damage to the Thing in the Depths.
- Giant Arm: The final arm in this scenario is the Giant Arm, who has mediocre stats compared to the other arms. It will grapple the location with the lower printed quest points, meaning that it will enter play quickly, if players are exploring locations in the staging area. There are no forced effect triggers or responses on this arm, so you can engage this 13 engagement cost enemy without trouble. However, the arm will get a +2 attack buff when it is attacking allies. This means that this enemy should be defended by heroes instead, or else players will lose even good defender allies like Jubayr and Deorwine to this enemy in one hit. Beregond and Dain are good heroes to bring for this enemy, who will only hit them for 4. Killing the Giant arm will take some time, as 6 hitpoints can be a lot to take care of in one go. Defeating this arm will deal one damage to the Thing in the Depths. This may not be much, but it can be that last point of damage you need to defeat this scenario.

Locations
The locations of this scenario remain the same, as you are stuck on the Stormcaller when you try to capture it, and when the tentacles try to tear it apart.
- Helm of the Stormcaller: I have talked about this location in depth now, as it is the key to progressing to stage 2. It will start the game in the staging area and is immune to any player card effects. The players can travel to the Helm during any Travel phase, but will be forced to add Sahir and Na’asiyah to the staging area when the Helm becomes the active location. After that, the players must try to overcome the quest points of this location by either placing a lot of progress, or removing as many resources as they can from enemies in play (while also placing progress on the location). Exploring this location allows progress to be made on the main quest, which leads to advancing the quest.
- Forecastle Deck: In terms of printed quest points, this location will be the highest in the staging area, which will affect what enemies will grapple with it. It is also one of the more nasty locations in this scenario, as it requires you to fetch an enemy when you have travelled to this Deck location. This is not a travel cost, so cards like Thror’s Map will not negate the fact that you will have to fetch an enemy for this location. The key will work, as it blanks the location’s text box. The best enemies to get depend a little on your situation and the decks you are running. For stage 1, the Corsair Infiltrator will be your best bet, as it is quite weak if you can deal with it quickly. During stage 3, the enemy is revealed, triggering the Grapple keyword. Don’t pick the Eye of the Beast or the Crushing Arm, as those enemies will surge. The other options will depend on the locations you have in the staging area. If you can take another enemy on a specific location, try to find one that matches the correct Grapple keyword. Because of the Forecastle Deck’s ability, the location is best explored in the staging area. Try to place a lot of progress quickly before too many Tentacles will grapple to this location, else you’ll have a lot of enemies on your hands when you pop this location.
- Weather Deck: With relatively balanced stats on this location, you could be forgiven to think this is just your average location. But don’t be fooled, this location can be your downfall if you don’t take care of it quickly. This is thanks to the passive ability on Weather Deck that places a travel cost on all other Deck locations. This does not include itself, but it does include any subsequent copies of Weather Deck that you might reveal in the future. The travel cost does not count for the two non-Deck locations, so those are still as normal. But all other locations will now require each player to exhaust a character they control in order to travel to a Deck location. This cost will stack with more copies of Weather Deck, making 2 of these at the same time a death sentence if you don’t have a way around it. These ways include blanking the text box of the Weather Deck with Thror’s Key, which completely shuts it down. Players can also use South Away or Thror’s Map to ignore travel costs. Remember that the extra travel option you get at stage 3 still requires you to pay any Travel cost. Explore this location in the staging area, and try to travel to non-Deck locations in the meantime.
- Cargo Hold: This is a rather innocent location to reveal, as it only has 2 threat and 2 quest points. This means that Asfaloth could take care of this location right away. However, during stage 3, you might not want to pop this location early, as it will be attracting a lot of Giant Arms, which can be nasty to deal with. In both phases of the battle, the Cargo Hold will available to travel to, and does not suffer from the Weather Deck‘s travel cost. The only downside to travelling to this location is that all enemies will have +1 defence while this location is active. This location is best explored in the staging area and shouldn’t be travelled to unless you have enough attack strength to take care of an extra point of defence. The shadow effect on this location can be nasty if you are just able to take care of an enemy, and suddenly they get a static +2 defence until the end of the round. It is unfortunate, but I wouldn’t consider it worth cancelling.
- Crew Quarters: This location does not have the Deck trait, and is therefor not affected by Weather Deck. Instead of that travel cost, Crew Quarters has another built into it. Travelling here can only be done by adding a resource to each Raider card in play. This means that if Sahir and Na’asiyah are not in play yet, they do not receive the resource. Each other Raider enemy does. If there are no Raider enemies in play, then the players are still capable of travelling here, since technically the cost was paid on 0 enemies. But the Quarters are a poor choice to travel to during stage 1. This is because you will only be removing 1 threat from the staging area, which isn’t really helping if there are other locations you can also travel to. Instead, it is best to leave the Quarters in the staging area and wait for stage 3. Because now, to travel here, you add 1 resource to the Raider objective allies, boosting their stats. Sit on this location for a while, and only pop it during the final stage for maximum benefit. This is also a good target for cards like Mariner’s Compass and Put Off Pursuit.
- Quarter Deck: It’s not a full deck, just a quarter deck. This location has the highest printed threat out of all locations in the deck, which will become a problem during stage 3, as it can only carry 3 tentacles at once. The deck location does only have 3 quest points, making it easy to explore through location control during any stage. Travelling to the Quarter deck is also possible, removing at least 4 threat from the staging area. However, this location does have an effect on it while it is active. While it is the active location, Quarter deck forces players to deal each enemy an additional shadow card at the beginning of the combat phase. This can make the Corsair Infiltrator even worse, adding more unpredictability to the enemy. The location is best left in the staging area and explored through some (combination of) location control effects.

Treacheries
The treacheries in this scenario are pretty brutal, as is expected during an on-board battle and a battle with a gigantic sea monster. Not all treacheries are in the encounter deck for the entire game, as some are switched in and out during the different stages.
- Battle-Hardened: This is the only treachery that is removed from the encounter deck at stage 2, meaning that it will only appear when there are Corsairs in the encounter deck. The treachery is pretty nasty, handing out more resources to each Raider enemy in play. This will not include Sahir and Na’asiyah if the players haven’t gone to the Helm yet. This will however boost the stats on all other Raider enemies, or make their abilities stronger. When the players have travelled to the Helm of the Stormcaller, the treachery will also boost that location’s quest points by a lot if there are several enemies in play. On top of handing out more resources, the treachery will also make each engaged Raider enemy attack. This can be brutal, as there is no window for counter attacks so you will have to face the same enemies again during the combat phase. Since Sahir and Na’asiyah are always engaged if they are in play, this treachery will trigger an attack from both of them. This can be a game-ending treachery and will stall you either way. If there are no engaged Raider enemies, then the treachery surges. This is worth cancelling if there are a lot of Raiders in play and you need to advance the stage. You can also cancel the attacks from engaged enemies, which will prevent the treachery from surging. Thicket of Spears will save a single player, while keeping their characters ready for the second wave of attacks during the combat phase.
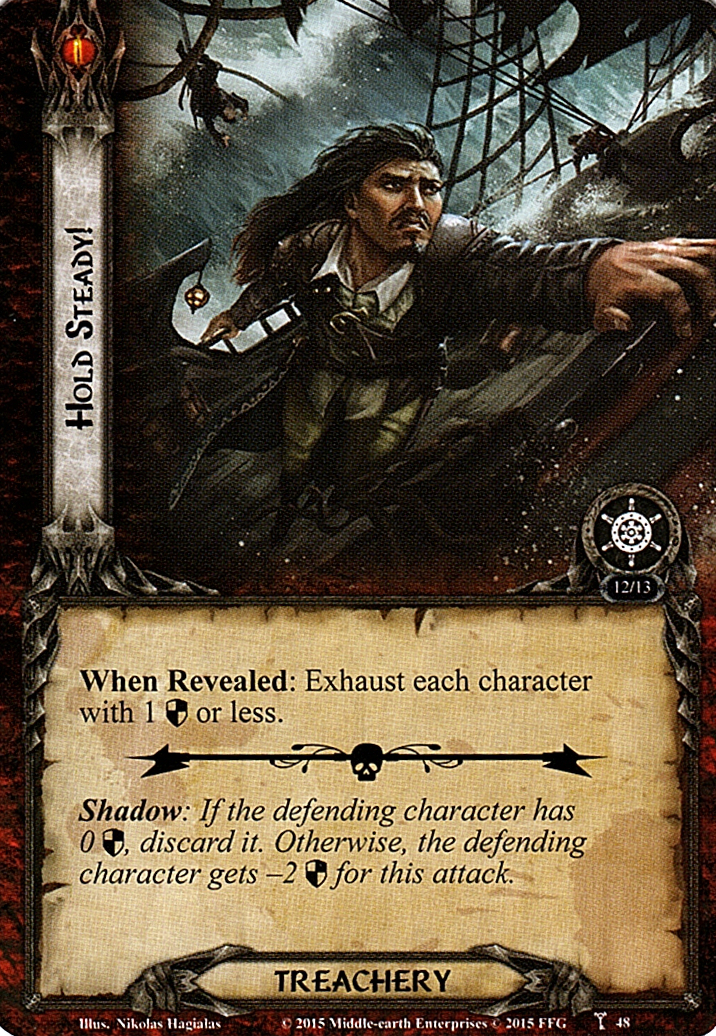
- Hold Steady!: A simple yet devastating treachery for those unprepared. Hold Steady will be a constant threat during the entire quest, as it is not removed during stage 2. When this treachery is revealed, it exhausts all characters with 0 or 1 defence. This can leave you understaffed to deal with enemies if you were counting on some chumps, so this is a treachery you will want to think of during deckbuilding. You can either choose to quest with your vulnerable characters before this treachery is revealed, giving you at least some willpower out of it. This means that you should also use healers, card draw allies, and other utility characters before questing. This may seem counter intuitive, but it is rather safe, as there are no direct damage effects for exhausted characters in this quest. Else that would have been a nasty knockout of half your board state. The other approach would be to only include characters with at least 2 defence. This can be tough for questers, as there aren’t many characters with 2 defence and a reasonable willpower value at a decent cost. Outlands comes to mind, where with 1 extra Warrior of Lossarnach, your 2 cost Outlands allies will be safe. The deckbuilding tips mostly apply for your attackers and heroes, which will need to remember to keep this treachery in mind. You can play out a Raiment on War on your attackers, boosting their defence slightly whilest also boost attack. For heroes, the Dunedain Warning comes to mind, besides the other pieces of armour that would boost defence. Know that this treachery exists and is a 2-off in the encounter deck. Readying abilities can also help, but might be less efficient.
- From the Depths: The first of 2 treacheries that get added to the encounter deck when you transition to the Tentacle phase of the quest. If you managed to beat a lot of tentacles already and are not cycling throught the encounter deck for more in order to deal the final blow to the Thing in the Depths, then this treachery can be rather useful. It will discard the top 3 cards from the encounter deck and will resolve the Grapple keyword on each enemy discarded this way. This means that the Eye of the Beast will simply be discarded this way, and only Tentacles will enter play. In reality, this is usually 1, maybe 2, extra enemies to deal with. But this depends on the tentacle density of the encounter deck. If you are doing poorly and all tentacles are already on the board, then this treachery will simply whiff. However, if that is the case, then the shadow effect on this treachery will be more deadly. It will deal damage to characters you control equal to the number of enemies grappled in the staging area. This treachery doesn’t have the highest priority when it comes to cancelling, but it can save you a few extra enemies if you are already swarmed.
- Lashing Tentacles: This treachery is really the one to cancel during stage 3. When it is revealed, the Thing in the Depths will make an attack against each player in turn order, so the players must be ready to defend a 5 base attack value attack right there and then. Each of these attacks will get a shadow card, which can lead to either adding more Tentacles to locations in play, or the Thing in the Depths making another attack against you if you happen to hit Lashing Tentacles again. Cancelling the attacks will be best if you cannot cancel the treachery. You can also have a chump ready to be fed to this Kraken. Remember that you will be able to use a Sentinel defender for these attacks to block them for other players.

Tips and Tricks
- Side-quests can be played relatively easy in this quest, as long as you are able to make enough progress to complete them. The main stages have serious restrictions on them preventing you to make progress, or they simply don’t have any quest points. This allows you to bring a side-quest focused deck that will help your party in the long run. Nearly all side-quests are well worth your time, except for maybe Delay the Enemy.
- You can use Follow Me! to more finely tune who will engage Sahir and Na’asiyah without having to wait several turns. This can save resources on those enemies, making it easier to progress through the first stage.
- Direct damage can be a valuable tool during the early stages to prevent the Corsairs from getting a lot of resources on them. Sahir in particular is quite vulnerable to direct damage, losing resources equal to the damage he takes. The other corsair enemies can die to various damage-dealing effects quite quickly. Tentacles are more resiliant, but can be chipped away at with various effects as well.
- Don’t bring threat lowering cards for enemies to stage 3. Since the Thing in the Depths only takes damage as much as the threat (not printed) of the destroyed enemy, you can losing out some points of damage if the tentacle has Secret Vigil or Ranger Spikes attached.
- Treachery cancellation can help you a lot in this quest. Battle-Hardened in particular can leave you with more attacks heading your way than you might like, and will add to the quest points of the Helm. Hold Steady is another dangerous treachery, but if you know it is in the encounter deck, you can build for it by only including non-questing characters with 2 defence or more. At stage 3, the treacheries don’t grow milder, so having a Test of Will ready at all times will save your skin.
- Leave the Crew Quarters in the staging area for stage 1. Not only will it allow you to spread out the tentacles for stage 3, but you will also be able to add resources to the objective allies by travelling there. With just 1 threat on the location, there is no real rush in going there anyway, but the extra resources will help you out in stage 3 when attacking tentacles.
- With locations getting to extreme high threat thanks to the Tentacles, it will be wise to pack threat reducing effects for locations. Secret Paths does some amazing work in this quest, but the new Familiar Lands is also a nice card to bring if you manage to get attachments onto locations (remember that Tentacles do not count).
- Know that Hold Steady is in the encounter deck. If you start with heroes who have 0 or 1 base defence, you will need to include some way to boost their defence if you want to use them after the quest phase.
- With the Tentacles having low engagement costs, the players should really avoid using Secrecy decks that can’t handle a lot of combat in the late game. You will have enough time to set up however, so get some characters out for cheap with secrecy costs or Timely Aid during the early stages of the game, even before travelling to the Helm. Or avoid Secrecy decks altogether.
- This quest is very hard in true solo, as it throws a lot of enemies at you while you also need to quest hard in order to not threat out. I would recommend going 2-handed if you have no extra people to play with. This allows you to handle the Raiders more easily, and gives you more characters to handle all the tentacles heading your way.
- If you want more Tentacles detatched from locations during the travel phase, you can use the Mariner’s Compass to replace a grappled location in the staging area with another location. This removes all tentacles from the location, giving you more enemies to fight. This can be useful in combination with a Tactics Aragorn/Tactics Merry combo to kill a lot of enemies during the combat phase.
- With such low engagement costs at the final stage, it can be wise to prevent some enemies from engaging. This can be done through Ranger Spikes or Advance Warning. This allows players to engage enemies whenever they want to, giving the players some space for breathing.
Playthroughs
There are plenty of playthrough videos to be found online, with large playgroups tackling this quest. Be ready for a long sit though, as these videos can be quite long.
- 4 players, progression decks: https://www.youtube.com/watch?v=KXcCBFxlhuI
- 3 players, progression decks: https://www.youtube.com/watch?v=vcpvTTB_uMw
- 4 players, updated decks: https://www.youtube.com/watch?v=Td3QMjH8zZg
- 4 players, modern decks: https://www.youtube.com/watch?v=AsKvOD6GTA4
With this quest over and done with, the cycle is nearing completion. With just a few scenarios left to go, we will soon be starting the Haradrim cycle scenario analyses. Only the Raid on the Grey Havens is left, which should be released within a month. I myself will be moving on to the Sands of Harad Deluxe box, which I will hopefully get another article of completed by the end of the month.

4 thoughts on “The Thing in the Depths”