With the current global pandemic keeping everyone locked in, it is important to enjoy the little things. Whether that is the extra time you can spend with your family, play some more games, or watch the entire backlog of series you have been meaning to watch, it is important that you keep morale up and stay as much inside as possible. When it comes to LOTR LCG, there is nothing more interesting than theorycrafting new decks with recently spoiled cards. Figuring out new combos and coming up with both obvious and out-of-the-box ideas can take up a lot of time, allowing you to focus on something new.
To help with this, Vision of the Palantir has been contacted by 3 European members of the community who were willing to share the final unspoiled player cards of the 4th AP of the Vengeance of Mordor cycle: Under the Ash Mountains. With its release date now up in the air (was supposed to be the first week of April I believe), it might be a while until we get some new player cards and quests to play with. So, in order to keep the community entertained, I will be giving my first impressions of the player cards in this pack, including the final unspoiled ones. While I haven’t received the pack or played the quest yet, I have seen many of the encounter cards, including all of the (side-)quest cards. This has given me a couple of points to mention on the quest as well, but I will update the segment once I get my hands on the actual cards.
Player cards
Hero
Gildor Inglorion

It wasn’t a big surprise that Gildor would end up being the second Leadership hero of this cycle, as he was spoiled in the Collector’s Edition nearly 1.5 years ago. But just because he isn’t new, doesn’t mean he isn’t exciting! Gildor has a solid stat line for Leadership, which has a hard time getting cheap willpower on its heroes. With Gildor starting with 3 willpower, that problem is solved. You won’t be using him for combat related activities as often, but the 2 attack can help in a pinch if you didn’t use him for questing. The biggest attribute of Gildor is his ability, which allows him to spend a resource each round to draw a card. Since card draw is one of the biggest flaws for Leadership, this is an excellent and reliable method of drawing more cards each round. While it is limited to once per round, that extra card draw will see you draw through your deck a lot faster. The ability also works well outside of a Leadership focused build, as the extra card draw and the high willpower can be splashed into nearly every deck. A threat cost of 9 is also a bargain, as Leadership heroes tend to be 10+ threat. I feel like this hero will be replacing Sam Gamgee in many decks, who is still one of the most splashed Leadership heroes in the game. Gildor can also be an alternative to Theodred, if you prefer to get more cards than resources. Of course, you can also run the two of them together, fuelling Gildor through Theodred’s ability. The resource for his ability does have to come out of his own resource pool, so it isn’t very flexible, but decks that run just a little Leadership and have no need for Gildor’s extra resources can simply spend them for cards. Gildor’s Noble trait can also be used to get a few extra resources to fuel his ability through cards like Hunting Party and Captain’s Wisdom. He can also be used for good effect in a Noldor deck, in case you haven’t drawn Elven-light in the early game. Though I think that Noldor (and especially Vilya) decks will want to run a Messenger of the King of Gildor’s ally version. Still, there are a great number of uses for Gildor, and I’m sure that he will see a lot of play now that the international community can finally play him without having to pay a lot of money for the CE+shipping.
Allies
Wandering Exile

Continuing the Leadership Noldor character trend, we get the Wandering Exile, which sports fantastic art that made me double-check if it was a Magali piece (it isn’t). The Exile is 3 cost in Leadership, but can be made a lot cheaper with cards like To The Sea! To The Sea!, since she is a Noldor ally. 2 willpower is good to have on a character like this, and 2 hitpoints will make sure that she can survive a bit of direct damage. The Exile also has 2 attack strength, which is a bit of a surprise looking at the art. But you don’t have to choose between either the willpower or the attack strength, you can have both! That’s because the Wandering Exile can be readied after she commits to the quest by discarding one card from your hand. This allows her to be uneffected by a Necromancer’s Reach, and will allow you to use her attack strength during the combat phase. This is especially important during Battle quests, where you use her attack strength to quest. Now you can send her to the quest ánd attack with her, which is often a hurdle during Battle quests. While Noldor decks already have a ton of cards that can discard cards from their hands, having an extra one in Leadership helps out a lot. You can even ditch the card you got with Gildor if you don’t need it or need to have it in the discard pile. For instance, if you have two copies of Elwing’s Flight in your hand, you can ditch one to ready the Exile, and then play the other copy to ready (at least) 2 other characters and give them +2 willpower. This discard option in the quest phase has many uses, and you get a competent attacker for it in return. The cost of 3 resources will be a little high to some, but considering she has no wasted stats and can benefit from a Noldor cost reducer and the Leadership sphere generating resources, I think she will hit the table in many games.
Odo Proudfoot

I simply love the flavour text on this card, just because it is such a comedic moment in the books and really embrace the funny nature of the Hobbits. But Odo has a lot more to offer than just his flavour text, as he is a 2 cost unique Spirit ally that has a solid ability that the Hobbit deck can make use of. The stat line of 1/1/1/2 isn’t great, but makes him versatile enough to use for several tasks, including sending him to tests. Being a unique character makes him a target for several buffs, like Leadership Merry, The Arkenstone, and the Fellowship contract. He will be fantastic for a Hobbit-based Fellowship deck, as he is rather cheap, and will fetch a Hobbit ally from the top 5 cards of your deck when he enters play. This allows you to keep the flow of allies going, and the extra card draw is great for the archetype. Since Odo is a Hobbit himself, he will be a target for effects like Tom Cotton, which increases his attack strength by 2, which improves him to be a 3 attack ally, which is quite powerful. Besides that, Odo has no realy synergy with having enemies engaged with a higher threat, making him a reliable ally in all situations. But after he has entered play and has been in play for a round, he won’t be doing much unless you give him attachments like a Hobbit Pipe. He’s fine to have another character on the table, but you would actually like to hit this ally for Raise the Shire to have him draw you some more allies.
Northern Bowmaster

This is the only card that has remained a mystery for a while. The art was known to us as the card was revealed in one of the card fans in the original article on this pack, but the ally’s stats and most of the textbox remained unknown. I for one would not have guessed that we would get another 1 cost Tactics ally. Dunedain allies tend to be a little more expensive than other traits (with some exceptions), so this will help the Dunedain deck in the early game. For the single resource, you get a 0/2/0/1 ally, who has the Ranged keyword as well. Gone are the days that we had to spend 3 resources on a 2 attack Ranged ally. The reason as to why this ally is so cheap for his stats and his keyword, is in his textbox. You can only play the Northern Bowmaster while you are engaged with an enemy. This of course plays into the synergy of the Dunedain archetype, which love to have more enemies engaged with them to get stat buffs, cost reduction, and extra abilities. This Bowmaster is therefore a situational ally, but a good one to use to get cheap Ranged characters on the table. This is useful for a variety of effects. Some enemies can only be targetted by Ranged characters, and some events like Skyward Volley and Rain or Arrows require the exhaustion of a Ranged character. As a regular ally, the Bowmaster won’t be doing too much, as his stats are pretty low. They are comparable to the Galadhon Archer, who costs 1 resource more for its ability. The 1 hitpoint is a bit problematic, but can be resolved with attachments like Squire’s Helm and Raiment of War. Other attachments also go well on this ally, such as Ranger Spear and Ranger Bow. The Warrior Sword is also an excellent tool for this ally to get its attack value up, making it a great Ranged ally that is cheaper than the Fornost Bowman. For its cost, the Bowmaster is better right out of the gate than other allies of its cost, like the Knights of the Swan, who lack the Ranged keyword and need several copies to be in play. The really limiting factor with this ally is that you have to have an enemy engaged with you in order to be able to play him from your hand. This rule does not restrict you to play the Bowmaster from your discard pile (Stand and Fight) or from the top of your deck (A Very Good Tale or Timely Aid, though you hope for some stronger allies with those events). You should also have no problem with getting an enemy engaged with you as a Dunedain player. Mablung and Dunedain Hunter can grab you an enemy in the planning phase, allowing you to spend a resource to play this ally from your hand. While not the strongest ally out there, this one has no wasted stats and has a great value for that single resource you spend to get him into play. While I would have liked to pair this ally with Hirgon, you cannot benefit from the cost reduction sadly.
Attachments
Stone of Elostirion

Meh, it’s alright.
Are you kidding me?! Another Palantir??? I am in love with this cycle and especially this card! To get another one of the Seeing Stones is great, even though it is the lamest one of them all. The Elostirion Stone wasn’t a part of the network of the other 6, but instead was only able to show the Elves the shores of Valinor. Still, it is better than getting another weapon attachment in the card pool! Going back to the actual card, the Elostirion Stone is a Guarded X attachment that can only attach to a location. This is a lot like the Mithril Shirt, but then in Lore. The fact that this attachment will only ever draw a location is great when you have none in the staging area, allowing you to at least have a travel destination during the next Travel phase. Lore is also a sphere that specializes in location control, allowing players to place a lot of progress on the revealed location to immediately get rid of it. This allows the controlling player to attach the Stone of Elostirion to a hero of his choice. That hero gets +2 willpower, and the player gets to draw an extra card during each resource phase. This makes it a counterpart to the Necklace of Girion, which did the same thing but with a resource instead of a card. Depending on your preference, you might prefer the Necklace over this one, but the extra card per round must not be underestimated. Play this with Lore Bilbo in true solo, and you are drawing 3 cards during the resource phase (4 if you also manage to complete Prepare for Battle). The extra card draw that this grants is fantastic, not to mention the extra 2 willpower on the attached hero. This does take up a restricted slot, but can be regarded as a Lore counterpart to Celebrian’s Stone or the Silver Circlet, but with an extra card per round on top of the willpower. This will kick Erestor decks into overdrive, which can be a good thing if you have included too many discard options in your deck. But playing this on other players who are lacking card draw since they are not playing Lore can be even better. Now the mono-Tactics player doesn’t have to worry about drawing Weapons for Foe-hammer, you simply mustn’t forget to draw the extra card each round (which I can see happening a lot). A fantastic card that gives me a sliver of hope to see other Palantiri in the final 2 packs.
Well Preserved

To complete the trend of getting a Master attachment for each sphere, we have this card for Lore. It can only attach to the Ringbearer, and will give that hero a constant +1 hitpoint. This is important, as you don’t want to have your hero with the One Ring dying on you, which would end the game. For 1 Lore resource, you get to play this attachment, which also comes with an optional response at the beginning of each round. Should you choose to raise your threat by 1 and exhaust the One Ring, then you may heal all damage from the attached hero. This cheap method of healing all damage from your hero will ensure that they remain alive for longer, even if you have no other means of healing. On heroes like Frodo (who often gets the ring in decks), this ability is less useful, as you won’t have that many hitpoints to take damage on, but if you combine this with the Spirit Master attachment Inner Strength on your defender, then there is little risk in losing him. A few bits are important though, the healing can only occur at the beginning of each round, meaning you can’t heal between attacks. You also have to exhaust the One Ring for this effect, meaning it will be down until the end of the round. This means that you cannot rely on any other Master cards that require that you exhaust the One Ring. You will lose out on other effects, but the healing can make it worth it, it will just mean that you won’t be doing much with the ring this round. Before we move on to the next card, it is worth mentioning that the community did already find a way to break the game somewhat with this card. Core Set hero Gloin loves taking damage, and has received several attachments over the years to obtain even more damage so that he can generate more resources. With Golden Belt in the previous pack, he can now equip 3 Citadel Plates, boosting his hitpoints through the roof. With this attachment, he no longer has to rely on loops with Warden of Healing, he can simply heal 12 or more damage off of him for 1 threat, which would have generated him a ton or resources. This does come at the cost of extra threat, and the risk of losing Gloin with the One Ring, ending the game, but as long as you are careful with this, Gloin can fund your entire deck within a few rounds with very little setup required. I am looking forward to seeing this deck archetype re-emerge on RingsDB very soon.
Valiant Sword

The Noble trait really doesn’t have a lot of things that work with the trait, other than a few niche events. But now it gets a great new Weapon to use, even if it is rather basic. The Valiant Sword is a 1 cost Leadership attachment that will fill a Restricted slot (making it free in a Three Hunters deck). The attached character gains a standard buff of +1 to attack strength, but if their threat is 40 or higher, it gets increased to +2. You aren’t allowed to dual-wield this Sword though, as it is only limited to one per character. Still, this is a good upgrade for Gondor decks that were still using Sword of Numenor or Dunedain Mark to buff their attack strength. With the recent push towards Valour, Gondor will have several good targets that benefit from this weapon. Tactics Boromir might be my favourite target, just because he really needed a good weapon for him to not have to rely on Gondorian Fire for increased attack. With his built in readying effect, you will end up at 40 threat in no time at all. The Sword is also good on Faramir, but Prince Imrahil is also a surprisingly strong pick as he has a high attack value to begin with. Obviously, there are other good Noble targets outside of the Gondor trait, though many will have their trait-specific weapons as well. Not all archetypes like to be above 40 threat either, so I will regard this a weapon used mostly in Leadership Gondor decks. The Sword is also nice as it provides a static buff and does not have to exhaust to trigger anything. Pair this with some Tactics events, like Swift and Strong, Goblin-cleaver, or Foe-hammer, and you will get much more use out of this weapon attachment. Since the Valiant Sword will always provide you the +2 attack when your threat is 40+, it makes for a great weapon to use during the Black Gate Opens! and Mount Doom, as the quests allow your threat to go up to 99 in those. This makes it a cheap way to increase attack strength, but keep in mind that the weapon can only go on Noble heroes. If you are playing thematic decks, Hobbits would pair poorly with this weapon unless you play Diligent Noble as well.
Events
Reckless Attack

With Saruman and his Staff having been released in the previous AP, we needed a couple more Doomed cards to fuel their abilities. With a Lore and Leadership event already released, this pack gives us new Tactics and Spirit Doomed events. Reckless Attack is the Tactics event and will cause each player to raise their threat by 2 (or 0 in case Saruman’s Staff is exhausted to lower the cost). In return, each player may deal 2 damage to an enemy engaged with them. This is a great event to kill off some enemies before they make another attack, though there are a few limitations to the event itself. The biggest of these is that the event assumes that each player has an enemy engaged with them. This is not always the case, which can lead to some players raising their threat by 2 for no effect. The same problem arose with Horns! Horns! Horns!, but I think that the problem is smaller in this case, as the players can plan ahead to take an enemy engaged with them to take damage with this event. The event is also not limited to non-unique enemies, allowing everyone to deal damage to unique enemies that are considered to be engaged with them, like Dagnir or Durin’s Bane. The only thing that blocks this event is immunity to non-combat damage or to card effects. But I can see 2 damage to potentially 4 enemies be a lifesaver during Goblin-swarm quests like those from the Dwarrowdelf cycle. Not many enemies in The Seventh Level for instance can survive 2 direct damage, clearing the board of enemies. This saves you from having to defend against these enemies, and will have the benefit of readying Saruman. Outside of Isengard decks, this card can replace Swift Strike as it does not require you to save 2 resources to play it. In direct damage focused decks, this will be an amazing event to get rid of enemies that are being damaged through all sorts of effects.
Defiant Challenge

The Spirit Doomed event of this pack is another one with Doomed 2. In return, the players may each ready a character they control. This is quite useful for quests where you might need extra action advantage. It is also a good emergency button to ready a few heroes in case a terrible treachery is coming up, or if more enemies were revealed than you would have liked and now you need characters for combat. This event is very flexible, allowing you to ready characters at any point as long as there is an action window. The Doomed 2 cost is quite steep, but considering that Saruman’s Staff will lower that to 0, it is probably going to be an auto-include in many Doomed decks. I can also see it being used in other decks, as Spirit has plenty of ways to lower your threat after you have raised it by 2. Just play a Galadhrim’s Greeting for everyone, and you are back where you left off, but now with more ready characters. The fact that this doesn’t only ready heroes is important as well. You can ready utility characters with this as well, like a Zigil Miner or a Warden of Healing. I think it will be most important for readying Ranged and Sentinel characters though, to provide extra combat support during the combat phase. Another benefit that this event has is that it will ready Saruman on top of any other character you control. This is great value in such an Isengard deck, and even has awesome art on top of that.
Helm of Secrecy

This 4 cost event really feels like a contract to me, as it will change the way you play the game halfway through. For 4 resources, you can play this neutral event that is limited to 1 copy in your deck. You then get to select a hero you control, and remove all tokens from it (including resources, damage, poison, etc). You then select a different hero from your collection (who doesn’t belong to the Baggins or Fellowship sphere) who has a threat level equal to or lower than the hero you removed from the game. You swap those heroes, but can attach any of the former hero’s eligable attachments over to the new one. You also place any damage tokens that the former hero had on the new one. This means that you can’t use this event to heal up the hero you had, the damage simply carries over to the new one. This does mean that Hobbit heroes have to watch out, as they can more easily be killed on arrival through this effect. The event does not have a victory value, so you might be able to reuse this event several times if you reshuffle your discard pile into your deck. The cost of 4 resources is pretty steep, but make sure you use the resources from the hero you are removing from play first, as those do not carry over to the new one.
When it comes to what possible combinations are possible for this event, a few come to mind. The most obvious one is to exchange Tactics Eowyn for Spirit Eowyn after her big reveal. You now get access to more willpower by allowing players to discard cards from their hand. Other 1-to-1 replacements can be Beregond. You build up Tactics Beregond with a bunch of cheaper weapons and armor, and then replace him with Spirit Beregond to get to use his threat reduction. Since the new hero will come in ready (else it would have said so on the event), you can swap an exhausted Beregond for a ready one to take another defence. Other good swaps are for instance a Saruman deck that eventually swaps Saruman for Lore Aragorn in order to drop threat. While Saruman’s attachments probably won’t fit well on Aragorn, you do remove Saruman’s restriction on threat reduction. You can reset it afterwards with Aragorn, giving you a second life as it were. Some less specific swaps would be to swap in Smeagol after a while, as this bypasses his setup text to include Stinker. You now have a solid hero with a useful card draw ability that does not turn into an enemy. You can also swap out of heroes with one-time abilities or setup text. Thurindir, Mirlonde, Folco Boffin, Galdor of the Havens, and Denethor are good picks for this. There is a lot you can do with this event, though you will need to find the one copy in your deck in order to pull it off.
Contract
Council of the Wise

This is the first time we’ve seen a one-sided Contract, but I am not complaining. It is nice to be able to quickly setup your deck with the contract, without having to read 2 cards worth of setup. You also won’t risk losing the bonus that this contract gives, unlike the Fellowship contract that can flip back and forth. Unlike many of the cards in this article (other than Gildor), I have actually played with this card already. I’ve had some good success with the contract, though it does present a few challenges in the way you build your deck.
But let’s go over the contract first. The first line of the contract is the limiting factor of this contract. Rather than preventing you from including a specific card type in your deck, you are not allowed to play any duplicates in your deck. To be more specific, you cannot have more than 1 copy of each card by title in your deck. This prevents you from cheating the contract with a copy of Core Set Gandalf and a copy of OHaUH Gandalf for instance. All cards in your deck will be 1 copy only, which has some positive and negative effects on the consistency of your deck. The positive things are that you are completely immune to effects like Savage South from the Mumakil. Since you have no duplicates in your deck, you can’t discard them, so your boardstate is safe from those effects. It also opens up the card pool a lot. Now that you are cutting all duplicates of your staple cards, you have the freedom to include other events and allies that you normally wouldn’t use. This gives you the chance to appreciate older cards that haven’t been included in a long time, but are suddenly good enough to include in your deck.
On the negative side of things, this contract shuts down a few archetypes right away. Outlands for instance will not like this contract, as they heavily rely on multiple copies of allies in the deck. The contract also prevents you from finding important attachments with more consistancy, as there is only 1 copy of the card in your deck. If you are playing an Elrond deck, and Vilya is at the very bottom of the deck, you will need some help with digging it out. Decks with this contract will also want to try and avoid quests that discard cards from their deck, as they might lose some important cards that they might not be able to fish out of their discard pile again (Under the Ash Mountains is a perfect example of such a quest).
But all is not lost, as in return for building a deck with only one copy of each included card, you get a nice reward on this contract. Whenever you play an event, you get to select if you want to gain a resource somewhere, draw a card, or lower your threat by 1. You can only select each option once per round, but if you manage to play 3 events per round, you will have a great engine going. The card draw is probably my favourite. It allows you to go through your deck a lot faster, and makes up for the lack of extra copies of card draw events in your deck. The extra resource is also nice, as you can spend that resource later in the round to pay for another event, to get a different benefit. The constant threat reduction allows you to stabilize your threat level each round, which is a great help in some quests with important threat levels that you don’t want to cross (30 and 35 for example in the first cycle). The inclusion of this added benefit on the contract will make Council of the Wise decks more Event-focused, where Fellowship and Three Hunters focused on (unique) allies and attachments. There are a few things you will want to include in your Council deck though, such as a way to find any card you want in the deck. Gather Information and Heed the Dream are important tools here, as you can find that key attachment or ally you need for the deck to function as normal.
Like I said, I have given this contract a try, and found it really fun. You will need to draw your events at a consistent rate though, else the deck starts to grind to a halt. I have played a deck based on the Silvan trait with this contract, as that trait has a wide variety of allies and events that can get you to those 50 different cards real quick. I noticed that the deck suddenly had space for cards I otherwise never use, like Children of the Sea and Daughter of the Nimrodel. I am looking forward to seeing what other archetypes you all can come up with once the pack releases worldwide!
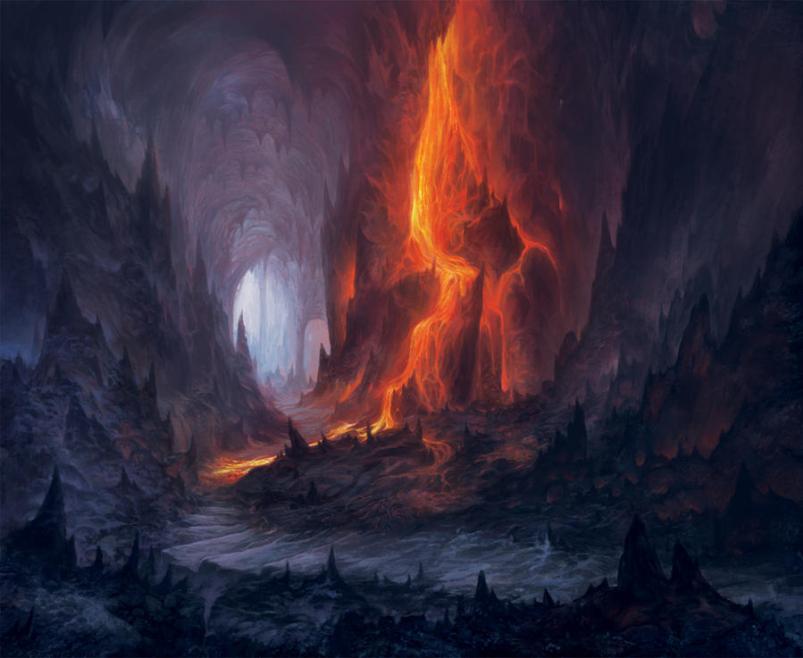
The Quest

While I haven’t personally played the quest, I have seen many of the encounter cards already, and got a feel of what the quest will be trying to do. With 2 main quest cards having 25 quest points each, this quest will require a lot of willpower, and will probably be tough in true solo. However, there are also several side-quests that will be troublesome if you encounter them. Some of these side-quests will force players to travel to locations, while others prevent the players from dealing more than 4 damage to each enemy per round. This is a problem, as several big enemies are included in the scenario, including Nameless things and trolls.
The biggest mechanic in this quest will be that players have to continuously discard cards from the top of their decks during the scenario. If ever a player has no cards left in their deck, they are eliminated from the game. If this sounds familiar to you, you are not mistaken, as the same mechanic got used in Deadmen’s Dike and Road to Isengard. It is a great way to keep you pressing forward, without actually using time counters. You will also be missing out on some player cards that you end up discarding. To make matters worse, you can no longer shuffle cards from your discard pile into your deck through player card effects. This shuts down Will of the West, making you look for ways that the encounter deck allows you to shuffle some cards from your discard pile to your deck in order to buy some more time.
The quest won’t be an easy one, but the journey to Mordor isn’t supposed to be easy. We do get a break from the Easterling enemies though, which is the first time this cycle. But with dangerous locations, big creature enemies, and difficult side-quests, it will be a while before you emerge from underneath the other end of the Ered Lithui. I can’t wait to sink my teeth into this quest, and am looking forward to hearing reports of those that have tried the quest themselves.
As I mentioned in the beginning, the pack has not been widely released, so players will have to be patient before getting their hands on this. In the meantime, there are plenty of quests to play, and you can also go back to some older quests with new rules added. Caleb has challenged the community to beat some scenarios using the Day/Night objective from Wastes of Eriador. It has been a real twist to some quests, and I can highly recommend trying it out.
I am not sure if I will do an article like this on the Land of Sorrow next. It will depend on how the situation in the world develops, but hopefully we can all get the pack in our shops like normal. The contract of that pack has sparked the community to come up with some amazing deck ideas, and I hope that a small trickle of spoilers will allow the community to keep the conversation going.

Thanks for writing this, was an interesting read!
LikeLiked by 1 person
“Caleb has challenged the community to beat some scenarios using the Day/Night objective from Wastes of Eriador. It has been a real twist to some quests, and I can highly recommend trying it out.” Which Quests are Those? I Own The Wastes of Eriador but Haven’t Cracked it Open Yet. Not Sure How it Works. Which Quests are Compatible with This Day/Night Cycle?
LikeLike
The challenge involves taking the objective from that pack, and trying to beat any other scenario with it. This makes those scenarios more difficult due to the limitations that the objective provides, such as engagement checks or revealing additional encounter cards. I have had success with it against Passage through Mirkwood and The hills of Emyn Muil, so I would advise starting with an easier scenario and see how this impacts your game. All quests should be compatible with this objective for the sake of this challenge, though some might be next to impossible to defeat. Best of luck with it!
LikeLiked by 1 person
Thank You! How might it stack up against my favorite Quest, 𝘛𝘩𝘦 𝘚𝘵𝘰𝘯𝘦 𝘰𝘧 𝘌𝘳𝘦𝘤𝘩? I ask this because that Scenario utilizes a similar mechanic, with 𝑬𝒗𝒆𝒏𝒕𝒊𝒅𝒆. 𝑴𝒊𝒅𝒏𝒊𝒈𝒉𝒕. 𝑫𝒖𝒔𝒌. as Objective Cards. Would it simply only break the immersion of the scene, with a Day/Night Cycle in tandem with a Night Cycle, or would this break the mechanics of the Scenario? Thanks again!
LikeLike
While the theme of the quest will indeed be broken as you will have 2 objectives that deal with the loss of sunlight, I don’t think it would break the Stone of Erech’s unique objective cards. The Wastes of Eriador one has different names, and as such, shouldn’t interact with the encounter cards from Stone of Erech to trigger Midnight effects as quickly as round 2. So you can play the scenario as normal, but would have to break immersion a little as it is becoming day every other turn. Maybe think of it as how late in the day or night you are travelling. So for night it would be Eventide, Dusk, Midnight, and for day it would be something like Dawn, Morning, Noon. Though some encounter cards would be very weird.
Bottom line is that the quest should be compatible with the extra rules from the challenge, though I am interested to learn how it would impact the difficulty of that quest.
LikeLiked by 1 person
I’ll let you know here. Still building a deck for this Challenge, from Caleb. Thanks ever so much. This clears everything up for me.
LikeLiked by 1 person