With COVID-19 keeping many of us around the world self-isolating or quarantined, communities like this one can keep connected through the wonders of modern technology. Some of us have had to learn new ways of getting our work done from home, becoming proficient in communications technology so advanced that would have seemed laughable nine years ago, when this game first made its debut on the world stage. And the support and fellowship we can offer each other will undoubtedly help us to persevere and see us through this difficult time.
 For some folk constrained by their technology, or lack thereof, playing this game over the internet isn’t an option. And even for those who have the capability must admit, there’s nothing quite like picking up the actual physical cards, shuffling them together and setting off on another adventure. Now unless you are able to convince your spouse / partner / flatmate / offspring / inmate to play with you, this means you’ll be going it alone. But fear not! This is what the game is built for, a struggle between you and the forces of Sauron. And so here I submit for your consideration some of the best quests out of our vast catalogue that are suited for solo play. You can find a guide for playing two-handed on the excellent blog Tales from the Cards, but for the purposes of this article, we will be considering these quests from the perspective of a true-solo player.
Passage through Mirkwood
While it would be easy to shrug and say 2011 was a simpler time, I shall instead merely say our quests were definitely a lot simpler back then. Now is the perfect chance to revisit that first quest which began our love affair with this game. Enjoy the straightforward progression conditions, the locations that actually help you without a drawback and the enemies with no textbox. Revel in a quest where the Big Bad Boss has all of 5 attack strength, but where an oversized wasp can one-shot a hero. Perfect for a rage-quest or easing yourself back into the game, you will get out of this quest exactly what you put into it. Personally I like to activate both of the final quest cards at once instead of having to choose, so you must both place 10 progress on the quest and defeat Ungoliant’s Spawn to win. Or if you’d prefer a little bit more meat on your quest, give the Nightmare variant a try, if for no other reason than that the artwork is phenomenal.

The Redhorn Gate
If you ever want to feel the chill of fresh mountain air while being trapped indoors, this is the quest for you. The art and mechanics of this quest are so evocative you almost shiver every time you reveal a new encounter card and sired a fine legacy of quests with an emphasis on the weather including The Weather Hills, Voyage Across Belegaer and Roam Across Rhovanion. You will need to cater your deck specifically for this quest, dealing especially in willpower boosting and location control. But the reason this quest is especially suited for solo-play is the treachery Snowstorm. This can potentially devastate your board state in the later stages, as is befitting for a card with that name set on a mountainside, and so you will want to see it as little as possible. With only one player and so only encounter one card revealed each quest phase, the odds of you seeing any copies at all plummet. Remember this quest was designed in the days when encounter decks were as thick as your player deck so you could go whole games without seeing copies of specific encounter cards.
This quest is one that starts off gentle and allows you time to build up your board state before moving on and attempting the summit itself. You are given an objective-ally you must protect in the form of Arwen Undomiel. She is not a complete liability however, as every time she exhausts to do something one of your heroes is given an extra resource, making it easier to get your forces assembled. Be sure to take plenty of location control along to this quest, getting location locked is a fate even veteran players can easily fall into with this quest. Also, while there the emphasis is less on combat for this quest, their strength grows with the amount of locations in the staging area so having more players reveal more locations makes everything that bit harder.

Foundations of Stone
From the roof of Middle Earth we go now to its lowest depths where Nameless Things gnaw at the roots of the world. This quest is a firm fan favourite and will show up on list after list of the best quests in the game. Really this would suit any number of players, but in solo play the emphasis is on its unpredictability as opposed to the separate staging areas that multiple players would be split off to. As discussed here, because of this quest’s capacity to throw multiple and diverse challenges at you, this is a perfect quest to test your decks against. Don’t expect consistency between your attempts at this quest however. The encounter deck is still quite thick, and the random Stage 4 you will face means that no two games will ever be the same. And therein is the delight of this quest. As a solo player you can return again and again, not knowing which challenges will need to be overcome and so you must be prepared for them all, whether the Nameless Things hunt you down in greater numbers or if you lose your way among the labyrinth tunnels beneath the mountains. This is a longer quest however, one to savour as opposed to rushing through it, so settle in and make yourself comfortable before you attempt this classic.

Peril in Pelargir
Don’t skip this one, keep reading and hear me out. If you don’t like what I have to say then fair enough, but I have a slightly controversial opinion here. I really like this quest. For many of us our first attempt at this quest went rather poorly. As did our second, and indeed our third. Passage through Mirkwood prepared us for the first two cycles of large and unpredictable encounter decks, quests that have difficulty spikes ranging wildly between playthroughs and mechanics that were only beginning to stretch the mechanics of the game, typified in scenarios like Hunt for Gollum, Road to Rivendell and The Long Dark. Peril in Pelargir serves as a Baptism of Fire for the new, sleeker and more dynamic encounters we would see from here on out, and it punches hard.
But the card pool has expanded massively since this quest was released, and we now have tools to keep up with it without the challenge being neutered. And there still is plenty of challenge. Players need to hit the ground running and be ready to face both Battle and Regular questing. This quest suits solo play because enemies and treacheries come at you in a much more manageable pace, allowing players the chance to build up a bit of a board presence before they are overwhelmed by too many copies of Collateral Damage. The running battle is tense and will not let up until you finish the quest, especially with enemies like the Umbar Assassin lurking in the shadows waiting for you. However the feeling of accomplishment you get when you complete the quest is palpable and brings me back to it again and again.

The Antlered Crown
One of the larger set-piece battles we get in the expanded lore Caleb has created for us, this quest forces players to balance locations with the Time keyword and an ever-growing host of Dunlendings. The Antlered Crown is one of the better quests in the Ringmaker cycle, and is particularly suited to solo play. The pace is relatively fast, unlike some other quests that shall remain nameless, without ever leaving you overwhelmed by it all, as opposed to Fords of Isen for example. And unlike The Three Trials, a good and enjoyable quest, the difficulty curve scales well with the number of players making it just as difficult for a larger number of players, if not more so.
Despite the amount of enemies you will face here, the key to this quest is the locations coming into play, which all have nasty effects that trigger when their last Time counters are removed. With less players, you will see less of these locations come off the encounter deck, and by extension there will be fewer of their effects being triggered. Chieftain Turch is a great boon to you as your engine gets up and running, though if your deck is doing its job he should become a background player during the later stages of the quest. One thing to remember is that you will get punished for having more cards in your hand, so either don’t take as much card draw as you normally would or step up your resource generation so you can play your cards faster. An excellent way to cap off the Ringmaker cycle, taking the best of the quests that had gone before and distilling those elements to create a battle you will not soon forget.

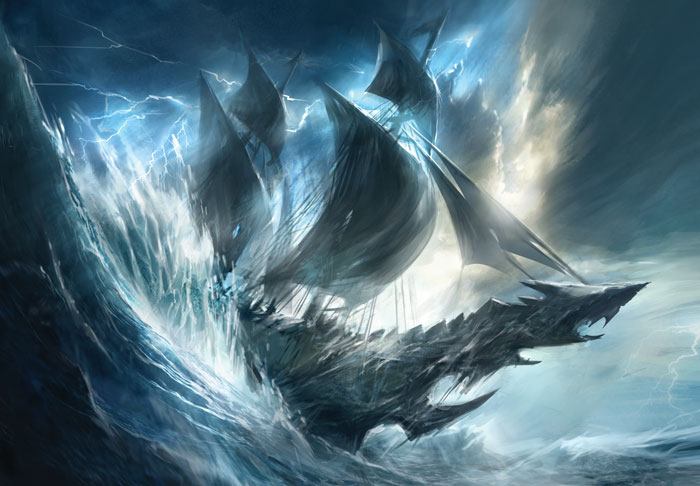
Flight of the Stormcaller
Another fan-favourite on par with Foundations of Stone, this quest exhibits the Dreamchaser cycle’s signature Sailing mechanic at its white-knuckle best. Voyage Across Belegaer introduced it to us and taught us how it works, and we shall see its triumphant crescendo in Storm on Cobas Haven, but here is where Sailing comes into its ascendancy. This is a quest to sit down and relish as you chase down an enemy ship across the seas of Middle Earth. Here mechanics and theme come together in a beautiful display of the finest sort as you weave together a story worthy of Johnny Depp and Geoffrey Rush. I am even going to point to the art of the cards as there are very few that are not absolutely stunning to behold on your tabletop. This quest should be particularly suited to solo players as you start off with two ships under your control, just as you would with two players, but you reveal half the encounter cards you otherwise would.
The set-up takes a wee bit of preparation, but this is one of those quests that has the pacing tightly nailed down. When you are trailing Sahir’s ship they will not be as punishing, so it is unlikely you will lose outright within the first turn or two avoiding a great deal of frustration some other quests can cause by cutting players down too quickly with encounter cards that have devastated unprepared board states. But the difficulty scales as players gain ground, ensuring the challenge is not lost as you build in power. This avoids the pitfall on the other end of the scale some quests have where encounter cards are just irrelevant because you have become so powerful you are able to completely negate them outright. No matter whether you win or lose, this is an experience you will always enjoy time and again.
Desert Crossing
Coming from the high seas and the Sailing mechanic, we arrive at the harsh deserts and the Temperature mechanic. Here you must not only survive the attacks of strange and diverse monsters and a steadily increasing threat, but also the very climate itself as you must attempt to navigate the arid sands of Harad to find shelter. At the end of each round the Temperature rises by 4 degrees, and should it reach 60 your heroes collapse from heat exhaustion and you loser the game. This makes the quest a race against time and Mother Nature herself, as here your worst enemies are not the Were-worms or Carrion Birds but the very elements themselves. Again this quest is dripping with theme and the pressure of the growing temperature will not allow you to slow lest you be overcome before your escape, providing you with another breathless experience filling you with relief when you finally complete that last quest card.
As is often the case with these quests, the reason why solo players will be particularly suited to this quest is because with fewer encounter cards being revealed there are concurrently fewer effects to raise your Temperature. From a logistical point of view, it is also easier to track your Temperature as you only need to use your second threat tracker, which wouldn’t be an option if you were playing two-handed but have only purchased the one Core Set. From a gameplay perspective you will need to pack lots of willpower because you are on a timer and haste is key to completing this quest before dehydration takes you.

Lost in Mirkwood
Coming once again to Mirkwood for this one for the first time outside the Hobbit since Return to Mirkwood, the dangers here are greater than once they were. You don’t have to make progress on the main quest in the tradirional sense, instead anytime progress ks put on the main quest if you have no Objective-Locations in play, you are to discard that amount of cards from the encounter deck and place the topmost Objective-Location in the discard pile into the staging area. When you explore Objective-Locations you get to progress on to the next stages of the quest, with paths diverging depending on which location you explore.
Solo players may have an easier time of this quest because of the amount of locations that are spat out at players. Having enough Objective-Locations in play will allow you to focus more on tackling the enemies that will assail you without getting overwhelmed by location lock. And just like Foundations of Stone mentioned earlier, the different quest stages you face will change on every playthrough meaning every experience is unique. The difference with this quest is that the crescendo is one last fight, either with one Big Bad Nemesis or a group of foes that gang up on you. Either way the ending is a suitably cinematic way to escape the forest once again.

A Shadow of the Past
What better way to spend your time inside than to begin the great Saga Campaign that is the jewel in our game’s crown. It helps that A Shadow of the Past is the perfect jumping off point, a quest that is both straightforward and easy to play without obscuring the wonderful story unfolding before you. There are only a very few enemies in this quest, although they are not to be trifled with. A solo player will do well in revealing fewer of them, and in having to survive fewer Hide tests that are the defining feature of this quest.
Solo players are also able to play through this quest in its most thematically appropriate form with an all-Hobbit lineup. You will get Frodo as your free Fellowship hero, and taking his three companions not only feels like you are reliving the books and the films, but is also a very powerful build when you have all the pieces in place. If you want a real adventure though, check out Matt and Caleb’s challenge to the Community here, where your heroes get added as the story unfolds and your deck is preconstructed for you. However you decide to play this one, either as a stand-alone or as the first steps onto the Road to Mount Doom, you will always relish your time here.

Helm’s Deep
The legendary battle itself, as if you need any excuse to play it. But I will recommend this for your consideration as a solo player over other epic set-piece battles. Helm’s Deep finds itself in that magical spot where theme, mechanics and difficulty all come together beautifully so that players of every disposition can enjoy this battle. This is a scenario lacking the brutality of Battle of Carn Dum or Assault on Dul Guldur, but more cinematic and grandiose than Assault on Osgiliath or Fate of the Wilderland. Helm’s Deep’s central mechanic of having the quest phase reversed is elegant and simple, unlike the equally epic though more complex Storm on Cobas Haven, so that you feel as though you are on the backfoot the entire battle until the glorious climax at the end.
As with so many quests on this list, any number of players will enjoy this one. But a solo player especially benefits from the slower rate the cards will come off the encounter deck, especially the explosive Devilry of Saruman. Nevertheless the pressure will be there from the start, and that first quest stage where you have to weigh up a short term gain and a potentially devastating turn further down the line is even more agonising when you realise you cannot rely on your friends for aid. And this is only the first of many decisions you will have to make that could decide the fate of the battle, for every location matters here and every single enemy is a threat. Whoever you take to defend this ancient fortress will have their work cut out for them, whether you stay faithful to the books where Rohan stands alone, or bring in Haldir and the Host of the Galadhrim sent (inexplicably) with greetings from Elrond. Perhaps if Gondor had come to Rohan’s aid the Deeping Wall would never have been breached? Who knows, for what can men do against such reckless hate?

And what more shall I say? I have no time to speak of the challenge that Conflict at the Carrock will bring, or the claustrophobia of Flight from Moria or the perils of The Druadan Forest. Nor of Trouble in Tharbad’s breathtaking chase, The Dread Realm’s horror or Temple of the Deceived’s sprawling junges. For all but a very few quests can, and should be enjoyed when playing by yourself. Actually scratch that, all the quests can be enjoyed when playing solo. Yes, even Nin-In-Eliph, just as long as you go in with your eyes open. And remember that this time of separation is just a passing thing, that one day we shall be able to join together again around the gaming mats and reunite our Fellowships. But until that day, stay safe, stay sane and may Eru Illuvater guide your every step.


Terrific write up,thanks for sharing! This is a great reminder of those quests, and a strong push to go back and play them again! I’d also add ruins of belegost to this list, as I love how it ramps up in difficulty.
LikeLike