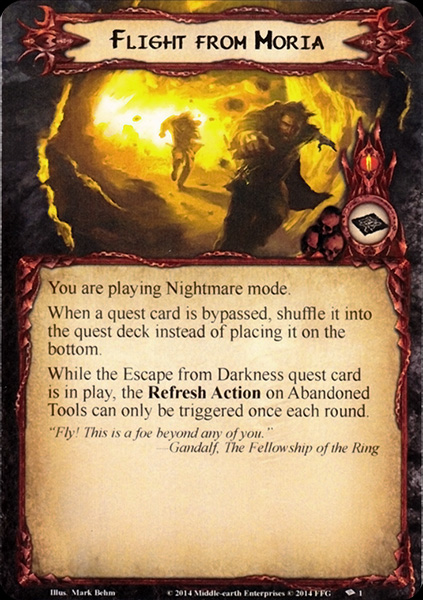
Rounding out the NM Khazad-Dum pack, the final quest from the box gets a major overhaul with this Nightmare version. The original Flight from Moria was, in my eyes, the weakest quest from the Deluxe box because it could either last just 1 round or take forever to clear if you got unlucky with the order of the quest cards. Couple this with the looming threat of the Nameless Fear that got stronger as you went on, and beating it the normal way was quite tricky. Luckily, we had pre-errata Boromir back in the day to exhaust 3 times with the Abandoned Tools to clear the final stage, but even if that FAQ never got published, this NM version shuts that strategy down. This version also cranks up the difficulty with new quest cards, more interactions with the Victory Display, and the removal of some of the easier cards from the encounter deck. You’d better quest hard and get lucky if you want to escape Moria with your lives!
Nightmare Flight from Moria

- Found in: Khazad-Dûm Nightmare deck, scenario 2
- Size: 16 new encounter cards, 3 new quest cards, 1 rule card
- Quest cards: 10, of which 3 are from the Nightmare version. 1 quest card got replaced from the normal version of this quest.
- Increase in difficulty?: Yes, there is a deeper focus on increasing the X-values on the Nameless Fear in this quest. Players are now also punished for bypassing quest stages, making this quest take longer and thereby more difficult. The new quest cards are also a lot more dangerous than the normal quest cards. Extra quest cards in the quest deck also decrease your chances of finding the ones you are looking for.
- Fixed loopholes?: One of the escape options that allowed players to escape on turn 1 has been removed from the quest deck. Instead, a new quest card has been added that forces you to spend 5 turns on there in order to escape successfully. If players want to get out with the Abandoned Tools, they must now spend 4 turns doing so, as the tools now have a limit.
- New mechanics introduced: Extra cost for bypassing the quest cards, more interactions with the victory display, easier to build up more victory points, new quest cards of which one allows you to escape.
- Play this scenario if: You enjoyed the normal version of the game but found it was too easy to get past the Nameless Fear. You want to really fear a potential 10/10/10/27 (or more!) enemy that will attack more often than in the regular version of the quest. You want to experience different ways to escape Moria in this quest and don’t mind a challenge.
- Solo or multiplayer?: I would really recommend solo for this quest. It has the tendency to be quite lengthy in solo, let alone in higher player counts. There are also several cards in the encounter deck that you would like to avoid revealing multiple copies of each round. Keep the number of players low for this quest in order to reduce the threat on The Mountain’s Roots, and limit the effect of Massing in the Deep and Orc Drummer.
- What to look out for: Well, there’s a Balrog in play. That would be pretty high on my list of “Avoid at all costs.” Besides that, you should be careful with exploring quest stages and adding cards to the victory display. Location lock is also a real threat in this scenario, so travel when you can. Sudden Pitfall in the early game can kill a hero. A Foe Beyond will also be very dangerous in the later stages of the game, so have a hero with plenty of hitpoints for this quest.
New Rules

There are 2 new rules in place for this Nightmare version of the scenario. The first one adds some more variety to the game, forcing you to shuffle any bypassed quest cards back into the quest deck instead of on the bottom. This discourages players from bypassing quest cards, as they might shuffle the entire deck up and run into quest stages a second time. It would seem better to explore quest cards instead, yet this adds victory points to the display, increasing the threat of the Nameless Fear. There will be more discouraging effects to bypass quest cards, so players will have to decide if it is worth it to shuffle up the pile again.
The second effect prevents players from escaping too quickly. In the normal version of the game, you could have one hero with multiple copies of Unexpected Courage (or other readying effects) claim the Abandoned Tools. Then, when you found the Escape from Darkness quest card, you could use the Abandoned Tools four times in the same phase, ending the game. Now, the new rule prevents this from happening. Players are no longer able to trigger the tools more than once per round. This forces players to stay at the quest stage for at least 4 rounds, holding off the encounter deck while one hero mines their way out of Moria.
New Setup
There are no new setup rules to this version of the game. Players do still have to remove all cards from the encounter deck (and quest deck!) as instructed by the other side of the rules card. Note that you will have to remove one of the quest cards and put the three new ones together with the rest of the Stage 2 cards. From there, the quest continues as normal, with the players adding in one more copy of A Foe Beyond than the number of players in the game. Players also have to reveal an encounter card per player for setup. From these new encounter cards, only Dismay and Fear is decent to reveal this early on, as it won’t be revealed during a quest phase. The rest of the Nightmare cards aren’t great to reveal this early. After revealing one card per player, the players add stage 1B to the victory display and advance to a random stage 2A.
Cards Removed
The following cards are removed from the encounter deck at the start of the game to make some space for the new Nightmare cards. These cards are either replaced by tougher versions or were too broken to keep included in this new version of the quest.
- 1x Blocked by Shadow (Quest card that allowed players to win really early on, replaced by Pursued by Shadow)
- 1x New Devilry (New rule is already shuffling the quest deck more often, 2 copies remain)
- 3x Stray Goblin (Easy enemy, especially in true solo)
- 2x The Mountain’s Roots (Easy location, especially in true solo, one copy remains in the encounter deck)
- 3x Chance Encounter (Pretty easy treachery that usually only brings back a Goblin)
- 2x Goblin Archer (With surging Goblins now in the deck, it wouldn’t be fair to keep these enemies in play)
- 1x Goblin Spearman (Easy enemy, replaced by the Swarming Goblins, who will return these Spearmen often)
- 2x Plundered Armoury (Beneficial location)
- 3x Cave in (Actually helps to prevent exploring quest cards too quickly, so it should be removed for this version)
- 2x Dark and Dreadful (Ghâsh will be dealing more direct damage, so this treachery is removed from the deck)
The Quest

This quest has always been difficult for me to review as the normal version of this quest can either be really difficult and take forever, or you can win by turn 2 if you are lucky. Fortunately, the new Nightmare version of the quest takes away the easy elements of this quest and swaps it for some tough decisions players have to make. Gone is the easy way out where you have to hope you draw a treachery in order to win on the next round. This is replaced by a chase that takes at least 5 turns, forcing you to play the game a little bit longer.
The setup of the scenario remains the same, meaning that you start with a 2/2/2 Nameless Fear in the staging area. Compared to the normal version of this quest, the Nameless Fear will grow in power a lot faster thanks to An Evil Fortune boosting the victory score, but also since new quest cards are easily explored. Ghâsh, A Wrong Turn, and Hasty Council all are explored in the blink of an eye and will be boosting the victory score that way. The good thing about exploring these quest cards is that you thin the quest deck a little more. This makes it easier to find the quest cards that allow you to escape the quest. The first of these is a single quest card that has the players run for their lives. Since this is a Nightmare quest card, I will go a bit further into depth later on. Players can also search for the Narrow Paths quest card, which ensures that they find the Abandoned Tools if the players have discarded it or have simply not come across it yet. If the Abandoned Tools is already in play, players can forget about searching for Narrow Paths and instead search for Escape from Darkness. There, the players will have to use the Abandoned Tools four times in order to win. This method should be familiar with the players already, as it was the main way to beat the game in normal mode. The only new thing is the new rule on the quest card that prevents the players from using the Tools multiple times per round.

Since finding these “escape quest cards” can be difficult in a quest deck made up of 9 quest cards, most of the quest cards offer a chance to bypass the current quest at the end of the combat phase. There are a few exceptions, like Hasty Council, but in general, players only have to stick on each quest card for 1 turn. While in the normal version of this quest, there was no penalty for doing so, the Nightmare version sees this bypassing as the opportune moment to hurt the players some more. The new rules card has probably the nastiest effect when bypassing quest cards. Usually, they are put on the bottom of the deck, but now they are getting shuffled into the quest deck. That means it could end up on top again, and it also means that any work put into digging through the stack of quest cards is for nothing. Your “escape quest cards” might now be 5 quest cards deep, which means that shuffling again might be a good decision, but you cannot be certain, as players cannot peak at the B-side of any quest card until the beginning of the staging step.
Bypassing quest cards also comes with the threat of more enemies from the Swarming Goblins enemy, and with added threat increase from any of the copies of Shadowed Corridor. If a lot of these cards are in play, then it might be worth considering exploring the quest card and thinning the quest deck a little. This does come at the cost of increasing the stats on the Nameless Fear and the Coal-black Orc, but you can remove some quest cards with nasty When Revealed effects from the deck, which will help in the long run.
During this quest, it is also important that players keep the victory score in check. Not only can this increase from exploring quest cards, but there are also treacheries, enemies, and locations with victory points. Clearing these encounter cards will mean a permanent buff to the Nameless Fear, making A Foe Beyond even more of a threat. It won’t help if players are adding victory points to the display themselves. Red Arrow, Black Arrow, and Side-quests will only be helping the Nameless Fear grow stronger. Oddly enough, so will the Flame of Anor, which works pretty counter-intuitively in this quest. Avoid adding these cards to your deck; they are not worth risking a higher threat Balrog for. Justice Shall Be Done is the only card that I wouldn’t dissuade you from using, but that’s only because it offers a quick death.
I will now cover the three new quest cards that are added to this quest. These replace the Blocked by Shadow quest card, increasing the stack of quest cards from 7 to 9. This will make it more difficult to find the stages you are trying to get to in order to escape.
Quest card 2B: Ghâsh! – 1 quest point

Instead of any lingering effects, Ghâsh just has a When Revealed effect that you have to deal with when you flip it over. Each questing character will be dealt a point of damage. Because of this card, Dark and Dreadful was removed from the deck, as that could potentially cause you to deal 3 damage to each questing character, which is a rough way to die. The single point of damage from this quest card can still be enough, though. Plenty of questers can have just 1 hitpoint remaining, causing you to lose willpower and potentially failing the quest. But if you do manage to make progress, then there is a real chance of you making it through this quest card, as it only has 1 quest point.
If you can avoid putting progress on this quest card, then it is pretty harmless after the initial reveal. Players can redirect progress to locations in the staging area with Explorer’s Almanac to clear some more threat, but eventually, they will have to come to a decision: Do you clear this quest, or do you skip it? For Ghâsh, my advice is to clear the quest card and add it to the victory display. Not only is this an easy way to thin the encounter deck, but you also avoid revealing this quest again. This would again deal 1 damage to each questing character, which can be dangerous if you aren’t healing. It is also a quest you can clear on accident, so there is no real reason to be careful unless you want to stall a little on this card. Thin the pile by exploring this one, as I think it is worth the extra stats on the Nameless Fear.
Quest card 2B: Blocked by Flame

This quest card took me some time to understand, but I think I got it now. It forces you to battle with the Nameless Fear in order to beat this quest card. When this quest card is flipped over, the Nameless Fear will continue to attack each player in turn order from the staging area with a shadow card. In the late game, this will mean that you must have some chump blockers available, or you will lose a hero to these attacks. The good thing about this quest card is that you can now deal damage to the Nameless Fear while it is in the staging area. All players can make individual attacks against the Nameless Fear or use Ranged characters to join in on the attack with other players. I recommend joining other players since the defence value on the Nameless Fear will be pretty high in the mid-to-late game.
This quest card can be skipped at the end of each combat phase, meaning that you have to suffer through at least 1 round of attacks. There is no way to make progress on this quest card, making it quite a nice quest to bring a lot of willpower to at least clear some active locations without having to worry about the progress accidentally spilling over and clearing a quest card. If players happen to have Back-Track with them, this is the quest to use it.
If the players decide not to skip the quest at the end of a combat phase, then they must get at least 10 damage on the Nameless Fear at some point. If this is achieved, all damage is removed, and the players clear this stage, adding it to the Victory Display for 1 additional point. I wouldn’t recommend clearing this stage, as dealing 10 damage to the Nameless Fear pulls your attention away from other enemies. It is also not the worst quest card to get at random, as long as you can chump an ally to the attack of the Nameless Fear. Should players have extra attackers to deal some damage on the Nameless Fear before skipping this quest card, then the damage remains on the Nameless Fear. This can help you get to the 10 total damage next time the quest card shows up.
Quest card 2B: Pursued by Shadow – 5 quest points
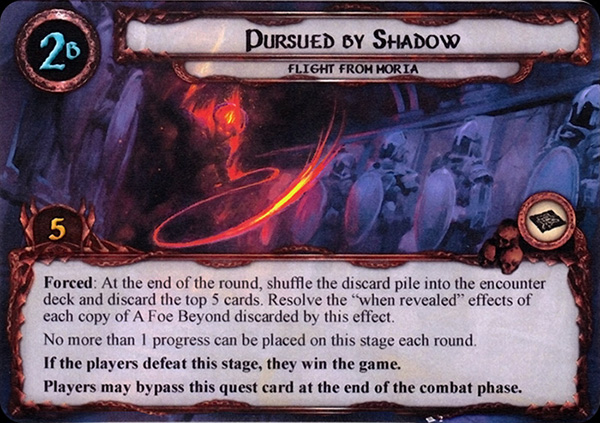
With Blocked by Shadow being such an easy way out of Moria, the developers decided that the players should really earn their way out of the mountains, not rely on luck. So if the players want to escape Moria without using the Abandoned Tools and finding the Escape from Darkness quest card, Pursued by Shadow gives an alternative way out. This is not an easy way, but this can lead to a faster escape than the traditional way.

Flipping this quest card, there is no When Revealed effect or any other effect to take into account during the combat phase. So if the players want to bypass this quest card, there is no harm done on the round that this card was revealed, giving the players a bit of rest. However, if the players decide to stay at this quest card and they want to try and defeat it, the Forced effect on this card will come into effect. This Forced effect will shuffle the encounter discard pile into the encounter deck at the end of the round (so after players would have had the chance to bypass this quest). Then, the top 5 cards of the encounter deck are discarded. The players must resolve any copy of “A Foe Beyond” that was discarded this way. That means that the Nameless Fear does not make an attack but instead deals its attack value in damage to a hero. If you are lucky and hit this quest card early, this damage can be absorbed by some tough heroes with 5 hitpoints, but in the later stages of the game, this will wipe out a hero without mercy. Of course, the chances of hitting “A Foe Beyond” depend on the number of players in the game, as well as the number of cards in play. If the encounter deck has put a lot of locations in the staging area already and even has all three copies of An Evil Fortune in the victory display, then the chances of hitting “A Foe Beyond” are a lot higher. True solo players also have an advantage here, as only 1 copy of the treachery will be in the deck instead of 4 copies in a 4 player game. In a 4 player game, you will have a serious chance of revealing multiple copies during a single round from this effect. Since the treachery cannot be cancelled, it will be very tricky to avoid losing all your heroes.
This Forced effect will happen several times, as the quest card cannot be beaten in less than 5 rounds. This means that the players will have to repeat the reshuffling and discarding of cards from the encounter deck at least 4 times. Each time they will run the gauntlet of having to inflict fatal damage to heroes. This restriction is based on the single line of text that restricts progress on this quest to just 1 per round. And with 5 quest points, that means at least 5 rounds of questing. Progress should be your top priority here, so you don’t have to wait longer in order to beat this quest. Players must also avoid the New Devilry treachery during these 5 rounds, as that treachery will wipe away all progress as Pursued by Shadow is shuffled back into the quest deck. Cancel New Devilry at all costs while you are attempting to complete this quest.
Should the players survive for 5 rounds and make the 5 progress required on this stage, they beat the game. It is a nice alternative chase to the regular way of mining your way through a wall. I also like that the developers have let in this alternative way to avoid having to find 2 other quest cards, but increased the dangerous feeling of the Nameless Fear in this quest card.
The Encounter Deck

Global
- The encounter deck consists out of 44 cards at the beginning of the game.
- The chance of hitting a shadow effect is 64%, which is high enough to warrant some shadow cancellation in your deck. Especially with some of these shadow effects discarding attachments and building up more shadow cards!
- The average threat on cards revealed is 1.2 threat per card. This is so low due to the many treacheries that count for 0 threat.
- 12 cards will reveal an additional encounter card, of which 11 do this through the Surge keyword. The Abandoned Tools do this through the Guarded keyword.
- Doomed 1 appears on 5 cards, though 3 of them will be sent to the Victory Display after their first reveal, so in the later stages of the game, the Doomed keyword will be less of a problem. Threat will still increase through the Shadowed Corridor if players ever skip a quest card, though!
- Immunity
- Great Cave-troll is immune to Ranged damage and no attachments can be played on it.
- A Foe Beyond cannot be cancelled
- Sudden Pitfall cannot be cancelled
- The Nameless Fear is immune to player card effects, cannot engage, and cannot be engaged.
For this analysis, an assumption is made that there is only 1 player in the game. More players would add more copies of A Foe Beyond and would increase the threat of The Mountain’s Roots. It is also assumed that the Coal-Black Orc only has 2 threat since that is its starting value. This will only go up as the game progresses. It can be seen that the encounter deck is made up of a lot of treacheries, which don’t add too much threat but do require you to be able to survive all of them. Some can be pretty nasty.
Enemies
As if the Nameless Fear wasn’t enough, the encounter deck is filled with more enemies to keep you occupied. This Nightmare version removes some of the easier, vanilla enemies and replaces them with new enemies that interact with bypassing the quest stage and with the number of victory points that the players have collected.
- Swarming Goblins: Goblin enemies are usually not really a threat, and at first glance, the new Swarming Goblins don’t appear to bring much to the table. But then you notice the 6 hitpoints and realize that these Goblins won’t die as quickly as those found in the Normal version of this quest. The Swarming Goblins live up to their name, though, as they will surge into another encounter card when they are revealed from the encounter deck. But with just 3 copies in the deck, you can probably avoid a surge-train where all of them are revealed on the same round. Not only do the Swarming Goblins get more enemies out with the Surge keyword, but their Forced effect will also draw out a copy of Goblin Spearman from the encounter discard pile and put it into play engaged with you. This effect will trigger whenever you bypass a quest card and have a copy of Swarming Goblins engaged with you. With 10 engagement cost and 6 hit points, it will be likely that you end up with this enemy engaged with you, meaning that you should prioritize killing the Swarming Goblins or stay at the same quest stage for a while to avoid getting swarmed. This effect will also trigger for each copy of Swarming Goblins engaged with players, which means that the Goblin Spearmen in the discard pile won’t stay in that pile for long and will come along to bother you again. Note, however, that the effect only brings back the Spearmen from the discard pile. If there are no copies of Goblin Spearman in the encounter discard pile (they are all in play, in the victory display, or still in the encounter deck), then the effect does nothing. With 4 copies of that enemy in the deck, one of them will appear at some point, though. Therefore, it is important that you take care of the Swarming Goblins with some big attacks to bring them down. Dealing damage to them is easy thanks to the single point of defence. But those 6 hitpoints will absorb a lot of damage before this enemy finally goes down. Luckily, the Swarming Goblins only hit for 3, which is quite tame for a NM enemy. Even some ally defenders can defend against this enemy, leaving your heroes up to deal with the counterattack or killing off the extra Goblin Spearmen that were brought back into play.
- Coal-black Orc: This next enemy is something rather unique. As the players continue to explore quest cards and defeat encounter cards like the Dreadful Gap and the Great Cave-Troll, they accumulate Victory Points. In the normal version of this quest, the number of victory points only mattered for the Nameless Fear, but it now also matters to the Coal-black Orc. This enemy has the same X/X values for threat and attack as the Nameless Fear, allowing it to hit very hard within a few rounds. The Orc starts with X = 2, but it is not uncommon for these values to hit 10 or higher if the players are stalling too long in Moria. Luckily, the defence and hitpoints of this enemy do not scale, requiring you to always have a combined total of 8 attack to kill this enemy. The Orc also doesn’t have any extra things in its textbox but does have a nasty shadow effect that can wipe out heroes in the mid-to-late game. Since the Orc has 5 hitpoints, direct damage won’t be as effective, but players can still use cards like Forest Snare to trap the Orc and prevent it from hitting so hard. If you want a one-turn solution to this problem, Revealed in Wrath will make the Coal-Black Orc a 0 threat and 0 attack enemy, allowing you to block the attack more comfortably. Don’t take it undefended, though, as some shadow effect, like the one on the Coal-black Orc, will ruin you. Bringing down the Orc won’t be too tough if you dedicate some attackers to it, but the initial hit of this enemy can be dangerous. Cancel the attacks when you can, and find a way to avoid engaging this enemy during the later rounds of the game.

Locations
Only one location is added to the encounter deck, but it’s not easy. It also comes with 4 copies to replace some of the easier locations from the normal version of the game.
You will come across this location a lot during your playthrough, as there are 4 copies of this new location in the encounter deck. And with 4 threat on each copy, you can quickly gain a lot of threat in the staging area when revealing these cards back-to-back. To get the threat out of the staging area, you can easily travel to this location, as 6 quest points makes it difficult to explore in the staging area through player card effects. But as the active location, the buffer of 6 quest points might still be too much to overcome, leading to a location lock if you are not careful. The good thing about these locations having 6 quest points is that they will absorb a lot of progress that will then not be placed on the main quest cards. This prevents you from clearing them too quickly, increasing the victory points. The Shadowed Corridor also has some text in its textbox, which makes you want to explore these locations as fast as you can. In order to bypass a quest card, players will have to raise their threat by 2 for each copy of Shadowed Corridor in play. This effect stacks, forcing you to raise your threat by 8 if all copies are in play. To clear these locations faster, you can use Woodmen’s Path to reduce the quest points to 1. If you are comfortable leaving 4 threat in the staging area, you can also use Thror’s Key to blank one copy of this location. Note that the passive effect is also still active while the Shadowed Corridor is the active location. If you find that you are revealing too many of these locations in a row, you can use the Eryn Galen Settler to clear an additional copy when you clear one as the active location. If the quest didn’t discourage you from using player side-quests, then I would also have recommended Explore Secret Ways, but the added victory point on that card is probably not worth it. The shadow effect on this location also deserves mention, as the effect is quite unique and can punish players defending with Grimbeorn and/or Blood of Númenor. This shadow effect forces any defending hero (allies are safe from this effect) to discard all resources from their resource pool. The attacking enemy gets 1 additional shadow card for each resource discarded this way. Usually, this doesn’t hit for more than 2 resources unless you were really saving for something big. The extra shadow cards can be devastating, though any additional copies of Shadowed Corridor will whiff the second time. There is a fair chance that the first shadow effect won’t do anything if you keep resources off your defender.

Treacheries
6 new treachery cards are included in the Nightmare version of the scenario, split between 2 sorts. The first increases the number of victory points and thus boosts the Nameless Fear. The other has a nasty shadow effect that can cost you the game halfway through your attempt.
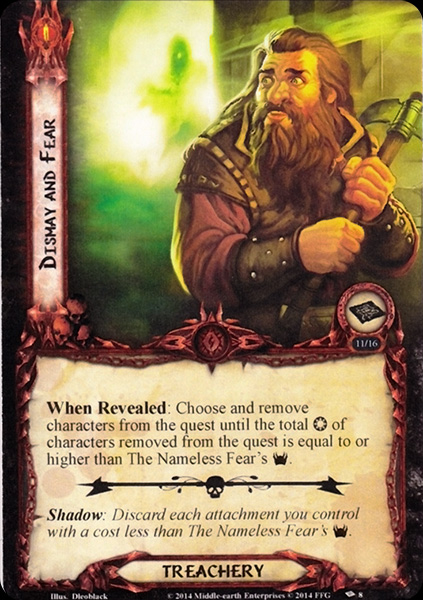
- Dismay and Fear: If you were going to play it safe during the quest phase in order to avoid clearing the quest card, I have good news and bad news when this treachery is revealed. The good news is that you are indeed not clearing the quest card this phase. The bad news is that you will have to remove quite a lot of willpower, likely causing you to fail the quest phase and raising your threat by a decent amount. When this treachery is revealed, the players as a group must remove characters from the quest until the amount of willpower removed from the quest is equal to or higher than the Nameless Fear’s threat. Hit this treachery more than once, and you run the real risk of not having any questing characters left. This is where cards like Windfola, Late Adventurer, and Hobbit Pony come in useful, but in the later stages of the scenario, you can be looking at removing 10+ willpower from the quest, which can cause you to lose quickly. With 3 copies of this treachery in the game, you would need scrying to know exactly how much to quest for without raising your threat or exploring quest cards. The shadow effect on this treachery can also be bad and a game-ender in most cases. It forces you to discard each attachment you own with a cost lower than the Nameless Fear’s threat. Only in the very early stages of this quest will that leave any attachments in play, but after questing for a bit, you will be forced even to discard 4-cost attachments. This ends the game for most people that cannot cancel this shadow effect. Three Hunter Contract decks and Dale decks are hit especially hard by this, but even the knowledge that you invested so many resources into your attachments to just have them be discarded can be a blow to your morale that you won’t recover from. Cancel this shadow effect at all costs!
- An Evil Fortune: This is a simple treachery that might not seem that bad at first, but once you have taken a look at your victory display and notice 3 extra points in there because of this treachery, you suddenly realize that this has more of a sting to it than you would think. The treachery is pretty basic, increasing each player’s threat by 1 and replacing itself with the surge keyword. After that, the players must add an Evil Fortune to the victory display, where it adds 1 more point to the total score. This raises the stats on the Nameless Fear and the Coal-Black Orc. Keep this increase in threat in mind because it is often forgotten at the end of the quest phase. Players can still cancel the When Revealed of this card, but I think you are only delaying the inevitable. This quest is quite long, and you will need your cancellation for other things besides the three copies of this treachery. If this treachery is drawn as a shadow card, it only gets added to the victory display if the attack destroys a character. This can be some salt in the wound in case the Nameless Fear just killed one of your heroes, but it’s sort of a thematic win. I’m also a big fan of the art on this one!

Tips and Tricks
- Leave behind your side-quests and other cards with victory points; they are no more use here. These cards will only increase the stats of the Nameless Fear and the Coal-black Orc. These cards are probably not worth it, so remove them from your deck, and slot in some other cards that will help you in this quest.
- Explorer’s Almanac is a good card for this scenario as it allows you to put progress on locations in the staging area before you place them on the main quest card. This allows you to avoid clearing some of the more dangerous quest cards from being explored while also helping you to deal with location lock. The new Shadowed Corridor location is a great target for this attachment.
- Avoid having a ton of resources on your defender. While this may allow you to pull off a nice defense against the Nameless Fear with Blood of Númenor, you run the risk of a big shadow-train hitting you, as well as losing all of those resources.
- Be very careful with the Great Cave-Troll. This enemy also has three victory points, meaning that killing both of these Trolls will boost the Nameless Fear by 6! It is better to keep a low threat and avoid these enemies. Use the Great Hunt if you can to discard these enemies since they cannot have attachments, so Forest Snare is not an option.
- Dreadful Gap also has 3 victory points that are quite dangerous in this quest. Try to avoid this location as best you can, though the nature of this location will make that difficult. The Hidden Way will be a nice event to use to bypass this location and send it to the staging area, where it won’t do so much harm.
- Assuming you can get enough action advantage, a Forth, the Three Hunters! contract deck would do ok against this quest. You only have 3 characters to worry about for Dreadful Gap and Undisturbed Bones whiffs. That’s three free cards in the encounter deck! Of course, some treacheries like Dismay and Fear as well as Shadow of Fear will hit a bit harder, so it is not a game-breaking solution. You will also have to invest in revival events, as Sudden Pitfall will take out a hero with that deck.
- In order to avoid losing heroes to A Foe Beyond, try to find ways to boost the hitpoints on those heroes. Citadel Plate and Ancestral Armor are obvious examples, but they will help you to keep your heroes alive when the treachery hits once the Nameless Fear reaches 7+ attack later in the game. Damage redirection of Dori and the White Tower Watchman will not save your heroes from this. Damage cancellation from the Honour Guard also triggers after the damage has already been dealt, so that’s not going to work here either. Focus on boosting hitpoints in any way you can.
- Sometimes, boosting hitpoints won’t be enough and your hero will die. To prevent from losing the game because of this, you can invest in a revival effect like Landroval, Houses of Healing, or Fortune or Fate. These effects are quite expensive, but if you are attempting to complete Pursued by Shadow, then having a hero return to you can make the difference between winning or losing.
- A good hero to use for soaking up damage from A Foe Beyond is hero Beorn. He starts with 10 hitpoints, giving you a good pool of hitpoints to use for the treachery. Keep in mind that you cannot heal Beorn directly, but should instead include damage cancellation if the damage doesn’t kill Beorn. The Valour action on Honour Guard can really help with this. Close Call is also a good card if you are comfortable with high gains in threat.
- Do not quest with just your heroes. Always have an ally quest with you. This encounter deck does still feature Sudden Pitfall, which will take out one of your questing characters without hesitation. It better be a replaceable ally instead of a hero you invested a lot of resources in and are relying upon.
Playthroughs
The following playthrough videos have been recorded by people going up against this quest with various decks.
- 2 handed, progression style: https://www.youtube.com/watch?v=Fv-9gq3pvqs
- True solo: https://www.youtube.com/watch?v=ITLcGeFhFCE
- 2 player, mono-Lore decks: https://www.youtube.com/watch?v=_Q4otWQ_IrE
And that completes the Nightmare Khazad-Dum expansion. We will now dive into the Dwarrowdelf cycle, with Redhorn Gate being the next quest in the progression mode. This article will be done by one of my co-authors, allowing me to spend some time on The City of Ulfast. I will then return with NM Road to Rivendell, which can’t be any worse than the normal version, right? (please let it remove all copies of Sleeping Sentry, pleeeease!!). Anyway, enough in the pipeline, so you won’t have to wait too long for more Nightmare content!

Hi!
Are you sure about this quote?
“Damage redirection of Dori and the White Tower Watchman will not save your heroes from this”
Thanks for your wonderful work! Davide
LikeLike