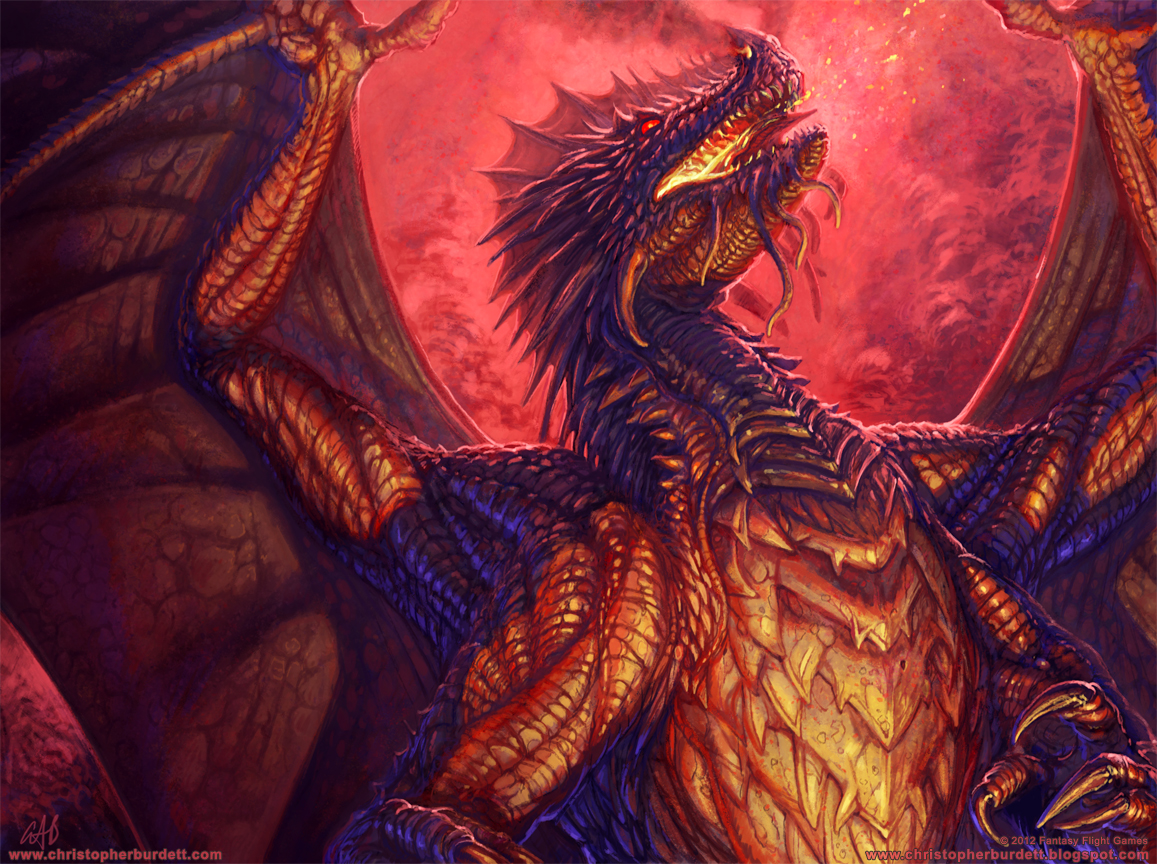
“My armour is like tenfold shields, my teeth are swords, my claws spears, the shock of my tail a thunderbolt, my wings a hurricane, and my breath death!”
The Hobbit
If you decide to play The Hobbit saga expansions, there is a great slot between the scenario of The Lonely Mountain and The Battle of Five Armies. There, you can wedge The Battle of Lake-town Print-On-Demand scenario. It doesn’t belong originally there, but it can extend The Hobbit campaign. On the other hand, if you feel you want to play a single independent scenario, you can try that too.
This scenario focuses on Smaug’s attempt to burn down Lake-town. The dwarf fellowship and their burglar hobbit (Bilbo Baggins) accidentally awoke him, trying to get some of the treasures lying in a chamber under the Lonely Mountain. After Smaug realized they were going to steal his treasure, he flew to the nearest town (Lake-town) and began burning down everything he saw. Your mission in this quest is to avert Lake-town from burning completely and finally to give a lesson to the flying beast!
Definitely, this is not a quest for the light-hearted. There are a bunch of nasty encounter deck cards which will convert your game to a nightmare. The best you can do in order to survive this scenario and hopefully leave to tell the tale is a well-prepared deck. Together we will find the weak spots of the encounter deck and how we can use them against it.
The Battle of Lake-town
- Found in: The Battle of Lake-town Print-on-Demand Expansion
- Official Difficulty: N/A
- Community Difficulty: 8.9
- Encounter Set: The Battle of Lake-town
- Quest Cards: 3
- Play if: You want a thematic but harsh “bridge” quest between The Hobbit saga expansions. You are looking forward to slaying Smaug but also not dealing with other enemies. You want to see an interesting location mechanic that simulates the burned parts of Lake-town from Smaug’s breath.
- What is different about this quest?: There are no enemies in this scenario (except, of course, the Smaug)! Every location has Victory points. There is a new burn mechanic/keyword, Smaug deck.
- Solo or Multiplayer?: Beating this scenario solo is pretty challenging but not impossible. On the other hand, playing a 4-player game maybe give you some extra trouble as you will reveal more cards from the encounter deck every quest phase, thus more nasty treacheries. Furthermore, playing the game with 2 or 3 players might be really challenging. You might get multiple attacks from Smaug (as a result of Dire Magnificence’s shadow effect). For me, the optimal choice of beating this quest is by playing solo.
- Can I run side-quests for this scenario?: I do not recommend running side-quests with The Battle of Lake-town. You should try and speed run it before Lake-town gets a lot of damage. But if you want to time some time and prepare your play area, you can probably try sneaking a copy of Explore Secret Ways or Scout Ahead.
- What to look out for: The nasty treacheries and shadow effects. Multiple attacks from Smaug. Lake-town burning down before you can stop the dragon.
The Quest

Before our quest begins, and we try to save Lake-town from the mighty dragon, there are some rulings that we must cover. An important rule of the game that is not written in any of the quest cards of this scenario is: At the beginning of each Quest phase, the first player must choose either his play area or the staging area as a destination for Smaug. He then reveals the top card of the Smaug deck, and puts it into the chosen area. If he/she chose his/her play area, he/she immediately engages Smaug. If another version of Smaug is already in play, move all damage tokens on that version to the new Smaug as it is revealed and discard the previous Smaug. Smaug is only defeated when he has 0 hit points remaining.
So this is sort of extensive ruling. In few words, it says that every turn you reveal a new version of Smaug from his deck (discarding the one from the previous round but passing the damage to the new), and the first player has to choose where to reveal it before they see the version of Smaug that is going to be revealed! The last phrase just indicates that even when the “old” version of Smaug is leaving the game, that doesn’t mean the dragon is defeated. Later in the article, we are going to discuss more about Smaug’s versions. Although, you need to have in mind that every version is immune to player card effects (so forget feinting him, trapping him with Forest Snare, or damaging him by other means).
In addition to the previous important ruling, there is a new keyword we should discuss too. The burn keyword is a new keyword find in The Battle of Lake-town scenario; it represents Smaug’s devastating attack against Lake-town. When instructed to resolve burn damage, each player may exhaust any number of his characters to assign any number of burn damage to those characters (up to their remaining hit points). Any damage not assigned to characters must be assigned to Lake-town.
If we see it more thoroughly, this quest is all about burn damage. I mean that as more locations are revealed from the encounter deck (all locations have the burn keyword) thus more and more burn “points” will pile up in the game. Then most of the treacheries or even the effect of one version of Smaug trigger those burn keywords and assigns an equal amount of damage on Lake-town. An important “loophole” that most players forget is that you are allowed to exhaust any number of characters you like and assign the burn damage to instead of Lake-town. That is a powerful strategy for healing-based decks or swarm decks such as (dwarfs, outlands, etc.).
Now that we got familiar with the extra ruling of the quest, let’s see how we can set up our game.
Setup
While setting up the game, you should shuffle all copies of Smaug into a separate Smaug deck. The Smaug deck will consist of 9 cards (3 copies of 3 different Smaug enemy cards). Then, you search the encounter deck for the Lake-town objective and add it to the staging area. Furthermore, you shuffle the encounter deck and reveal one card for every player in the game. Some nice encounter cards that you want to exclude from the encounter deck at this point are Scorching Blast, Town-Baiting, and of course, Reckless in His Rage. This unpleasant treachery will have no effect at that point. Some extra ruling about the Smaug’s deck is that it has its own discard pile. When the Smaug’s deck is empty, you must shuffle the Smaug’s deck discard pile back into Smaug’s deck.
Quest Card1: Terror from the Mountain – 14 quest points

When the players reveal stage 1B, they have to deal 1 damage to Lake-town per player in the game. On top of that, it gives a restriction to the players as to how much damage Smaug can take (up to 6 damage while the players are at this stage). Generally, if Lake-town has 50 or more damage tokens on it, the Lake-town is burned down by the dragon, and the players have lost the game. So the encounter deck tries to increase that damage by any means. This +1 damage from this effect ain’t much, but you always need to have in mind how much damage is on Lake-town.
This is a straightforward quest card, so there isn’t much to say. It only requires 14 progress tokens in order to advance to the next stage. I usually try to speed run this part in order to access the next stage and start reducing the damage tokens from the Lake-town. To do so, I try to maximize my willpower and commit most of my characters (if not all of them) to the quest. That move requires that the first player choose to place Smaug in the staging area this round. A useful piece of advice is not to attempt damaging or fighting the dragon this stage (most of the time, and not even in the next) as there are some effects that will help him heal, and even worse, cause more damage to Lake-town.
Quest Card 2: Fire and Water – 10 quest points

That is a pretty accurate title for the specific quest card. At first, you will notice that the side 2A doesn’t have any “When revealed” effects or any effects in general. Flipping it to stage 2B, you find out that the maximum damage that Smaug can have is now doubled to 12 damage. In addition to that (and what makes the title accurate) is an effect that allows players to discard any amount of the progress they would place in the quest card, and instead remove an equal amount of damage tokens from Lake-town. So, on the one hand, we have the damage “fire,” which is increased as the rounds pass, but on the other hand, the players have an opportunity to remove that damage “water” from Lake-town just by questing successfully on the quest. In contrast to quest 1B, I choose to take some time in this stage just to build up my play area. When I am ready and have removed most of the damage (I recommend removing all the damage) from Lake-town, it’s time to advance to the next stage. Sometimes, a couple of rounds before I advance to stage 3, and if I have some great defending power or a couple of chump blockers in the game, I choose to engage Smaug and try to assign some damage to him. Engaging him will help you remove damage from Lake-town even faster as his huge amount of threat won’t be on the staging area anymore.
Quest Card 3: The Dragon’s Wrath

Once again, the A-side of the quest card doesn’t have any effects. So let’s go directly to stage 3B. This side has some interesting effects and a winning condition. The first effect is a “Forced” effect which obligates the players to reveal an extra encounter card from the encounter deck during the staging step of the quest phase. The effect’s purpose is to increase the damage on Lake-town dramatically and to corner the players with multiple Smaug attacks. The second effect is a “Refresh Action,” which means that players can use it only when they are at the refresh phase. This effect allows the players to reset the quest deck to stage 2B. This effect gives an opportunity to the players to remove some extra damage from Lake-town that might be assigned during stage 3. You might wonder why the players need to remove extra damage from Lake-town after they have advanced from stage 2B, where they removed all of it, and they are not threatened from that? The answer is the winning condition. In order for the players to win the game, they must defeat Smaug by damaging him and leaving him with 0 hit points remaining. When they achieve this demanding task, they need to compare the victory points they have gathered from the locations they explored and the damage points on Lake-town. If the players have more victory points, they have won the game. Otherwise, Lake-town has burned, and the players have lost. At this point, you might understand why I tried to assign some damage on Smaug at stage 2B. The more you stay on this stage, the more damage it’s going to be assigned to Lake-town as you reveal more encounter cards every round. Furthermore, having cleared Lake-town from damage in stage 2B is essential to achieve victory. In general, all quest cards aren’t so complicated, but they are unique in their own way.
The Encounter Deck

Global
- There are 46 encounter cards in this scenario. Although, in the encounter deck we only end up with 36 cards, both in Normal and Easy mode.
- The chance of getting a shadow effect is extremely high, approximately 72% !! So a general rule to have in mind is that around 3 of 4 attacks are going to have a shadow effect.
- Average threat per card revealed is 1.6 threat/card + Smaug’s threat (if we choose to place him to the staging area). The average threat for Smaug (as he has 3 versions) is 6. As a result, if the players choose to add Smaug to the staging area, the total average threat would be 6+(1.6 * x), where x is the number of players. So for example, in solo play it would be 7.6, in a 2-player game it would be 9.2 and so on. Except from Smaug (who can have up to 8 threat!) the locations in this quest range from 1 to 6 threat. This spreading of threat through the locations makes it difficult for the players to predict the total threat that would be on the staging area after the staging step during the quest phase. As I said before, this scenario requires a high willpower deck, which can commit huge amounts of willpower to progress through the quest.
- Thankfully, not a single encounter card has the surge keyword printed. Although, there are 3 cards who can trigger a surge keyword if another condition isn’t met. Those cards are Catching Fire (x2 copies) and Great Bridge (x1 copy).
- There isn’t a doomed keyword printed in any of the encounter cards in this quest. All in all, this isn’t a quest that aims to increase your threat, as it can eliminate the players by the Lake-town damage mechanism.
- There is a single objective card with the Guarded keyword. That card is The Old Thrush which can be really handy when the players try to defeat Smaug.
- Immunity/Passive abilities
- All 9 Smaug cards (3 cards x 3 versions) are Immune to player card effects.
Objectives
There are only a couple of Objective cards in this POD scenario. One of them doesn’t even end up in the encounter deck at all. Let’s see and analyze those Objective cards and their impact on the game.
- Lake-town: As discussed before, Lake-town is an Objective card that is added to the staging area while players setting up this quest. During the game, most of the encounter cards try to assign damage on Lake-town in order to “burn” down the city. More accurately, if Lake-town has 50 or more damage on it, Lake-town has completely burned, and the players have lost the game.
There isn’t much the players can do to reduce that damage from Lake-town. Their only option is to quest successfully in stage 2B: Fire and Water so they can remove damage from Lake-town.
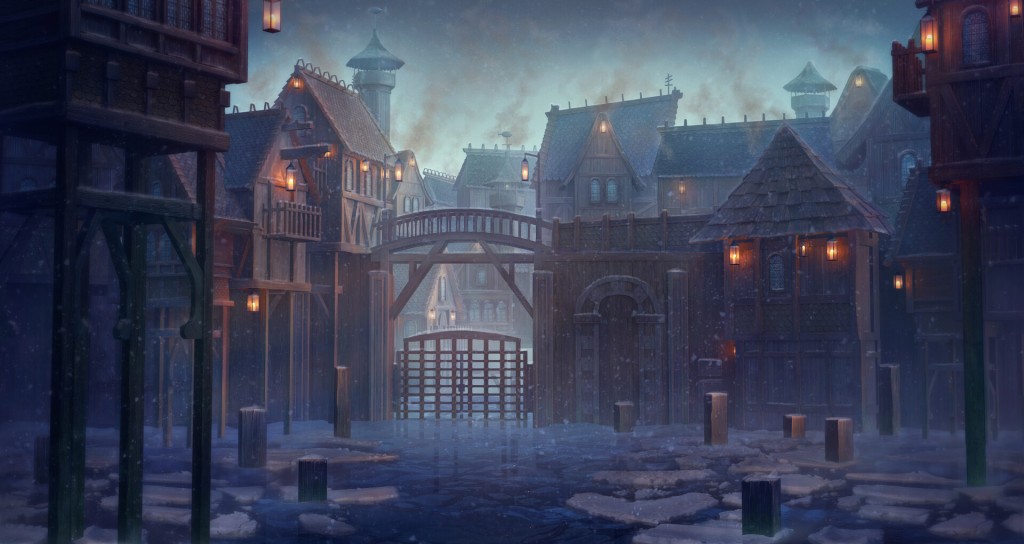
It was not built on the shore, though there were a few huts and buildings there, but right out on the surface of the lake, protected from the swirl of the entering river by a promontory of rock which formed a calm bay.
The Hobbit
- The Old Thrush: This is a Guarded Objective card that is designed to help the players in their attempt to slay the dragon. When it is free of encounters, any player can exhaust a hero to claim this objective and attach it to that hero. Then this objective counts as an attachment, with the text: “If detached, discard The Old Thrush.” This is one of the rare cards that let the players have a Creature as an attachment. I believe this encounter card contains a lot of thematic purposes. If we take a look at The Hobbit book, the thrush is said to have belonged to an ancient breed known by Thorin’s ancestors. The Men of Dale were able to understand the language of the bird, and they served the men as messengers. Bilbo was skeptical that any of the Lakemen still spoke the thrush language, but was proven wrong when the bird told Bard the Bowman of Smaug‘s only weak spot, thus enabling Bard to kill the dragon. One can say that The Old Thrush plays a similar role to our quest. When the hero who has The Old Thrush attached exhausts to attack Smaug, you can discard any amount of cards you like from your hand to reduce Smaug’s defense by an equal amount. So The Old Thrush serves the same purpose both in the story and the quest. It helps to find Smaug’s weak spot and defeat him more easily.
If you are lucky enough and get the Old Thrush on the staging area and not as a shadow card, then in order to use it, you must have a ready hero to claim it. You can’t use its effect at the same round, though (except if you can ready the hero by any effect).
Enemies
This scenario definitely stands out in respect to enemies. There isn’t a single enemy in this quest except for Smaug. On top of that, Smaug is in a separate deck where you know when it is going to get revealed. As a result, the encounter deck has zero enemies in it! That factor, though, doesn’t make the scenario easier. The players have other things in mind in order to survive and ultimately defeat this POD scenario. Those things are, of course, the damage on Lake-town (a.k.a. burn damage), location control, and Smaug’s possible multiple attacks! As written above, Smaug has 3 different versions of 3 different copies each. In total, there are 9 Smaug enemies in the Smaug deck. Every turn, the players, reveal a new “Smaug” card, and they choose if they want to engage it or place it in the staging area. While the Smaug deck gets thinner and thinner, by the round, the players can guess with greater accuracy the next Smaug version that will be revealed from the Smaug deck. This knowledge can assist them in preparing for the imminent enemy (and its “When revealed” effect). Each version has its own pros and cons, and that’s what we are going to analyze in the next paragraphs.
- Smaug the Magnificent: As all Smaug enemy cards are immune to player card effects, Smaug the Magnificent also shares that text. This is the version of Smaug that you want to reveal to the staging area. He has the lowest threat of the 3 versions (5 threat) and simultaneously the highest combat stats (8 attack and 8 defense). Of course, all Smaug versions have the same value of hit points, at 20. When Smaug the Magnificent is revealed, the players should move 3 damage from him to Lake-town. A generally great strategy is to avoid damaging Smaug before quest stage 3b, as he can heal himself via such effects. Furthermore, the current version has one more effect that aims to boost the damage on Lake-town by a lot! If you didn’t place Smaug in the staging area (or he engaged you when he has the lowest threat cost of all other versions, at 30 points), you are going to face an attack from the mighty dragon. The excess damage from that attack isn’t thrown away; instead, the damage is dealt to Lake-town. This effect resembles Troll enemy effects, where the excess damage from combat matters.

- Smaug the Terrible: This version of Smaug is also immune to player card effects. When it is revealed from the Smaug deck, the Burn damage must be resolved from all locations in play. If the players have been location locked at this point, a huge amount of damage will be dealt to Lake-town! Always you should bring location control cards in your deck for this scenario. Smaug the Terrible has 6 threat, and 7 attack and defense. He has the lowest defense of all 3 versions of Smaug, which makes him the best target when you try to defeat Smaug. On the other hand, in order to defeat Smaug, you will need between 27 and 29 attack power! So there isn’t going to be much deference between the versions. To profit more damage from your attacks, you should organize your army prior to the attack. In that way, you could probably one-shot the dragon. You should try to one-shot him instead of multiple small attacks. When you try multiple small attacks, the dragon’s high defense is going to absorb 7-9 points of damage evry time!
Looking at the card from another perspective, I believe it has one of the best artworks in this scenario. It’s a great depiction of Smaug while he attacks Lake-town and burns every single house. Thick smoke rises to the sky. The artist manages to make a clear distinction between dark and light colors. To the top, we notice the night sky of Lake-town, and at the bottom of the picture, the town is really bright from all the fires that the beast has light up.

- Smaug the Mighty: This is the last version of the dragon we will meet in this Print On Demand scenario. This card is also Immune to player card effects. It is probably the worst Smaug card for the players, as it has the highest threat of all versions at 7 threat but also when it is revealed from the Smaug deck, it makes an immediate attack against each player! The players have to deal him a shadow card for every attack. Considering the shadow effects of the encounter cards, it’s not impossible for Smaug to make even more attacks. On the bright side, Smaug the Mighty has the lowest attack points (5 attack) which makes him a little more tolerable for the defenders. If he doesn’t gain extra attack points from shadow effects, use defense (for example) Beregond and a Gondorian Shield , or a Raven-Winged Helm attached to him. Smaug the Mighty is the worst target if you want to defeat Smaug, as it has the highest defense of all Dragon versions at 9 points of defense. In conclusion, the worst part is his immunity to player card effects because you can’t lower his stats.
Locations
The most important part of this scenario is the Locations and how to manage them. Most of the encounter deck consists of locations and with a good reason. Not only do they give a great thematic touch to the whole quest, but also help the players (in the end) win the scenario. The reason is that every location has Victory points. While players explore the various locations, they add them to the Victory display and raise their total victory points. At the end of the game, the players have to count the total damage on Lake-town and the total victory points they have earned during the quest, and if they have more victory points than damage on the Lake-town, they have won the game. Otherwise, the Lake-town has been burned to the ground, and the players have lost the game. Unfortunately, this mild location has only 1 copy in the encounter deck, so when you explore it, you won’t see it again during your playthrough.

- West Pier: This is a really straightforward location with 2 threat and 2 quest points. This makes it the perfect target for Asfaloth. This location’s only effect is that it gives +1 to the burn value of every location in play. That +1 burn isn’t the end of the world, so I’m usually happy when I reveal this location, especially in solo play. When you explore West Pier, you will get 2 victory points that will help you win the scenario. Furthermore, West Pier doesn’t have a Burn keyword originally printed on it, but it gains 1 burn from its own effect.
- The Master’s Manor: This location belongs to the group of the high threat locations. It has 4 threat, and believe it or not; it doesn’t have the highest threat from all the locations in this scenario. When The Master’s Manor is revealed, the players must move all damage from Smaug to Lake-town. That’s an effect you don’t want to see while you are in the final stage and trying to defeat the dragon. Thankfully, there is a single copy of The Master’s Manor in the encounter deck, so dealing with it in the early game won’t give you any problems later on. The best way to explore this location is by the traditional way of traveling to the location and not by player card effects from a location control deck. It has 8 quest points in order to get explored. Another reason you don’t want to have Master’s Manor in the staging area for long is its burn 3 keyword. On the other hand, this location rewards the players when they explore it by lavishly giving them 8 victory points. In conclusion, Master’s Manor has a shadow effect that makes the defending player discard his/her hand if the attack (from Smaug, of course) destroys a character. That can be a frustrating effect at times, and a copy of A Burning Brand or Hasty Stroke might be handy, but there are worse shadow effects waiting for you in the corner.

- South Pier: As with all Pier locations in this scenario, the South Pier keeps things simple. It has 1 threat and burn 2 keyword. The only effect on South Pier is that when the players are faced with the option to travel, they cannot travel to other locations. Regularly, this effect won’t be a problem. The only situation that might give some trouble is if there is a copy of Esgaroth Wharf (which makes all locations in play immune to player card effects) on the staging area, and you want to explore it as soon as possible. Moreover, when the players explore South Pier, they will get 4 victory points for their effort.
- Merchant’s District: It is a 4 threat location with a high chance of getting revealed from the encounter deck as it has 4 copies. Merchant’s District doesn’t have any “When revealed” effects, but it has a Travel Action, which might help the players to avoid location lock. The action says that each player can place 2 damage tokens on Lake-town to add Merchant’s District to the victory display. Triggering that effect won’t be necessary if you have a location control deck. You can possibly insta-explore it with Asfaloth on Glorfindel and a Northern Tracker committed to the quest (We will discuss more suggestions and tricks in the Tips and Tricks section). Merchant’s District has a shadow effect that doesn’t seem too harsh at once, but it can make a nasty effect with other encounter cards. When you deal and resolve the shadow effect of this location, you have to deal 1 damage on Lake-town or 4 damage if the attack is undefended. The only enemy in the game is Smaug, so you think that every attack will have a defender, and only 1 damage is going to Lake-town; that’s not always true. If Town-Baiting is revealed during the staging step, Smaug will make an attack directly to Lake-town. In that case you might not want to sacrifice an ally for this attack, thus let it go undefended. So imagine the attacking version of Smaug is Smaug the Magnificent, then Lake-town will get 8 (from the attack)+4(from the shadow effect)=12 damage tokens! This effect ended up pretty nasty for the players; all the same, there are other shadow effects that need your Hasty Stroke, so keep it at hand. Finally, Merchant’s District has only 1 burn and 3 Victory points for you to collect after exploring it.

- North Pier: this Pier location has the same stats as West Pier at 2 threat, victory, and quest points. Moreover, it has 2 burn, and the text that Smaug cannot be damaged. I’m sure you don’t want to get this location to the staging area while you try to defeat Smaug at stage 3b. Although, Northern Pier is the best target for Asfaloth on Glorfindel, so in that case, it won’t be much of a problem.
- Great House: One can say this is the boss of locations in this scenario. It has 6 threat (!), victory, and quest points. If you reveal the Great House, in addition to skyrocketing your staging threat, you must resolve all burn damage from locations in play. That burn damage would be at least 3 because Great House itself has 3 burn. Thankfully, this location doesn’t have any shadow effects. When I reveal it, in my games, I prioritize traveling there to reduce the stage threat significantly and gain 6 amazing victory points after exploring it.
- Great Bridge: After the Great House, we have the Great Bridge! Even though it doesn’t have those bulky stats of Great House, Great Bridge isn’t a pleasant location to reveal from the encounter deck. Despite its 3 threat and 4 quest points, it might give you a hard time when you try to find vital cards from your deck. When Great Bridge is revealed, every player must discard X cards from his/her deck, where X is the number of damage tokens on Lake-town. If this effect doesn’t discard any card, Great Bridge gains surge. In some cases you might want to Test of Will this card, although if there isn’t much damage on Lake-town, you probably won’t have any problems. Great Bridge has 2 burn and 4 victory points that you can gain after exploring it. Luckily, there is only one copy of Great Bridge in the encounter deck, so you will have to deal with it once at most.
- Fisherman’s Dock: It is one of those locations that is designed to help the players with their quest. It has only 2 threat and quest points, and there are 4 copies of it in the encounter deck. It is a 1 burn, 2 victory points location, with a Travel effect that allows the players to have 2 active locations instead of 1. In order to travel to Fisherman’s Dock, the players need to have an active location already and then travel to this location. This effect, most of the time, decongests the staging area from locations. Fisherman’s Dock also has a shadow effect. When you resolve its shadow effect, you have to place it in the staging area. Most of the time that won’t be so bad, although you might want to cancel it situationally.

- East Pier: This is the last Pier location you are going to see in this scenario. As all previous Pier locations, so this one has a low threat at 2 points. It also has 2 quest and victory points and Burn 1. Similar to other Pier locations, East Pier doesn’t have any shadow effects. It is advised to explore East Pier as soon as possible because while it is in the staging area, the “When Revealed” effects cannot be canceled. Once again, one of the best solutions is Asfaloth attached to Glorfindel or a copy of The Evening Star.
- Esgaroth Wharf: This is the last location we come across in this POD scenario. In my opinion, Esgaroth Wharf is the most dreadful location in this quest. It has a mid-high threat of 3 and 4 quest and victory points. Esgaroth Wharf carries a relatively low Burn value of 1 point. The worst part of this card is both its effect while in play and its shadow effect. When Esgaroth Wharf is in play, all locations are immune to player card effects. This effect counters your location control deck’s mechanism, which leaves you with the only option to explore it, the old-fashioned way. To make matters worse, when you deal Esgaroth Wharf to Smaug as a shadow card, he is going to get +2 attack points and make an additional attack after this one. This is one of the shadow effects you definitely want to cancel. You must keep in mind that shadow cards are discarded at the end of the combat phase, so Smaug is going to have the +2 attack for his additional attack in which you have to deal him a shadow card once again.
Treacheries
The treacheries of this quest focus on buffing Smaug, damaging your characters, dealing damage to Lake-town and returning locations from the victory display. These treacheries represent the encounter deck’s effort to burn down the Lake-town. Most of them are the “side effects” of Smaug’s mighty breath which rapidly burns down the city. Bringing many copies of A Test of Will with you, is highly recommended, and some copies of Dwarven Tomb, to regain some more Test of Will from the discard pile.
- Close to the Flame: Is a really nasty Treachery that quite resembles The Necromancer’s Reach, except you have to deal 1 damage to every character in play rather than 1 damage on every exhausted character in play. If you think that Close to the Flame nastiness ends here, you are far from right. It comes with a shadow effect which is exactly the same as the When Revealed effect. You have to deal 1 damage to every character in play. Although, it gives you an alternative. Any player can DISCARD (!) a hero he/she controls to cancel this effect. This treachery is the main target for Test of Will and shadow cancellation cards, such as Hasty Stroke, Burning Brand, Staff of Lebethron, etc. Another great strategy against this Treachery is to avoid playing with a lot of 1HP allies, such as Silvans or Outlands (although if you can get Anfalas Herdsman in early rounds, you will be fine with outlands too).
- Scorching Blast: If you play a 1 or 2-player game, location lock won’t be a huge problem (although you should always have some location control cards in your deck). As a result, Scorching Blast won’t be a huge problem either. When you reveal Scorching Blast, you have to resolve all Burn damage from all locations in play. This Treachery comes with a Shadow effect very similar to the shadow effect of Close to the Flame. If you deal with Scorching Blast as a shadow card, you have to resolve its When Revealed effect (resolving all Burn damage from all locations in play), and as with Close to the Flame, it gives you an alternative. The alternative is that any player can discard a Hero he/she controls, in order to cancel the effect. Hopefully, it won’t be necessary to cancel this Treachery either as a revealed card from the encounter deck or as a shadow card.

- Dire Magnificence: When you reveal Dire Magnificence, you have to say goodbye to an ally of yours (if you have one or if you haven’t any when revealed cancellation card). In the rare yet possible case, you don’t have any allies in play, you don’t get away from this Treachery. In that case, every player that can’t discard an ally has to deal 2 damage on Lake-town. The worst part of Dire Magnificence isn’t the When Revealed effect, but the shadow effect. When you deal the Dire Magnificence on Smaug as a shadow card, and he succeeds and destroys an ally of yours, he engages the next player and makes an immediate attack against that player. This shadow effect is no worries for solo play as it isn’t a next player (only the first and last player, which is the same person). Although, in 2-4 player game, this could be really unpleasant. This is the main target for shadow cancellation player cards. Moreover, the players should expect such shadow cards and always have an extra defender or a chump blocker ready (or even have a spare copy of Feint) in order to not lose any Heroes.
- Catching Fire: I wouldn’t characterize Catching Fire as a harsh Treachery. If you reveal it from the encounter deck, you should shuffle a Pier location from the victory display to the encounter deck, and if you don’t have any Pier location to the victory display, Catching Fire gains surge. Most of the time, I don’t bother to cancel Catching Fire and let it Surge or bring back a location to the encounter deck. The shadow effect, though, is another case. When you deal Catching Fire to Smaug as a shadow card, the defending character gets -2 defense. This shadow is made to destroy your defender, so in order to avoid it, you should probably cancel it, or you can defend most of the time with a chump blocker.

- Town-Baiting: This is the only Treachery without a shadow effect! When Town-Baiting is revealed, Smaug makes an attack against Lake-Town. The last player may declare a defender against this attack, and every excess damage from this attack is placed on Lake-Town. Most of the time I let this attack go undefended, but if you have a spare defender, or you can’t really deal more damage on Lake-town, you are very welcome to defend the attack. The only drawback of this Treachery is that you cannot cancel its effect. In other words, almost definitely, you’ll have to place some damage tokens on Lake-town.
- Reckless in his Rage: You should hope you didn’t engage Smaug this round because he will probably destroy one of your Heroes. When Reckless in his Rage is revealed, and Smaug is in play, he gets +2 threat and attack and -2 defense for the rest of the round. That would make him a tougher enemy while questing and defending but will also make him more vulnerable to attacks. On top of that, you can’t declare allies as defenders against attacks made by Smaug. If you placed Smaug engaged with you at the beginning of the quest phase, or you placed him to the staging area, but he’ll engage you during the engagement phase, you probably want to cancel this effect! On the other hand, if you dealt Reckless in his Rage as a shadow card on Smaug, you must resolve all Burn damage on all locations in play if he destroys a character during the attack. This shadow effect won’t be essential to cancel most of the time.
Tips & Tricks
- Bring Test of Will with you! It is super important and can save you from many unfortunate situations, such as Close to the Flame, Dire Magnificence, Reckless in his Rage or even Great Bridge .
- Always have chump blockers or at least a great defender with some armor attachments in order to withstand Smaug’s attacks without any casualties. A really powerful defender can be Beregond, with Gondorian Shield and a Round Shield (as there are a lot of shadow effects and round shield can actually cancel out the Catching Fire shadow effect) moreover, a Raven-Winged Helm wouldn’t be a bad idea. With all the above attachment’s you can give Beregond up to +4 defense, to a total of 8 defense, and a possibility cancel a point of damage with the Helm.
- If you choose to go with the Defender option and not the chump blocker, you definitely need to bring some healing with you. Most of the time Warden of Healing works just fine. If you need something more effective, try including Ioreth in your deck.
- Bringing Location control cards is essential even for solo play. In higher player counts you definitely want to bring Glorfindel with Asfaloth, or Northern Trackers and Rhovanion Outriders, or even multiple copies of Evening Star. If you try this quest with 3 or 4 players at least one of you should focus on location control. In that case, don’t forget to bring Thror’s Key for disabling Esgaroth Wharf’s effect. If you want to open the Spirit resource icon with a location control deck, Idraen is always a great choice.
- When the time comes to defeat Smaug, I believe it is best to try and one-shot him. Beating him and damaging him little by little isn’t wise. Smaug the Magnificent is healing himself every time he enters the game. Moreover, while you delay defeating Smaug, the damage will pile up on Lake-Town, and as a result, sooner or later, you’ll need to turn back to stage 2B to remove all those Burn damages from Lake-Town. To make a long story short, you need to hit the worm harm! The best ways to do this is by using a Swarm deck (as I usually do, as I explain later) or by buffing up some powerful Heroes or/and characters. Great swarm deck archetypes are Outlands (what I prefer), Dwarves (highly thematic) or even Dale deck (again highly thematic). On average, you’ll need 28 attack power to defeat Smaug. Dealing all that damage in one round seems really hard, and it is! Thankfully, the game gives us some options here. A great Hero for this task is Tactics Eowyn, when triggering her effect can deal up to 10 damage. You can deal another 11 using a ranged Hero (such as Legolas) with a Black arrow and Unseen Strike (depending on your threat). On average, you need another 7 attack power that can be easily done with another 3 allies. Of course, building that board state won’t be a walk in the park; you need to be well prepared for this quest.
- A sort of obvious tip is to choose to put Smaug to the staging area, especially in the early game until you build up your board state and are ready for the attacks. Personally, I take my time until I choose to engage Smaug. I prefer heavy questing for this scenario until I reach the final stage and then (when I have a bunch of allies in play) engage the Dragon and defeat him once and for all.
Playthroughs
- Solo Play from COTRPodcast: https://www.youtube.com/watch?v=ZgjXFs1OqkE&ab_channel=COTRPodcast
- 2-Player, progression style game from The Tenth Nazgul: https://www.youtube.com/watch?v=mGeO1-7RtH0&t=1s&ab_channel=TheTenthNazgul (This is their second attempt on beating this quest. The first one didn’t went as expected by I really recommend watching it is a great play from the Tenth Nazgul company).
- 2-Handed, progression style game from Warden of Arnor: https://www.youtube.com/watch?v=-m0eaSiyhcQ&ab_channel=WardenofArnor
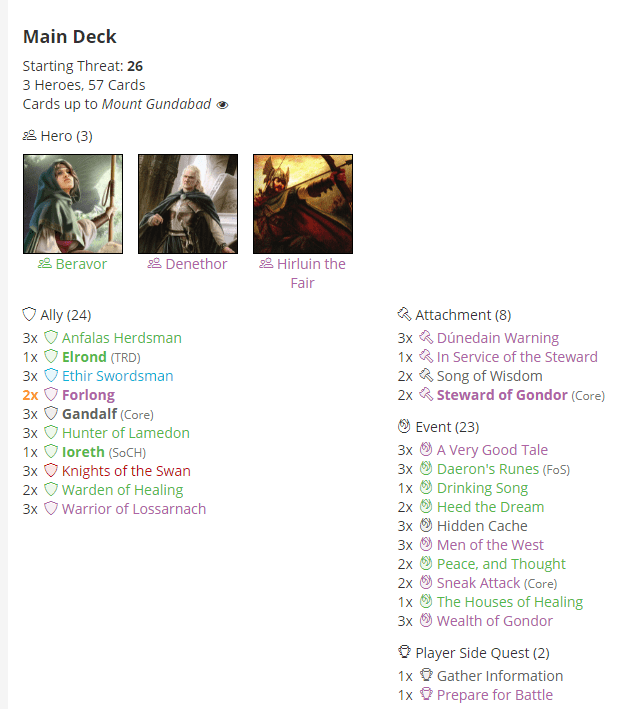
I really enjoyed playing The Battle of Lake-Town Print-On-Demand scenario, especially solo! So here I’ll display my favourite deck for beating this quest.
It was really fun playing with an Outlands deck against Smaug. I could build my board in 3 or 4 rounds, and after that, I was capable of handling a lot of threat from the staging area. Moreover, when I reached stage 3 I could one-shot Smaug with all those Outlands allies I had in play. Without further ado, I present to you my Outland swarm deck:
In conclusion, I wish I made you look at The Battle of Lake-Town from another perspective and help you enjoy this harsh quest, and who knows, maybe you beat it! Before I close this article, I want to thank all of the writers and the people who try to make this blog better every day. A special thanks to Durin’s Father for supporting all the writers. Till the next article, happy gaming!

One thought on “The Battle of Lake-town”