This article on the Into the West contract was written by community member Autumn. Since the contract is a part of the A Long-extended Party project, I was unable to give a lot of info on the contract, so she stepped forward to discuss it. Autumn is most known for her amazing alt art cards, which you can find here. She also builds great decks, some of which will be linked to the article at the end. Thanks again to Autumn for writing this article! – Durin’s Father
For anyone who knows me, they will know that the elves of Tolkien’s legendarium are an obsession of mine. As a young girl, I was mesmerized by their beauty and grace (and also by Legolas’ cool acrobatics in the Peter Jackson movies). As an adult turning 30 this year, though, the aspect of them that captures my imagination is the tragedy of their existence: that they stay beautiful and persist while civilizations crumble around them and years turn to ages. If you want to capture that feeling when you play, look no further than the Into the West contract. This contract flips how you think about your board state on its head: instead of solely focusing on building up a fellowship of allies, your focus will shift to maintaining your board despite the fact that allies are forced to leave the game every round.

At the very start of the contract’s game text, we see a difference that clearly sets this card apart from any other card in the card pool: you are not supposed to be using this card unless you have defeated the Lord of the Rings Saga and won against the Scouring of the Shire. This card then is the reward for all your pain and toil, as well as the incentive for you to continue the campaign after Mount Doom. For me personally, this card was the single biggest motivator for me to get my act together and finish my saga campaign finally. Hopefully, the idea of an “achievement” card helps motivate you too. If not, remember that there is no card game police who will arrest you for using this card even if you haven’t completed your own saga. Just make sure to be honest with yourself about whether using it prematurely will ruin anything for you.
Next, we get to the deck-building restrictions: your deck must contain an equal number of cards with a printed cost of 1, 2, 3, 4, and 5 (note that because there is no mention of 0-cost or x-cost cards, you can have as many of those cards in your deck as you want). This restriction will likely drastically change how you think about what cards you will put in your deck. Most of the cards in this game are 1- or 2-cost, and there are very few cards that cost 5 (there are only 26 cards in the entire card pool that cost 5). You will have to make some difficult decisions about what you can fit into your deck—particularly with the ever-important staple cards that are usually 2-cost—and some equally difficult decisions about which expensive cards you wouldn’t hate to see in your hand.
Once you get your deck to the table, the setup ability will allow you to search the top 10 cards of your deck for an ally of 3-cost or less and put it into play. If you are using ALeP’s latest FAQ, this happens before you draw your opening hand. If you are using FFG’s latest rulings, this would happen after drawing your opening hand and taking a mulligan. Either way, the choice of which ally to put into play is an important one. You will likely be forced in the first few turns to send this ally into the West. Don’t choose an ally you know you’ll need in the later parts of the quest.

Here on side B, we get into the complexity of this contract. First and foremost, the contract is immune to all other card effects. It cannot be targeted by player cards or by encounter cards. It cannot leave your control or leave play, meaning that no matter what happens during your game, this card will stay in your play area the entire time. Similar to Messenger of the King, Into the West will attach to a character. One distinction given here is that Into the West’s attached character cannot leave your control, whereas the Messenger of the King character can.
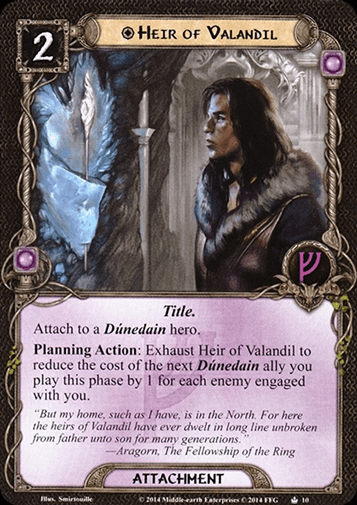
Another important piece of rules text here is that the cost of an ally played from hand cannot be reduced by more than 2. It is very crucial to keep this in mind when planning your deck. If you are using King of Dale, you won’t get any benefit from having more than 2 player attachments on your King. If you are using Heir of Valandil, you won’t get any benefit from having more than 2 enemies engaged (for purposes of cost reduction). If you are using To the Sea, To the Sea! you can’t reduce by more than 2 (unless you are playing an ally from your discard pile—like Glorfindel). This is not to say that cost reduction on allies is not useful in Into the West decks. On the contrary, the fact that you have to keep playing allies every turn to maintain your ally presence, and the fact that you can refund allies at their printed cost, means you should really be trying to get the most out of your cost-reducer cards. But we’ll get to that in a bit.

At the beginning of the quest phase, Into the West will get attached to an ally you control. This will occur before any action window in the quest phase, so you cannot sneak attack an ally into play to become the target of the contract. This means that you either have to play the ally in the planning phase or use one of only a few cards that let you put an ally into play for the entire round (i.e., Mustering the Rohirrim or Gwaihir’s Debt). Note that the contract is not limited to attaching to non-objective allies, so if you have no other allies in play and have control of Nalir, you are forced to attach the contract to him. Spoiler alert: this will cause the players to lose, so be careful!
While Into the West is attached to an ally, it doesn’t do anything to that ally until the end of the refresh phase. If the ally has survived that long, you are now forced to remove that ally from the game. The benefit to this is that you get to refund the printed cost of the ally among the resource pools of your heroes, and you also get to draw 1 card. If at any point in the round prior to this the ally is defeated, discarded, etc., the contract will not attach to anyone else, and you will not be forced to remove any ally from the game this round but will not get any resources either. In this case, you do still get to draw the card.
Positives
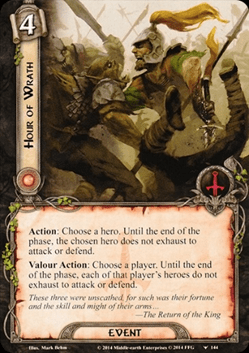
This contract’s main positive is economy: it gives you a steady stream of resources and cards. It can be hard in most decks to afford a high-cost combo like Charge into Battle + Hour of Wrath (9 total tactics resources) without having a ludicrous resource generation method. But with Into the West, if you refund a high-cost ally, you will find yourself awash with resources to spend on the next turn. This can allow you to play some of those cool combos you’ve been dreaming of pulling off without the need to do a lot of setup for them. The card draw from the contract also allows you to find the key pieces of your combo easily.

Speaking of resource generation, this contract also excels at allowing tri-sphere decks to function with a minimum of resource smoothing cards because the resources generated from the contract can be divided among the heroes you choose. Even in a two-sphere deck, you can safely put in high-cost cards in your off-sphere and know that if you draw them, you can add resources to that pool during the next refresh phase.
Another positive for this contract is starting with a free ally in play at the start of the game. Because the first round is often the most important, effects that benefit your first turn are disproportionately valuable. This free ally is essentially the same type of effect as Leadership Denethor, who is often cited as one of the best splash heroes.

Even the contract’s biggest downside can occasionally become a positive. Some decks thrive when their allies are regularly leaving play. Gwaihir, for example, gets a free ready in the refresh phase when the contract removes an Eagle ally. Bard son of Brand, can let you recycle some attachments by sending an ally into the West. Morwen Steelsheen loves to see allies leaving play so she can heal or reduce threat.
Overall, the biggest positive for me is the theme. Playing this contract makes you feel what Galadriel calls “The Long Defeat” of the elves. The longer you play, the more your board state is diminishing. Rather than just looking at your threat dial, you’re watching your supply of allies literally leave the game and wondering if you can get a victory before your power is a thing of the past.
Negatives
The most powerful card type in this game is the ally. Most of the “One Decks” (decks that can defeat any quest in the game) focus on setting up an ally swarm. Because Into the West taxes your ally supply every turn, it can be very punishing to your board state. In order to keep up with your losses, you have to reliably be able to play at least one ally every round. Anything that prevents you from doing this will be very difficult to handle. This is true for quests that are either very long (e.g., Ghost of Framsburg or Temple of the Deceived), restrict when or how many allies you can play (e.g., Drowned Ruins or Escape from Dol Guldur), or cause you to lose cards in your hand (e.g., Shelob’s Lair).

Another important drawback is deckbuilding. You simply cannot play decks that have lots of key cards that all have the same card cost. If you are playing a 50 card deck and include no 0- or x-cost cards, you can only have up to 10 cards of a single cost. The other side of this coin is that you have to find a way to somehow find at least 6 (depending on your deck) 5-cost cards. There simply aren’t enough appealing 5-cost cards in the card pool to make that an exciting choice.
This makes sideboarding cards extremely difficult. If ally Glorfindel is occupying one of your 5-cost card slots, but your buddy is playing a deck with hero Glorfindel, you can’t trade out your ally for just any card. You have to trade him in for another 5-cost card.
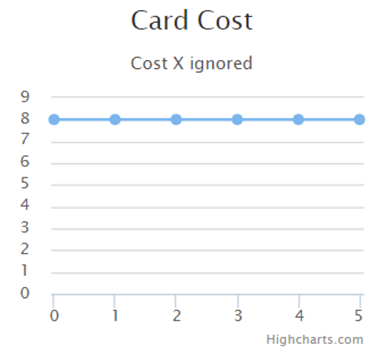
Speaking of deckbuilding, your inner instincts for cost curves will scream in dismay as your “curve” is actually a straight line. This will make it much harder to find cards in your opening hand that are easily playable on the first turn. It is not rare for Into the West decks to not have anything to play the first turn. By the second turn, you should have a whole lot of resources and cards to choose from, but as discussed earlier, the first turn is often the most crucial.
Cards to Include

One thing to look for when thinking about cards to include in an Into the West deck is any card that has a higher printed cost than its “actual” cost. Because the deckbuilding restrictions only look at printed costs, you can create a more normal cost curve by filling your high-cost card slots with cards that can be reliably played for fewer resources. Examples of this would be Need Brooks No Delay, Keen as Lances, Citadel Custodian (but remember that his cost can’t be reduced by more than 2), or Morwen Steelsheen. The biggest source for cards that fit into this category are secrecy cards, as they have a built-in cost-reduction if your threat is 20 or lower.
As discussed briefly, key attachments that act as cost-reducers for allies go a long way when building for this contract. An attachment that reduces the cost of an ally by 2 is actually usually better in an Into the West deck than Steward of Gondor, despite having the same net effect of earning you 2 resources per round. This is because Steward of Gondor only generates resources for a single hero. On the other hand, an ally whose cost was reduced by 2, if it is refunded with the contract, will generate resources for any of your heroes, depending on what you need.

Another key card type to look for is allies that leave play at the end of the round. Examples would be core Gandalf (who is probably the single best card for an Into the West deck), Elrond, Galadriel, Wilyador, or the Dwarven Sellsword. These allies are great because they provide you a huge benefit for a turn, act as a no-brainer for the target of the contract, and then refund themselves before they would leave play by their normal effects.
Archetypes that Work Well
I have found that the archetypes that work the best are the ones that come with their own ally cost reducer and that have useful allies of high costs, such as Dale or Eagles.
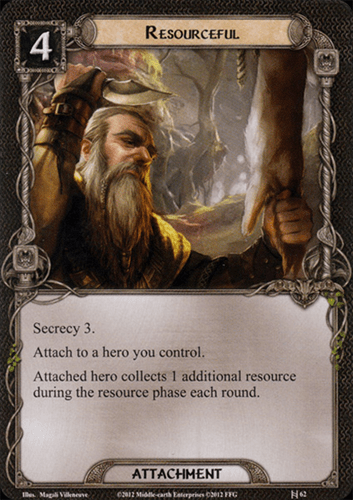
Secrecy decks easily find a place with this Contract as well, given that they can functionally change your cost curve (or line, in this case) to a more normal curve.
Other archetypes that work well are ones that work best when they can maintain a “revolving door” of allies entering and leaving play. Silvans and Eagles are great examples of traits that focus on that playstyle.
Example Decks
At the time of writing, there are only 9 published decks on RingsDB that feature the Into the West contract. Here are a few good examples:
- Dale: https://ringsdb.com/decklist/view/24689/dalepassesintothewest-1.0
- Eagles: https://ringsdb.com/decklist/view/25182/returntomanwintothewest-1.0
- Rohan: https://ringsdb.com/decklist/view/25685/wherenowthehorseandtherider-1.0
- Silvan: https://ringsdb.com/decklist/view/21988/theelvessailwest-1.0
Have fun and I will see you in the West!
