The Grey Mountains have been infested with orcs, goblins, and other fell creatures ever since Mount Gundabad was first sacked after the destruction of Eregion in Second Age 1697. The dragon Dagnir had succeeded in doing what no army had been able to do for over 4500 years – driving the orcs out of what was widely considered the goblin capital of the North. But the dragon is dead, and Urdug, the chieftain of the Gundabad goblins, has brought his hordes of orcs, goblins and wargs to reclaim their homeland.
Your band of heroes gave everything they had on the quest to kill the dragon that was threatening all of Rhovanion. But they must fight once more, this time against impossible odds, not just for the wealth of the mountain, or the safety of the free peoples of the north, but for their very lives.
Both sides will give all they have. Urdug is ready and willing to fling thousands of goblins into the fray. He will not stop until every last one of the heroes are dead. Prepare yourself for the battle to determine the future of the North. Prepare yourself to fight – for the Fate of Wilderland…
The Fate of Wilderland
- Found in: The Fate of Wilderland Adventure pack, Ered Mithrin pack 6
- Official Difficulty: 6
- Community Difficulty: 5.9
- Encounter Sets: The Fate of Wilderland, Grey Mountain Goblins, Hills of Wilderland, Gathering Gloom
- Quest cards: 3
- Play if: You want to experience an epic battle that includes a powerful but different boss. The combat phase is your favorite part of the game. You want to face swarming orcs, but still with differentiation from Khazad-Dûm. You want a nail-biting multiplayer quest.
- What’s different about this quest: The only non-POD quest where all stages have the printed “-” for quest points (Attack on Dol Guldur is the only other). The only quest in the game where victory can occur on any stage (Flight of the Stormcaller can be defeated on stages 2, 3, or 4). The scenario is wholly driven by two objectives, The Goblins’ Assault, and The Heroes’ Defense.
- Solo or Multiplayer: While Fate of Wilderland can be played and enjoyed at any player count, both the difficulty and enjoyment level increase with the number of players. It can hit hard from the beginning, but it is possible at lower player counts to win the game on stage one or two. At higher player counts, you are guaranteed an extremely fun, combat-heavy, down-to-the-wire quest every time. Keep in mind that between surging enemies and When Revealed effects on quest stages it is very possible to see upwards of seven or eight enemies in one round at four players.
- Can I bring side-quests to this quest: Absolutely! Since none of the quest stages require any progress, and excess quest progress will do nothing else, side quests are a great way to give yourself more advantages over the encounter deck. Basically any and every side-quest will be useful, as it is better than nothing. Admittedly though, because of the extremely combat-focused nature of this scenario, Rally the West and Explore Secret Ways are probably the weakest and least useful. This will be discussed more in Tips and Tricks.
- What to look out for: Immediate attacks from Urdug (more on that later). A plethora of brutal attack-boosting and other shadow effects. Progress on The Goblins’ Assault causing the players to advance to the next stage prematurely, flooding the board with more enemies. A threat in multiple Ered Mithrin scenarios, Hills of Wilderland™, hacking off LOTR LCG players since 2018. An alternate loss condition in the form of progress on The Goblin’s Assault, which provides a finite time limit for the game, making any turtling strategy difficult.
The Quest
Setup
Stage 1A instructs you to add The Goblins’ Assault, The Heroes’ Defense, and Urdug to the staging area, then discard cards from the encounter deck until you have discarded enemies equal to the number of players in the game, and add them to the staging area. Urdug is marshaling his forces and he is not going to give you a moments rest. This discard effect will be repeated if and when you advance to Stages 2 and 3. This means, depending on the player count, you will be starting the game with at least 3, possibly as much as 16 threat in the threat in the staging area, with enemies equal to the number of players, plus Urdug. This can be a brutal start, especially in multiplayer, so it is definitely helpful to bring decks that can quest well right out of the gate, and also be prepared to take early enemies, as many of the enemies in this quest have a low engagement cost.
Quest card 1: Urdug’s Assault

The initial stage has no effect upon the players or the game, except for an end of round effect that attempts to advance to stage 2. Each of the stages scales in how much progress must be on The Goblins’ Assault to advance: 2 plus 2 for each player on Stage 1, 4 plus 4 for each player on Stage 2, and you lose at 8 plus 8 for each player on Stage 3. The Forced effect on Stage 1 is the one that will place the least progress on The Goblins’ Assault, 1 for each enemy in the staging area. This will always be at least one, since Urdug spend the entire game in the staging area. There are 2 cards with shadow effects that return enemies to the staging area, and 3 that add a new enemy to the staging area, not to mention the Warg-Rider that can return itself to the staging area. This means you will not have that much time on Stage 1, between its own Forced effect and various encounter and shadow effects. It is definitely best, however, to attempt to stay on each stage as long as possible, since every time you advance you will be receiving a horde of new enemies.
Quest card 2: Outflanked

Just as they have finished dealing with the hard rush of Urdug’s initial assault, your weary heroes turn to see a new force of goblins coming in from behind them, from what they had considered to be an impassable side of Mount Gundabad. With a groan, you turn to deal with this new threat. Once again, you must shuffle the encounter discard pile into the encounter deck and discard until you have discarded enemies equal to the number of players and add those enemies to the staging area. This time, instead of an end of round effect adding progreess to The Goblins’ Assault, every time an enemy attacks you must place a progress. Keep in mind this triggers even if Urdug makes an immediate attack from Urdug’s Command or if a Pack of Wargs makes an additional attack. You will advance from this stage as soon as you have twice as much progress on The Goblins’ Assault as you did when Stage 1 was cleared.
Quest card 3: The Final Push
“I know we’re not supposed to talk about art on an audio podcast BUT…” – Brandon, every
COTR episode ever.

I am going to take a quick paragraph to admire this GORGEOUS piece of art by talented artist Monztre. This is one of my absolute favorite pieces of art in the game. There are many beautiful works in the game, but it seems like all the best pieces are quest cards, from Against the Trolls to The Betrayal to A Cornered Dragon. Anyone who has ever watched a movie with combat knows that SOMEHOW, no matter how big the battlefield and armies, the chief protagonist and antagonist always end up in an epic 1v1 showdown. This art perfectly captures that moment where whoever your heroes happen to be are so close to victory, but blocked by the greatest of foes. Every last ounce of courage and strength must be spent if Wilderland is to be saved. Apologies for the side-quest but I love The Final Push artwork!

Ain’t nothin’ like an amazing piece of art to grace a quest card that aims to destroy you! Once again, upon reaching Stage 3A, you shuffle in the encounter discard pile and discard until you discard enemies equal to the number of players in game. Then, once you flip to 3B, instead of an advancement condition, you are met with the text, “Forced: At the end of the round, place 1 progress on the Goblins’ Assault for each enemy in play. Then, if there is X or more progress on The Goblins’ Assault, the players lose the game. X is equal to 8, plus 8 per player.” This means that if you have been playing recklessly with your Goblins’ Assault progress, you could be in trouble. We’ll discuss Goblins’ Assault management later. Suffice it to say, you want to kill Urdug sooner rather than later. Also note, the progress placing mechanic on this final stage is the most brutal of the three: at the end of the round, you must place a progress on The Goblins’ Assault for every enemy in play! Whether solo with a sixteen progress cap, or four player with a forty progress cap, the time is going to go quickly. Notice that you can only lose this way at the end of the round. Completely independent of questing, the quest can only be won in one way – defeating Urdug. This is no simple task. But before we dive into the deeps of strategy, let’s take a quick look at the makeup of the encounter deck.
The Encounter Deck
Global

- The encounter deck is of a fairly decent size with 43 cards in the deck once the setup cards are removed in Normal mode, and 30 in Easy mode.
- Shadow effects will appear on 67% of encounter cards in Normal mode, and 60% of cards in Easy mode.
- Average threat on revealed encounter cards is 1.5 in Normal mode, and 1.6 in Easy mode. This ranges from the zero threat of the treachery cards to the Hills of Wilderland, which scales with the number of characters controlled by the player with the most characters.
- The printed surge keyword appears only on the Stray Goblin, though Swarm of Bats can surge if its effect whiffs. Slopes of Gundabad can also pull an additional encounter card if you do not place a progress on The Goblins’ Assault.
- Doomed 1 appears on 5 encounter cards, and one of those cards, Swarm of Bats, can raise your threat by a ton more.
- Immunity:
- Urdug is Immune to player card effects, and cannot leave the staging area. Also, per The Goblins’ Assault, while engaged with the players, Urdug cannot be damaged unless he has resolved an attack during the combat phase.
- Goblin Troop cannot have player card attachments.
- Stray Goblin cannot be optionally engaged.
- Gate of Gundabad is immune to player card effects, and while it is in the staging area, resources cannot be placed on The Heroes’ Defense.
The above statistics do not count Urdug, The Goblins’ Assault, or The Heroes’ Defense as these three cards enter the staging area during setup and cannot leave the staging area for any region. The encounter deck is comprised of fifteen enemies, fifteen locations, and thirteen treacheries, but don’t be fooled. Though the least common encounter card type, it is the treacheries that can definitely end a game that seems to be going well, so as in any scenario, cancellation is advised.
Objectives
The Goblins’ Assault
The Fate of Wilderland has two objectives, both of the kind that simply sit in the staging area for the game and affect it through their text. The first thing to note is that even though both of these objectives belong to the Fate of Wilderland encounter set, and only appear in this scenario, they have “Mount Gundabad” printed as the scenario they belong to.

The Goblins’ Assault has the Assault trait, and is the only card in the game with the Assault trait. We have already seen how the quest cards place progress on this card, and later we will see how enemies, locations and treacheries all conspire as well to help you lose. Add to this mix The Goblins’ Assault’s own Forced effect: After the players quest unsuccessfully, place 1 progress here for each player in the game. This makes it imperative to understand – even though none of the stages require progress, adequate questing is still needed. This Forced effect is most likely to trigger at the beginning of the game, or after advancing to Stages 2 or 3, as these are the times when the most threat is built up in the staging area. Once again, this is another reason to try to win sooner rather than later, before having to face the pain of quest card When Revealed effects.
We’ll look at the ramifications of the first effect on The Goblins’ Assault more when we look at Urdug, but is clear that plus two defense for EACH other enemy is no small matter. The “cannot be dealt damage” clause is to prevent the players from killing an enemy to place the final necessary resource on The Heroes’ Defense, then attacking Urdug to win.
The Heroes’ Defense
The Heroes’ Defense is the second objective for the Fate of Wilderland. Just like its Assault counterpart, The Heroes Defense has the Defense trait, which doesn’t really count for anything. Unlike The Goblins’ Assault, which has tokens accumulate faster than hobbits at the Green Dragon, resource tokens on The Heroes’ Defense are a lot harder to collect.

Only two effects will place resources: the Response on The Heroes’ Defense, and The Response on Dwarven Watchtower, which can place a resource after you explore it. The Response on The Heroes’ Defense can be triggered every time you destroy an enemy. Note that this does not trigger if you directly discard an enemy from an effect such as The Great Hunt. While on the topic of The Great Hunt, it is important to realize that there aren’t really any good targets in this quest for it, or its brother, Hunting Party, with the possible exception of the Pack of Wargs. The vast majority of the eligible enemies in this scenario are smaller enemies that attempt to swarm you, making the high cost of resources or an extra card not very profitable.
In solo, you are going to have to destroy five other enemies before you are even able to attack Urdug. This can take a while, as you are only seeing one card a round, but the quest cards do their very best to help you find more and destroy you in the process. In multiplayer, you are going to be seeing a lot more enemies, but it is still going to take some time to destroy fifteen or twenty enemies. One interesting aspect of this mechanic is that it does give you some insight into how many enemies are sent to the abyss over the course of the average game.
Enemies
With the exception of Urdug, there are two main types of enemies in this quest: orcs that attempt to swarm and smash you, and the Warg type enemies that have a second bad effect if they receive an effectless shadow card. But before we look at his hordes of minions, lets look at the big man (orc actually) himself, Urdug.
- Ever since his betrayal while you roamed across Rhovanion, and subsequent escape from Hrogar’s Hill, Urdug has been rallying the dispersed goblins of Mount Gundabad, waiting for the day when they could retake their ancestral home. Now he has come, and the fight will be desperate, as are all fights for a homeland. The first look at Urdug’s 2/3/2/5 stat line can be deceiving. It is important not to underestimate this squat little orc on a glaring warg. The 50 engagement cost has no direct effect, since Urdug is never going to leave the staging area. It will help for effects that give boost against high engagement cost enemies, such as Hobbit Cloak, or Dagger of Westernesse. Urdug’s two threat can only be boosted by Dark Clouds, and thus is fairly tame. Base three attack may seem mild, but it can easily be boosted. Urdug’s Forced effect is identical to the effect on his horn in Roam Across Rhovanion. This horn can also be seen on the picture for Stage 1 of this scenario. There is a 65% chance or Urdug’s attack being boosted by at least one, and a 23% chance of his attack being boosted by three or more. This, combined with the fact that you have a 67% chance of getting a shadow effect, means Urdug’s attack can range from an easily defendable three, to as high as seven or eight. Sending Denethor with no attachments to the defense may be tempting. But Urdug’s Forced effect can easily be the end of a hero. Two defense and five hitpoints may not look like much, but remember, per The Goblins’ Assault, Urdug has plus two defense for each other enemy in play. As soon as Urdug is defeated, you win the game, no matter what stage you are on. The five victory points mean nothing then, unless you are scoring your games.
- Here to support their boss, Urdug’s Elite is your standard orc swarming enemy, but can also be a major pain as he can exhaust your main defenders or attackers and keep you from being able to actually kill enemies. The 2/3/2/5 stat line, identical to Urdug’s, is not that bad, but can become a little more dangerous with certain attack boosting shadows. Five hitpoints is just enough to make the Elite non-Gandalfable (yes, that is a word). Often the fact that you have to swing for seven to outright kill them can mean that that Urdug’s Elite could stay engaged for a few rounds, triggering effects on Stages 2 and 3. The shadow effect could hit you at unawares to exhaust a character you were planning on having ready for combat
- The Fierce Vanguard is probably the weakest of the enemies unique to this encounter set. 2/2/2/3 makes it pretty simple to handle and kill. Even the possibility of plus two attack is not that threatening. This is one of those enemies where the choice to place progress on The Goblins’ Assault is almost always the less desirable option. The shadow is where this card can really become dangerous. Not only does it turn what possibly was a small enemy into a boss-level attack, potentially killing or severely injuring an unsuspecting defender, but it makes an enemy that you were possibly planning on killing now much more difficult. On a Goblin Troop, Pack of Wargs, or Urdug himself this can be especially brutal.
- In keeping with the theme originally established in the core set Wargs, the Warg-rider’s ability triggers if he receives a shadowless shadow card. More powerful than its core cousin however, Warg-rider’s stats come in at 3/4/1/4. Just like the other two non-unique enemies in this encounter set, Warg-Rider presents you with a choice that pits placing progress on The Goblins’ Assault against another nasty effect. In this case, if he doesn’t receive a shadow effect, the Warg-Rider will return to the staging area unless you place progress. One additional note: Warg-Rider is the only enemy without a shadow effect.
- The three other enemies in this scenario were already covered in Journey Up the Anduin, but they deserve a brief discussion of how they work in this scenario.
- The Goblin Troop is at its most powerful of the cycle, as all but one of the enemies are Goblins. Keep in mind that its effect will also boost Urdug. The plus two attack shadow can also hurt if it hits at the wrong time.
- The Stray Goblin is dangerous mainly because it can advance Stage 1 before you are ready, but it can also be helpful as an easy resource for The Heroes’ Defense.
- The Pack of Wargs can hit hard with its high threat and also the fact that it can make multiple attacks, potentially advancing Stage 2 quicker.

Locations
For a scenario so heavily focused on combat, the locations do not take it easy on you. But that makes sense. You didn’t fight your way through a mountain of enemies expecting to find a nice Bee Pasture awaiting you on the other side!
- The Gate of Gundabad is somewhat surprising in that it is not set aside or fetched by any of the quest cards. It is just a unique four threat location that also feels very thematic. Four threat is no joke, but keep in mind any location that comes off is one less enemy that comes off. The restrictions are what really make the Gate dangerous, as you cannot explore it except by traveling, and must travel there to be able to place resources on The Heroes Defense. The timing of traveling here must be handled carefully, because an ill-timed Goblin Troop can spell the end of the game. The Victory 1 does ensure that you will only see the Gate a maximum of once in one game, but once is enough. Four quest points is not too bad, but remember that no progress placing effects can help to whittle it down. The Gate of Gundabad is also the one card that can boost Urdug’s attack to seven if discarded to his ability.
- The Hilltop Battlements is your standard three threat, three quest point location. While in the staging area, it gives minus five engagement cost to each non-unique enemy. This can hurt certain deck types that try to avoid enemies, though that is probably not the best approach for this scenario. The engagement cost subtractions can stack if there are multiple Hilltop Battlements in the staging area. The Forced effect (When Hilltop Battlements is explored, discard the top X cards of the encounter deck, where X is the number of players in the game. Add each enemy discarded by this effect to the staging area) can potentially problematic, but it scales with the player count. In solo, it may do nothing, but in multiplayer it is common to get at least one enemy. This effect triggers even if Hilltop Battlements is explored while in the staging area.
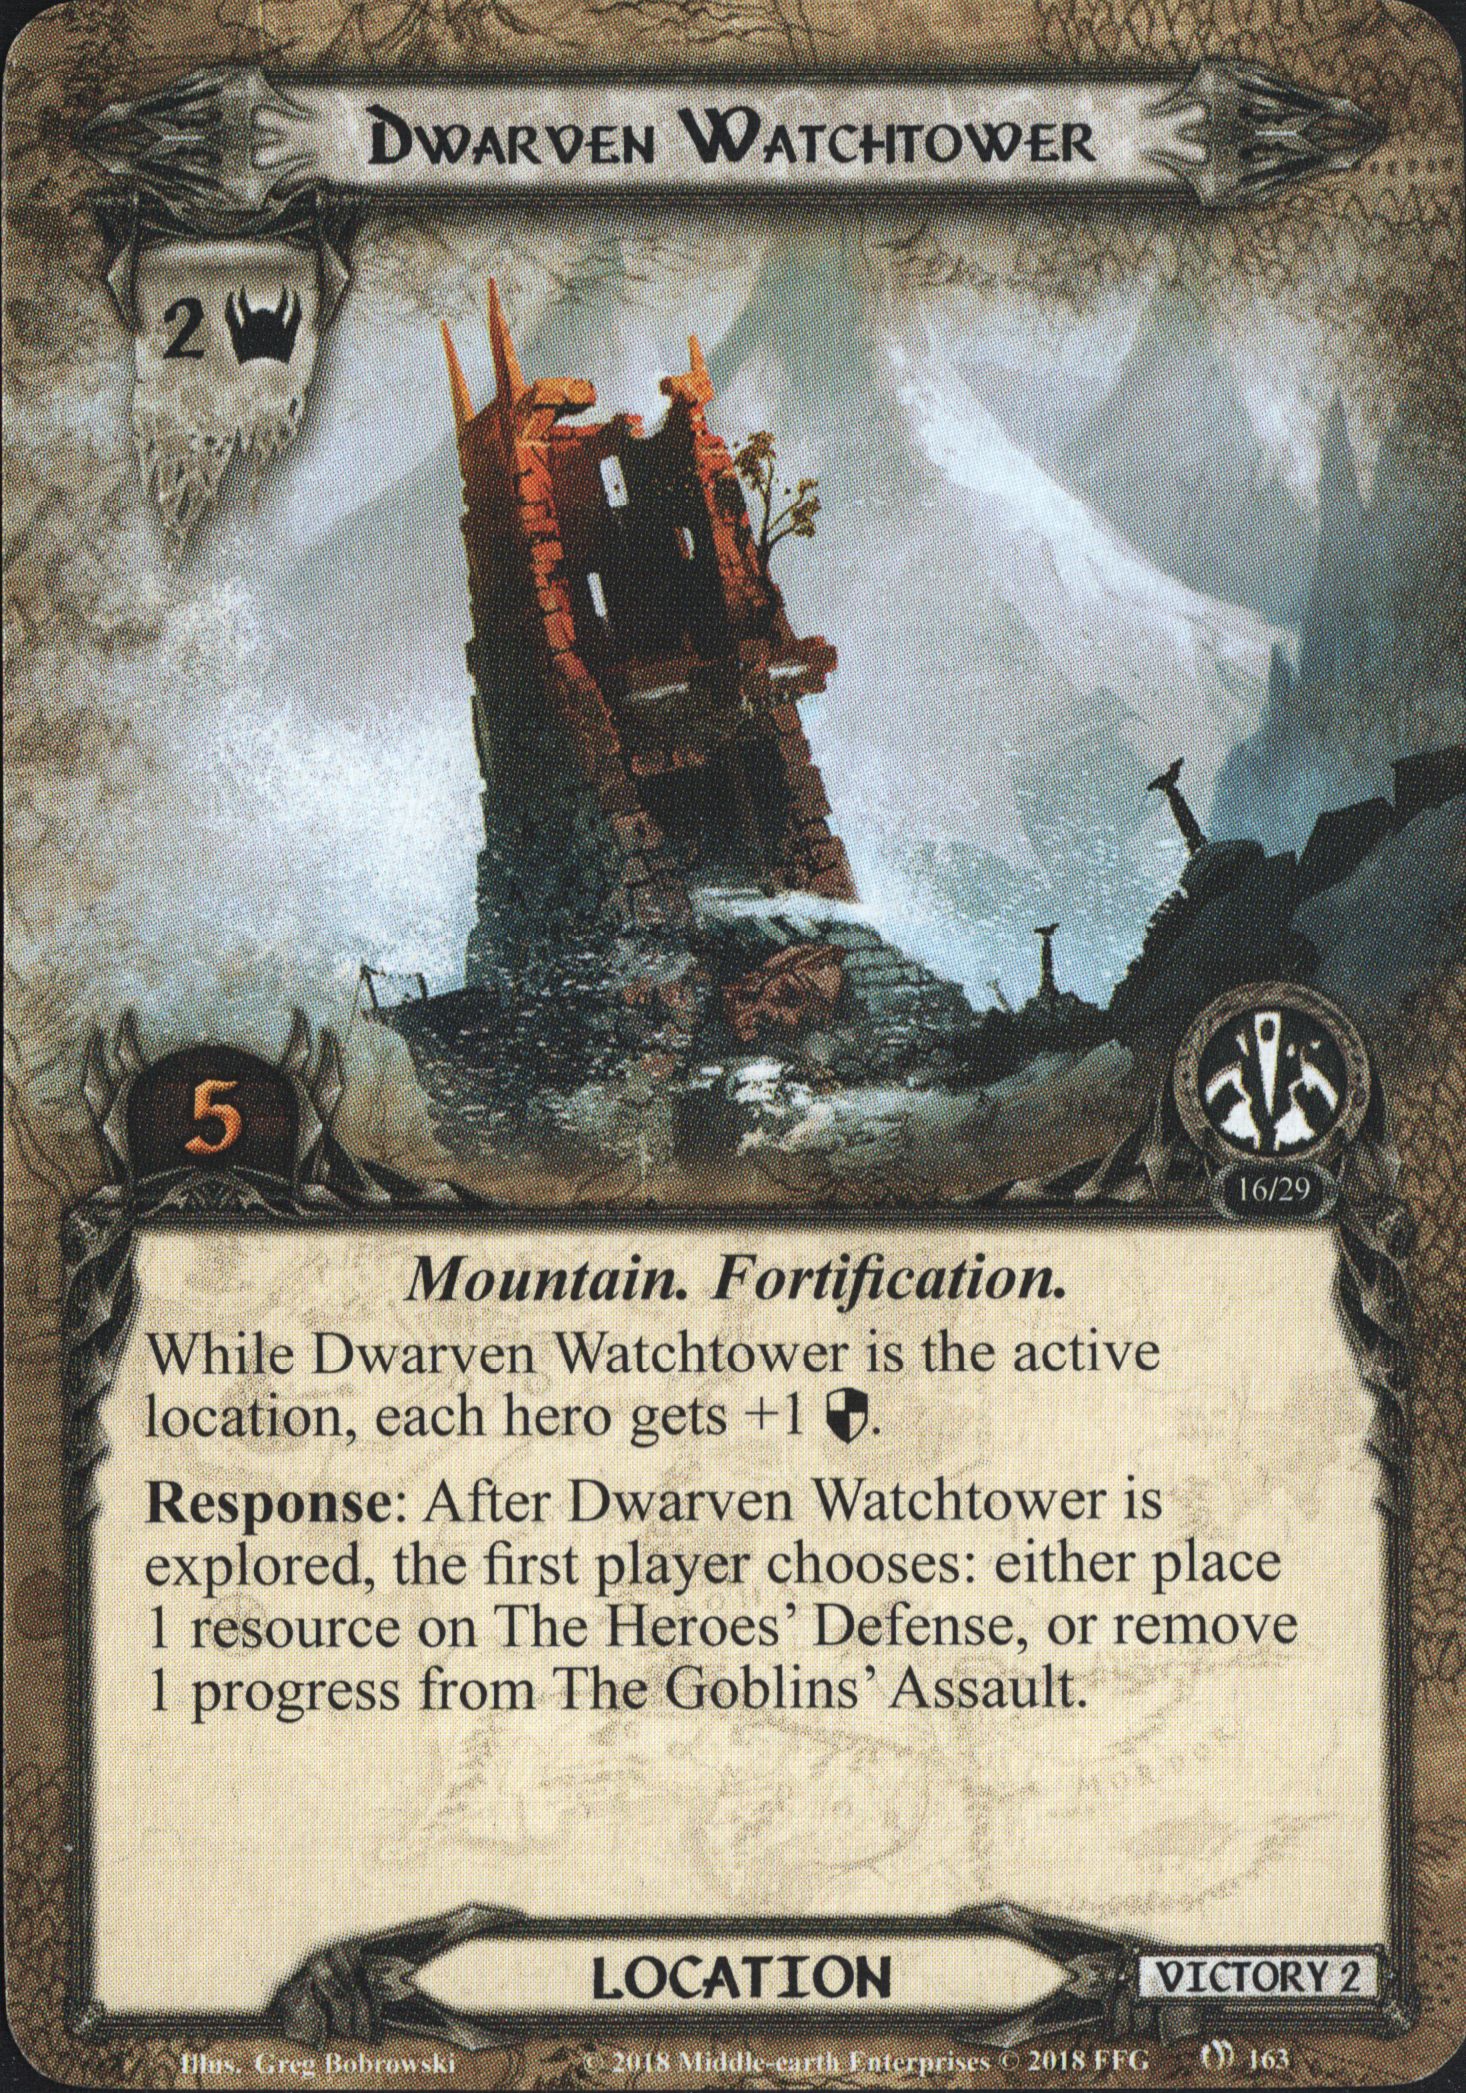
- Possibly one of the most enjoyed aspect of the LOTR LCG is when the encounter deck gives you something good in a difficult scenario. The Dwarven Watchtower is exactly that. It is a two threat, five quest point location. Both sections of text are beneficial to the players. The first gives each hero plus one defense while it is the active location. This can be helpful against the attack boosting Goblin Troop, Fierce Vanguard, or attack boosting shadow effects. The second portion of text, only active while the Watchtower is the active location, allows the players to either remove a progress from The Goblins’ Assault, or add a resource to The Heroes’ Defense. This can be extremely helpful, either to keep from advancing the stage or losing the game by removing a progress, or by getting closer to the required number of resources on The Heroes’ Defense so the players can attack Urdug and win the game. Each Watchtower can only be used once, however, as they have Victory 2.
- Rounding out the locations from The Fate of Wilderland encounter set is something that is very rare: a location with a When Revealed effect. In fact, there are only seventeen non-POD, non-nightmare locations that have a When Revealed effect. The Slopes of Gundabad is one of them. Effect aside, the Slopes are pretty tame, with two threat and four quest points. The effect itself is “Either place 1 progress on The Goblins’ Assault, or reveal an additional encounter card.” This can be annoying, but the best choice is typically the progress, as seeing cards could mean seeing more enemies. Once in play, the Slopes will probably stay in the staging area for a while, because other locations are going to have more pressing issues. The shadow effect (Attacking enemy cannot take damage this phase) can hurt, whether on a small enemy that you were planning on killing so you don’t have so many attacks, or on Urdug, forcing you to survive another entire round.
- The two other locations in this scenario were already covered in Journey Up the Anduin, but they deserve a brief discussion of how they work in this scenario.
- The ever-heartwarming Hills of Wilderland are painful as always, especially since one of the best ways to approach this scenario is ally swarming.
- The Lonely Lands is not that hurtful, and typically a relief to see over other things during the quest phase.
Treacheries
The treacheries in The Fate of Wilderland, while mostly not of the kind that can be immediately game-ending, are still evil enough to possibly warrant the bringing of cancellation.
- Fierce Attack is probably the treachery with the smallest effect, but also the one that could end the game the easiest. It has Doomed 1, and “When Revealed: Place X progress on The Goblins’ Assault, where X is in the stage number of the main quest.“ X is going to be at least one, and at the most three. This could come off when you need one more round to defeat Urdug, and make you lose by having too much progress on The Goblins’ Assault on the current round. But, all considered, it will most of the time be better to see this than any other bad card. The shadow effect on Fierce Attack starts out bad and progressively gets worse: Attacking enemy gets plus X attack, where X is the stage number of the current quest. Just like the When Revealed effect, this starts at one, but will reach three by the end of the game.
- As if other enemies weren’t enough, Urdug’s Command seeks to exhaust your defenders or you chump supply and punish you for it. An immediate attack from Urdug is more dangerous than any other enemy, as even his attack value is variable, without even counting the shadow effect. The effect also punishes chumping, as does the shadow effect. This, or Swarm of Bats, is probably the most necessary to cancel treachery. The shadow effect is not too dangerous, providing you are not following a strategy that employs large amounts of chumping.
- The final Fate of Wilderland treachery is your typical plus one threat to everything: Dark Clouds. It gives each enemy and each location in the staging area plus one threat until the end of the phase (note: not each enemy currently in the staging area). It also has the secondary text “If the players quest unsuccesfully this phase, place 1 progress on The Goblins’ Assault.” This progress is in addition to the progress that you are already forced to place per The Goblins’ Assault. The shadow effect forces you to discard a nonobjective attachment, which can be annoying, but seeing as there only two copies of this, and no other attachment hate in the encounter deck, this is not too dangerous.
- The two other treacheries in this scenario were already covered in Lost in Mirkwood, but they deserve a brief discussion of how they work in this scenario.
- Gathering Gloom is really the only direct form of ally hate, but not too dangerous.
- Swarm of Bats is horrible as always, especially late game when the resources tend to be piling up more.

Tips and Tricks
- Remember that each of the objectives has the Mount Gundabad scenario name as a misprint.
- Bring side-quests. Especially helpful, even though it won’t place resources on The Heroes’ Defense is Delay the Enemy. But really any side-quest will be better than nothing since progress on the quest does nothing.
- Speaking of excess progress on the quest, Ride Them Down or Backtrack can be great to provide value for overquesting.
- With so many enemies engaged, Thicket of Spears and other Feint-like abilities will come in very handy.
- Getting one or two sentinels set up, with lots of readying, will make you everyone’s best friend. Having enough defenses, but still having attackers up to kill things is the most important key to surviving the quest.
Playthroughs
This is a very new quest, so only one video playthrough has been published:
- 2 players (Eagle and Beorn decks): https://www.youtube.com/watch?v=NrP2_3oJZCk
Here is one deck for Fate of Wilderland using the in-pack hero, Radagast:
This concludes the Fate of Wilderland scenario analysis, and the Ered Mithrin cycle! This cycle is so much fun, with a great story outline (It made me read Beowulf) and amazing design all the way through. Yes, there were a few print hiccups, and overlooked mistakes, but on the whole the Ered Mithrin cycle is a blast, from the reappearance of old friends (enemies?) from the Core Set, to not one, not two, but four epic dragon showdowns, each of which still feel different from each other with plenty of replayability, to the final standoff with the backstabbing orc (Did anyone really not see that coming though?) Urdug. Stay tuned as the heroes (SPOILER ALERT!) head east and south to face The Vengeance of Mordor!
About the author
Bobbymcbobface is a high school student in Norman, Oklahoma, USA. I currently have the Shadows of Mirkwood, Against the Shadow, Dream-Chaser, Haradrim, and Ered Mithrin cycles, along with the Saga expansions and Dream-Chaser nightmare decks. Feel free to find me on COTR Discord and hit me up for a game of LOTR or disc golf if ever in the Oklahoma City area.

One thought on “The Fate of Wilderland”