In December 2020, the community got a nice surprise from FFG. Since the GenCon of that year could not be held due to the pandemic, FFG could not release their GenCon-exclusive scenario that year. And with no Fellowship events being held in that year either, they needed to publish their quest in one way or another. And so, the Hunt for the Dreadnaught was released for public purchase at the end of 2020. This quest improves upon the Epic Multiplayer format by including the possibility of playing this quest with any number of players! This makes the quest an amazing convention event, which was proven during Con of the Rings 2021, where over 20 players beat the quest at the same time! The quest also makes improvements on other aspects of the game and stands out with various difficulties and interesting objectives. Strap in because this is going to be a long article!
The Hunt for the Dreadnaught

- Found in: The Hunt for the Dreadnaught scenario pack.
- Official Difficulty: None (Scenario packs do not get difficulties).
- Community Difficulty: 5.5. Note that there are 3 different difficulty modes though, so you can make the quest easier or harder if you want.
- Encounter Sets: The Hunt for the Dreadnaught (stand-alone pack).
- Quest cards: 2, with a clear break on the second one, making it feel like 3.
- Play if: You are at a convention and want to join in on the fun with the rest of the attendees. You are looking for another boat-themed quest with ship objectives but without the Sailing mechanic. You have need of some of the unique abilities on the ship objectives to test a weird deck.
- What is different about the quest?: A lot.
- Go on, tell us the differences: This quest has it all, double-sided ship objectives with unique abilities, a Corsair deck, an epic battle against a Massive ship, smaller fights against tough Corsair enemies, beneficial locations, 3 built-in difficulty modes, more ship objectives to earn, quest scales infinitely with the number of players.
- Solo or multiplayer?: While this quest is certainly beatable in solo, the fun is in the preparation with other players, deciding what ships to take, and then battling the Dreadnaught with as many people as possible. I would advise about 2-3 players per table in order to keep the rounds relatively short so that the entire group can beat the Dreadnaught without it taking 5 hours.
- Can I bring side-quests to the scenario?: Yes. The nice thing about an Epic Multiplayer game like this is that other groups can continue to make progress on the main quest while you explore some side-quests. It is common on round 1, making the progress check on round 1 a bit lower than usual. Stage 2 does not necessarily require progress to beat, so you can continue to explore side-quests there.
- What to look out for: Continuous attacks from the Dreadnaught, threating out as this quest takes a long time to beat, losing your ship eliminates you from the game, unique Corsair enemies can be difficult to handle, the Boarding keyword can overwhelm players as they engage multiple enemies at once, Captain of the Havens can cause you to lose if you have no more cards left in your deck by the end of the round.
Rules explanation
Before we start the quest analysis, a few unique keywords and mechanics have to be explained beforehand. This quest is rather unique, even by stand-alone scenario standards. I will advise you to read the rule sheets included in the pack before you start and have them ready by your side whenever you progress.

This is a quest with ship objectives and ship enemies. These mechanics are borrowed from the Dream-chaser cycle, along with the Boarding keyword on certain ships. I have done a complete article on how these mechanics work here, so read up on it if you have not yet started that cycle. You can ignore the Sailing mechanics explained in the article; they do not apply here.
The star of this quest is the large Dreadnaught card included in the pack. This is the first card in the game that is of this size, more than twice the size of a regular card. This enemy is your goal to destroy during the quest. It won’t be easy, as the Dreadnaught enemy has a number of things going for it. I will explain most of these things in the enemy review for both sides, but the important part to note is the Massive keyword on it. The Massive keyword means that the enemy cannot leave the staging area, is considered to be engaged with each player, and will attack each player during the combat phase in turn order. This means that once stage 2 rolls around, you will start taking attacks from the Dreadnaught. The quest card itself has a way to avoid this, which will be explained later.

Another important part of these quests is the Meeple icon in some textboxes (the person icon, or circle balancing on half a circle). This symbol represents each player at the table. This is not the total number of players playing the quest, as it can be split between multiple tables. This just represents the number of players playing with the same staging area at your table. This number can vary between 1 and 4. Whenever you see the meeple icon, you multiply the value before it by the number of players at your table. For instance, the Dreadnaught Elite side has Archery 1 per meeple. This means that if you have 3 players at your table, you deal out 3 points of Archery damage each combat phase even if 20 other tables are fighting the Dreadnaught with you.
The other tables fighting the Dreadnaught only come into consideration when the asterisk (*) is concerned. This symbol is always explained on the card it appears on and usually scales quest points or hitpoints by the total number of players in the group. So if 20 players attempt to fight the Dreadnaught at once, it will have 20 x 15 = 300 hitpoints.
It is also important to note that this quest does not wait on any team to make sure everyone advances at the same time to the next phase. Each table will take on the quest at their own pace and will record the progress they make on the quest or the damage they do to the Dreadnaught to one central observer who records this for all tables. This can be a player, but it is usually best to be a separate person for larger events. Once all progress is made on stage 1, each group advances the next time they reach the end of the quest phase. This can cause the quest to have more progress than quest points. Once the Dreadnaught has no hitpoints remaining, all teams immediately win.
Setup
With all those rules explained, you’d think that we’d jump right into the game, right? Wrong. There is a lot of setup to be done, and the setup even differs between what difficulty you do. So you select your difficulty mode first. This does not have to be the same as the other tables if you want a more difficult time or just want to cruise by when other tables are getting smacked around. I will cover the similarities in setup first.
The players start by preparing their fleet. This means that each player may select one of the unique double-sided ship objectives and put it next to their heroes. They may then do any setup actions on that ship if there are any. There are 6 different unique ships, so at least 2 are leftover and are removed from the game. Put the non-unique Gondorian Warships with the leftovers as well. Players then prepare the Corsair deck by removing every Corsair traited enemy from the normal encounter deck. Set the unique Corsair enemies aside (there should be 6 of these) and shuffle the rest into a second encounter deck. This will be the Corsair deck from which cards are revealed for the Boarding keyword. Players also set the large Dreadnaught card aside, out of play. The rest of the setup is unique to the difficulty mode you select.
Easy mode

For easy mode, you do not remove any golden-ringed cards from the encounter deck like you would with a regular scenario. Instead, the rules card instructs you on what cards to remove from the deck. These are the two copies of Black Sails and one copy of the Corsair Warship. These are all the copies of those vessels in the deck, so you do not have to worry about encountering them during your game. Players also search the deck for a copy of Cobas Haven and make it the active location. This reduces the Boarding value for Ship enemies by 1, which is a nice help for the early game. Players also add one resource to their heroes as per regular Easy mode rules at this point. This means that if a player starts with the Swan Ship of Dol Amroth as their starting ship, all their heroes will have 3 resources to start the game with (5 in the case of Denethor). Players then flip over this card.

The rules on the backside of the card will remain in play throughout the quest and will make the game a little easier for the players. This starts by increasing the number of cards you draw during the resource phase by 1. That means that traditional decks will now draw 2 cards at the start of the resource phase. This is not restricted to just the first player; all players get the extra card.
This card also informs you of your “cannon ability,” a once per game action for your table where you can deal 10 damage to any non-unique enemy engaged with a player at any group. So if you are struggling with fighting off a ship, you may use the cannon once and then never again. Note that you can still request this ability from other tables if they have it available to you. It is a last resort but very useful if you are unlucky with your draws from the encounter deck.
Standard mode
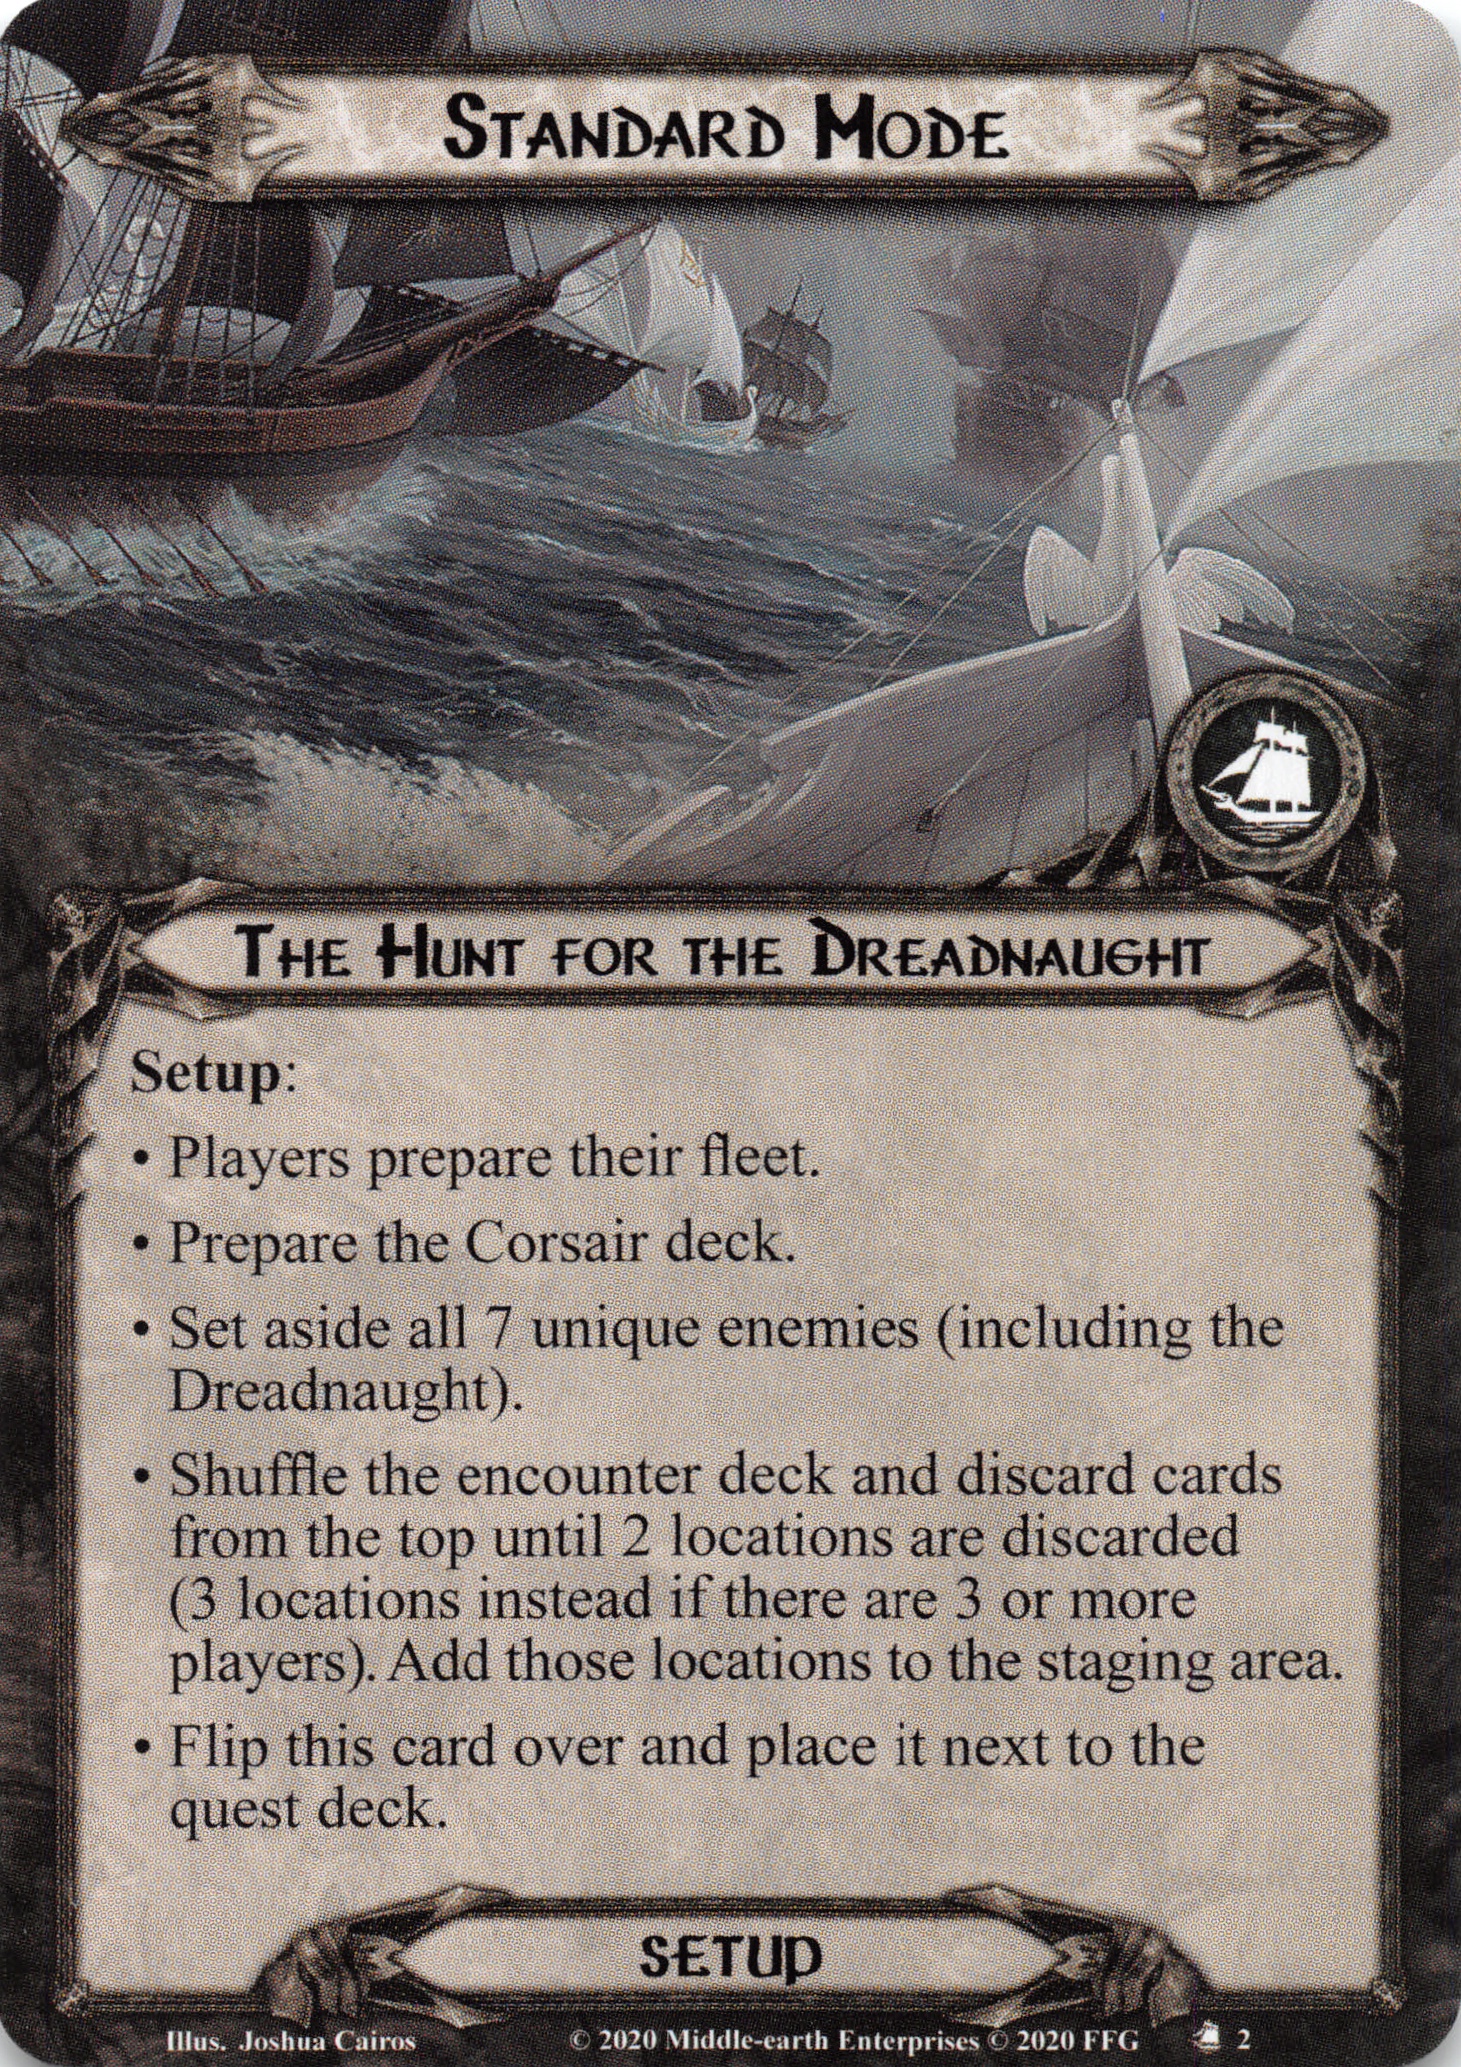
The standard mode does not remove any additional encounter cards from the deck and does not make Cobas Haven the active location. Instead, the mode instructs players to discard cards from the top of the encounter deck until 2 locations are discarded (3 locations in case of 3 or 4 players at the table). All those locations are added to the staging area. This offers enough options to travel somewhere but also starts you out with some threat in the staging area. If you happen to also get Wicked Cove, Tolfalas Landing, or Mouths of Anduin in the staging area, there will be passive effects to take into account as well.

Flipping over the standard rules card shows you that you have lost the right to extra cards at the beginning of each turn, but you retain your “cannon ability.” The quest action still does the same 10 damage to any non-unique enemy engaged with any player but now comes at an additional cost. The team that uses the action must reveal an encounter card. This can be a decent trade-off since you are almost always killing a dangerous ship with this effect. However, if you use this effect on another table, you must be ready to deal with the consequences of making your table-state worse.
Hard mode

This mode is not quite Nightmare mode, but it is really tricky. The focus of this mode is threating players out, so make sure to pack plenty of threat reduction if you are attempting the quest in this mode. To start with, the mode does not remove any cards from the encounter deck. It does, however, stack the staging area with a bunch of locations. For 1 to 2 players, it reveals all three copies of Tolfalas Landing, meaning that players will now have to raise their threat each time they draw any number of cards. If there are 3 to 4 players in the game, 2 copies of Wicked Cove are also added to the staging area so that players are unable to place progress or interact with the Landings in any way until the Coves are cleared. This means that you start the game with 5 locations in the staging area for a combined threat of 10.
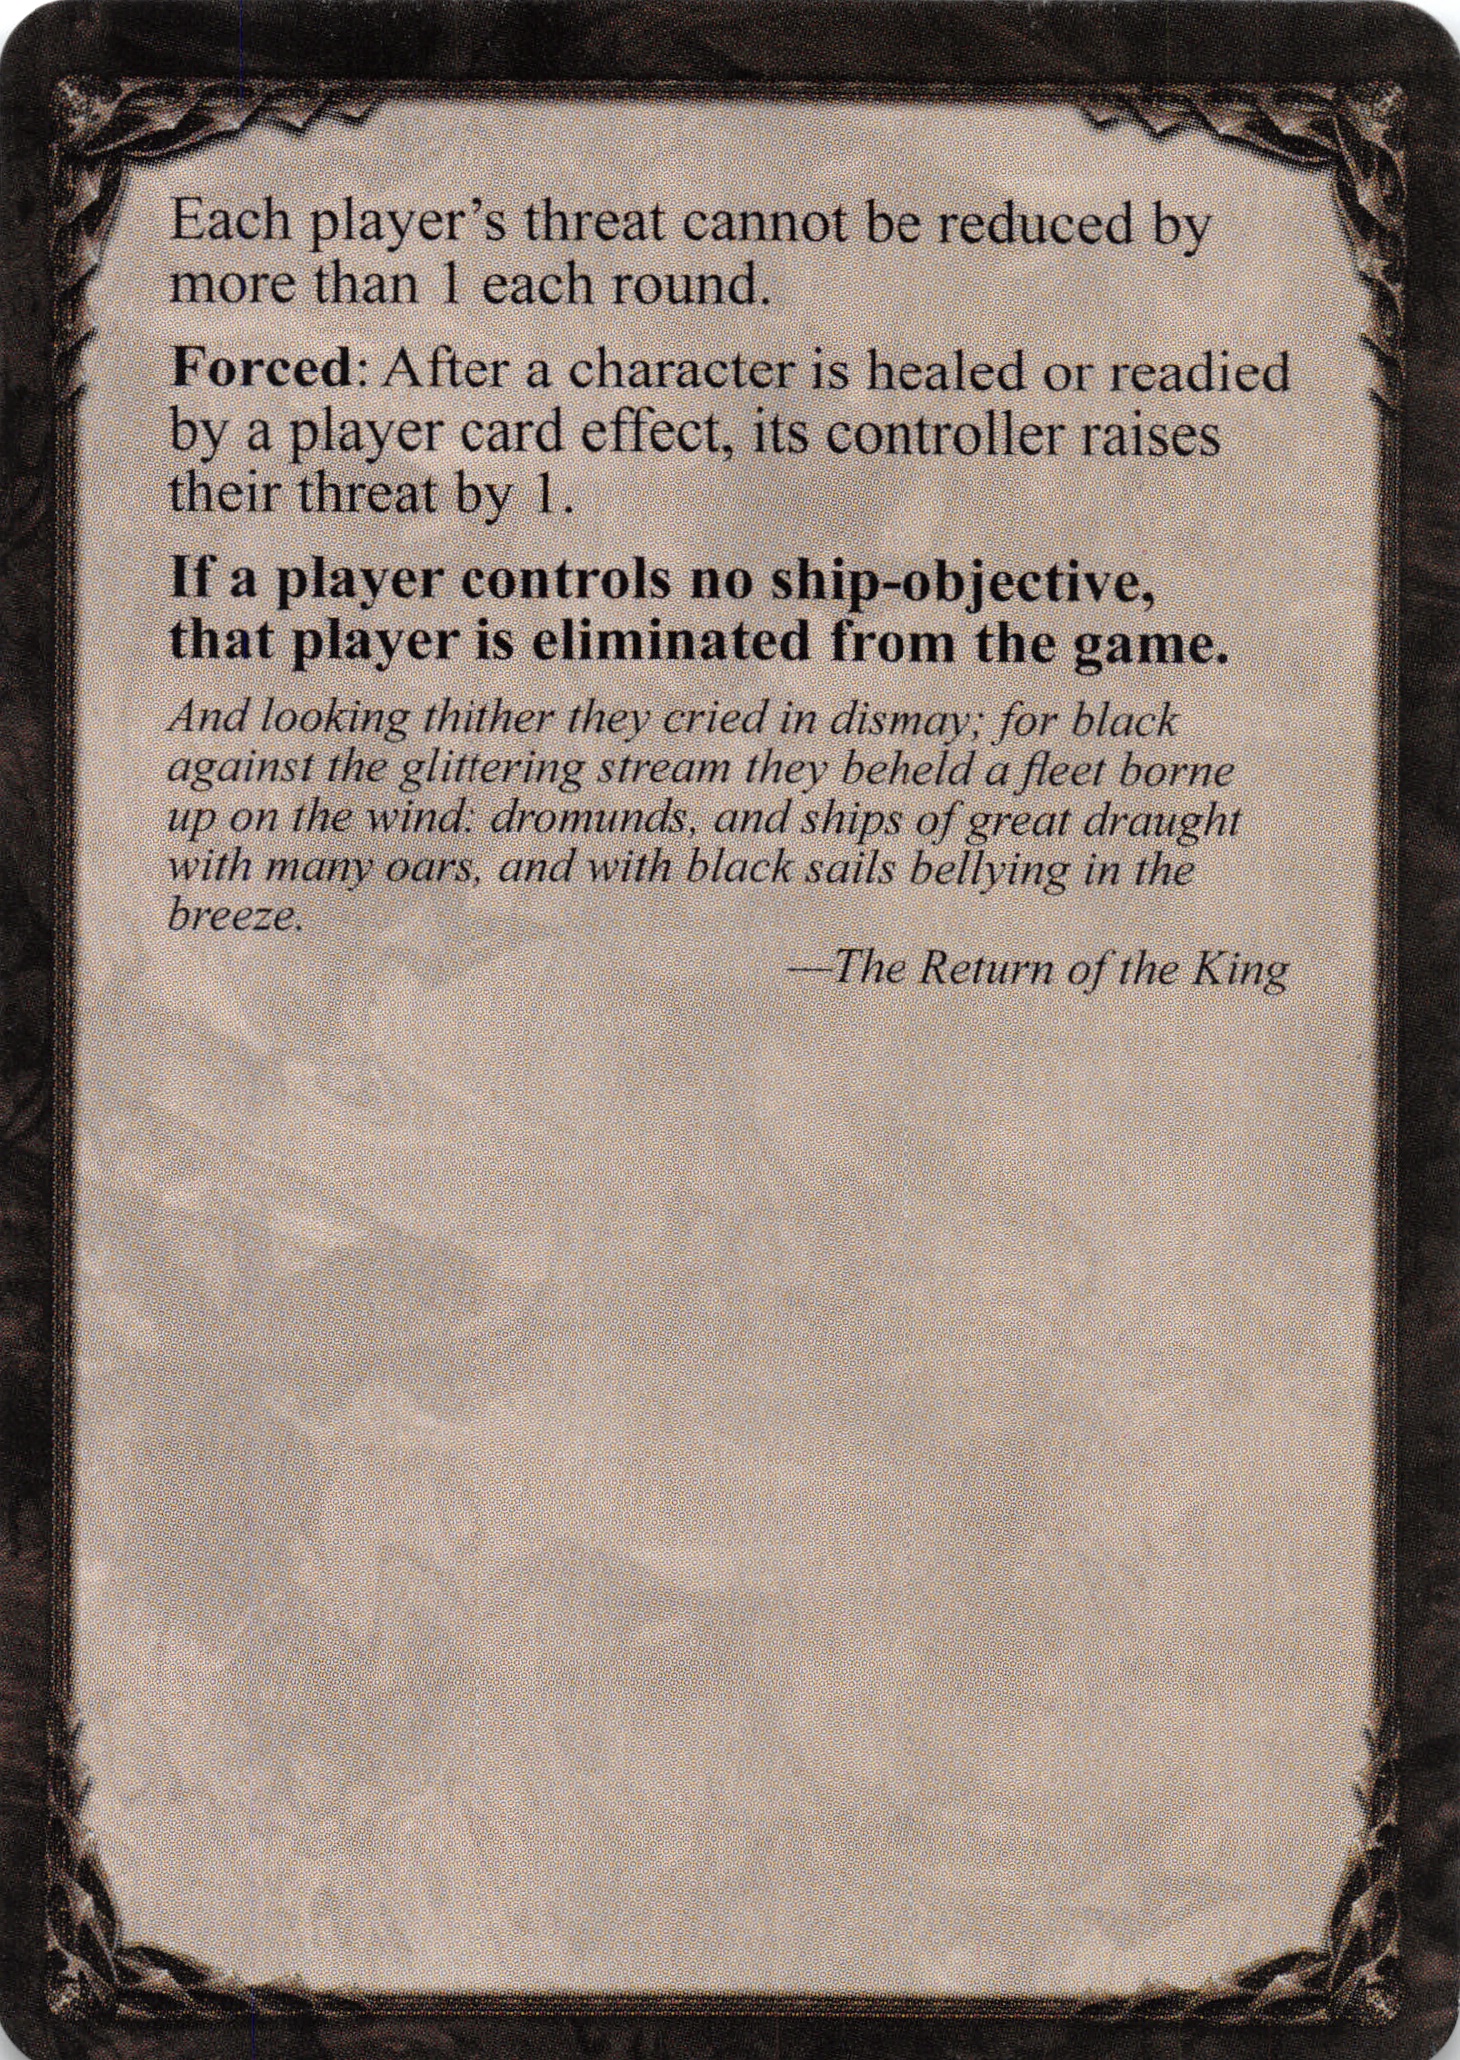
Flipping over the rules card shows that you no longer have access to your “cannon ability” and are instead subject to a few additional rules that try to threat you out. First of these, is an ability that tells the players that they may not lower their threat by more than 1 per round. This means that even if you are playing with spirit ally Elfhelm, you can only use him once per round. These rules remind me a lot of the Dire quests in Mountain of Fire and mean that you are being pressured to move fast!
Even worse, there is now an additional Forced ability that forces you to raise your threat whenever a character you control is either healed or readied by a player card effect. This does not count the effect on Swan Ship of Dol Amroth but still seriously affects your healing and action advantage. Luckily, you only have to raise your threat by 1 if you do this, but as you cannot lower your threat by more than 1 per round, you will be drifting close to 50 before the end of the game.
After the players have finished their setup (either Easy, Standard, or Hard), they may flip over stage 1A, and begin the quest.
The Quest
Quest Card 1: Searching the High Seas – 8 quest points per global player


With all that setup out of the way, it is finally time to move on to the quest itself. There is nothing but flavor text on side 1A, and even 1B is pretty bare. This first quest stage only informs the players that this quest stage has a total number of quest points equal to 8 times the number of players across all tables. It also informs players that they are unable to make more than 5 progress per player at the table per round. This means that it will take you at least 2 turns to clear the quest, but I would suggest taking your time here.
Stage 1B is designed for you to build up your board state and perhaps already start upgrading some ships. You also have some smaller goals that you can aim for, like defeating the Corsair Warship early so that it does not come out at the same time as the Dreadnaught. Players can also familiarize themselves with the many encounter cards in the deck and could even start growing their fleet if they manage to capture the Corsair Skirmisher. It is also common for players at this stage to explore some side-quests before attempting to go to the main quest. In theory, during Epic Multiplayer games, you can get away with just exploring side-quests all the time, whilst other tables clear the main quest. However, it is not really a cooperative move, and teams may have to take additional rounds to clear this quest since your table is not contributing.

The goal at this stage is to try and advance with as empty a staging area as possible. This will not be easy, as there are plenty of locations in the encounter deck, and you might not always be allowed to clear them from the staging area due to Wicked Cove. But since the second stage will be more combat-focused, you really shouldn’t allow a lot of threat to build up in the staging area, distracting characters to quest while they could be used during combat.
When the quest has finally achieved 8 progress per player among all groups, the tables may each advance to stage 2 individually. Players can only move on at the end of the quest phase. So if you happen to be in the travel phase and another team places the final points of progress on the main quest, you will have to wait until your next quest phase to advance. This means that you can keep a few characters back, as there is no real point in making more progress on the quest card.
Quest Card 2: Destroy the Dreadnaught

At the end of the next quest phase, after stage 1 has received all of the progress, your team moves on to stage 2. 2A informs you to place the large Dreadnaught enemy card in the staging area, with the Elite side face-up. This is the side that is the most dangerous, adding 1 Archery per player to the staging area and having enormous stats. The Dreadnaught cannot leave the staging area but is considered to be engaged with each player and will make an attack in turn order against each player. It also means that it will contribute 4 threat to the staging area, but luckily this is only counted once, not for each player.

Stage 2B has no quest points, but there is still a point in trying to make progress here. While there is a cap of just 5 progress per player per round, those points of progress can be used to shuffle in Gondorian Warships into the encounter deck. This requires the players to spend 5 progress per player, but it can shuffle the Warship into the encounter deck of any group. So if there is a group somewhere that has a relatively empty encounter deck and could really use another ship objective, send a ship their way!
Of course, it is not required to make progress at this stage to win, making this a pretty good stage to explore some more side-quests. This will give you an edge against the encounter deck by lowering your threat, increasing your stats, removing enemies from play, and much more. I am a fan of Explore Secret Ways for this quest, as you can potentially be left with a lot of locations in the staging area that are all the same kind. With this side-quest, you can at least remove a lot of threat from the staging area when traveling to one of those locations.
The goal at this stage is to defeat the Dreadnaught, but that is easier said than done. The Elite side of the Dreadnaught hits pretty hard, meaning that ships without a lot of defence or hitpoints might struggle against it. Luckily, the stage offers you an option to cancel the attack that the Dreadnaught makes against you. By increasing your threat by 4, you can cancel the attack by the Dreadnaught. This is the only way you are going to get out of the attack, as the Dreadnaught is immune to player card effects. I would advise using this ability if you are engaged with other ship enemies so that you have the option to defend them instead. You could even use your ships to attack the Dreadnaught back!
Dealing damage to the Dreadnaught is not that difficult. Yes, it has 4 defence, but you should have plenty of attack on the table by now. You can also use your ships to attack this enemy, which can be very useful. Since the Dreadnaught is considered to be engaged by all players, you all attack at the same time, adding your attack values to the total. The only restriction here is that the Dreadnaught cannot take more than 5 damage per player each round. Any damage dealt must be communicated to whoever is keeping track of the Dreadnaught’s hitpoints so that you know when it is past half of its health.

Once the Dreadnaught is damaged by more than half of its hitpoints at the end of the round, it flips over to its Damaged side. If you just happened to be in the planning phase and another team dealt enough damage to cause the ship to flip, you still have to keep it on the Elite side until the end of the round. That means that you can continue to damage the Dreadnaught, well past half its health. Once the end of the round comes along, you must flip over the Dreadnaught and deal each player a random unique Corsair enemy. These Corsair enemies prevent you from attacking the Dreadnaught while they are engaged with you, so you must either kill them or send them back to the staging area if you cannot deal with them. They each hurt in a different way, and it is very difficult to build your deck against each of them. But once you manage to defeat your Corsair, you can again damage the Dreadnaught.
The game continues until eventually a team deals the final points of damage to the Dreadnaught, and it has no more hitpoints remaining. You will find that this second half of the fight against the Dreadnaught is a little easier, as the ship has lost its Archery keyword and has reduced stats in its Damaged form. Because of this, it usually just takes 2 turns after people have dealt with their Corsairs to sink this ship. Once the ship has no hitpoints remaining, all players across all groups have won the game!
The Encounter Deck
Global
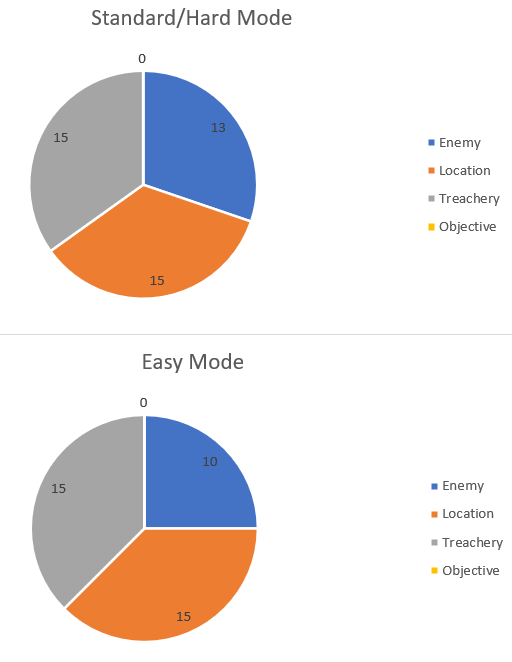
- The encounter deck is decently large, with 43 cards at the beginning of the game. For Easy mode, this is 40 cards, as 3 ships are removed during setup.
- The chance of hitting a shadow effect is 67% in both modes. Most shadow effects specifically target Ships, but there is a wide variety of effects.
- The average threat on cards revealed is 1.7 in normal mode and 1.55 in easy mode. This ranges from 0 threat treacheries to 4 threat locations and Ships.
- The surge keyword will always trigger on 2 cards, but 5 additional cards will have surge if their requirements are (not) met.
- Doomed 1 only appears on the Ballista Barrage, but the quest has plenty of other ways to increase the threat of players. Especially in Hard mode, I do not recommend raising your threat intentionally.
- Archery is quite a common keyword. The Ballista Barrage will give any ship in play Archery 2. The Dreadnaught has an Archery value equal to the number of players at the table, and the War Galley will always have Archery 2. The Corsair Warship and Black Sails will only get Archery if they are in the staging area, receiving Archery 4 and 3, respectively. Damage cancellation and healing are advised here.
- Immunity
- The Dreadnaught cannot leave the staging area, can only take 5 damage per player per round, and is immune to player card effects.
- Any enemy who gets Wicked Cove as a shadow effect gains immunity to player card effects until the end of the round.
- While Wicked Cove is in play, all locations in the staging area gain immunity to player card effects.
- All Ship objectives are immune to player card effects.
- Each unique Corsair enemy is immune to player card effects.
- While players are engaged with a unique Corsair enemy, they cannot attack the Dreadnaught
Objectives
This quest comes with a fresh set of ship objectives for you to use on your voyage. These ships are the only things able to defend ship enemies, and if a player has no ship objectives remaining, they are eliminated from the game. The unique ships are divided among players during setup, with the remaining ships set away, out of play. Each of the ships is immune to player card effects so that players cannot heal them or get extra action advantage out of them. They also all have the Sentinel keyword, allowing them to defend for other players.

- Eithiliant: Let’s start with the ship that I have personally used the most, the Rainbow Spearpoint, or Eithiliant. This ship boasts the highest willpower out of all the Basic ships and is equal to the Dream-chaser at 5 willpower out of the gate. It suffers a little in the other stats, having just 3 attack and defence, as well as the fewest hitpoints of all the unique ships. This makes the Eithiliant a vessel ill-suited for combat and one of the first ships to consider upgrading when players explore the Belfalas Shipyard. Because of the poor quality in combat of this ship, you will have to rely on other players to defend ships engaged with you, and you will need a deck with characters capable of dealing damage to ships because the Eithiliant will be of little use there. You make up for this with amazing willpower, as the ship will also grant each hero you control +1 willpower. This immediately makes you a questing powerhouse. If done well, you will be questing for the most during the quest phase, and your team members will be taking on the enemies for you in return.
The setup text on the Eithiliant is unique, as it allows you to select a hero you control and grant them any trait of another hero you control until the end of the game. This means that this is the only way to grant a hero trait that it would otherwise never be able to receive. Think Hobbit, Dwarf, Istari, Dale, Dunedain, Eagle, etc. This allows some very weird combinations of cards, too many for me to name here. I am certain that you can do a lot of weird things with Grimbeorn as a Hobbit, for example. The other strength of this ship is that it allows you to streamline your deck that usually depends on heroes finding cards that grant them traits. Tactics Imrahil is the perfect example of this, as you can now grant him the Silvan trait from the start of the game without having to find and play Elf-friend. Other characters like Lothiriel will also enjoy starting the game with more traits on them.
Upgraded: In the upgraded version, the Eithiliant will get +1 to all stats and +2 in hitpoints, which, combined with the healing that the Shipyard grants you, gives you time to complete the game before the Eithiliant sinks beneath the waves. The boost to willpower of each hero is also doubled to +2. Your heroes are now amazing questers, so you should consider having cards like Light of Valinor on them. The B-side of the Perilous Voyage contract that came with the pack is also useful, as it allows your heroes to quest without exhausting. There is also a response on the Eithiliant when it flips. You may now shuffle up to 6 cards from your discard pile back into your deck. This helps you to find some important events again or any cards that got pillaged from your deck. On top of it all, you get to blow up any progress on a location in any group with the effect. Technically, it’s 6 progress, but that is more than enough to discard any location in the game. Note that you can use this for any group, so some teamwork is allowed here.

- Golden Wing: Where the Eithiliant was focused more on willpower, the Golden Wing is more attack-focused. With a base attack of 5 combined with the Ranged keyword thanks to its onboard ballista, the Golden Wing will be able to handle any ship engaged with any player. While you cannot boost this attack other than upgrading the ship, you can start to help out other players and might even send some more Ranged characters to help out. The role of the Golden Wing is usually to stand aside and help with the counter-attacks against ship enemies. The other stats on it aren’t great, but at least it has more hitpoints than the Eithiliant or the Silent Mist. Your heroes will also get a hitpoint extra, which is useful to Hobbit players. The extra hitpoints will really help out against Archery damage and might even make the difference between surviving and losing a hero. For setup, the player controlling the Golden Wing gets to reduce their threat by 3. They may then choose a hero that they control to gain the Ranged keyword. This saves you from having to include Dunedain Cache in your deck and can grant some peculiar heroes the Ranged keyword. Na’asiyah, Quickbeam, Tactics Eowyn, and Treebeard come to mind. That hero can now also equip the Black Arrow for even bigger attacks at Ranged!
Upgraded: When the Golden Wing flips after having been upgraded, it will again gain +1 to all its stats, but also +3 hitpoints. The extra attack is nice to have so that your Ranged attacks do even more damage. Each of your heroes now also gets +2 hitpoints and the Ranged keyword. So when building for this ship, consider that all your heroes will eventually get Ranged. This ship will work well with Tactics decks that focus a lot on increasing damage dealt at range. Also, consider adding in some cards like Hands Upon the Bow, Skyward Volley, or Rumil, as you will be getting a lot of use from those cards. Players will now be looking at you for dealing with the enemies in play. As a cherry on top, you get to deal 6 damage to any enemy in any group. This may include the Dreadnaught or can be enemies in the staging area. This isn’t as powerful as the “cannon-ability,” but 6 direct damage is still a lot! It can even help against the unique Corsairs, as this is technically not a player card effect.

- Pride of Lebennin: This is the final ship with a 5 as one of its starting stats, and it is put into defence. When the previous ships were excellent for questing and ranged combat, the Pride of Lebennin is focused on Defence. Not only do you get a ship with 5 defence and 16 hitpoints, capable of taking on a lot of enemy ships, but each hero you control also gets +1 defence. While the heroes do not gain the Sentinel keyword from this ship, it is not very difficult to set up. Players building for the Pride of Lebennin will want to have at least one proper defender, able to benefit from the easy increase in Defence. It’s also useful when you are in a pinch and have to defend with a hero usually not suited for defending. +1 defence will always come in handy. For setup, this ship changes the way that you draw your opening hand. You draw 5 extra cards at the beginning but have to shuffle 5 cards of your choice back into your deck. This allows you to dig a little deeper for some key cards that you might need. You can also shuffle back some extra copies of unique cards or shuffle in cards that you don’t want to see in your hand, like Hidden Cache. This ability doesn’t influence your deckbuilding too much, making this ship one of the easier ones to pick up with any deck and enjoy. You do not get a mulligan after this Forced effect, though, so I hope you are happy with your refined hand of cards.
Upgraded: In the upgraded form, the Pride of Lebennin gains +1 to all stats and +3 hitpoints. This makes it capable of easily defending the Dreadnaught, which will only be dealing 1 damage each time it attacks (or even 0 if it is halfway through its hitpoints). Each hero you control also gets an additional point of defence, making them even more difficult to kill by enemies. Try to include some action advantage for your deck so you can really use this boost a lot. There is also a pretty generic response when the ship flips over. You get to heal 2 damage from a character in play. This may include ship objectives, as this is not a player card effect. You may then choose up to 2 cards from the encounter discard pile and place them in the victory display. This means you no longer have to deal with these cards anymore and can even cancel extra copies with The Door is Closed and the Woodland Sentry.

- Silent Mist: The Silent Mist is the first ship without any stand-out stat, but being better-rounded than the previous ones. 4 willpower is great to start with, and the 4 defence is nice for ships engaging you early. Do not count too much on the defence, though, as the Silent Mist only has 14 hitpoints on its Basic side. This is also the first ship that does not boost your heroes but instead boosts your hand size at the beginning of the game. Instead of drawing 6 cards at the start, you draw 8. This does not even take away your option to mulligan, allowing you to dig deep into your deck for some cards you might need early on. The Silent Mist has an action that you get to use each time you play an event with a cost of 3 or more. There is no limit to this action, which reduces the cost of these events by 1. This is extremely useful, as the expensive events usually do some big things for all players to enjoy. Consider healing all heroes from a player with Beorn’s Hospitality or Waters of Nimrodel, readying characters with Need Drives Them or Grim Resolve, or reviving heroes with Fortune or Fate, or Houses of Healing. This is just the start of whatever strange deck you might consider running alongside this ship. Since you will be playing a lot of events, you can even run the Council of the Wise contract, which grants you extra benefits for playing events. Your increased starting hand size will even help with finding the correct cards to play.
Upgraded: Upgraded, the Silent Mist upgrades as most other ships, with getting +1 to all stats and +3 to its hitpoints. This makes it even more capable of questing or defending enemy ships, especially considering that the upgrading healed some damage off of the Silent Mist. The upgrade also improved the Action, reducing the cost to play expensive events by 2 resources. This makes cards like Lorien’s Wealth worth including! If you aren’t sure what events to play with this effect, the response on the Silent Mist will offer you a unique chance to retrieve any 2 events from your collection or your discard pile and add them to your hand. This does require that you follow deckbuilding rules, which does not allow you to include more than 3 copies of any one card in your deck. The flexibility that this offers works well with the ship, allowing you to be ready for what the situation calls for. Extra card draw, direct damage, threat reduction: you have access to it all and get to play these cards at a reduced cost. This is also the point where cards like Keen as Lances will be amazing for your deck, giving you even more flexibility.

- Swan Ship of Dol Amroth: With more balanced stats again, this time focusing on hitpoints and attack, the Swan Ship is a great ship to bring to any Leadership deck. This is because resources are suddenly worth a lot more when playing with this ship. To start with, you will gain an extra resource on each hero at the start of the game. If you are playing Easy mode, that means each hero starts with 3 resources (Denethor with 5!). This allows for a very fast start, as you get to play expensive cards early on. This does mean that you might run out of cards in your hand soon, so be sure to bring some card draw when playing with this ship. If you are just topdecking, you might run the risk of stalling a little. The extra resources you obtain do not go to waste, though, as the Swan Ship allows you to spend two resources to ready a character from any player at your table. This includes the ability to ready Ship objectives, which is amazing and will be your primary goal when piloting this ship. The downside to this is that the action is limited to once per round, so infinite resource engines do not ready everyone.
Upgraded: When flipping over to the upgraded side, the Swan Ship will gain +1 to all its stats, which means it now hits for 5 attack, which is quite a lot. It also gains +3 hitpoints, putting it at 20. This makes it one of the stronger ships, and it should use that to defend against attacks for players running weaker (or unupgraded) ships. When flipping over, the player controlling the ship also gets to put 2 resources on a hero and ready a card. Now, this is important: It does not specify what card you may ready. Neither does the improved ability on this side of the ship. That means that this is the only time in the entire game that you get to ready attachments and contracts outside of the refresh phase. This breaks open the game like you would not believe, so be careful with what you do with this power. You could, for instance, use this action to ready Steward of Gondor and get an extra use out of that. You can also ready the Elven rings of power (though not the One Ring) in order to either get extra buffs that round from Narya, more willpower from Nenya, or 2 free cards per round from Vilya!! This is just a taste of the crazy things that this upgraded ship can do for you, so have fun designing a deck with it.

- Twilight’s Call: Finally, we get the Twilight’s Call, who might just sport the best-combined combat stats out of any of these six ships. With 4 attack, 4 defence, and 18 starting hitpoints, the ship is great at taking damage and dealing it back. It also offers the controlling player a lot of flexibility when it comes to cards that they can play. Namely, the first card they play each round does not require a resource match. This is the same effect as found on the Grey Wanderer contract but sadly does not stack with it. It does improve The Storm Comes, which only targets allies. The ability to play any card without needing a resource match already opens up a lot of interesting ideas. I would personally recommend running this with a Bond of Friendship contract, as you get to play any 4 cost card from the start of the game! But the ship does more than just this. Once per round, the controlling player may play an ally or attachment from their hand as an action. Unless this is the first card you play this round, that card does still require a resource match. But the ability to play an ally during the combat phase or an attachment like a Trap or location attachment outside of the planning phase is huge. You could, for instance, play a Forest Snare before an enemy attacks you or play an Elf-stone on a location just before it is explored. You can also play allies you just drew from some other effect. The possibilities are endless, though you are still limited by the cost of the card and the limit of once per round.
Upgraded: The Twilight’s Call upgrades to a 4/5/5/22 ship, which means it gets an extra hitpoint compared to the other ship. It probably stole the hitpoint from the Eithiliant, who only gets +2 when it upgrades. Regardless, the ship is now even better in combat and will take on a lot of punishment from the ship enemies in this scenario. But there is more than just improved stats for this upgraded ship. Each card you now play no longer requires a resource match. This is extremely useful for decks that run 3 or 4 spheres, as you now no longer have to worry about any of that. It’s like your entire deck suddenly became Neutral. When flipping over, you also get to draw 3 cards, which allows you to use the new lack of spheres on your cards immediately. The action on this ship now also loses its restriction of once per round. This allows the controlling player to play any attachment or ally at any point during the round (assuming there is an action window). You are now only restricted to the cost of your cards. Multisphere swarm decks will rejoice at the sound of this, and you will quickly find yourself with a solid boardstate while in more control of the encounter deck than ever (assuming you are building with this ship in mind). - Gondorian Warship: Apart from the unique ships that players can select during setup, there are also 4 non-unique ships per table to be earned by the players. These Gondorian Warships can be shuffled into any group’s encounter deck when any group makes 5 progress per player on stage 2. These objectives then have to wait until the encounter deck reveals them to join the fight. They do not surge, so it is a free encounter card when you reveal them. The first player chooses a player to take control of the Warship when it is revealed. It is quite a useful ship, having both Ranged and Sentinel, so it can help out with defending against ship enemies if your unique ship is in a lot of trouble. The 5 attack with Ranged is also very powerful to help across the table. The ship itself is immune to player card effects, meaning it cannot be healed or interact with any player cards. The Warship also helps the players in case their own unique ship is nearly destroyed, and a Sea Monster could take it out. While normally, the player would be eliminated if they lose their ship, having a Gondorian Warship under your control protects you from elimination. It is not totally wasted should the Warship ever be revealed as a shadow card. It will deal 5 damage to the attacking enemy, which has serious potential to kill attacking enemies, thus dealing no damage to your defender. You do not even remove the ship from the encounter discard pile afterwards, making it possible to deal more damage with it in the future. If the ship is ever destroyed, it is set aside, out of play, until a team makes enough progress again to shuffle another ship into the deck.
TL:DR ships
- Eithiliant: Spirit deck, high willpower, focus on having weird traits.
- Golden Wing: Tactics deck, high attack and hitpoints, focus on Ranged attacks.
- Pride of Lebennin: Generic deck, high defence, improved starting hand.
- Silent Mist: Cost reduction for events that cost 3 or more resources to play, high flexibility.
- Swan Ship of Dol Amroth: Leadership deck, extra resources and action advantage on any card.
- Twilight’s Call: Tri-/Quad sphere deck, ability to play cards outside of the planning phase.
Enemies
There are two types of enemies in the game, ships and Corsairs. The Corsairs are put into their own separate deck and can only be brought into play via the Boarding keyword or other encounter card effects. Ship enemies are revealed from the encounter deck and can only be defended by Ship objectives. There is also the Sea Monster, which I will put under the Ship category for simplicity’s sake.
Ships (and monsters)
These enemies will come into play from the encounter deck and follow the Dream-chaser cycle rules of ship-on-ship combat. The Sea Monster is the exception, though Ship objectives may be used to attack or defend against it as well.
- Dreadnaught: We kick off this list with the biggest ship of them all, the Dreadnaught. And I mean biggest quite literally, as this is the first card for the game that is not of standard size. Instead, it is about 1,5 times bigger along the length and width of a regular card, making it a bit difficult to find proper sleeves for this one. The Dreadnaught also has some of the biggest stats out there, though they aren’t that crazy when you compare it to other boss-level enemies. We will cover the Elite side first, as that is the side that you have to deal with first when transitioning to stage 2. On this side, the Dreadnaught has 4 threat, 7 attack, 4 defence, Archery 1 per player, and 15 hitpoints per player in the entire event. This can easily put his hitpoints past 100, or even 1000 if you are attending a large event. The Dreadnaught is immune to player card effects and cannot take more than 5 damage per player each round. This means that you have a minimum of 3 rounds to deal with this ship, not counting the fact that it flips halfway through. The Dreadnaught is considered to be engaged with each player during stage 2, so you will have to deal with the 7 attack somehow. Luckily, stage 2 offers you a way out if you are willing to raise your threat by 4. If you are engaged with more ships than just the Dreadnaught or have a particularly weak ship for this enemy, I would take the threat. A 7 attack is difficult to defend for very long, and you cannot really interact with your ships to heal them. Better to hold off the smaller ships and then bring some threat reduction.
Once the Dreadnaught has received more than half of its hitpoints worth of damage at the end of the round, you flip over the card to the Damaged side. Note that this only happens at the end of the round, so if another team pushes the Dreadnaught past half-health, you still fight the Elite side until the next round. When it is flipped over, the Forced effect will be the first thing that triggers, so I will look at that first. After the Dreadnaught flips to its Damaged side, each player puts one of the unique Corsair enemies into play engaged with them. This is done at random so that you have no time to prepare for a particular enemy. While you are engaged with these unique Corsairs, you cannot deal damage to the Dreadnaught. You have to kill those Corsairs first before you can attack again. This is for each player individually, so it can happen that one player might be out of the fight for a little longer if their Corsair simply won’t go down. You are free to take down other ships during this time, though, which will help you focus later on the Dreadnaught.
Contrary to what cartoons may have taught you, this next phase of the enemy does not actually make it stronger. In fact, the Dreadnaught’s stats reduce to just 3/5/3, which is easier to defend for the weaker ships like the Eithiliant. The Dreadnaught also loses its Archery keyword, meaning that you will reduce the damage taken each round, which is a nice way to get back into the fight after that first half and the fight with the Corsair. The Damaged side retains the immunity to player card effects and the limit of 5 damage per player per round. So it will likely take another 2 rounds of combat before you manage to destroy the Dreadnaught. Once it has no hitpoints left, each team attending the event immediately wins. This always makes it a fight to deal the final blow to the Dreadnaught, which is great fun!

- Black Sails: There are two copies of this big ship, and both of them are removed from the game if you are playing this scenario in Easy mode. For those attempting the harder difficulties, strap in because this ship is removed for a reason! While it is not the hardest-hitting ship in the Umbarim Fleet, it does boast the highest hitpoints, aside from the Dreadnaught. It still hits like a truck, too, with 6 attack being difficult to defend with Basic ships. However, thanks to the 37 engagement cost, the Black Sails can remain in the staging area for a while, during which time you can take down other ship enemies. Leaving it in the staging area does come at a cost though. Not only do the Black Sails have 4 threat each, but they also gain Archery 3 while it is in the staging area. This will slowly ping you with arrows until you either have to heal or finally engage this ship. When you engage the Black Sails, you get Boarded by 2 additional enemies from the Corsair deck. That means you will have to defend 3 attacks at the same time, which can be difficult in the early game. The Black Sails themselves hit for 6, which means that your ship objective will be taking some damage. Destroying the Black Sails will also take some effort. 2 defence isn’t much, but 10 hitpoints will mean that the Black Sails will likely stay around for an extra round. There is also the option to use the “Cannon ability” in standard mode to sink this ship in the next quest phase. 10 damage is enough to sink this boat, which will free up the characters of the engaged player to handle any other ships that are coming down. I would suggest saving the ability for the Corsair Warship and trying to damage this ship as much as you can. Perhaps a friendly Sea Monster will do the final points of damage and drag it down to the depths. A special mention must go to the awful shadow effect on this enemy. Returning a Ship enemy to the staging area isn’t great because this will mean the Boarding keyword triggers again when you re-engage it. Getting this on the Ramming Ship is even worse, as it will regain its +4 attack.
- Corsair Warship: Aside from the Dreadnaught, this is the biggest ship of the fleet, though luckily, there is just one copy of it. There are two in the Dream-chaser cycle, making mincemeat of any deck if you aren’t careful. The single copy of this ship will also be removed from the deck if you are playing in easy mode. This ship has the highest Boarding value, the highest base attack, the highest Archery value, the most hitpoints after the Black Sails and Dreadnaught, and gains the text that it cannot be damaged whilst in the staging area! Surely this is a ship that you will want to avoid engaging. This is made possible by the 44 engagement cost, but the 4 points of Archery extra per round is going to be horrible to deal with, especially in lower player counts. The protection from damage whilst in the staging area also means that you cannot start to chip through the 9 hitpoints with things like Ranger Bows, so you will either have to use The Great Hunt (it’s not a unique ship!) or have to engage it at some point. Word of advise, use Revealed in Wrath during the Engagement Phase so that you do not have to deal with the 3 extra Corsair enemies that are going to be engaging you. You can also time the engagement so that you have Cobas Haven as the active location, lowering the Boarding value by 1. It’s still 2 extra enemies, but it could be worse.
Once engaged, the Warship is brutal, dealing 8 damage to your Ship objectives. This can knock out any Corsair Skirmisher that the players may have stolen and left undefended, or it can deal massive damage to the Gondorian Warship or the unique enemy ships. Because of this high attack, it is vital to either cancel the attacks (the Warship isn’t immune to player card effects) or make sure that you kill the Warship as fast as possible. Easier said than done though, as the ship has 4 defence and 9 hitpoints, requiring the most attack of any non-unique ship enemy in this set. However, if the players manage to bring down this ship, then it does go into the Victory Display. You only have to deal with this one once. Because of this, I see the Warship as the perfect target for the “Cannon ability” in standard mode. Get rid of the ship after tanking one of the attacks, and then send it to the Victory Display to never be seen again. It’s a tough fight, but hopefully, you can get this enemy in the VD by the end of stage 1 so that you are well-prepared for the Dreadnaught. - Corsair Skiff: From the very worst ship, to probably the easiest one. The Skiff is the smallest ship in the fleet, though there are several copies of it, so they make up for their small size with numbers. Those numbers might increase fast, as the Skiff comes with the Surge keyword, adding another encounter card to the staging area. The Skiff also has a low engagement cost of just 24, engaging the players early on. Not to worry though, as the ship doesn’t have very frightening stats, and even the ability is not something to be scared about. When the Skiff engages you from the staging area, you may choose to either give the Skiff Boarding 1 or raise your threat by 3. I tend to go for the Boarding keyword, as the Skiff requires little attention from your characters, and you can easily handle another enemy. It is also wise to avoid raising your threat so much, especially early on. Stage 2 has an ability where you can raise threat to cancel attacks by the Dreadnaught, so the lower your threat is, the easier it is to use that ability. It also prevents you from engaging bigger ships later on. If the players have Cobas Haven as the active location, the Boarding 1 keyword cancels out with the ability, so that’s even better!
In combat, the Skiff has 2 attack, which could be defended by your ship, though I will not be surprised if you let it go undefended. Your ship is likely more useful defending other ships, or you can use it to sail over this small skiff and destroy it. With 2 defence and 5 hitpoints, the ship enemy resembles a basic enemy you might find on land. Use your characters to sink the ship if you have enough attack still ready. Otherwise, you can just leave it engaged with you for a little while, keeping the surge out of the encounter discard pile. With 5 hitpoints, it is also likely that this ship will be a target for the Sea Monster, which can damage it by 4 if it appears. - War Galley: If you are looking for something very similar to the Corsair Skiff but a little stronger, you’ll end up with the War Galley. This ship will start to engage the players early on and is a relatively average ship enemy, without much craziness going on. It has Archery 2, Boarding 1, a base attack of 5, and will start to engage the players once they hit 33 threat. Once the War Galley engages a player, it gets the same choice as the Corsair Skiff. Either raise your threat (by 4 this time), or the Galley gains another point of Boarding. Since the ship already has Boarding 1, you might be more inclined to take the threat with this one (unless you are at Cobas Haven). This ship enemy is also a lot stronger than the Skiff and will require more attention, so your characters being distracted by 2 additional enemies is not great. 4 threat is a lot, though, so the choice will depend on your current boardstate and how well you can lower your own threat.
- Corsair Skirmisher: One of the cool things about A Storm on Cobas Haven was that you got to take control of enemy ships once you’ve beaten them. That same mechanic returns with the single copy of the Corsair Skirmisher in the encounter deck. Once you manage to destroy this ship, you may discard allies you control with a total willpower of at least 3 to take over this ship. It then becomes a ship-objective, which will help you grow your own armada. It’s not the best ship out there, but certainly, it will help!
Before you do, though, you must first deal with this enemy as a… well, enemy! The Skirmisher will quickly engage players thanks to its 28 engagement cost, and it will trigger Boarding 1 when it engages a player. Luckily, with just 4 attack, it does not hit as hard as other ships out there, so it is not uncommon to take this attack as undefended. Destroying the Skirmisher will require 10 attack in total, which is pretty average. Note that taking over the ship is an optional response. You do not have to trigger it if you want to. Only the engaged player will get this option, which may influence where this ship goes during the engagement phase.

- Slave Ship: Aside from the hitpoints, this is a monster of a ship that you really have to watch out for. The Slave Ship has an attack strength equal to the Dreadnaught and boasts the highest defence of the Umbarim Fleet. This means that while it only has 5 hitpoints, you still need a combined attack of 10 to destroy it. This makes direct damage a more lucrative response to this ship once it is time to attack it. You will want to make sure that you destroy it in one go, as you otherwise have to deal with the high attack again! This becomes even worse when you read the text box of the Slave Ship. Aside from the Boarding 1 keyword, it has a passive effect that will deal damage to your characters equal to the damage it does to your Ship objective. Players will want to defend this ship with the Pride of Lebennin so that you take as little damage as possible. It is also advised to use effects like Horn’s Cry to lower the attack of the Slave Ship. This not only saves you the direct damage on your characters but also on your ship objectives. This is one of the ships for who you will want to keep an attack cancellation effect ready. Then use all your attack power to sink the ship to the discard pile.
- Ramming Ship: The final ship enemy is the Ramming Ship that was seen in A Storm on Cobas Haven as well. This ship has no Boarding keyword but instead gets +4 attack after it engages a player until the end of the round. This makes it tie for the highest attack value in the game, along with the Warship. This only lasts for one round, though, meaning that you only have to worry about one big attack. There is also no hidden mechanic behind this big attack, like with the Slave Ship. This is one ship that you do not want to see returned to the staging area, though, as you will have to deal with the attack boost again once it re-engages. Attacking it in the staging area could work, but I doubt you will be able to get through the 3 defence and all 8 hitpoints in one shot. It is better to tank or cancel the attack, then slowly chip away at the vessel before sinking it.
- Sea Monster: The last enemy on this list is a rather unique one, as it is not a Ship enemy but can still appear out of the encounter deck. The Sea Monster is a throwback to the Thing in the Depths scenario from the Dream-chaser cycle and can be attacked and defended by both regular characters like heroes and allies, as well as ship objectives. The stats on the Sea Monster aren’t that impressive, save for its 11 hitpoints, but the biggest damage comes from the When Revealed effect. When the Sea Monster is revealed, it will do 4 damage to the ship objective or enemy in play with the fewest remaining hitpoints. Initially, this will mostly be enemy ships since the ship objectives have more than 10 hitpoints. However, the Sea Monster will be a threat when your objective is at 4 hitpoints or fewer. It can mercilessly kill you unless you have another ship objective to jump to. With 26 engagement cost, it won’t be long before the Sea Monster engages a player. Luckily, there is no Boarding on this enemy, and it only attacks for 4. This is enough where allies could defend the Sea Monster and survive. Chumping is also an option now; tossing a Snowbourn Scout to the Sea Monster is something that won’t be punished a lot (unless you happen to get the Violent Tempest as a shadow effect). Attacking the Sea Monster will take some effort, but at least each point of attack that you commit is a point of damage on the Monster. The 0 defence should also ring a bell in the back of your head that this is a decent target for Straight Shot! This discards the Monster right away, requiring little attention. I prefer drawing this enemy over one of the enemies in the encounter deck, though it can be dangerous if you are low on hitpoints.

Corsairs
The non-unique Corsair enemies come into play from the Boarding keyword or other encounter card effects. These are shuffled together in the Corsair deck at the beginning of the game. The unique Corsair enemies are shuffled into their own pile and only come into play when the Dreadnaught flips to its Damaged form. These enemies are all immune to player card effects, and while they are engaged with a player, that player cannot attack the Dreadnaught. You will need to kill these enemies before you can continue your attack on the Dreadnaught in order to win. Each of these enemies has its own nasty effect and will be difficult to deal with since there is no telling which one you will engage.

- Captain of the Haven: You are pretty unlucky if you happen to get this guy, as he is the commander of the entire Umbarim Fleet. Because of this, he has the highest base attack, defence, and Pillage value of all the unique Corsairs in this scenario. The Captain will discard the top 8 cards of your deck each time he makes an attack. Because of his immunity to player card effects, those attacks cannot be cancelled, so you’d better have a big deck left over by the time this enemy starts attacking. Will of the West can increase your decksize by shuffling in your discard pile, and you can use cards like Dwarf Pipe to put discarded cards back into your deck. You are still on a timer though, as the Captain will continue to discard cards until your deck is empty. If your deck happens to be empty by the end of the combat phase and the Captain is still in play, you are eliminated from the game. This is the only enemy out of these six that has such an effect, and it can be quite brutal if you are unable to refill your deck by the end of the phase. Have shadow cancellation ready as well, since Belfalas Shipyard and Out of the Mist will ruin your day by increasing the Pillage value or having the Captain make an additional attack. He will require 12 attack to be defeated, which is the most out of these 6 enemies. This is the time to use some once-per-game attack boosts like Black Arrow or Tactics Eowyn to be rid of this guy quickly!
- Commander of the Dreadnaught: The next enemy isn’t much nicer, though his stats are a bit lower than the Captain. Still, the Commander of the Dreadnaught has a decent attack of 5 and the largest pool of hitpoints out of all these enemies. He has no keywords in his textbox, but when the Commander has finished with his attack, the Dreadnaught makes an immediate attack against you. This does not resolve the usual attack that it makes but is in addition to that one. Luckily, the Dreadnaught is relatively weak at the point that the Commander attacks, plus you can still cancel the Dreadnaught’s attack through the effect on stage 2 (raise your threat by 4). The immunity to player card effects is again a problem here, as you would be able to prevent both attacks by this enemy and the Dreadnaught if you could just cancel his attack. But alas, you will have to prepare for a 5 attack enemy and another 5 attack from a ship enemy on top of all other attacks. Players with few characters will struggle against this enemy.
- Ophidian: Here is an enemy that is less trouble than the ones before it if you bring the right deck. If you are playing an ally swarm deck and have no really big attackers, you are going to struggle against Ophidian. His gimmick is that only 1 character can attack him each round. With immunity to player card effects, that also means that this is the only way to deal damage to him. Fortunately, he only has 1 point of defence, though 8 hitpoints is quite a lot. However, it should not take more than 2 turns to defeat Ophidian if you happen to have a combat-orientated hero. Ranged attackers can also help, which might be easy to do for the player controlling the Golden Wing.
The other nasty effect with Ophidian is that he is difficult to defend against. He has a base attack of 6, but also deals 2 damage to any defender. This rules out the idea of chumping his attack by anyone with 2 remaining hitpoints, as you might otherwise have to take 6 points of undefended damage. The Violent Tempest shadow effect would add another point of damage to the attack, making it difficult to chump with 3 hitpoint allies too! You would do well to rely on a big (Sentinel) defender on the table to take this attack, allowing you to deal with other enemies through your allies. - Hydraken: This enemy has the most balanced stats out of all of them, which means that his stats aren’t super high. His 4 defence is probably the most annoying thing about him, but “just” 4 attack is easy enough to defend. He also does not come with the Pillage or Archery keyword, which is helpful. Instead, Hydraken focuses on making multiple attacks each round, receiving more shadow cards, and the defending player has to raise their threat by 4. Compared to the other enemies you can get, it certainly isn’t the worst, though you still have to be careful. The first attack by Hydraken is a normal one, just receiving 1 shadow card. After that one (or after another if the shadow card has him make an additional attack), he attacks you again. He gets dealt 2 additional shadow cards (so 3 in total), and the defending player has to raise their threat by 4. None of these attacks can be cancelled, so there is a real chance that Hydraken can make several attacks per round, with increased stats from the shadow effects. Fortunately, there are a fair few shadow cards out there that only work if the attacker or defender is a Ship. So Hydraken might just get some of those shadow cards, and all you have to defend are 2 attacks for 4 each.
- Descendant of Castamir: I get the feeling that this guy is just along for the ride because his ancestor was famous. The Descendant of Castamir has the worst stats of these six enemies, except for defence. He has no keywords but will act like he has Boarding 2 on him when he engages you. This is because you will have to also put the top 2 cards of the Corsair deck into play engaged with you, each of those receiving an extra shadow card for this round. The Descendant himself does not get any buffs and is often the first of these unique Corsairs to die. He is annoying if you also had left-over enemies from Ships engaging you, but remember that while the Descendant may be immune to player card effects, the Corsairs that tag along with him do not. With a bit of luck, you get some weaker enemies who quickly die to your board, after which you can easily muster the 7 attack required to kill this enemy.
- Varjax: After the Captain of the Havens, Varjax has the highest attack that you have to deal with. He is an expert in dishing out a lot of direct damage to your characters, starting with his Archery 3 keyword. He also has 6 threat for some reason, even though he won’t count his threat unless the players move him back to the staging area for some reason. Instead, it is probably best to deal with Varjax quickly so that you can return to destroying the Dreadnaught asap. On top of the Archery damage, Varjax will deal 1 damage to a Ship that the defending player controls for each excess point of combat damage by his attack. That means that if you are chumping this enemy, you will be dealing a lot of extra damage to your ships. Because of this, it is probably better to ask a (Sentinel) hero for help in tanking this damage. 7 attack is difficult to completely negate, but if you happen to have a defender with enough defence or damage cancellation (Raven-winged Helm), then you don’t have to deal that much damage to your ships, risking them to be destroyed. Varjax will require 9 attack to kill, which is pretty average for these enemies. Once he is destroyed, you can again damage the Dreadnaught!

- Fierce Marauder: The first non-unique Corsair enemy that you can encounter in the Corsair deck is the brand-new Fierce Marauder. He comes with decently balanced stats that aren’t anything to be afraid of, except maybe his low engagement cost of 19. While engagement cost doesn’t really matter on these enemies as they engage you via the Boarding keyword anyways, it might mess up some cards like Dagger of Westernesse during your counter-attack. This enemy also comes with the new Pillage keyword, which will discard the top X cards from the top of your deck when the attack resolves. If you happen to discard an event through this effect, the Fierce Marauder will cause you to have to discard a resource from a hero you control. These Corsair enemies do not collect resources themselves, so there isn’t some hidden mechanic behind this effect. You just lose a single resource if you happen to have any on your heroes left over. This can mess with your plans for the next round, but it is easy to prevent. Canceling the attack of the Fierce Marauder already stops his Pillage keyword, so you do not have to discard cards and run the risk of losing a resource. With 2 defence and 3 hitpoints, it won’t take much to take care of this enemy. In fact, most Corsair enemies in this deck do not require much to kill, allowing you to focus on the Ship enemies and the unique Corsair enemies if they are in play. These regular enemies are more of a nuisance.

- Umbar Captain: And, of course, my theory is disproven immediately with the Umbar Captain. This is the one enemy in the Corsair deck that boasts decent stats, and you will want to avoid him as much as possible. His stats are pretty scary for a Corsair, with 5 attack, 3 defence and 5 hitpoints. He also has 4 threat, though that hardly matters because he often doesn’t go to the staging area. He also comes with a passive effect that prevents you from attacking Ship enemies while the Umbar Captain is engaged with you. You will have to dispatch him before you can focus on ships again. Requiring 8 attack to kill the Captain is quite a lot though, so you may not have enough attack left over on your characters to destroy any ships afterwards. Luckily, there is just one copy of this enemy in the Corsair deck, so if you happen to use a None Return after you kill him, you never have to deal with him again. The 5 attack on this enemy is dangerous, so I will advise defending this with a proper hero so that you avoid taking unnecessary losses. He does not come with the Pillage keyword, so I would save my attack cancelation for the other enemies in order to ensure that you have cards remaining in your deck.
- Daring Buccaneer: This next enemy is another one of the Pillaging Corsairs and will act much like the Fierce Marauder. The only difference is that this enemy is easier to kill and has a slightly different ability when you happen to discard an event from the Pillage 3 keyword of his. Should you happen to discard an event, then you have to deal 1 damage to a character you control. Combined with the Archery in this quest, it might be too much for your deck, but generally, you can either cancel this damage or heal it off by the end of the turn. The Buccaneer only has 2 hitpoints, so decks that focus a lot of direct damage have a serious advantage against this enemy. Play Swift Strike before the attack, and you can immediately discard this enemy.
- Southron Sailor: Here is another familiar face, though a lot weaker than the Umbar Captain, luckily. The Southron Sailor has 0 threat, just 2 attack, 1 point of defence, but is less easy to kill with direct damage thanks to its 4 hitpoints. This is the type of enemy that you would normally be able to tank for a few turns while you direct the majority of your attention on the more hard-hitting enemies engaged with you. However, the Southron Sailor has a nasty passive effect that will cause you to prioritize him a little more. While he is engaged with you, each Ship enemy also engaged with you will contribute its threat to the total in the staging area. If you manage to kill the ship enemies engaged with you, then that is no problem. Otherwise, you will be looking at a lot more threat “in the staging area” for the following round. It is not uncommon to use Gandalf‘s direct damage during the quest phase to kill this enemy, as it can free up some threat from the ships engaged with you. On his own, the Sailor isn’t that big a threat, so if you manage to kill the ships engaged with you first, you can easily keep him around for a little while longer.
- Corsair Plunderer: I didn’t think I’d see the day when we would get another 1 hitpoint enemy that doesn’t have the Goblin trait. The Corsair Plunderer does though, so I think you can see the best way to deal with this enemy: Direct Damage. A simple Spear of the Citadel on your defender will kill this enemy before you have to worry about his meagre 2 attack. Killing him before he attacks also means you do not have to worry about his Pillage 2 keyword. That’s a good thing because the Plunderer has a Forced effect that will cause you to discard an attachment you control when the Plunderer discards an event card from the top of your deck through the Pillage keyword. The rest of the stats on this enemy aren’t that impressive, though 3 defence will be an issue if you cannot deal with this enemy through direct damage effects. Overall, this is not the worst enemy to get from the Corsair deck, though you have to be careful about any additional attacks that this enemy might get. If your deck is stacked with events (because of Council of the Wise or Silent Mist), you run a greater risk of having to discard attachments.
- Brash Corsair: The final non-unique Corsair enemy on this list specializes in high defence and making additional attacks. Luckily, he doesn’t have the Pillage keyword, so you do not have to discard cards when you are defending his attacks. The Brash Corsair has 3 attack, which is low enough to defend with allies. However, each time that the engaged player exhausts a Ship objective, the Brash Corsair will make an additional attack. This can be either the unique ship you start with, one of the Gondorian Warships or even the Corsair Skirmisher if you manage to take control of it. If you are questing or defending with any of these boats, the Corsair will make an additional attack. Therefore, it is wise to attack this enemy before you use any of your ships to attack other ships. This is also a good enemy to use effects like Roheryn or Quick Strike on so that you can potentially kill this enemy before you have to defend with your ships. Killing the Brash Corsair isn’t easy though, as he has 4 defence and 3 hitpoints. A Rivendell Blade or other weapons will be very useful against this enemy. Luckily there is just 1 copy of this enemy in the Corsair deck, so you will not be facing him very frequently or have several copies make multiple attacks. This was one of the difficult things about NM Voyage of Belegaer, where this enemy is originally from.

Locations
There are several locations to consider traveling to in this scenario. Several are actually beneficial to the players, granting upgrades to ships or extra resources if you decide to go hunt for treasure. Other locations add nasty passive effects to the game if they are left in the staging area, so traveling there might be a higher priority.
- Tolfalas Landing: This first location will be familiar to all players attempting this quest in Hard mode since all copies start in the staging area. The location does not bring that much threat to the table, only 2, but is quite difficult to explore. It takes 5 progress to clear, which usually means that you need to travel here in order to clear it. Luckily, there is no Travel cost for this location, allowing you to travel there with ease. The downside to that is that you are putting a 5-progress barrier between you and the quest card. Leaving it in the staging area is worse though, as the Landing will have a Forced effect when in the staging area. Each time a player draws any number of cards, and at least 1 copy of this location is in play, the player must raise their threat by the same number. This does not count for the card you draw at the beginning of each round, but any player card effect that would draw you a card will also raise your threat. This also counts for effects that increase the number of cards you draw at the resource phase, like Erestor, Bilbo, the Stone of Elostirion, and Cirdan. Travelling is the best way to get rid of this location, though you do have to ensure that you have enough willpower to quest through it. Otherwise, the staging area locations will continue to build up, and better destinations will show up. Exploring it in the staging area or interacting with the location in a different way is possible at times but made difficult by the Wicked Cove.
- Wicked Cove: Speaking of which, let’s move on to just that location. The Cove is a slightly smaller location than the Landing, at just 4 quest points compared to 5, but still at 2 threat. The passive ability on this location is simple but deadly: Each location in the staging area is now immune to player card effects. This targets the Wicked Cove as well (as long as it is in the staging area) and shuts down any and all location control that you might hope to bring. With several copies in the encounter deck, you can almost ensure that there will always be one of these locations in the staging area, providing immunity to the rest of the locations. The active location is the exception for this and can still be interacted with by the players. This is useful for players who want to play around with the Woodmen archetype or players who have progress-placing cards like Asfaloth on the table. As long as you travel, there will always be a target for those effects. My advice is to skip on the location control though, as it will be unreliable as long as these locations are around. If you manage to send them to the Victory Display with Leave No Trace, you might fare better in the later stages of the game. This does demand quite some commitment, and I advise against it outside of a 4-player group.
The shadow effect on this location is also annoying, granting the attacking enemy immunity to player card effects and a bonus of 2 defence until the end of the round. This can seriously mess with your plans to take out an enemy. Keep them around and try to focus on other enemies instead if you cannot cancel this shadow effect.

- Isle of Fortune: We now get to the more beneficial locations in the encounter deck. These are great to travel to in order to get a reward, although there are likely more pressing destinations to travel to in order to get rid of a nasty passive effect from the staging area. With most locations, there’s no punishment for waiting. Not so for the Isle of Fortune, which has some sort of timer on it before it becomes worthless to the players. See this location as a chance to go on a real pirate adventure, including treasure! When the location enters play, it gains one resource token on it for each player in the game. Then, if players explore the Isle as the active location, each resource on it may be moved to the resource pool of a hero in play. The treasure can be split between the various heroes in any way that the players want. However, there is a catch. Each time a Ship enemy enters play, a resource is removed from the Isle. This puts pressure on the players to explore the island first before the Corsairs have stolen all of the loot. With 3 threat and 5 quest points, the location is a decent destination to travel to when given the option, as you remove quite a lot of threat from the staging area. It is up to the players whether or not this is worth it over travelling to a location that is hurting the players while in the staging area.
- Cobas Haven: This location should look familiar, as it was discovered in the Storm on Cobas Haven expansion for the game (if the title of the card didn’t spoil that yet). The location is another beneficial one, as it gives you the option to focus more on the ship enemies without being distracted by the Corsair enemies that engage you when you engage a ship. While the Cobas Haven is the active location, each Boarding value is reduced by 1. This nullifies the Boarding keyword on the Slave Ship, Corsair Skirmisher, War Galley (if you raise your threat instead), and the Corsair Skiff (if you don’t raise your threat). This just leaves two ship enemies with a positive boarding value, and even that is reduced compared to normal. This allows players to take a breather, as you have to deal with fewer enemies that round. If players anticipate that they will be engaging a lot of ships, this location is ideal to travel to. It also allows you to focus more on killing enemies, as you will need fewer defenders. You also happen to remove 2 threat from the staging area, which is a nice bonus.
- Belfalas Shipyard: Remember that I spoke of upgrading your ships for extra abilities and improved stats? Well, this is the location that allows you to do that! The Belfalas Shipyard has the highest stats of any location in the encounter deck, with 4 threat and 6 quest points. This is an incentive for the players to travel here, just because it removes the most threat from the staging area right away. The textbox of the Shipyard only activates when it is explored as the active location, so you might as well travel here unless you have a really good reason to wait. Once the players do decide to explore this location, they are given the option to spend 5 resources as a group to select one of the unique ships. They may heal that ship from 5 damage and flip it over to the Upgraded side. This, in turn, improves the stats on that ship and improves the ability it had on its Basic side. Some ships also have an extra benefit when they are flipped. Because this Shipyard is so important, I would argue that it is well worth using effects like Shadow of the Past or A Watchful Peace to return it to the top of the encounter deck. That way, you can ensure that it will appear next round again. Only do this if you have no enemies engaged though, as the shadow effect on this location is pretty nasty. The +1 attack isn’t great, but the Pillage 3 can get rid of some important cards. Especially if the Captain of the Haven enemy is in play, you do not want this shadow effect near the top. Luckily, there are two copies of this location, so you might happen to find the other copy to flip some more ships over to their improved sides. Note that you still need 5 resources on the table to afford the improvements. This is always worth it, so you’d better save up if you have the Shipyard as the active location.
- Mouths of Anduin: The final location on the list is another one with a passive ability while it is in the staging area. It has the same stats as the Tolfalas Landing, so it comes down to the effect of whether you decide to travel here or there, given the choice. The Mouths of Anduin serves as a warning to those looking to cancel When Revealed effects in this scenario. Whenever such an effect is cancelled, the Months of Anduin will reveal a new encounter card. This targets not only treacheries but also the When Revealed effects of enemies. It does not trigger on player card effects that cancel the entire card like the Door is Closed. I do not believe that the effect stacks with the multiple copies of this card in the deck, but you will have to clear them all from the staging area in order to be able to cancel When Revealed effects again without getting more cards in return.

Treacheries
There are a ton of treacheries in this quest, several of which will attach themselves to ships. Cancellation is still important during this naval battle, so you’d best prepare yourself for the following treacheries. Luckily, several of these treacheries will seem familiar to you, so you aren’t taken by surprise when these effects rear their ugly heads.
- Boarding Party: Players who have gone through the Dream-chaser cycle will be all too familiar with this treachery. The Boarding Party is one of the ways that Corsair enemies can engage players outside of the Boarding keyword. When the treachery is revealed, each player puts the top card of the Corsair deck into play engaged with them. Depending on what Corsair you get, this is either horrible or not that bad. Players can get some weaker Corsairs like the Plunderer or Sailor and be totally fine, even if they are engaged with other enemies. Other Corsairs put up a bit more of a fight and will even discard cards from the top of your deck. Get this in the early game, and you might lose out on some important cards. This treachery is usually cancelled, since not all players are prepared for an additional enemy on top of any enemy ship that might come down from the staging area, bringing more enemies with them. There is only 1 copy in the deck, so you might just miss the party if it comes up as a relatively tame shadow card.
- Overworked: Here’s a card title that we can probably all relate to. Overworked is a tough treachery to deal with, especially since there are multiple copies in the encounter deck. When revealed, the textbox of each non-Ship ally is blanked, except for traits. Heroes and ship objectives remain unharmed, which is pretty nice, considering that some similar treacheries in the cycles blank heroes as well. On top of that, global buffs like Dain Ironfoot and Visionary Leadership remain untouched, as the allies retain their traits. You do still lose a lot of utility with your allies, especially with those that gain buffs from their text box. Dale allies and characters like the Defender of Cair Andros will be significantly worse until the end of the round, so you are in for a tough combat phase. Utility allies like healers and scrying allies are also worthless now. Should any player control 7 or more allies, then Overworked also gains surge, which pushes me to think that you should probably cancel this unless you are determined you can handle this. Playing with heroes only will mean that this treachery does nothing.
- Grappled!: This treachery was originally used in the Storm on Cobas Haven Nightmare expansion, so you know it is going to be a fun card to encounter! When this treachery is revealed, it attaches to a Ship objective. While attached, it counts as a Condition attachment that prevents the Ship from readying by any means. This obviously sucks, but players will have a chance to clear this attachment by other means than traditional Condition-discarding cards like Miner of the Iron Hills. As an action, the players as a group may exhaust 3 characters in order to discard Grappled. I prefer doing this at the end of the combat phase if there are still characters ready. It might also be better to clear this objective and have the ship available to the team than killing one enemy engaged with a player. You can also use this action before or after a large readying effect like The Free Peoples or Lure of Moria. The problem with this treachery comes in the early game and in low player counts. Players who do not have that many allies to use will also suffer from getting Grappled. If you have the option, put this on a Gondorian Warship, as that will be less crucial to your game than the unique ships. This treachery is luckily a singleton in the deck, though getting it as a shadow card will just resolve the effect if the defending character is a Ship. Worse yet, you do not get to select the ship in that case and are sure to have it exhausted already from the defence.

- Ballista Barrage: It’s funny that the game has to explain to you what the Doomed keyword does at this point. I mean, we all know the “How to Play” guide by heart now, right? Right???
Well, for those of you who don’t know, the treachery has you raise every player’s threat by 1 before moving on to the When Revealed effect. This gives every Ship enemy in play Archery 2. This means that all ships in the staging area, as well as those engaged with players, will get (extra) Archery, which will either be horrible (if the entire Corsair fleet is on the table by now) or not too bad (if you’ve managed to continue sinking their ships). Should you really want to avoid the extra damage from this treachery, try to use direct damage or your “cannon-ability” (if you are playing Easy/Standard mode) to try and kill some more ships before the start of the combat phase. It is also wise to keep this treachery in the staging area for the rest of the round because you might otherwise forget the extra damage you have to deal out. There are 3 copies in the deck, which makes for a very dangerous situation if you have a lot of ships in play and draw multiple copies of this card. Cancellation is advised in situations like that; otherwise, players will have to start healing a lot of damage soon (Hard mode will raise your threat for that, so be careful). - Taking on Water: Another Cobas Haven Condition attachment, though this one is from the regular version of the quest. When the treachery is revealed, it is attached to a Ship objective of your choice. That Ship will now take 2 damage whenever it exhausts. Combine this with Grappled to negate this damage, but you will want this card gone as fast as possible in most cases. Luckily, you can again exhaust 3 characters to discard the Condition attachment so that you don’t have to wait to draw Condition removal from your deck. Usually, you put this treachery on the ship with the most remaining hitpoints, just in case you need to wait until you have 3 characters available for removing this effect.
- Out of the Mist: This treachery is the reason why you should always leave a ship ready to defend anything. When this card is revealed, the enemy with the highest engagement cost in the staging area will engage the first player and make an immediate attack. In the worst-case scenario, this is the Corsair Warship, which will have the highest engagement cost out of all enemies in the staging area. The Boarding keyword will still trigger for any Ship enemies that engage you this way. The attack can be cancelled with cards like Feint, but I would save that until the combat phase. Because if the treachery does not lead to any attacks being made, then Out of the Mist will gain surge. Better to defend this attack and cancel during the combat phase. Or you can just cancel the entire treachery if you do not want a big ship engaging you when you aren’t ready; up to you.
- Violent Tempest: What’s this? A treachery that actually damages enemies? You read that right! Violent Tempest will start its When Revealed effect by dealing 1 damage to each enemy in play. This includes the Dreadnaught, any enemies engaged with you, and everything in the staging area. But it’s not all good. The players each must also assign damage to their characters. The total amount depends on the number of exhausted characters that they control. Players who quested with a lot of allies or are using their utility allies during planning will have to deal more damage, but luckily the damage can be dealt to any character they control. You do not necessarily have to target questing characters for this. Combine this effect with the Archery in this quest, and you are going to be down a few characters soon. Have some healing on standby to get rid of this damage before the start of the combat phase. Should players have effects that can ready their characters, then I suggest you use them before the staging step so that you can get away with taking no damage while the treachery still deals damage to your enemies.
The shadow effect on this card deserves special mention, as that one point of damage dealt to the defending character means that allies like Winged Guardian and Defender of Rammas are not reliable if you know one of the three copies of this treachery is still in the deck. Should a defender die because of this damage, then the attack is undefended. This can quickly kill heroes or even ships if you aren’t careful.

Tips and Tricks

- If you want to improve the interactivity between tables for more of a “group feeling,” have the players be able to only add Gondorian Warships to other tables, not their own. Players at Easy or Normal mode can also use their “Once per game” action on other tables if needed. Coordinate this with whoever is keeping track of all the tables.
- Try to figure out what ship you want to play with beforehand. You can design your deck around that particular ship’s ability to improve your deck. However, be sure to have a backup plan in case that ship is taken by a team member. There are plenty of options, so you should have no problem finding a suitable vessel. Communication is important though.
- Side-quests are actually pretty easy to get going in this quest, even more so if you are partaking in a large event with many tables playing at once. Your team working away at a side-quest will slow down the group just a little while other tables continue to make progress on the main quest. Stage 2 is even better suited for side-quests!
- Healing is important in this quest, as there is a lot of direct damage being dealt to you through Archery and other effects. Make sure that enough healing hits the board quickly, and ideally, have Elrond in play so he can increase the effects. Players on Hard difficulty should try and stack all damage on a single character and heal it off at once, thus gaining the least amount of penalty from their rules card.
- Dwarf decks actually have some tricks to encourage the Pillage keyword. Hidden Cache and Ered Luin Miner will still do their thing if they are discarded with the keyword. Having extra resources or a basic ally for free is always welcome, so I encourage you to include it in your deck. This also increases your deck size, which is good if you are facing the Captain of the Havens.
- With so much Archery in the game, you would do well to get some damage cancellation on the table as well as healing (unless you are playing on hard mode). The Mithril Shirt is a free point of Archery each round, but other effects like Honour Guard can also prevent damage on your characters.

- Secrecy and Hobbit decks will have a tough time against this quest. Not only will you be raising your threat a lot from the various effects (especially in Hard mode), but the regular Corsair enemies also have very low engagement costs. This makes it difficult to defend them when you are counting on the Hobbit archetype. It will be best just to have a generic, solid defender.
- The Pillage keyword can drain your deck quickly, so either cancel the attacks that will pillage your deck or ensure that you can recycle your deck. Will of the West is a great card to use so that you get all the cards in your discard pile back. Bring enough copies, and maybe even Dwarven Tomb in case you discard the event to the keyword by accident.
- The Corsair enemies that pillage your deck are after events. If you happen to discard those, they will trigger a secondary effect. Try to filter your deck for events a little by running cards like the Galadhrim Minstrel and Spare Pipe. If you are given a choice to draw cards from your top 5 or something, go for events as well. That way, you reduce the risk of taking damage, losing resources, or losing attachments.
- With all these Ships and their high natural defence values, you will get some proper use out of defence-reducing abilities like Tactics Aragorn and Rivendell Blade. Even against some of the other enemies out there, these abilities might be worth more than other weapons!
Playthroughs
With this quest being more of a convention scenario, it’s not easy to find a lot of playthroughs. However, I participated in an online event where we recorded all tables. You can keep track of the game via various videos there.
- Solo playthrough, easy mode: https://www.youtube.com/watch?v=UGE2XUc4m7E
- Solo playthrough, standard mode: https://www.youtube.com/watch?v=yCaNNvnm_NA
- Solo playthrough, hard mode: https://www.youtube.com/watch?v=2oqHTlf2Lts
- 13 player game, Durin’s Father’s table: https://www.youtube.com/watch?v=zCm7Ss-7AQQ
- 13 player game, Warden of Arnor’s table: https://www.youtube.com/watch?v=Z-G_Q9LU0qw
So ends one of the longer scenario analyses I have ever written. This quest is a lot of fun, and I hope that I get to play it at more conventions in the future. It might also be announced to be played with the community online if you ever want to participate there. I hope to see you there!
In the meantime, I will be beginning to focus a little more on contracts for the next month. Expect a few articles of me highlighting the ones that remain. I have gotten to play quite a lot with them over the last year, so I’m keen to share my thoughts with you all.


6 thoughts on “The Hunt for the Dreadnaught”