At the end of the first cycle, solo players were challenged like they had previously been during Escape from Dol Guldur. The final AP of the cycle gave them a quest that was very difficult to beat in true solo, but got easier with more players, as they got to share Gollum between players, reducing the threat each player gained each round. While the normal version of the quest isn’t one of the easiest quests, it is still beatable by decks that aren’t built specifically for it, especially in higher player counts. However, there was made a Nightmare version for this quest that punishes players even more for trying to escort Gollum. While some enemies from the regular encounter deck would fit in nicely with the Nightmare pack (Attercop, Attercop deserves to be a Nightmare-exclusive card), the 19 extra cards introduced in the pack will make it even more difficult to pass through Mirkwood unseen. More tantrums, less threat reduction, and more nasty tricks from Gollum will make this a tough quest to beat.
Nightmare Return to Mirkwood
- Found in: Return to Mirkwood Nightmare expansion pack
- Size: 19 encounter cards, 1 rules card
- Quest cards: 4, remains unchanged from the original quest
- Increase in difficulty?: Yes, several new cards are worse than the original encounter cards, and easier encounter cards have been removed from the encounter deck. The added Forced effects on the rules card also slow down progress by attempting to reduce the action advantage of the player guarding Gollum.
- Fixed loopholes?: There are a few extra cards that also target players not guarding Gollum as if they are guarding him. This increases the challenge a bit when attempting to tackle this quest with higher player counts. Not enough in my opinion though, as multiplayer will still be the easiest way to complete this quest, even in Nightmare format. The loophole of not having any enemies revealed at stage 4 has also been resolved by the new rules card.
- New mechanics introduced: There is some more focus on the Tantrum treacheries by other cards from the encounter deck. Other than that, the quest was already full of different effects, so you will just have to keep an eye out for them, especially if you haven’t played the regular version of this quest in a while.
- Play this scenario if: You are really looking for a challenge, you want to test a control-style deck that is decent at cancelling terrible treacheries, you have been playing the entire cycle in Nightmare mode and are looking to end your suffering.
- What to look out for: Threat increasing effects, very tough enemies, terrible treacheries, quest card effects that can cause a premature loss, undefended damage is dealt to Gollum
New Rules
The new rulesheet that is included with this Nightmare pack has two new rules that the players must remember for this scenario. One of these only triggers at the end of the game, while the other triggers each round at the beginning of the quest phase. This can be easy to forget by the players, but having some sort of reminder will help to not forget this Forced effect.

The Forced effect that happens each round at the start of the quest phase gives the player guarding Gollum the choice to either exhaust a hero that they control, or they must resolve the “when revealed” effect of the top most Tantrum treachery in the encounter discard pile. If there are no Tantrums in the discard pile, then the player must exhaust a hero. When choosing between these options, it is important to know what the top most Tantrum is and if you can suffer its effect again. If you have a solid healing setup ready, and Gollum’s Bite is on top, then it might be a good idea to resolve that instead of exhausting a hero. However, if you have a hero with built in readying effects or have other ways to ready the hero, then that might be a better call than resolving the Tantrum. It will be situation specific, but must not be forgotten by the players.
The second rule that has been added to this version of the quest is that when stage 4A is revealed, the players must find a copy of Attercop, Attercop from the encounter deck or discard pile and add it to the staging area if able. If all copies are already in play or in the victory display, then this does nothing. This ensures that the players will have an enemy to defeat at this final stage. The players will have to be ready for it, as it will be engaging the player guarding Gollum during the encounter phase. The best strategy for this would be to send all copies of Attercop, Attercop to the victory display before going to stage 4, which can be done though either defeating it and playing None Return, or through fishing it out of the encounter deck through Scout Ahead or Out of the Wild. Having Attercop, Attercop out of the encounter deck will help you a lot in surviving the scenario, so the more you can send to the VD, the better!
New Setup
There are no new changes to the setup of this quest, other than the removal of several easier cards from the encounter deck, which are listed below. The quest still begins with one player guarding Gollum, and each player revealing one card from the top of the encounter deck. This can be a good way to get rid of some nasty cards, like Befouled Equipment, which won’t discard any attachments this early on, except if the player guarding Gollum is running the Grey Wanderer contract (which isn’t recommended because of the exhaustion rule). This means that the treachery will simply surge, allowing players to avoid at least one copy this way. Web-wall is also a good NM card to get out for this effect, as there won’t be any Spider enemies in the discard pile at this point in time. The rest of the setup stage resolves as normal.
Cards removed
The following cards are removed from the encounter deck as a part of the setup of this quest. Do this before resolving quest card 1A.

- 3x Woodman’s Glade (Beneficial location)
- 3x Wood Elf Path (Beneficial location)
- 3x Mountains of Mirkwood (Beneficial location)
- 2x Goblin Sniper (To prevent stage 4 from lasting forever)
- 1x Marsh Adder (Unthematic enemy)
- 2x Wargs (To make way for the Pursuing Warg-rider)
- 2x Despair (Easy treachery in this quest)
- 2x The Brown Lands (Wouldn’t work with Deceptive Path very well)
- 2x The East Bight (Thinning the encounter deck of locations)
The Quest
Outside of the extra rules that are printed on the new Nightmare card, the rest of the quest plays a lot like the original quest. You have to escort Gollum through the forest of Mirkwood and have to avoid some big enemies along the way. Gollum isn’t keen on being captured, and throws some new Tantrums in this version of the quest. The name of the game in this quest is speed, as you will want to go through this quest as fast as you can. This lowers the chances of something bad happening to your deck, and makes it so that Gollum’s threat raising ability won’t threat any players out near the end of the game. Rushing through stages 2 and 3 in particular is recommended, as players shouldn’t stay there for too long, else they will end up being outpaced by the encounter deck.

The first quest card allows for a bit of setup, as there are no downsides on the quest card for staying at 1B for too long. Remember that both Gollum and the new Nightmare card will have extra Forced triggers that happen outside of the normal flow of the game. Gollum will raise the threat of the guarding player by 3 additional points each round on top of the 1 threat every player has to gain at the end of each round. The new rules card will also have the player guarding Gollum choose between exhausting a hero or revealing the top Tantrum from the encounter deck. These are things that are easy to forget, and will require some reminders to be set. The first stage isn’t all that tough, though the players will have to deal with a potentially bad setup now that more cards out of the encounter deck are nasty.
Stage 2 remains unchanges as well, and will force the players to quest succesfully, or else Gollum escapes. Now that the new encounter deck includes cards with higher threat, such as the 4 threat Deceptive Path, there is a higher chance of players failing the quest. This isn’t helped by the fact that only players not guarding Gollum can send characters to the quest. Note that the player guarding Gollum can still help out by playing events or using effects that raise the willpower of other players such as Nenya. Careful planning on who gets to control Gollum during this stage is important, so that the maximum amount of willpower can be sent to the quest. Have Gollum being guarded by the combat-orientated player if there is one in the group. If you are playing true solo, the first of all: best of luck to you, and second: you can commit characters to the quest even while guarding Gollum. You’ll have to do some careful scrying or just go all out on willpower at this stage, just make sure that you don’t underquest. That will cause Gollum to escape, and ends the game in a loss. With just 3 progress to be made on this quest card, you will likely clear it in one turn.

Stage 3 is very tough, as the player guarding Gollum cannot play cards from their hand. This will greatly reduce the boardstate of that player, and will prevent them from playing anything in their hand. Solo playthroughs tend to stall here for a reason. However, there are other places that you can play cards from, though it will require specific decks. Hero Gandalf allows you to play the top card of your deck, and the Noldor archetype can play some cards like Glorfindel and Elven-light from the discard pile. It is important at this stage that each player has the opportunity to play some cards and get ready for the final round, so hitting Isolation at this stage will be terrible, unless the players have enough willpower to push through the quest.
Stage 4 is the only one that really got changed in Nightmare mode. Now, when the players arrive at this stage, the players must find one copy of Attercop, Attercop, and put it in the staging area. This boss-level enemy has 3 copies, so unless all three are in play already or in the victory display, you will have to fish out another copy. Like all other enemies at this stage, the Attercop will engage the player guarding Gollum at the beginning of the combat phase. This will put some extra stress on that player’s deck, as having at least one Attercop engaged can be difficult, let alone having multiple copies engaged alongside other enemies. This extra enemy will make sure that the players have at least something to fight at this stage, as in some rare cases, the normal mode of this quest can be beaten by just placing 2 progress on the quest if no enemies were revealed for a few rounds. Defeating all enemies and making 2 progress on the quest card will clear the stage and will win the scenario for the players. Make sure to already have dealt with some enemies before arriving at this stage, as stalling here for too long will cause a loss if the players end up threating out or take too much undefended damage on Gollum.
The Encounter deck
Global
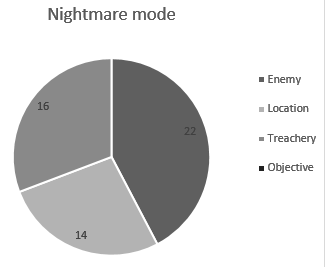
- This Nightmare encounter deck consists out of 52 encounter cards, not counting the Gollum objective that is removed at the start of the game.
- The chances of hitting a shadow effect are relatively low for Nightmare quests, at only 48%
- Average threat on cards revealed is 1.5 threat per card, which is in large part due to a high density of treacheries in the encounter deck.
- Surge is quite a common keyword, with 12 cards having the keyword. There are also various other cards that end up revealing more encounter cards, allowing you to see the majority of the encounter deck in lower player counts.
- The Doomed keyword is not present in the encounter deck, but there are various other effects that will raise the threat of the players. Gollum is the main cause of players threating out, but treacheries like Gollum’s Anguish will also help to get to dangerously high threat levels.
- Immunity
- While Deceptive Path is in the staging area, progress cannot be placed on it.
- While The Spider’s Ring is the active location, the player guarding Gollum cannot change.
- Pursuing Warg-rider cannot be optionally engaged.
The statistics do not count Gollum to be a part of the encounter deck. As you can see, the majority of the cards in the deck are enemy cards, and with several treacheries having surge, you can usually be sure of at least 1 enemy being revealed each round in multiplayer. There aren’t a lot of easy encounter cards left either, making it difficult to overcome the staging area, which can stall your progress. This will end up costing you extra turns, which is very dangerous in this quest, as it raises threat of the player guarding Gollum by a lot.
Enemies
While the Hill Troll and Attercops from the original set are a challenge of themselves, the Nightmare version of this quest adds 3 new sorts of enemies for you to go up against. These will have to be defeated during stage 4 if you want to come out on top.
- Ambushing Orcs: A tank-style enemy that is going to end up engaging players very quickly. The Ambushing Orcs don’t hit for as much as some other enemies in the encounter deck (Attercops and Hill Trolls mostly), but are very difficult to get rid of. With 3 defence and 7 hitpoints, the Ambushing Orcs will take a lot of attention to defeat. And you really want to defeat them, since they are a potential risk each time they attack. This is because when they are given a shadow effect that targets the player guarding Gollum, each player in the game must resolve that shadow effect. In true solo, this makes no difference, but in many other cases, the shadow effects will target players who weren’t prepared for it. The normal encounter shadow cards have some bad targets for this, especially the Tantrums, but the worst ones are probably in the Nightmare cards. Befouled Equipment can discard all attachments on the board this way, which is dangerous to do in the combat phase. Web-wall will get rid of all resources on heroes in play. Web-spinner will cause each player to exhaust a character, which is also bad if it hits early in the combat phase. The shadow card of these Orcs must be cancelled at all costs, and this enemy is a prime target for a Forest Snare if you can pull one off. You will eventually have to chew through the 7 hitpoints, but given enough time, you can pull it off. Not that you are give so much time though, as the quest demands a high pace.
- Pursuing Warg-rider: The Warg-rider is an enemy that will stay in the staging area during most engagement phases, as it cannot be optionally engaged and has an engagement cost of 48. While in the staging area, the Warg-rider will contribute 3 threat, so it will slow you down if you don’t handle him quickly. The Warg-rider engages only when Gollum is moved to a new player, this means that if Isolation is in play, the Warg-rider cannot engage anyone unless someone gets to 48 threat eventually. When Gollum is moved to a new player, that player gets engaged by the Warg-rider who makes an immediate attack against that player. This means that if you defend this 4 attack strength attack with a hero, it will be down for the next round. Chumping is generally a good idea, but you can also still defend with a Gandalf that is now ready. Speaking of Gandalf, he is the best tech against this enemy, as his direct damage can kill the Warg-rider in one hit, freeing up some threat in the staging area, and allowing players to transfer Gollum without getting hit by this enemy. Getting multiple Warg-riders in the staging area is a big problem, as each will engage and attack when Gollum is given to another player. If you transfer him during the quest phase, you do remove some threat from the staging area, but at the cost of suffering an attack made against you in the quest phase. With 2 defence and 4 hitpoints, killing the Pursuing Warg-rider isn’t the issue. Defending the multiple attacks will be critical though.
- Web-Spinner: As the softest hitting enemy from the NM deck, the Web-spinner is more focused on slowing down the players than killing them. The 3 threat will stop some progress from being placed on the quest while the Web-spinner is in the staging area, but the real threat lies in its When Revealed effect. This forces the player guarding Gollum to either exhaust a hero, or the Web-spinner gains surge. Since the player guarding Gollum has already had to make the choice to exhaust a hero due to the new rules at the beginning of the quest phase, there won’t be many heroes left to exhaust, especially if more than one Web-spinner is revealed that round. The surge might not look so bad as a trade, but considering the terrible cards in this encounter deck, you really want to avoid revealing more encounter cards. The choice will be up to you, but I suggest exhausting a hero with a readying ability for this effect. Note that this effect also triggers when the Web-spinner enters play because of Web-wall. During combat, the Web-spinner only attacks for 3, which can be dealt with through some allies. A defence of 2 and 5 hitpoints isn’t too much to deal with for a NM enemy, but will still require some attention. Since the Web-spinner is only dangerous when it is revealed, there is an argument to be made to keep it alive and out of the encounter deck, removing the potential surge from the encounter deck. You will still have to kill the enemy during stage 4, but you should focus other enemies first. This also removes the shadow effect from the encounter deck, which will cause the player guarding Gollum to exhaust a character during the combat phase. This is dangerous, as it can exhaust the final character that player had, like a chumpblocker. If the player is then engaged with an enemy, the attack has to go undefended, potentially killing Gollum, and ending the quest.

Locations
With the removal of some beneficial locations from the encounter deck, you will find that Mirkwood is a much more hostile place in this version. There are 2 new locations in this quest that will add to that hostility.
- Deceptive Path: 4 threat is the most you will end up revealing on a single encounter card, and will be a good reason on its own to make it your next active location. 1 quest point would make it easy to explore, except that progress cannot be placed on Deceptive Path while it is in the staging area. This does not protect it from receiving progress as the active location, or cards like Heirs of Earendil that discard the location at the cost of just one threat. If you cannot clear the Deceptive Path while it is in the staging area, and end up travelling there, you have to trigger the Forced ability of the Path after it becomes the active location. This shuffles the encounter discard pile into the encounter deck. After that, it discards cards from the encounter deck until a location is discarded. That location is then revealed and made the active location. Deceptive Path is discarded afterwards. Not knowing what you will get as the new active location is dangerous in this quest, as it can cause you to reveal more Spiders with Web-wall, or forces the players to keep Gollum where he is with the Spider’s Ring. While many of the older locations can be cleared with location control, the Forced effect on Deceptive Path is still dangerous. It also resets the encounter discard pile, which can shuffle in all Tantrums, forcing the player guarding Gollum to exhaust a hero if no Tantrums end up in the discard pile before the start of the next quest phase. Other than Heirs of Earendil, Strength of Will is also a good card to use, as it can clear Deceptive Path as the active location before the Forced effect triggers. The event targets the location during it being moved from the staging area to the active location slot, bypassing its immunity and its Forced effect. It will require the exhaustion of a Spirit character, but characters like Idraen are ideal for this.
- Web-wall: This location is a lot more difficult to get rid of than the Deceptive Path, and will still add 3 threat to the staging area. On top of that, it reveals the topmost Spider enemy in the encounter discard pile and adds it to the staging area. In the early game, this won’t do much, but when you have massive spiders like Ungoliant’s Spawn and Attercop, Attercop in the discard pile, then this location is really one problem after another. As the spiders themselves are also revealed, they can trigger their own effects again, which will trigger the King Spider, Ungoliant’s Spawn, and Web-Spinner. This makes it feel like there is no end to the spider infestation of Mirkwood, which is quite thematic. As for the location, it does nothing but contribute its threat while it is in the staging area. Because of this, it doesn’t have a high priority to travel to, as exploring it will mean that you can reveal the location again, triggering its response. It also means that when the discard pile gets reshuffled, you have a chance to encountering its shadow effect, which will discard all resources from the player guarding Gollum, just to pour some salt in the wound of that player.

Treacheries
The treacheries have always been the highlight of Return to Mirkwood, and this version adds 3 new sorts of horrible treacheries to the mix that will try to waylay you. These are all worth to cancel, and will synergize with each other.
- Isolation: As a new Condition attachment in this version of the quest, Isolation is meant to rob the player guarding Gollum from any help the other players may give to them. When it is revealed, the treachery surges, and then attaches to the current quest card. While that quest is in play, the treachery will cause all characters to lose Ranged and Sentinel, which makes the combat phase a lot more tricky to deal with. Players won’t be able to attack each others enemies, and engaged enemies can no longer be defended by other players. The loss of Ranged and Sentinel at stage 4 is really going to be rough, as you will probably have an Attercop in play at that time. Not being able to help your teammates out like this is difficult, but there are still things you can do. Events and allies can still interact with other players, cancelling enemy attacks and healing each others characters. On top of the loss of the Ranged and Sentinel keyword, the player guarding Gollum cannot change. This is a big issue in multiplayer, as that means that one player will take all of the Tantrums during that quest unless the Condition is discarded. Having to go through +3 threat each round as well can be a game-ender at the final stage, unless plenty of threat reduction is used. The treachery isn’t all that bad in true solo though, as Ranged and Sentinel don’t do anything (except blocking a few attachments and events) and since you are the only player, Gollum can’t have a different owner anyways. But if you are going up against this quest in true solo, you’ll have plenty of other problems besides this treachery.
- Befouled Equipment: At long last we have something that can rival Leaves on Tree for being a horrible treachery to your attachments. This brand new Tantrum card will straight up discard all attachments controlled by the player controlling Gollum. Then, in order to prevent you from returning the attachments with Reforged or Dwarven Tomb, the treachery sets aside your entire discard pile, and removes all of the cards from the game. If this hits after a Wasted Provisions, you can end up with no cards to play in your deck or your discard pile. The removal of your discard pile only hurts if you build for it, but Noldor decks are going to struggle against this treachery. This effect usually causes a scoop if Dry Watercourse is the active location, destroying all attachments and removing them from the game. This is worth cancelling at any point, unless it is revealed during setup, when no attachments are in play. If no attachments were discarded through this effect though, the Tantrum gains surge. Forth! The Three Hunters decks are not going to work against this quest, unless both copies of this treachery are removed from the encounter deck and placed in the victory display. This also prevents the treachery from discarding attachments through its shadow effect, that can still hit the player guarding Gollum if the attack was made against another player.
- Wickedness and Mischief: This final treachery is a tough one, as it forces the player guarding Gollum to resolve the topmost Tantrum in the discard pile, or the treachery is replaced by 2 new encounter cards. Getting this after a Tantrum just hit is very brutal, raising the threat of a player by 16 or dealing 4 damage to heroes twice. Hitting Befouled Equipment twice is not as bad though, unless the first one got cancelled. The really bad combo here is this treachery combined with the Dry Watercourse. This forces each player to either take 2 extra encounter cards or resolve the top Tantrum over and over again. This is usually a scoop, and another reason to never travel to the Dry Watercourse (or clear it as the active location if Deceiving Path draws it out). If there is no Tantrum in the discard pile, the treachery will replace itself with 2 new encounter cards, unless the players cancel the treachery.

Tips and Tricks
- As with the regular scenario, multiplayer will be your best bet with this scenario. The more players you have, the easier it will be for everyone to guard Gollum for a while. Higher player counts will mean that more Nightmare cards are being revealed, but also increases the chance somebody has a Test of Will in hand.
- Speed should really be the focus of this scenario, allowing you to get through the quest with as low a threat as possible. Because of this, try to go for heroes with good starting stats, that need very little setup to be effective. The resources you save with this can be pumped into an ally swarm, which is a decent strategy to this quest.
- Be prepared for the Tantrums. If you are guarding Gollum, be prepared to take damage from the bite and be able to heal it off. Discarding cards from the top of your deck can be a benefit if you are running a Dwarf, Noldor, or Caldara deck. The new Tantrum is nasty and should be reason enough for you to avoid a Dale deck or other decks relying too much on attachments.
- Bring threat reduction, as much as you can bring. This is easier said than done in some decks, but be sure to have at least some way to lower your threat, as this quest loves to raise it, especially if you are guarding Gollum. Gandalf will especially be useful throughout the entire game.
- Since the new rules put an Attercop into play during stage 4A, it might be a good idea to invest in some victory display cards. Not only will this remove the Attercop from the game, it will also give Rossiel bonuses against other Spiders, and will make the combat phase a little easier as there is no massive Spider in play.
- Secrecy decks are a bad idea in this quest, as you will have a hard time staying below 20 threat when you are guarding Gollum. Valour is easier to achieve, but very risky, as there are treacheries that raise your threat by 8.
- The player guarding Gollum is seriously crippled during this quest, losing action advantage and taking the full force of the Tantrum treacheries. Include plenty of cards in your deck that can help other players out, such as with cards that ready characters, heal, or remove Condition attachments. This is a quest that demands cooperation between decks, else the players will swiftly lose the game.
- Readying abilities will be important in this quest, especially those that ready heroes. The new rule and the Web-spinner enemy will require that the player guarding Gollum exhausts heroes, so having a way to ready them built it will aliviate the loss of action advantage. Tactics Boromir comes to mind, though you have to be very careful with his threat increase. Messenger of the King or Sword-thain on ally Glorfindel will be an easier way to exhaust and ready a hero. Make sure that you avoid using attachments that ready heroes, as Befouled Equipment can discard them (unless you cancel the treachery first).
Playthroughs
There are quite a few playthrough videos online on this quest in Nightmare mode, giving you an idea on how the quest works and what decks are used to tackle it.
- 2 player, take 1: https://www.youtube.com/watch?v=0spa_q8SWoY
- 2 player, take 2: https://www.youtube.com/watch?v=QWbhQWMi_2I
- 2 handed, progression style: https://www.youtube.com/watch?v=Sva47T3B52A
- True solo, Seastan deck: https://www.youtube.com/watch?v=Rzjh4d_Unts
And with that, the first cycle of Nightmare scenarios has come to an end for many players. I still have to go back and do the write-up for a few more NM scenarios of this cycle, but I wasn’t going to do them in order anyways. I do have a few more tough ones to get through, but at my current rate, I hope to complete the first cycle in a few months. These Nightmare articles take a lot less time to do then regular scenarios as I don’t have to go through all the quest cards in depth or have to cover each encounter card in the deck. I will try and do an NM scenario each month until the first cycle is over. After that, I will have to find the NM packs of the Dwarrowdelf cycle in order to complete that one.
