Of the three splinter factions of the Kingdom of Arnor, Rhudaur was the first to fall to the Witch-King during his conquest of the north. This quests deals with the aftermath of that war many hundreds of years ago. The quest also goes in a bit deeper on the lineage of the Dunedain you have encountered during this cycle. The quest is unique, as it involves you having the option to clear 3 side-quests in the first half of the quest. Based on how many you complete, you get bonus objectives and the second half of the quest gets a little easier. This quest is of medium difficulty and is often used by players as a testing quest.
The Treachery of Rhudaur
- Found in: The Treachery of Rhudaur Adventure pack, Angmar Awakened cycle 4
- Official Difficulty: 5
- Community Difficulty: 6.0
- Encounter sets: The Treachery of Rhudaur, Cursed Dead, Ruins of Arnor
- Quest cards: 2, with 3 side-quests for the first stage
- Play if: You want to test a deck against a moderate difficulty quest, you want to battle Undead enemies but find Deadmen’s Dike and Dread Realm too difficult, you enjoy a treasure hunt style quest with a boss-fight at the end, you just came from the Ringmaker cycle and want a transition quest with both the old time mechanic and the new side-quest mechanic.
- What is different about this quest?: First stage is split into three side-quests that can be explored simultaneously, boss-fight at the final stage.
- Solo or multiplayer?: This scenario can be beaten in true solo, but it is slightly easier to bring a friend. In 2/3 players, this quest is the best, but with 4 players, the number of enemies can outpace you if you are not careful. Adding more players will also increase your chances at beating the three side-quests. However, you are also more likely to reveal Sorcery cards at stage 2, triggering Thaurdir to attack you.
- Can I run side-quests for this scenario?: The first stage gives you three side-quests that you can clear, but if you want to go to a side-quest of your own, that is no problem. Selecting your own side-quest will not activate any of the negative effects on the encounter side-quests, which can be a boon for the players. Note that the player side-quests will still be influenced by a lot of encounter cards, removing progress or increasing quest points.
- What to look out for?: Steady threat increase, swarms of enemies, Thaurdir boss that can make multiple attacks.
The Quest
Setup
To start the quest, the players will make the Great Hall the active location and remove Thaurdir from play. This unique location will provide players with an 8 quest point buffer before progress can be placed on side-quests. The players then add the 3 Treachery of Rhudaur side-quests to the staging area, side-quest side face-up. Depending on the number of players, you must search the encounter deck for a copy of Ancient Causeway and add it to the staging area. If you are playing with 3 or 4 players, 2 copies of this location must be added to the staging area. No other cards get revealed from the encounter deck. Once the first player has taken control of Amarthiul, the players may flip the quest card and begin the game. Note that Amarthiul will have to remain alive during this scenario, else the players lose the game.
Quest card 1: Secrets of Rhudaur – Time 5
Differently than usual quests, the players will be unable to select this quest card as their active quest card during the game. This means that players will have to focus on side-quests for the first part of the scenario. The encounter deck gives you 3 side-quests already, but an additional two are somewhere in the encounter deck, waiting to be revealed. Important to know is that all three of the Treachery of Rhudaur side-quests have abilities when they become the active quest, and they also have an ability that allows you to play progress on them whenever you can.
Make sure that during the first round you put a lot of effort into questing hard against any one side-quest. You will likely have to chew through a lot of quest points to clear the active location. You can circumvent the 8 quest points on The Great Hall by attaching a Woodmen’s Path on it during round 1. Not only will this make sure you can travel next phase, but you will also be able to pour more progress on a side-quest. Remember that exploring the Great Hall will likely draw out a couple of enemies, so be ready for those.
You get 5 rounds to clear side-quests at this stage. While it is not required that you clear them all (or any, for that matter), you will be aided by the objectives hidden on the flip-slide of the quests. Exploring several of these side-quests will also allow you to progress through stage 2 faster, and protects you from certain shadow effects. Players can also ignore the encounter side-quests, and instead focus on player side-quests for 5 turns. This can, in turn, save the players from any of the effects on the encounter side-quests, while providing them with benefits as well. There is something to say for both strategies, really. Players could take the first 1-3 turns exploring their own side-quests, and then take the last few rounds to smash one of the Treachery of Rhudaur ones. After the final Time counter has been removed from the quest card, the players automatically advance to the next stage. Any unexplored Treachery of Rhudaur side-quests are then placed out of play.
Another way to progress through to stage 2 is to explore all three of the scenario-specific side-quests. This will force the players to immediately advance to the next stage. While this method of progression is rare, higher multiplayer counts can achieve this. Note that stage 2 will draw out more enemies, so if you just revealed a bunch during staging, you are going to have a rough combat phase.
Since this stage is difficult to discuss without going into the three side-quests, I will discuss them here, saving the two of the encounter sets for the separate Side-quest chapter later in the article.
Decipher Ancient Texts – 14 quest points
This side-quest tends to be the quest players go up against during the first round. This is because they can make some good progress on this if they clear the active location, and it requires the least progress out of the three. Decipher Ancient Texts has a passive effect that reduces the willpower of allies by 2, rendering most allies useless for the quest. This again makes this quest easier to tackle early, as there isn’t much threat in the staging area, and not many allies are on the board yet. The minus 2 to willpower will become troubling if this is the final side-quest left over, making progress slow, since players can only really use heroes to quest with. Try to run events like Untroubled by Darkness, Scouting Party, and Faramir to boost the willpower of your allies, making them more useful when going up against the quest. Players can also use effects like Rosie Cotton to use their allies to buff hero’s willpower.

The Action on this quest card can be triggered at any time, even if the side-quest isn’t the active one that round. Any player may pay 1 resource to place 1 progress on the quest, which is an easy point-and-click way to finish the quest off before the end of the round. However, to prevent players paying all their resources for this quest right out of the gate (which would be possible with Leadership Denethor in a 4 player game), the action is limited to 3 times per round. This allows players to still make some progress on the quest card each round, but will likely require at least 1 round of players questing against the Texts. In the end, the 14 quest points can easily be obtained by devoting 1 round of questing and filling out the rest with resources. The best way to ensure that your resources are best spent, is to place 3 progress at the end of a round, and then immediately spend another 3 resources at the start of the next round. This prevents any progress getting removed during either the combat phase or the quest phase, which would be a waste of resources. Use Resource Acceleration effects to your advantage when tackling this quest, and you will likely clear it within 5 turns. Once this quest is defeated, it is flipped over and the Orders From Angmar are added to the staging area.
Quiet the Spirits – 16 quest points
This is the combat heavy quest card, and is usually the first side-quest to be completed in multiplayer. The passive effect on the side-quest is an interesting one, as it turns on some synergies, and works differently with Traps. When the players have picked this side-quest as the active quest card, all Undead enemies in the encounter deck will engage the player with the highest threat when they are revealed from the encounter deck. They do not enter the staging area, bypassing any Traps there. However, this does count as the enemies engaging a player, potentially readying Sam, and triggering a bunch of Dunedain cards, such as the Warden of Annuminas, who gets an extra point of willpower. Followed is a great card to have when going up against this side-quest, as the enemies will not be contributing their threat to the staging area. Any other enemies that engage a player from this effect, will count their threat to the total in the staging area.

The side-quest has also got a forced effect that will trigger any time an enemy has been defeated. This effect also triggers when Quiet the Spirits isn’t the active quest, so try to keep track of how many enemies you killed, it might just resolved the side-quest. Finding enemies in this quest isn’t difficult, the quest even has multiple ways to fetch enemies through encounter card effects. Even enemies in the discard pile might return to the game after you killed them, making you even more progress on this side-quest. Think of the Forced effect like giving every character the ability of Tactics hero Legolas, where upon the destruction of one enemy, you get to place 2 progress on theat particular quest card. Only in this case, it bypasses the active location.
The 16 progress required for this side-quest will be easily obtained in higher player counts, as more enemies are revealed. Players can also use Dunedain Hunter and Wait no Longer to find even more enemies. Through combat alone, players will make the majority of progress, but it doesn’t hurt to go up against this quest every now and then. Just make sure that the player with the highest threat can take the enemies that will engage him. Once the players have cleared this side-quest, the Daechanar’s Brand objective is added to the staging area.
Sift through the Debris – 18 quest points
Finally, we have a side-quest which will require a lot of progress, and is centred around clearing locations. Sift through the Debris requires a whopping 18 quest points before it is cleared, so players will likely have to spend a couple of rounds questing against this particular side-quest. While this side-quest is the active quest, all locations in the staging area will get +1 threat. This includes newly revealed locations and locations that were already in the staging area, but not the active location (sorry Ghan-buri-Ghan). This +1 threat will have to be remembered, as it is an easy thing to miss in your final calculations. The preferred time to go up against this side-quest is when players have no locations in the staging area, thereby minimizing the increase in threat. With the quest not being very heavily focused on locations, there will be ideal moments for the players to go up against this side-quest.

Sift through the Debris also has a Forced ability that triggers regardless of if it is the active quest. Whenever any location is explored, the players get to place 2 points of progress on the side-quest. This isn’t much progress towards the 18 points required, but at least it is a start. If you can reliably find and explore locations (Dunedain Pathfinder, The Hidden Way) you will find the progress piling up on the quest card with ease. However, since you will be needing to clear at least 9 locations in 5 turns, it is advised to at least pick this quest as the active one in order to clear it sooner. Having a location control deck in a multiplayer game will be a great asset towards this side-quest, though you must remember to actually explore the locations, not discard them (no Heir of Earendil). Since the players will start off with at least 2 (and sometimes 3) locations in play right off the bat, you will be sure to make some progress via this Forced effect on the quest during your 5 turns. Once the players have cleared the side-quest, they flip the card and add the Heirloom of Iarchon to the staging area, ready to be claimed.
Quest card 2: Thaurdir’s Pursuit – 30 quest points
Now that Time has run out (or the players have cleared all 3 Treachery of Rhudaur side-quests) the players move on to stage 2 of this scenario. At this point, any unclaimed objectives are still left in the staging area, but any uncompleted side-quests will be put out of play. On top of this, the players will have to add Thaurdir to the staging area, and each player must find an Undead enemy in the encounter deck and discard pile and add it to the staging area. There are a number of options here, but the best bet would be to remove as many Cursed Dead from the encounter deck as possible. Not only will this remove the When Revealed effect on the enemy, but it also adds little threat to the staging area and is an easy enemy to kill. Wight of Rhudaur is another good pick, as you will avoid the Doomed 2 on it, just in case threat is becoming an issue at this point.
The B-side of this quest card offers very little text to keep track off, but there are some important things to note here. First, the quest card has 30 quest points, meaning that players will be picking the main quest as the active quest a lot in order to clear it. This gives players little time to explore side-quests, either encounter of player typed. Second, the main quest gets -5 quest points for each of the Clue objectives attached to a character. This means that players will need to claim any Clue objectives in the staging area to lower the quest point value of the main stage. If the players have done well and cleared all three side-quests, the quest points on this main stage will be halved to 15. This saves the players a couple of turns of questing, and can allow them to quest less hard against this main quest.
The goal of this stage is to make sure that Thaurdir has no hitpoints remaining. You cannot destroy him during this scenario, as he has the Indestructible keyword, but you can deal damage to him beyond his printed hitpoints. However, Since Thaurdir has a healing ability, it is probably best to make sure that players have enough progress to win the main stage, and then start to focus their attention to Thaurdir. The difficult part here is that whenever a treachery card with the Sorcery trait is revealed from the encounter deck, Thaurdir makes an immediate attack against the first player and heals 3 points of damage. This means that if you have dealt enough damage to him to destroy him, but don’t have enough progress yet, Thaurdir could heal and make you suffer his attacks again.
The additional attacks made by Thaurdir are also not mild. With a density of 9 Sorcery Treacheries (or 7 in Easy mode) out of a 42 card encounter deck, there is a 21% chance of you revealing a Sorcery card, on average in both modes. Try to keep track of some of these effects, as they might end up in the discard pile when revealed as shadow cards, or attach to quest cards in the case of Haunting Fog. Note as well that Thaurdir isn’t immune to player card effects, and that if you cancel his attack during the quest phase, you are likely to cancel any other attacks as well for the remainder of that phase. This means that it doesn’t matter how many Sorceries you reveal during the quest phase: if you cancel the first attack, you have cancelled any other attacks against that player as well for the rest of that phase.
Dealing damage to Thaurdir should be done in one fell swoop after players are certain they have enough progress on the quest, or can win that next turn. The more damage you do, the more certain you can be that Thaurdir doesn’t heal all of it during the next staging step. 4 defence can be tough to beat, so try to join in with some Ranged attacks, and maybe use Tactics Eowyn’s ability to deal even more damage to the wraith. Direct damage can also be dealt thanks to Thaurdir’s lack of immunity to player card effects, however, you cannot play attachments on him. This does mean that you can also lower Thaurdir’s defence, making it easier to deal damage to him.
Once the players have placed enough progress on the main stage and have dealt enough damage to Thaurdir, they win the game and can move on to the next scenario in the cycle. it doesn’t matter which order you complete these prerequisites for winning the quest, though it will feel more thematic to quest hard first, and then battle the wraith blocking the exit. You better rest up at Rivendell before tackling the behemoth of a quest that is The Battle of Carn Dûm.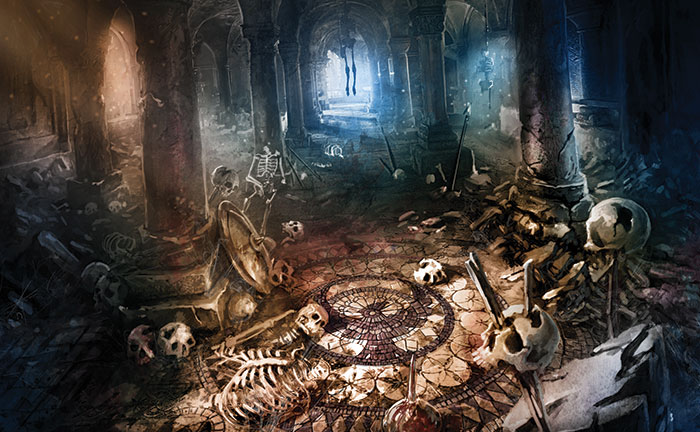
The Encounter deck
Global
- The encounter deck consists out of 42 cards in Normal mode, and is reduced to 31 in easy mode.

- Shadow effects in this scenario are on 69% of cards in Normal mode, and 65% in Easy mode. Many effects will increase the enemy’s attack value or will trigger on not having Clues attached to characters.
- Average threat on cards revealed is 1.4 threat/card in Normal mode, and 1.2 in easy mode. There are big gaps between this though, ranging from 5 threat locations to 0 threat treacheries.
- Surge appears on 8 cards in total, but many other effects will drag out more enemies from the discard pile.
- The Doomed keyword only appears on the 2 Wights of Rhudaur, but there is a host of threat raising abilities in this quest, so don’t bring your Doomed deck, unless you want the game to end within a few rounds.
- The chances of revealing a Sorcery card from the encounter deck is 20% in both modes, with variations when looking at what cards are in play or in the discard pile.
- The Time keyword appears on the first stage of the quest, but there are no cards interacting with the keyword at all. You will have a consistent 5 rounds to beat the side-quests before moving on.
- Immunity:
- Thaurdir is indestructible and cannot have attachments
There is a relative equal distribution of cards in the encounter deck, with just slightly more treacheries than enemies or locations. It will feel like the encounter deck throws more enemies your way, since the Undead will be recurring from the discard pile a lot.
Objectives
There are a number of objective cards in this scenario, but none of them will end up in the encounter deck, so you don’t have to fish for them. If you are struggling to find the Objective attachments, look at the flip-side of the side-quests, that usually helps.
- Amarthiul: By now, we have had Amarthiul for several scenarios already, and nothing has changed with this version. Amarthiul’s stats remain the same and players will have to keep in mind that he does not move with the first player token. Amarthiul only moves between players when another player has just been engaged by an enemy. His stats are solid, and make him into a powerful attacker for decks that are a bit short on the offensive part of the game. He can also act as an emergency defender, but be careful with that during this game. There are shadow effects out there that will boost the enemy’s attack by 3, potentially dealing enough damage to kill Amarthiul, at which point the players lose the game. Remember that you will be able to boost Amarthiul’s stats with the three Clue objectives. While the willpower one might not be the best option, the attack boosting one is very useful on him, giving him a bigger punch towards Undead enemies.
- Daechanar’s Brand: This Clue objective is on the flip side of the Quiet the Spirits side-quest and continues the trend of being a combat related card. This Brand grants the wielder a +1 to its attack when attacking Undead enemies. Since all enemies in the scenario are Undead, you can consider it to be a free Dunedain Mark on the hero or on Amarthiul. Remember that the objective will first go to the staging area, and you will have to exhaust either a hero or Amarthiul to claim the objective. This one is a good match for any Ranged hero, but also on Amarthiul, since he is likely attacking as well.
- Orders From Angmar: Where there is an attack boosting objective, there must also be a defence boosting one, which is the Orders from Angmar. This objective is on the flip-side of the Decipher Ancient Texts side-quests and grants the wielder a +1 defence when defending Undead enemies. Not sure how a piece of paper protects you from a ghost, but who cares. This objective is a good fit for your defenders, and especially Sentinel defenders who are going to tank Thaurdir for a while. Since it is not a restricted attachment, you can run it alongside any other defensive gear, making your tower defender even stronger.
- Heirloom of Iârchon: Lastly, we have the heirloom that boosts willpower. When comparing objectives to the Dunedain signals, this one should be the most valuable, so clearing Sift through the Debris will help you a lot. Having one character claim this objective will help when trying to clear the second stage, though claiming this objective is a bit more difficult than with the others. That is because your questing heroes will all be likely exhausted by the time this objective enters the staging area. In order to claim it, you will have to hold that character back from questing for next round, or have a readying effect like Lanwyn, Snowmane or Unexpected Courage.

Enemies
The Undead of Angmar have returned under the banner of Thaurdir. These swarming enemies have already been covered during the Deadmen’s Dike analysis, so there is no real reason to repeat myself. Just know that the enemies will be returning from the graveyard (discard pile) a lot, so be ready to keep track of that and not to get overwhelmed. Remember that killing enemies will place progress on Quiet the Spirits.
- Thaurdir: The Wight from Fornost has followed you from the north, forcing you to face him again. Nothing has really changed with him, besides the fact that when a Sorcery treachery is revealed, he not only makes an attack, but also heals 3 damage. This is troublesome, as you will have to deal with Thaurdir in one attack, in order to avoid him healing of the small bits of damage you have done over time. This is why Direct damage usually isn’t a viable tactic against this boss-level enemy, as it is unlikely to do a lot of damage in one go. I have already talked a little about how to deal with Thaurdir’s attacks and how to deal enough damage in the quest overview. This is because it is a prerequisite to win the game that you deal enough damage to Thaurdir so that he has no hitpoints remaining. Note that he is not immune to player card effects, making it easier to deal with his 4 points of defence, and to deal crazy amounts of damage to him with Heavy Stroke on a Dwarf character. Remember that even if Thaurdir has no hitpoints remaining, he does not leave play, as he has the Indestructible keyword. Players will also have to make enough progress on stage 2 to win the game and be rid of him. At least…for this scenario…
- Traitorous Wight: A 2/4/2/4 enemy is quite troublesome by itself, as 4 attack is quite high for a base stat. With even more ways to boost the attack of this enemy, you will likely find yourself defending this wight with a hero rather than an ally. But that is not all. The Traitorous Wight also has a Forced effect whenever it engages an enemy where it removes 2 progress from each quest card in play, including (player) side-quests. This makes it often difficult and frustrating to engage this enemy, as it can remove the final few points of progress required to clear a side-quest. Even worse, it can prevent players from beating the scenario if they have just barely broken even on stage 2 with their progress. In order to prevent this, the players can make sure to kill the Wight in the staging area with effects like Hands Upon the Bow and Haldir. A 32 engagement cost will mean that the wight will come down around halfway through the game, perhaps a bit earlier since the quest raises threat a lot. A great way around this is to use Noiseless Movement, in order to keep the enemy in the staging area for a turn. This can set up Haldir quite nicely and saves you 2 progress on every quest card in play. Ranger Spikes is also a great counter to this enemy.
- Wight of Rhudaur: Another strong Undead enemy, though this one is slightly harder to kill than the Traitorous Wight. The Wight of Rhudaur has a very low engagement cost of 23, meaning that it will engage most players right from the start of the game. On top of decent stats, the Wight of Rhudaur has either Surge or Doomed 2 in its text box, depending on how much progress is on the current quest. The Doomed 2 is nasty, as your threat will be raised through various effects already. The best counter to this enemy is to use Ranger Spikes on it. That way, it will remain in the staging area, contributing no threat. It will also ensure that its Surge/Doomed will only go off once, saving you from any other cards you need to reveal, or threat you have to raise. If you do engage the enemy, bring some solid attack power to go through the 3 defence and 5 hitpoints. If you bring a Sword of Numenor to the party, you even get a resource upon killing this enemy.

Locations
Rhudaur is no longer inhabited by men, so the ancient ruins feature high threat locations that can lead to a quick location lock if you are not careful in making enough progress each turn. Whenever a location is explored during stage 1, remember to place 2 points of progress on Sift through the Debris.
- The Great Hall: This unique location is part of the setup and will start in play as the active location. Having 8 quest points makes this location into a big buffer against the players making progress on the side-quests during the first turn. Some solo players will even struggle to clear the location during their first turn, since 8 progress is hard to come by, without using specific heroes or tricks. In order to make sure that this location is cleared as soon as possible, players can use various tricks. Once of which will be to slap a Woodmen’s Path to the location, reducing its quest points to 1, saving 7 progress for a side-quest. Players can also swap out The Great Hall for another location, bypassing it immediately. However, this does add 4 threat to the staging area. There is another thing to keep track off with this location: its forced effect. Upon exploring the Great Hall, each player must discard 5 cards from the top of the encounter deck. From these 5 cards, they must pick 1 enemy and add it to the staging area, discarding the other cards. Each player repeats this with 5 new cards. This will likely add 1 enemy per player to the staging area, though sometimes the players can get lucky and reveal no enemies this way. When faced with the option to pick enemies, try to go for those with When Revealed effects or Surge/Doomed effects, since this bypasses those effects. After that, the players must add this location to the Victory display.
- Decrepit Remains: “Oh, a 1 threar location, how bad can it be?” Well, pretty bad, as this location will shut down a lot of location control decks, and will create a buffer on every side-quest card in play. While this location is in the staging area, players will have to add 2 quest points to every location and side-quest in play per copy of Decrepit Remains in play. This means that players will have to travel to this location in order to get rid of the buffer. This is a waste when comparing this location to others in the game, but it will help you to clear the location lock in the long term, and you will also be able to clear side-quests more easily.
- Forbidden Descent: This location will clear itself as long as the players are making progress. Every time the players would make progress on a quest card, the first 2 points of progress is placed on Forbidden Descent instead, serving as a sponge. While this would clear the location itself, you might not want to do that, as the players will have to raise their threat by 2 if this location would leave play while in the staging area. This effect triggers on both location control cards, as well as its own ability. The best bet for players to do is to build up some progress on this location by questing succesfully, and then travelling to it. If there are location control decks on the table, they will be able to clear the location in the active location slot, and travel to another location through effects like South Away and Thror’s Map. Note that Decrepit Remains will stretch the quest points on this location, giving you more time before you have to travel there.
- Eerie Halls: It has been a while since we have seen a 5 threat location, making the Eerie Halls a real pain to reveal during staging (especially if Sift through the Debris is the active quest). However, there is an action on the location where a player can raise their threat by 1 to lower the threat of the location by 1. This is a great way to make some more progress on the quest that round, but players will have to be careful with raising their threat so much. A safer bet would be to use Heirs of Earendil to raise your threat by 4 to get rid of the location all together. Remember that the action on the location is unlimited and any player can take the action, meaning that each player could raise their threat by 1 in a 4p game to lower the threat of the Halls to 1. The shadow effect on this location is why players will want to claim a Clue objective as soon as possible.
- Ghostly Ruins: This is a Normal mode exclusive location and has a bunch of text on it for players to keep track of. To start off, the location has a pretty high threat of 4, preventing players from making some progress on the side-quests. The Ruins also have a passive effect that will remain active while the location is in play, not just in the staging area. This effect will return the topmost Undead enemy from the discard pile to the staging area whenever the encounter deck runs out of cards. This is important to remember, as the order in which you discard cards can dictate which enemy you will get. On OCTGN, this is an even more tricky thing to keep track of, since it resets the encounter deck automatically if you run out. If you are thinking about travelling to this location in order to get rid of the 4 threat, reconsider. This is the only location in the encounter deck with a Travel cost, which must be paid in order to travel. This requires you to return the top most enemy in the discard pile to the staging area. If there are no enemies in the discard pile, you are unable to travel here and must pick another location to travel to. I would advise clearing this location in the staging area, as there are better candidate locations to travel to, since their effects depend on if they are in the staging area or not.

Treacheries
The Undead of Angmar bring sorcery with them, that in turn make Thaurdir more of a problem. The ancient ruins of Rhudaur also hide the dreadful history of its people, leading to a number of nasty treacheries in this encounter deck. Here are the scenario specific ones:
- Centuries of Sorrow: This is the only non-Sorcery Treachery introduced in this scenario, and basically forces players to pick a different quest to be the active one. This can suck in the later phases of stage 1, as you were hoping to clear one side-quest but get forced off track to another side-quest instead. Remember that changing side-quests like this will mean that new passive effects might trigger, especially when considering the different quests at stage 1. This can royally screw you over when it comes to progress, but it might also give you the chance to clear out one of the other encounter side-quests that the game has revealed in the mean time. This treachery will surge into another card, which doesn’t tend to be much of a problem, since this one doesn’t deal damage or reduces your board state. If you are keen on clearing a particular side-quest, feel free to cancel it, but I rarely find that to be the case. There are usually other good targets to quest against.
- Curse of the Years: You will probably be saving your Test of Will for this treachery, as it will deal damage to each exhausted character, but has another sting to it for players in the late game. Once players have hit a threat level of 35 or higher, this treachery will also discard any exhausted attachment. This will force you to wait on exhausting Steward of Gondor and Vilya until after the quest phase, else you might lose attachments like it. If you are not yet at 35 threat, the treachery can still hurt you, especially if your questing allies are weak and don’t have that many hitpoints. There are quite a number of these treacheries in the game, so be ready to cancel a few to avoid losing your questing allies.
- Dark Covenant: I really like the art on this one, looks very realistic and worthy of a Nightmare card really. This Sorcery treachery will discard the top 3 cards of the encounter deck and add the threat of all the discarded cards up. The total number of threat will have to either be dealt as damage to characters controlled by the first player, or be removed as progress from quest cards in play. You can get either very lucky with this card, or lose right there if you have not enough progress to remove than threat revealed. Luckily, there are a fair number of 0 threat cards like the treacheries and side-quests, but Eerie Halls and Ghostly Ruins will be terrible to reveal for this. If you have the option to pick either one, try to remove progress from quest cards that you are not keen on exploring anyways. This can for instance be Sift through the Debris, if you have cleared some locations but are not likely to complete the entire side-quest. The damage option is interesting once the players have some Ents on the table, or have an effective healing machine going. Cancellation is also always an option.
- Haunting Fog: This treachery has forced me out of many side-quests before, and should be near the top of the cancellation list. The Haunting Fog will first exhaust a character from each player, potentially screwing over the players that were counting on those characters during the combat phase. Then, the treachery will attach to the active quest card and will boost the quest point value of that quest by 6. This is enough in low player counts to make sure that you will have to take more turns going up against that quest, or even fail that side-quest that you were hoping to get if you are out of time. If this treachery attaches to the main quest of stage 2, you will have to make some more progress in order to win the game, and Thaurdir will make an attack since this is a Sorcery treachery. Running Condition Removal is optional for this quest because of this card, though having these cards in play will lower the density of Sorcery cards in the encounter deck, so it is up to you. Try to cancel the card if you can, saving you a character and 6 points of progress.

Side-quests
While the players have faced these side-quests before in the Deluxe box, I will mention them here again, as they have a big impact on the scenario you are playing. In this scenario specifically, clearing out these side-quests will save you from the passive effects of the scenario-specific side-quests. While these side-quests don’t provide you with clues, it is advisable to get them out-of-the-way if possible.
- Seal the Tomb: The sole purpose of this side-quest is to bring out even more Undead enemies, tying up the players with multiple enemies that they have killed in the previous combat phase. The side-quest can mostly be ignored in multiplayer games, but in lower player counts, that extra enemy will be difficult to handle. Also remember to kill the enemies in a particular order, in case the three discarded cards don’t reveal another enemy. This way, you can avoid the When Revealed effect on the Cursed Dead, and also the keywords on the Wight of Rhudaur. If this side-quest comes up early, try to tackle it if you are not interested in any of the scenario-specific side-quests.
- Search the Ruins: This one is a big problem for many players, as threat in this scenario is a big concern. Raising your threat by an additional 2 points at the end of each round is not something you will want to do often, so this side-quest takes priority over most others. Try to beat this quest in one shot, so that you also get to lower your threat a little. This is also a perfect target to go to during stage 2 if Centuries of Sorrow pops up, forcing you to go to a different quest.

Tips and Tricks
- If you bring side-quests of your own, you can avoid the negative effects for selecting a Treachery of Rhudaur quest. While exploring your own side-quests doesn’t help you at stage 2, it can be a safer bet than going up against the 12+ quest points of the encounter side-quests, especially in solo.
- Unless you are going to ignore the encounter side-quests of this scenario and focus solely on your own side-quests, don’t bother bringing any side-quest supporting cards with you. The three side-quests that start off in the staging area will not go to the victory display, shutting down the side-quest synergy a little. East Road Ranger is an exception to this rule, as that ally will be questing for 3 during the entire first half of the game, making for some good value out of that ally.
- The treacheries in this encounter deck can sometimes be worth cancelling, so be sure to bring some form of cancellation with you. Note that there will be some encounter cards that punish you for cancelling encounter card effects, so try to weigh the decision on whether or not you should cancel the treachery, based on the situation.
- Threat reduction will be a blessing in this quest, as there are various ways in which your threat can be raised. Galadhrim’s Greeting is great here, as well as Free to Choose. Spirit ally Elfhelm will be the best form of threat reduction, as it will save you a lot of points when you get him out early.
- Try to at least claim one of the Clue objectives as soon as you can, even in solo. There are a number of shadow effects that get worse if the players do not control at least 1 Clue objective. This will mean to prioritize one encounter side-quest and claim its objective as soon as you can, ideally around turn 3.
- A very niche, but effective way to defend the attacks made by Thaurdir during stage 2 whenever a Sorcery is revealed, is to abuse the Sailor of Lune. While the Sailor is committed to the quest, as long as the top card of that player’s discard pile is an event, the Sailor becomes immune to any damage. With the Sailor not exhausting to quest thanks to either Galadriel or Valiant Determination (or readying the ally through various ways), you can use it to defend Thaurdir and not take any damage or lose the ally. Cancellation is an easier way to get around the attacks, but this is more fun 🙂
- Scrying in stage 2 to find out if Sorcery treacheries are coming can save you from an unexpected attack by Thaurdir. You can also try to remove these Sorceries from the game by adding them to the victory display, making stage 2 a little easier.
- Remember that you only have 5 rounds to get your board state set up. Try to find your combo pieces early to get a defender out for Thaurdir. Open the Armoury and Gather Information are good cards to use here, as they can help with getting your armour pieces together within a few rounds.
- When making progress at stage 2, try to make more than the required amount. There are a number of effects on encounter cards that will make you remove progress from quest cards in play. It will be easier if you build up a buffer of progress to remove in order to be able to beat the scenario that round, and not be short a few points since they got removed.
- Don’t try to bring Hobbits to this quest, as a lot of enemies have a relative low engagement cost, and your threat will be raised a lot throughout the quest. Secrecy is not really an option here.
Playthroughs
As I mentioned before, this quest is pretty popular as a testing quest. As a result, you can find a lot of playthroughs online. Here is a list to get you started:
- True solo, progression style: https://www.youtube.com/watch?v=dBaKpllCEKk
- 2 players, progression style: https://www.youtube.com/watch?v=OyuHE-Jvn38
- 2 handed, progression style: https://www.youtube.com/watch?v=3UyYN7lZJLI
- 4 players, progression style: https://www.youtube.com/watch?v=U5FJDvGd8HY
With the end of the cycle drawing near, I am making sure that the final quests will be dealt with shortly. The final scenarios will soon be online, meaning that the Dream-chaser cycle is soon to appear on the blog as well!


7 thoughts on “The Treachery of Rhudaur”