
This last cycle has been one to change the fundamentals of the game. Contracts have placed restrictions on deck building in exchange for granting boosts and bonuses; Helm of Secrecy has allowed you to swap out your heroes in the middle of the game; and players may take The One Ring with them on their quests, attempting to wield its awesome power at the risk of having it easier to threat out and lose the game.
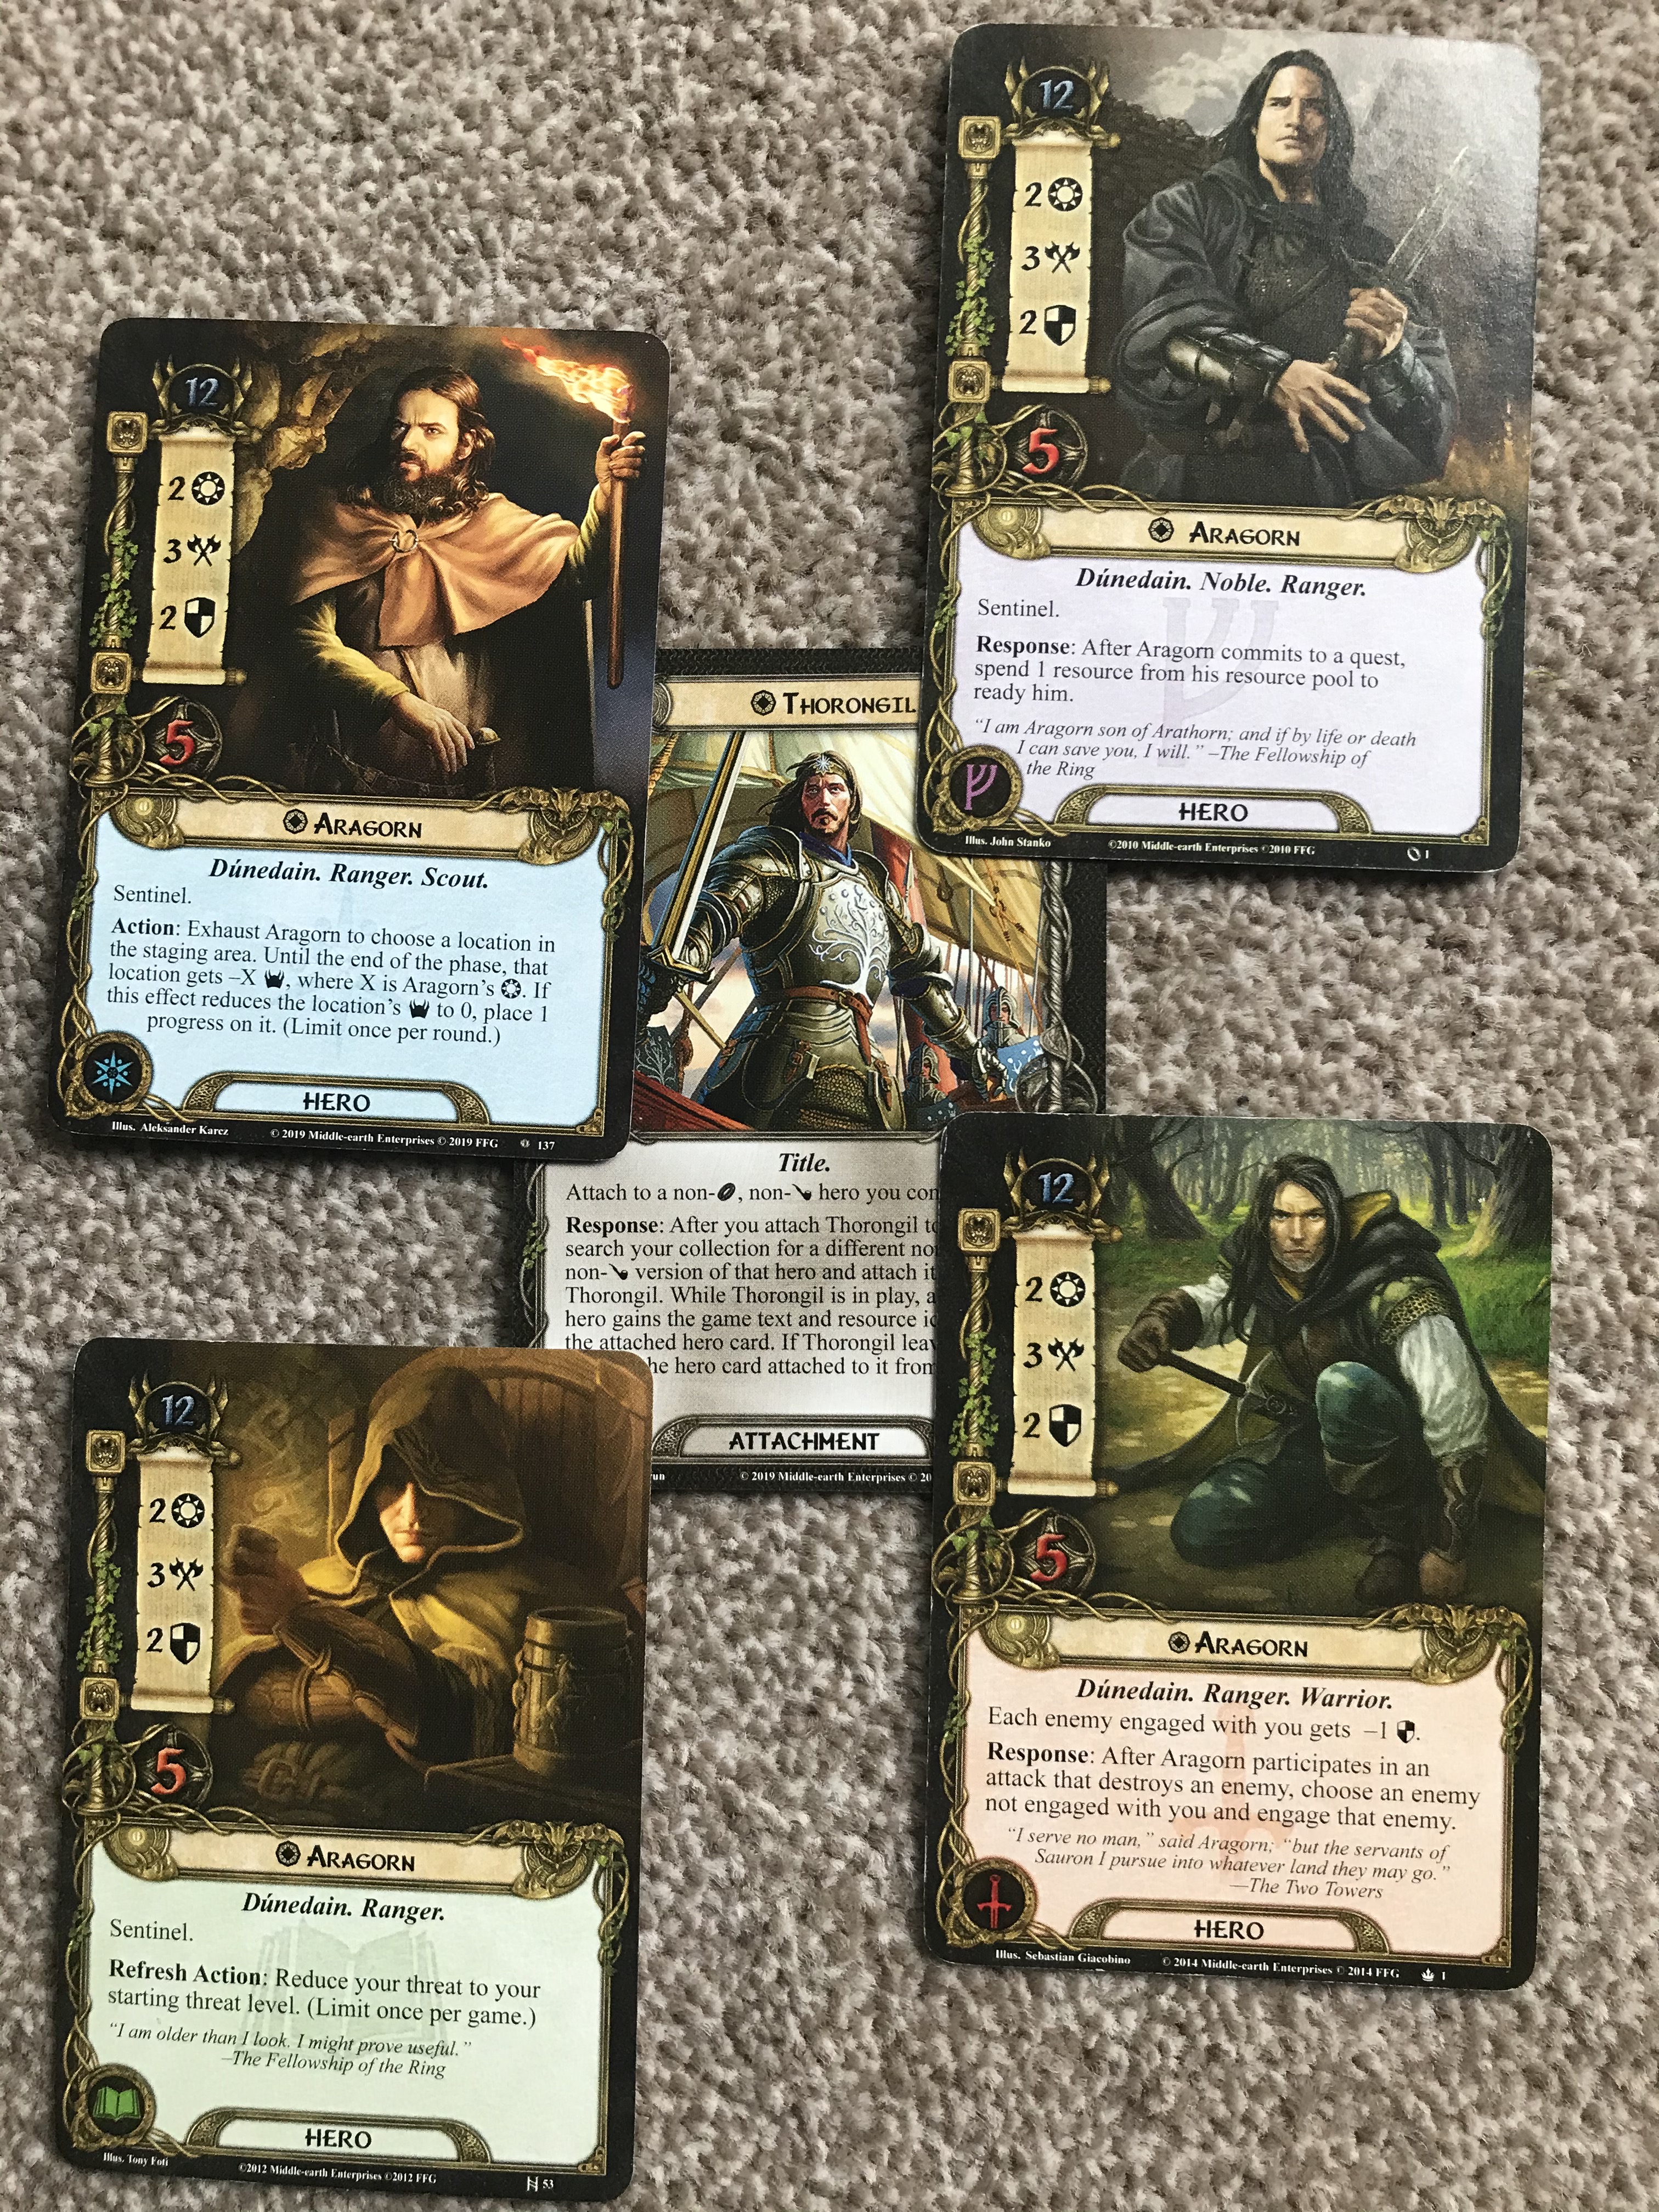
And now we have revealed to us a new card that will once again forever change how we build our decks: Thorongil. A 3 cost neutral attachment with the Title trait, you attach this card to one of your heroes, search your collection for another hero with the same name and attach it to your original hero. Your first hero then gains the game text and resource icon of the attached hero. If for some reason Thorongil leaves play, so does the attached hero. This has massive gameplay potential, turning your heroes into a more fully realised version of themselves as they achieve their true potential.

Thematically and mechanically this card is a triumph. Thorongil was the pseudonym that Aragorn took when he was in the service of Thengel of Rohan, Theoden’s father, and latterly Ecthelion II, Ruling Steward of Gondor and father to Denethor II. Aragorn’s latter career as Thorongil saw him leading the fight against the Corsairs of Umbar and combatting their continual raids of Gondor’s coast. This culminated in a raid on Umbar itself where many Corsair ships were burned and the Captain of Umbar was slain by Aragorn. Instead of returning to Minas Tirith, he disembarked at Pelargir and went to wander the lands of the far East and South, “exploring the hearts of men good and evil” and learning about the “plots and devices” of the servants of the Dark Lord. It is reckoned that the knowledge he gained during this time ensured victory for the West during the War of the Ring, and indeed a successful peace afterward. This ability then of heroes to draw on the abilities of other aspects of their character, welding knowledge that they have learned in past experiences is a masterful stroke that serves as a fitting end to our card game as we know it. And just as Thorongil left those he served with, only to return later in his triumph, so our beloved Card Game now departs us though we know not when or whence it might return.
Now as to the mechanics, if you only include one copy of Thorongil in your deck, this let’s you choose whether or not to grant your heroes another ability part of the way through the game. And while sphere smoothing is definitely helpful, because of the uncertainty about when you are able to draw Thorongil, barring things like Heed the Dream, Word of Command and Gather Information, you probably shouldn’t insert too many off-sphere cards in your deck with this being the only way to pay for them. As such we will largely be considering only the combination of heroes’s abilities, as opposed to many of the cards that a new sphere may open up for them. In your own considerations, the easiest way to see if Thorongil might be worth the investment is to see how much it would cost to achieve the same effect by paying for alternative cards. Thorongil should be considered chiefly as a 3 cost attachment comprised of a sphere-smoothing Song attachment and the text of the new hero you are adding. As such I will be looking at what different iterations of Thorongil brings to your existing decks and archetypes as though it were any other attachment, as opposed to decks revolving around these new hybrid creations.This list here contains all the possible combinations of the heroes that can be grafted together, with a few thoughts on each one. Now there are 101 different combinations, so don’t be afraid to Ctl+F to find the specific ones you are after.
Timing

First of all the timing of when to play this card must be considered. Costing 3 neutral resources means that the vast majority of decks will be able to play this during the next resource phase after it is drawn. Of course drawing it will be the key thing about using this card. There are a few effects that can search your deck for specific cards, such as the ones mentioned above, that can ensure you find Thorongil as fast as you possibly can. Other card draw effects are easy enough to come by, such as Beravor’s ability, Ancient Mathom, Foe-hammer or Campfire Tales.
When it comes to choosing which hero to be the primary copy, you must remember that some heroes abilities are geared towards the early game, some might benefit you better towards the end of the game and others are useful throughout. This means that wherever possible, if you are imagining a combination between two heroes, you should use the one with the best early game effect to begin with and wait for Thorongil to come into play for your second. You should also consider whether or not the new ability you are gaining is worth the 3 resources you are paying for, instead of buying an extra ally who has their own action economy, or an attachment with a global benefit, or indeed an event that might reduce your threat or ready each character you have.
This is of course dependent on how your deck is built, and just because one combination is more mechanically optimised in a vacuum, this does not override what is best for the deck that you are building. And as always, don’t let me tell you what to do. If you want to pair two heroes together, as long as they fulfil the criteria for Thorongil, then you go for it. It is for you to decide what to do with the time that is given you, and consequentially how you want to enjoy playing this game. But here are a few thoughts for your consideration on each hero pairing.
Leadership Aragorn: Lore Aragorn

Your original version of Aragorn fits well into most decks that run Leadership, but threat control is one of the things that this sphere struggles with. The ability to reset your threat to its starting value halfway through a game is not something to be passed up lightly, especially if you are running multiple copies of Legacy of Numenor to boost your resource acceleration, or are playing a particularly threat-intensive quest such as Return to Mirkwood, The Weather Hills or The Passing of the Grey Company. Well worth the cost of 3, this combination is extremely viable in practically any quest you bring it to.
Leadership Aragorn: Tactics Aragorn
Combat is something that Leadership decks are slightly better equipped with, though their power tends to come through the allies they can muster as opposed to the might of their heroes. This combination really lends some teeth to your deck, allowing Aragorn to ready himself after questing and then throw himself into the fray with his enhanced combat capabilities. Paying 3 to reduce the defense of each enemy engaged with you is insanely good, let alone the forced engagement of new enemies. You would choose this match-up in a quest that doesn’t start with a lot of enemies, where being versatile is more helpful than being specialised, but combat becomes a lot heavier as the game goes on. Examples of this could include Into the Pit, Wastes of Eriador and The Crossings of Poros. In the right quest this can make the game and is easily worth the resources.
Leadership Aragorn: Spirit Aragorn

The last iteration of Aragorn that comes to the table deals with location control. This isn’t something Leadership has too much to worry about, considering the sheer amount of raw willpower it is able to muster. And a Spirit resource icon again isn’t something Leadership Aragorn needs to worry about acquiring since any deck that includes him should also be packing Celebrian’s Stone. However, when joined together Aragorn is able to quest, ready himself and then exhaust again to neuter a location in the staging area, effectively doubling his willpower. Let’s assume you do get Celebrian’s Stone on Aragorn, he now quests for 4 and then counters a location’s threat for another 4, effectively contributing 8 willpower as well as an extra progress on a location so it’s actually closer to 9. If hard questing is needed there are certainly worse ways to boost your willpower and get a handle on locations. This will especially find its niche in quests like Flight of the Stormcaller, Race Across Harad and Roam Across Rhovanion.
Lore Aragorn: Leadership Aragorn

The primary reason you would bring Lore Aragorn from the beginning in this pairing is if you were going heavy with Doomed effects from the start and so needed Lore Aragorn’s threat reset early on, but really wanted the versatility that Leadership Aragorn brings to the table after the original’s ability had been triggered. Of course Lore resources are harder to come by than Leadership so fueling his readying ability will be a bit trickier, but it is better than having a blank text box. To be honest this is not worth the 3 resources in most cases, but if you really feel drawn to this, perhaps in a deck with one other Leadership hero, or in a quest where you need as much action advantage as you can physically muster. Put these two together for quests where you will need the early game boosts that Doomed cards provide, such as in Into Ithilien and Siege of Annuminas for the best use of this combination.
Lore Aragorn: Tactics Aragorn
Getting a strong attacking force is something that many Lore decks can find hard to muster, outside of Ents or heavy Trap decks. You can usually get by a round or two before enemies mass enough to become a problem, during which time you can dig through your deck with the many draw effects that Lore can employ to bring out Thorongil and get Tactics Aragorn’s ability into effect. Couple this with the Tactics Doomed events that will help your combat efforts, and you should be able to plot through most enemies with relative ease. The best times to use this match are any quests where after a certain point enemies can suddenly swell in numbers beyond what you might otherwise be able to handle, such as The Seventh Level, Deadman’s Dike and The Battle of Five Armies.
Lore Aragorn: Spirit Aragorn

Here we see a combo that enables decks to destroy locations and handle questing while keeping your threat in check. This works especially well with other decks that demolish locations, such as the Woodman deck, although Woodman’s Clearing can take care of most of that deck’s threat needs. Alternatively combine this with a strong Spirit element in your deck with cards like Idraen, Northern Tracker, Greyflood Wanderer and Warden of Arnor to ensure that no location will stay in the staging for more than one round. Quests to try this one on would be more location heavy ones, such as Voyage Across Belegaer, The Temple of the Deceived or The Ghost of Framsburg.
Tactics Aragorn: Leadership Aragorn

Starting with a greater affinity for combat, this pairing would suit you if after your board state was able to handle any foes that may come off the encounter deck, but are struggling with questing. This situation will be rather rare, and there are cheaper ways of increasing your questing prowess in Tactics. For the same cost and extra willpower as Thorongil would provide you can get Grimbold, who can save you from an attack without having to exhaust, or Meneldor who puts down 2 progress whenever he enters or leaves play. Leadership Aragorn’s ability is also a resource sink for Tactics, where every one of them counts. The only time this might be worth it would be for quests that specifically target your allies, such as Road to Rivendell or The Dread Realm.
Tactics Aragorn: Lore Aragorn
This is probably one of the more powerful uses of Thorongil, as resetting your threat is extremely powerful, as we have already discussed. Tactics already has a means of reducing their threat in the form of Secret Vigil, which does work for every player in the game, though it is certainly not as powerful as Lore Aragorn’s ability. An extremely powerful use of your 3 resources, this works best in quests that open with a lot of enemies but pounds on your threat levels at the same time, such as The Siege of Cair Andros, The Battle of Carn Dum and Murder at the Prancing Pony.
Tactics Aragorn: Spirit Aragorn

Outside of Tactics Legolas builds, handling locations is an area that Tactics decks can struggle with. So as long as you have readying, whether with Steed of the North or Unexpected Courage, this is certainly not a bad option in quests that have lots of locations. That readying will be key however, so you can make the most of both abilities that Aragorn will now have, and none of the ones in Tactics apply outside of the combat phase. Some cross-sphere pollination will be needed, but if you can pull it off this can be potent in quests like Assault on Osgiliath, The Antlered Crown or Raid on the Grey Havens.
Spirit Aragorn: Leadership Aragorn

Of all the Spirit Aragorn / Other Aragorn hybrids, this is the one that meshes the best. Once you have Thorongil on Spirit Aragorn, you will be able to use Leadership Aragorn’s ability to quest, pay a resource and then ready so that you can use Spirit Aragorn’s ability as well. If we compare getting Thorongil to be able to do this to buying Unexpected Courage and Song of Kings, we do lose out slightly as Leadership Aragorn’s ability requires continual investment with resources to be able to keep readying. What you gain by starting with the Spirit sphere is access to more Dunedain and Scout toys tooled toward handling locations. I’m thinking here especially of Warden of Arnor, Northern Tracker, Rhovanion Outrider and Scouting Party. This is the build of Aragorn you will want when you are facing a quest with plenty of locations you will need to plow through, while still being able to weigh in on combat should the need arise. Quests to consider using this for include The Hills of Emyn Muil, Desert Crossing and Lost in Mirkwood.
Spirit Aragorn: Lore Aragorn

As we have said above, by starting in the Spirit sphere you gain access to a wide variety of location control. The other sphere that excels in this area is the Lore sphere. The Woodman archetype has plenty of tools to deal with locations, as well as various attachments for locations that give you various benefits when they are triggered. The Spirit aspects of the Dunedain already synergise well with them, such as Idraen with Haldan, and this serves to further support that cooperation. Lore Aragorn’s ability is obviously well worth the 3 resources, but this is probably the hybrid where it is needed the least. Woodmen’s Clearing and Well Warned do wonders in keeping your threat down for very competitive prices, and I might suggest you would be better served by sticking with those options and paying for Song of Wisdom to be able to access the Lore sphere with Aragorn instead. However this is still a build with a lot of utility, being able to make the most of various Doomed effects such as with Celduin Traveller and Waters of Nimrodel. You can get the most mileage out of quests that focus heavily on locations, but still feature a fair amount of stress on your threat, as found in Celebrimbor’s Secret, The Old Forest and The Drowned Ruins.
Spirit Aragorn: Tactics Aragorn
While Spirit now has enough tools to handle most combat situations, you will have nothing as powerful as Tactics Aragorn’s ability. Providing you are able to get the readying capabilities to support it, this will allow you to either quest or use Spirit Aragorn’s ability to pick off a progress point here and there, and then be ready to fight alongside your forces. There really isn’t a downside to this hybrid, other than sourcing the Unexpected Courage, though for extra progress shenanigans, feel free to put a Blade of Gondolin or two on Aragorn. You will find this especially useful in quests that require you to consistently make progress while throwing plenty of enemies at you, such as Flight from Moria, Intruders in Chetwood and The Fate of Numenor.
Tactics Beregond: Spirit Beregond

Here we have one of the objectively stronger uses of Thorongil. Unless you use Dale attachment-shuffling shenanigans, Beregond’s reduction to Armour and Weapon attachments only helps for as long as there is yet room to fit them on him. A lot of qualifying attachments that aren’t restricted are limited to only one per hero. Once Beregond has everything that he needs, his text box will essentially be blank for the remainder of the game. So gaining the ability to lower your threat by 1 each and every turn you successfully defend is an incredibly powerful one, so much so that you would likely never need any further threat reduction in your game. The fact that Tactics has comparatively little threat control only makes this proportionately even more incredible. Use Tactics Beregond to get your chief defender up and running, and then keep your threat in check, effectively locking down two major aspects of the game. This combination will work well in any scenario, although especially so in ones where early on you will face heavy hitting enemies that require high defense to counter, such as Conflict at the Carrock, Across the Ettenmoors and The Mumakil.
Spirit Beregond: Tactics Beregond

The advantage you gain by starting with Spirit Beregond is you are in-sphere for a lot of attachments or events that play well with him, such as Unexpected Courage, Blood of Numenor or Behind Strong Walls. Keeping your threat in check is not something that Spirit struggles with, but having a strong defender can be an area of weakness. Using Thorongil in this pairing allows the investment you are making to be easily reconciled. By spending 3 resources on Thorongil, you will hopefully get your money back as you put attachments on Beregond for a reduced price, breaking even as soon as the second attachment is given to him. You do not start with this ability however, so it may be prudent to hold in your hand the various attachments you want to put on Beregond until either you are desperate or until you can get them at a discounted price. Beregond’s cost reduction is not limited by turn or by phase, so feel free to splash out all at once on your Gondorian Shield, Spear of the Citadel and Raven-winged Helm. Just as powerful as its counterpart, this particular iteration will serve you best when there is a sudden change in tempo to the quest so that having Tactic’s Beregond’s cost reduction helps you keep pace, but lacking it does not harm you at the start. Examples of such quests include Foundations of Stone, The Dunland Trap or Over Misty Mountains Grim.
Lore Bilbo Baggins: Tactics Bilbo Baggins

To this day, Lore Bilbo is cited as the most over-costed heroes in the game considering his stats and ability. There are some, like this author, who have a soft spot for the old Hobbit, while recognising his drawbacks. But does the addition of Tactics Bilbo’s ability make him worth 9 starting threat, let alone paying 3 resources for Thorongil. Well like with all things, it depends. Tactics Bilbo will cancel out the threat of an enemy in the staging area, dealing it a damage if you quest successfully. This can be doubled if they are guarding a card, whether it is a player or encounter card. Now this one comes down entirely to personal preference. Lore Bilbo’s ability will help you pull out your guarded cards quicker, so that when you do get Tactics Bilbo you can retrieve them quicker. It would be quicker and cheaper to directly kill the enemies in question however, so the real benefit comes from Bilbo’s pseudo-questing. You can make the most of this combination in quests that already feature guarded cards, to maximise targets for Tactics Bilbo’s ability. Some examples of these would be A Storm on Cobas Haven, The Black Serpent or Lost in Mirkwood.
Tactics Bilbo Baggins: Lore Bilbo Baggins

This is a much more straightforward comparison to make because there are already one or two abilities that broadly give you the same effect as slapping Lore Bilbo on top of Tactics Bilbo. The old hobbit allows the first player to draw an extra card every turn. Now in single player this is golden, though the comparative value does decrease as more and more players are involved. The best direct comparison would be to Prepare for Battle, a 1 cost, 6 progress Leadership side-quest that does exactly the same thing. This is one of the strongest side-quests because it provides card draw in a sphere that can struggle to muster enough of it to keep their engine running. Similarly with adding Lore Bilbo’s ability to a Tactics deck will definitely plug a gap that would otherwise be difficult to fill, Ally Legolas not withstanding. While the 3 cost will sting, especially in Tactics, the extra card draw you see may well be worth it, especially in quests where you will be discarding cards from your hand more than usual such as The Lonely Mountain, The Road to Isengard or Shelob’s Lair.
Tactics Boromir: Leadership Boromir

One of the biggest problems that face the Gondor Swarm is how to tread water until the armies have been summoned. Some load their decks with powerful heroes to hold the fort, while others double down and focus on drawing out their allies as fast as they possibly can. By adding in Tactics Boromir, you are able to walk a middle line here as he can quest and fight off enemies while you build up your forces. Paying 3 resources for increasing each Gondor ally’s attack can seem slightly overpriced, especially when compared to Visionary Leadership doing the same for their willpower, only cheaper. And unless you are going for an unconventional Mono-Tactics Gondor Swarm, which is certainly doable though tricky to pull off, by diversifying your spheres from Mono-Leadership you will lose some of the advantages you gain by specialising, such as Strength of Arms or White Tower Watchman. But where having the extra versatility will shine are quests that send enemies against you from Turn One without really letting up, like The Fords of Isen, Escape from Umbar or Massing at Osgiliath.
Leadership Boromir: Tactics Boromir

Here we have one of the harder match-ups to justify, simply because these two versions of Boromir support such vastly different deck-types. While the opposite order enables the Gondor Swarm to be supported until the attack bonus comes into effect, there usually isn’t a lot to be gained by paying for a hero to gain extra readying in a deck where you have so many bodies that every base should be covered. Instead of paying for Thorongil, it would be a more worthwhile investment to pay for another ally, especially one that further enables the archetype, such as Soldier of Gondor or Herald of Anorian. The latter card is probably the best one to make the point with: to gain the stats and action advantage of two allies, it will cost you one fewer resource and threat point than paying for Thorongil. The only time I could ever see this being worthwhile would be for quests that specifically target your allies and have thinned your ranks enough that you need every action you can take such as The Dread Realm.
Tactics Brand son of Bain: Leadership Brand son of Bain

This is another one that doesn’t seem to have a lot going for it. The only reason you should include Leadership Brand is if you were running a Dale deck, complete with all the ally attachments and Dale allies that make this deck sing. Leadership Brand is the engine of that deck that is practically required for a Dale deck to function. The only way that this match-up could be mechanically justified would be if you were somehow able to guarantee getting Thorongil on the first turn, and even then the 3 cost that Thorongil costs could be better used on buying allies or attachments. At the time of writing I cannot think of any quest that this combination would have any mechanical advantage on. If you can think of any, please let us know in the comments below.
Leadership Brand son of Bain: Tactics Brand son of Bain

For the inversion however, this is much more applicable to your decks, with one caveat however. You need to be playing a multiplayer game to make the most of this. The cost of Thorongil to give you Ranged is not unreasonable, considering that it takes 2 Leadership resources to get Dunedain Cache or 1 Neutral and 1 Tactics to get Elf-friend / Rivendell Bow. So for one extra point, gaining also the ability to ready a hero across the table after he kills an enemy is definitely value for money. This could allow Thorin Oakenshield to make an attack after question, Beravor to draw an extra 2 cards, Lore Denethor to look further ahead at the encounter deck or have Galadriel draw a card and drop your threat. As long as you have Brand’s attack sufficiently boosted and are able to pick off enemies across the table, this will work well in any quest you have more than one player. Certain quests are better suited for this, such as Return to Mirkwood, The Morgul Vale or The Three Trials.
Leadership Dain Ironfoot: Spirit Dain Ironfoot

On the face of it, this looks like a similar match-up to the one we saw with Leadership and Tactics Boromir, where one boosts the army of allies bearing a specific Trait and the latter is a powerful hero that can function independently of that Trait. Leadership Dain is certainly one of the most powerful heroes in the game when you have your Dwarf ally army summoned. Adding Spirit Dain effectively gave him the ability of Blood of Numenor for one extra resource, except fueled by discarding cards instead of resources. This is a very powerful ability a much easier cost to pay than resources. However Leadership Dain’s ability is dependent on him being ready, which does work in conflict with having his function as your defender. This can be mitigated with readying abilities like Cram, Lure of Moria or Armoured Destrier so that Dain is ready to give your Dwarves their attack boost when theory need it. It can be argued that by the time you have your Dwarven Swarm assembled, you don’t need to give them an attack boost, especially with allies like Veteran Axehand on the table, but it is still better to be safe than sorry. This combination therefore should be regarded as a failsafe, a parachute as opposed to your plan of attack. With this attitude in mind, your deck would be particularly suited to face quests that pull out a big bad enemy in the latter third of the quest, such that your allies might not be able to defend against easily themselves. Examples of such might include The Battle of Pelennor Fields, The City of Corsairs or The King’s Quest.
Spirit Dain Ironfoot: Leadership Dain Ironfoot

As well as being one of the premier defenders in the game, if not foremost in the field, Spirit Dain served as the capstone for the Dwarven Mining mechanic, where they not only gain benefits from discarding cards, but the cards that are discarded can have a secondary benefit as well. You could see extra resources, attachments or even allies enter play if they are discarded from your deck. But without the proper support, the Mining deck sometimes can be a bit lackluster with their allies. Through the power of Thorongil, they now have this support. Spirit Dain will be able to hold back all but the most potent of enemies until the opportune moment, and then when Leadership Dain comes online, your Dwarven allies will be taken to the next level. You will still have the ability to defend with Dain should the need arise, but being in sphere for Unexpected Courage, Spare Hood and Cloak and Desperate Defense means that you are not short of readying effects. This works best in quests that open with something big and nasty that you need to handle while your deck comes online, such as Journey Along the Anduin, Into Ithilien or Fire in the Night.
Lore Denethor: Leadership Denethor

This combination is patently not worthwhile. The set-up text that makes Leadership Denethor so valuable will not apply, so the only thing you will be gaining from putting this the ability to shuffle your resources and the Leadership sphere. If you want to be able to shunt resources around, use Envoy of Pelargir or Errand-rider. If you want the Leadership sphere, perhaps to get Errand-rider, use A Good Harvest or Song of Kings. I’m afraid I cannot think of a situation where this match-up would be advantageous, but if you can correct me then please do let us know in the comments below.
Leadership Denethor: Lore Denethor

On the other hand, this is a much better match-up. Once you have made the most of your extra resource, the ability to transfer resources is very much a secondary benefit. By his nature, his ability is much more powerful in the early game. Expanding into his Lore counterpart gives him the ability to look ahead at the encounter deck and allows you to plan ahead for the turn to come, with the possibility of moving the top card of the encounter deck to the bottom, giving Denethor a much longer shelf life in the course of your game. Having 3 defense also makes Denethor a reliable defender, so stepping into the Lore sphere opens up A Burning Brand to him, which elevates his abilities to a much higher level of efficiency. This will be useful in any quest that you play, bur really works at its best when you need an early game boost but encounter more enemies or need to have more foreknowledge as the game goes on. Such quests might include The Dead Marshes, The Thing in the Depths or Journey in the Dark.
Tactics Eomer: Leadership Eomer

With the right set-up, Tactics Eomer has one of the highest attacks in the game. Give him Guthwine and Firefoot when a Westfold Outrider leaves play and you’re looking at 9 attack that carries over to another enemy you are engaged with. Stick Golden Belt and Warrior Sword on him, and suddenly he’s between 10 and 12 attack strength. So the ability to allow him to strike into the staging area as well should be really good, right? Well yes, but with caveats. First of all questing is not Eomer’s strong suit, having only 1 willpower, or 2 if you run Tactics Theoden. Then Eomer’s ability to gain extra attack strength comes after an ally leaves play, which there’s not a large window for because Leadership Eomer’s ability triggers immediately upon committing to the quest. You would need to use The Riddenmark’s Finest or Ride to Ruin in the planning phase to get Eomer’s increased strength ability triggered. At that point you’re probably as well to bring Halbarad and engage more enemies to keep them out of the staging area. This does have a use however in quests that simply swamp you with enemies that both engage you, to make the most of Firefoot, and are still stuck in the staging area and you need as much willpower as you can possibly muster, such as The Seventh Level, Journey Up the Anduin and Massing at Osgiliath.
Leadership Eomer: Tactics Eomer

With this version you get the advantage of Eomer being able to attack into the staging area from the beginning of the game. As we have discussed above, getting the timing of Tactics Eomer’s ability to synchronise with Leadership Eomer can be tricky, so much so that it may be most effective to pay for Song of Battle and Spear of the Mark to get a more consistent attack boost. One way you could make this work is use Riddermark Horsebreaker to discard him and ready Eomer, giving him his extra 2 attack for a second attack. This combination might find its niche in quests where a fair few enemies will hang out in the staging area, like Journey Along the Anduin, Wastes of Eriador and A Knife in the Dark.
Spirit Eowyn: Tactics Eowyn

Here we have one of the perennial questers in the game, sporting a colossal 4 willpower with the option to discard an extra card to boost your willpower by 1. The opportunity to pay 3 resources to gain the ability to ready and gain a massive +9 attack is an excellent investment, one that will pay dividends in your game. Putting Herugrim on Spirit Eowyn is a sound investment under normal circumstances, which when combined with Windfola and Unexpected Courage, would allow her to quest for 5 and attack for 6. Slap down Thorongil for Tactics Eowyn’s ability and you’re looking at an unstoppable 15 attack at a late stage in the game. This is can prove key for tackling larger Bosses you will face at the end of your quest, such as can be found in The Ring Goes South, Encounter at Amon Din or The Thing in the Depths.
Tactics Eowyn: Spirit Eowyn

This incarnation is just as good as her counterpart, if not better. Tactics Eowyn starts the game reducing your starting threat by 3, potentially giving you 3 extra turns before you engage that nasty enemy. By attaching Spirit Eowyn to her Tactics version, you give her an ability that allows you to fine-tune your questing capabilities in the later stages of the quest by discarding cards from your hand. If you have access to the Lore sphere you would be able to do this cheaper and more effectively in lower player counts by using Protector of Lorien. Outside of that, Leadership can play Song of Hope which burns resources for the same effect. The reason why you would go for this match-up would be if you needed the assurance of having Eowyn’s massive attack on standby from the beginning, while still wanting access to the Spirit sphere and her quest-tuning ability. This would be especially useful in quests where you can come across a powerful enemy relatively early on in the quest that you might otherwise find difficult to kill, such as The Morgul Vale, The Three Trials and A Shadow of the Past.
Lore Faramir: Leadership Faramir

Here I must confess to having a soft spot for Lore Faramir. I recognise that mechanically speaking he is not the strongest, but I think the theme of his character meshes wonderfully with his ability, where he is more dangerous when keeping enemies at a distance. But herein lies the fault of this combination for Lore Faramir benefits from keeping enemies in the staging area, Leadership Faramir’s ability triggers every time an enemy engages him, as he is able to ready an ally when that happens. Now ideally when you do engage enemies with Lore Faramir, you are doing it one at a time and Faramir ought to be strong enough with his ability and any weapons you have so that you won’t need allies. Leadership Faramir’s ability doesn’t explicitly contradict this as it can only trigger once per phase, meaning you could theoretically ready an ally that had also been used in questing to either make use of his attack or defense. The prime candidate for this would be a tricked-out Knight of the White Tower, who can quickly exceed hero-level powers when given the right equipment. While relatively cost-effective as this effect can be repeated every phase, this should be considered a fall-back however, not the front-line strategy of a Lore Faramir deck. The combination of Lore/Leadership Faramir would work well in quests that feature several sturdy enemies that Faramir might not be able to finish off himself, such as Foundations of Stone, The Fate of Numenor or The Uruk-hai.
Leadership Faramir: Lore Faramir

The challenge and utility of Faramir goes hand in hand, in that while he can turn his hand to anything he is not especially good at it. More so than any other hero, elevated above the field by his hefty 5 hitpoints, this version of Faramir can truly be described as a Jack of all Trades, Master of None. This ought to change when you put Lore Faramir’s ability onto him as well, as he should surely become your primary attacker. However the attack boost provided by Lore Faramir is unreliable, though technically unlimited. In the vast majority of cases you would probably be better off paying for weapons to increase Faramir’s attack. Where this combination shines is in Battle quests, where a character’s attack value is committed to the quest instead of their willpower. Faramir’s attack would respond dynamically as enemies get revealed through staging, so that he will contribute more for every enemy in the staging area. Most enemies have more than 1 threat so by himself Faramir will be outstripped, but sending allies to the quest as well should keep you abreast of your foes’ efforts. You would then be able to ready one of those allies again when you engage an enemy with Leadership Faramir, allowing you to better cope with the combat to follow. The best Battle quests to try this would be Peril in Pelargir, Into Ithilien or Blood of Gondor.
Spirit Frodo: Leadership Frodo

Theoretically the idea of giving Spirit Frodo, who raises your threat to mitigate damage, the ability to lower your threat is a very attractive one. In practise however, to make best use of both you will need to find reliable readying for Frodo, as well as some resource acceleration to make the combination sustainable. By that point the question needs to be asked whether or not it would be more cost effective and efficient to pay for Galadhrim’s Greeting and Unexpected Courage to achieve broadly the same result. The key thing you are gaining here however is not the threat reduction, nice though that is, but rather it is the versatility of being able to ready any other questing character in the game. This could be used to let Beravor draw you 2 more cards, Starting in Spirit means that there are several readying abilities that Frodo can make use of to maximise the potential of his defensive ability as well, such as Miruvor or Elwing’s Flight. When you do get this together, this can be a potent combination as Leadership Frodo can counterbalance some of the threat increases that Spirit Frodo will cause. This will probably work best where you start in a situation where the attacks you come under may mean the difference between life and death. Examples of these quests include Shadow and Flame, Fire in the Night and We Must Away, Ere Break of Day.
Leadership Frodo: Spirit Frodo

Starting off with Leadership Frodo gives you an unparalleled flexibility for the Threat cost. Able to ready any other character committed to the quest at the same time as him, Frodo will ensure you get the most out of your decks. Paying 3 resources to add Spirit Frodo’s ability onto his is a not too difficult sell because we can use Spirit Frodo even if exhausted to soak up undefended attacks or Archery Once you are able to get some reliable reading, such as from Spirit Legolas, then having the defensive fail-safe could prove to be an invaluable tool, especially if you are able to keep your threat low in previous turns. Once you get it going, this combination would work well in most quests, though perhaps particularly suited to quests where particular strain is placed on your heroes’ action economy, such as Escape from Dol Guldur, Escape from Mount Gram and The Long Arm of Mordor.
Tactics Gimli: Leadership Gimli

These two iterations don’t marry all that well when paired in this order. Tactics Gimli is about getting damage tokens on him, whether by defending or soaking up Archery damage, in order to turn into a fearsome attacker later on in the game. Leadership Gimli hinges on being declared as a defender, as he can then ready another hero upon spending a resource. Paying 3 resources for this ability is dubious as by the time you get to ready your first hero, that is 4 resources down the drain. The only time you might, might, be able to justify this is if you were able to pulled Thorongil extremely early and the hero in question was Legolas, as Leadership Gimli’s ability gives Legolas an extra attack strength. Otherwise, I would advise staying away from this match-up and use those 3 resources to pay for a decent ally instead.
Leadership Gimli: Tactics Gimli

On the reverse side of the coin however, I think this is a much better pairing. You will be defending throughout the game with this ability, as Leadership is in the prime position to not only pay for this ability and ready a hero, but for plenty of armour attachments as well such as Hauberk of Mail or Ancestral Armor. Leadership Gimli even comes with Dwarven Shield, that boosts his defense to 3 and gives him a resource every time he takes a damage. Once you get Armored Destrier or a copy of Cram on Gimli, he will be in an excellent position to make a few counter-attacks, and that is where Thorongil comes in. By mid- to late-game you might reasonably expect Gimli to have 3 or 4 damage on him, and so paying 3 resources for an attack boost of 3 or 4 will be worth its weight in gold. Access to the Tactics sphere also opens up the wardrobe of weapons Gimli can take to boost his attack by even further. If you run this in conjunction with Spirit Legolas, then your attacking prowess will be unparalleled. On balance however, as we will explain below, Spirit Legolas probably has more to gain from Thorongil than Leadership Gimli does. But this Gimli combination would be particularly suited to quests that have a multitude of enemies before finishing things off with one boss enemy that Gimli’s beefed up attack would be particularly suited to tackling. Examples of these quests include The Steward’s Fear, The Treachery of Rhuduar and The City of Corsairs.
Lore Glorfindel: Spirit Glorfindel
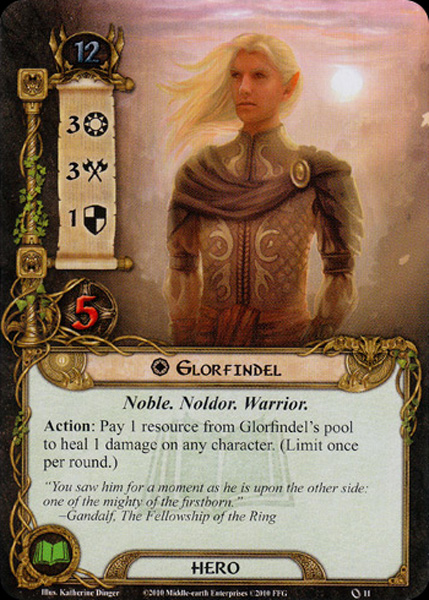
This is not a good combination to go for at all. Spirit Glorfindel’s ability causes you to raise your threat every time that you exhaust to commit to the quest as a means of counter-balancing his low starting threat of 5. Lore Glorfindel does not have that low threat, and so the only positive aspect you are gaining from this interaction is to gain the Spirit sphere icon. Instead of paying3 resources for Thorongil, pay 1 resource for Song of Travel and be on your way.
Spirit Glorfindel: Lore Glorfindel

Assuming that you are able to source Light of Valinor, then giving Glorfindel the ability to heal damage for the cost of a resource is not to be ignored, even if it is only once per round. There are a few ways for Spirit to generate resources at this point, the most consistent of which being Arwen’s ability to discard a card in exchange for a resource. This would essentially turn the cost of paying a resource to heal a damage from a character into discarding a card. However, there are cheaper ways to get healing than doing this. For the cost of 2 resources, as opposed to paying 3 for Thorongil, you can get the Imladris Caregiver who can heal by discarding cards though he can do it twice per round. Alternatively you can pay for the Warden of Healing and have all your healing problems taken care of. You lose the benefit of Glorfindel’s 5 hit points but you gain the action advantage of having the extra ally. Once you factor in the cost of Song of Wisdom then you are pretty much breaking even. Using Thorongil to get Glorfindel’s healing ability would be especially helpful in quests that heavily feature Archery and Direct Damage like A Journey to Rhosgobel, The Druadan Forest or The Uruk-hai.
Tactics Legolas: Spirit Legolas

Much like the usefulness of the Tactics/Leadership Gimli, this combination depends on the circumstances in which you use it. In most cases however I’m afraid that paying 3 resources to let you discard a card to ready another hero after they both quest isn’t really worth it if you can secure any other readying at all. Legolas only quests for 1, and without being readied himself you are throwing away his 3 attack for not a great deal. This imbalance is emphasised by Tactics Legolas’s ability to pseudo-quest and place progress on the active location after killing an enemy. Unless you are running Leadership Gimli alongside this pairing, and even then only if you were able to find Thorongil very early on when action advantage is critical, I’m afraid this combination isn’t worth the investment. That said, this may have advantages in quests that penalise you for having cards in your hand, and so any means of discarding extra cards for some benefit will be useful. Such quests are prevalent in the Ringmaker cycle, such as The Fords of Isen, The Dunland Trap and The Antlered Crown.
Spirit Legolas: Tactics Legolas

Here is one of the better investments that Thorongil can offer. In order to gain the same effect, you would have to pay for a Song of Battle and two Blades of Gondolin. Now by opting for Thorongil you do forfeit the attack bonus for attacking Orcs, but instead you recover 2 restricted slots for other weapons, you can pay for this with Neutral resources and all of this only takes up 1 card instead of 3. There is no reason why you could not put on the Blades and Arod in addition, so that the first enemy Legolas kills each turn now converts to a hefty 5 progress, reduced to 4 progress for each enemy thereafter killed in the same turn. Obviously this works especially well when paired with Leadership Gimli, but Spirit Legolas begins the game with access to a large amount readying abilities so finding an alternative shouldn’t be too much of a strain. The extra progress you are able to make up with this hybrid would be a sound investment in any scenario, but would be best suited to ones where you face a good amount of enemies that Legolas can reliably kill each turn, and where progress needs to be made in order to avoid being bogged down and overwhelmed by threat in the staging area. There are many examples of such quests, but prime instances would include Into the Pit, Trouble in Tharbad and Journey in the Dark.
Spirit Merry: Tactics Merry

On the face of things it seems like these two are at odds with each other. Spirit Merry’s ability depends on being able to exhaust him in order to be able to lower your threat, whereas Tactics Merry is solely combat focused. Unless you are able to obtain readying, you will be in a position where you need to choose which ability you will be focussing on. Combat is something that most Hobbit decks struggle with, so the chance to add up to 3 attack, or 4 in a Saga quest, to one of your heroes is not something to be passed up lightly, nevermind that access to the Tactics sphere will let you purchase the eminently useful Dagger of Westernesse. It should be noted that Spirit Merry natively has 1 attack more than Tactics Merry, so an all-Hobbit hero line-up will see this combination provide 4 attack as opposed to the inverse iteration’s 3 attack. This will work best in quests where you can keep your threat low with Spirit Merry as enemies with high engagement costs are revealed, only for you to be able to strike them down later in the game with Tactics Merry’s high attack strength. This is particularly suited in quests like Across the Ettenmoors, A Shadow of the Past and A Knife in the Dark.
Tactics Merry: Spirit Merry

Given how universally useful both incarnations of Merry are, there really isn’t a downside to either iteration of their combination. Both of their abilities can easily be worth the 3 cost for Thorongil, and should be seriously considered in any deck that runs either version. Each variation yields its own advantages however, and having the more combat-centric incarnation of Merry in your opening board-state will pay dividends if you will be up against enemies from the beginning. Tactics Merry’s strongest ability isn’t actually his attack strength increase, unless you are playing a Saga quest with a Sword-thained Hobbit such as Rosie Cotton or Tactics Pippin. Rather the ability to ready another attacking hero after an enemy is slain can pay off massively when facing several enemies at once, it is inbuilt to his threat cost and is available without condition from the very beginning. Moreover, bringing the ability of Spirit Merry later in the game will be especially advantageous in quests that last a while and, once you have the table under control with allies and powered up heroes, it becomes the case that threat is actually your biggest concern. This tends to happen more often in quests that take some time to complete, or have several Doomed effects, such The Battle of Carn Dum, The Fate of Wilderland or The Battle of the Pelennor Fields.
Spirit Pippin: Lore Pippin

Spirit Pippin has been much maligned ever since his release as the worst hero in the game. Now what you may have read there was a pretty bad hero, and one of the worst, with a corner-case use that people have found and exploited. So I will repeat myself: Spirit Pippin is widely considered the worst hero in the game. His ability only works if you have all of your heroes as Hobbits, and even then it is situational at best. You would only trigger this ability if an enemy has engaged you that you do not want to be engaged with, which usually happens when your threat is higher than your engagement cost, in which case without threat reduction you have bought yourself one turn to prepare yourself to get ready at the cost of 3 threat. On top of this, you will now have to quest past them again next quest phase. The corner case where this might be effective is if an enemy engages you by some forced effect, bypassing their engagement value. So now what we must ask is whether or not Lore Pippin’s ability is worth the 3 cost you need for Thorongil. You raise the engagement cost of each enemy by the number of Hobbit heroes you control, which will be about 3 on average if you are trying to get Spirit Pippin’s ability to work. Lore Pippin also allows you to draw a card every time you engage an enemy with a higher engagement cost than your threat. This is almost certainly worth the 3 cost for Thorongil, so now we must wonder whether it is enough to make it worth your while taking Spirit Pippin. Theoretically you can use the two abilities in tandem, to engage an enemy, draw a card and then raise your threat by 3 to push the enemy away again. This could work if you had ready access to Hobbit Pipes and threat reduction, such as Smoke Rings and The Shirefolk, and had a second player to either trap enemies or to pick them off for you. It is also worth noting that neither ability requires Pippin to exhaust, and so you can feel free to throw his comparatively cheap willpower into the quest. This is a niche use, but still an existent one that needs must be acknowledged and may yield results in quests that have relatively few enemies so you don’t find yourself overwhelmed by enemies or threat. Examples of such quests include Conflict at the Carrock, Fog on the Barrow Downs or Flight to the Ford.
Lore Pippin: Spirit Pippin

Now while it may have been worth your investment to make Spirit Pippin viable in more than a handful of circumstances, I do not believe that the reverse can be said. If your deck wishes to avoid engaging enemies, Lore Pippin raises their engagement cost to aid in that. If you want access to the Spirit sphere, take Spirit Merry who can lower your threat and make it harder again for enemies to engage you. Spirit Frodo is a more viable fall-back for if you do engage an enemy, as you can negate enemy attacks by raising your threat, but having the option of boosting your defense to reduce that threat bump. Thorongil would be a much better fit on either of those two heroes. And even if you do need to buy a little bit of breathing space with some threat, Fatty Bolger is a more effective solution. I cannot in good conscience recommend this pairing as being an efficient or workable one when other more effective options are available.
Leadership Prince Imrahil: Tactics Prince Imrahil

Both versions of Prince Imrahil have very useful and versatile abilities that, on the face of things, synergise extremely well with one another. Leadership Imrahil readies whenever an ally leaves play, while Tactics Imrahil can pay a resource at the beginning of the Combat Phase to put an ally into play that shares a trait with him, only for it to leave play at the end of the Combat Phase. The key part is that last phrase there, the end of the Combat Phase. There is no action window between the end of the Combat Phase and when your characters refresh at the beginning of the Refresh Phase. This means that unless the ally Tactics Imrahil takes in either dies or leaves play by some other way, these two abilities do not really interact. The Riddermark Knight, Grimbold and Derufin are the best choices for allies that can be discarded for some benefit to ready Leadership Imrahil, but the pickings aren’t exactly vast. The alternative would be to bring chump blockers to put in with Tactics Imrahil, but at that point you’re almost just as well to start paying for those chumps with the money you’d save from the cost of Thorongil and Tactics Imrahil’s ability. But that is not to say this can’t work, only that it takes some effort in getting it to work. You’d probably be best served using it in quests that penalise multi-sphere decks, so Tactics Imrahil can sneak in different allies during the questing phase that you wouldn’t otherwise be able to use in a Mono-Leadership deck. Such quests include The Siege of Cair Andros, Assault on Osgiliath and The Morgul Vale.
Tactics Prince Imrahil: Leadership Prince Imrahil

I’m afraid that this entry should be almost exactly the same as the above. There isn’t really a lot to distinguish this Tactics / Leadership combination from the Leadership / Tactics one, except that the allies you will be subbing in during the combat phase are less likely to be Tactics ones, as you are more able to pay for them to stick around permanently by starting with a Tactics resource icon. Otherwise, check the above entry.
Tactics Theoden: Spirit Theoden

Now this can potentially elevate the Rohan ally deck to where it needs to be in terms of power level, if you are able to make the most of it. It will take you 3 turns of consistently paying for allies for you to break even, 4 turns for you to start making a profit. If you do manage this, Thorongil effectively fills the role of a slightly cheaper Resourceful, giving your Rohan deck a more efficient cost curve, as well as bringing in the Spirit sphere. Many of Rohan’s utility allies, such as the Westfold Horsebreaker or Gamling, can be found in the Spirit sphere, which can often be needed to bring your heroes and allies to a place of power that they need to be. An ideal hero to run with this combination would be Hirgon, who would not only benefit from Tactics Theoden’s willpower boost, but also doubles down on reducing the cost of your allies. If you are not planning on running an ally heavy deck however, or are playing a quest that does not require haste, such as To Catch An Orc, The Treachery of Rhuduar or Helm’s Deep.
Spirit Theoden: Tactics Theoden

As for this variant, given that Tactics Theoden adds a willpower to each hero you have with a printed Tactics icon, it is probably not worth the investment. Because the card ability specifies ‘printed’ that means the most you are going to gain from this will be an extra 2 willpower. The exception to this would be if you were playing multiplayer, with the value of the ability increasing for every Tactics hero that is on the board. Of course Tactics characters typically won’t be questing, I suppose it is still nice to have in a pinch. Buying Thorongil in this case however would only be worthwhile if, and this is a big if, there were Tactics heroes across the board from you in a quest that works best with more than one player, examples of which include Escape from Dol Guldur, Foundations of Stone and Breaking of the Fellowship.
Messenger of the King
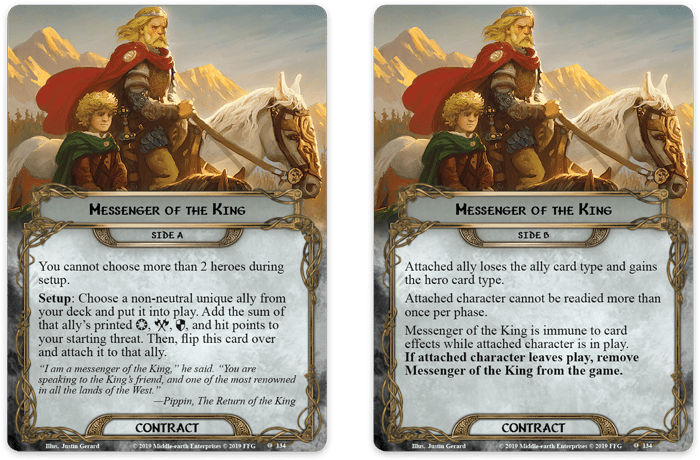
That’s it for the regular heroes and their combinations. But as many of you know, one of the newly released contracts allows you to choose a unique ally from your deck at the beginning of the game and give them the hero type. In one fell swoop, we have been given a wealth of new heroes with new abilities to improve and solidify various archetypes. And now with the introduction of Thorongil, you can make sure you don’t miss out on the original heroes’s abilities while taking advantage of the low threat cost provided by the allies.
MotK Arwen Undomiel: Arwen Undomiel

One of the most powerful allies in the game, edged out in most cases by the hero version, but still is never a bad option for your decks. Now with Thorongil, MotK Arwen gains the ability to discard a card to give a resource to any Noldor hero on the table, or Aragorn. This ability does not depend on Arwen being ready or not, which means the ability of MotK Arwen meshes really well with the hero version. Being able to discard a card for a resource once a turn will mean you’re able to recoup your money in 3 turns, but you are able to give that resource to any Noldor hero on the table, meaning your spheres can be made smooth and you will get those resources where you need them. In a Noldor deck however, being able to discard cards at will is often what is needed to kick things into the next level. This will be especially useful in quests that penalise you for cards in your hand, such as The Fords of Isen, The Dunland Trap or The Anterled Crown.
MotK Beorn: Beorn
This does not work I’m afraid. As soon as you add Hero Beorn to MotK Beorn, the latter gains “Cannot have attachments”, and Thorongil gets discarded instantly, and Hero Beorn along with him. So I suppose if you feel you like you need to handicap yourself to give the encounter deck a fighting chance, go right ahead. Otherwise, invest in something else with your money.
MotK Bifur: Bifur

To be honest, I see know reason why you would choose to take MotK Bifur in the first place. For one less starting threat, you trade a point of willpower and defense for one extra attack. But more to the point, you shed Hero Bifur’s stellar ability for one that does not even mechanically work because there is no way for you to control 5 Dwarfs. And even if by some twisted miracle that you did, he is not played from your hand so the ability doesn’t even get a chance to fire. All of this is to say, if you want Bifur’s ability just take Bifur and save yourself 3 resources. Sorry guys, look elsewhere.
MotK Bilbo Baggins: Lore Bilbo Baggins

Some have argued that MotK Bilbo is the best hero incarnation that we have, and while I cannot find much ground on which I can disagree with that assertion, I do have a fondness for both his Hero iterations. So how do they pair together with Thorongil then? Rather well, as it turns out. We have already discussed above how 3 resources for an extra card a turn is a bit steep, but obviously the sooner you get it on the board the better return you will get for your investment. Using MotK Bilbo’s ability to dig out a Hobbit Pipe or a Dunedain Pipe to help sift through your cards ought to make it easier to find Thorongil to begin with, but I’m afraid that after a certain point in the game it will become apparent that it would not longer be a profitable investment. The best quests to make the most out of this would be on ones that may give you the chance to dig out Thorongil at the beginning, like The Ring goes South, or quests that may take a bit longer to complete, such as The Nin-in-eilph or Journey Up the Anduin.
MotK Bilbo Baggins: Tactics Bilbo Baggins

One of the major drawbacks of Tactics Bilbo’s ability is that without willpower boosting, you will only ever be questing higher than your target’s threat by 1, and Tactics is not exactly known as the sphere for willpower boosting. By starting off with 2 willpower instead of 1 you counter part of this drawback, but crucially by natively belonging in the Spirit sphere, you have easy access to a bevy of willpower increasing abilities, such as Smoke Rings and Silver Circlet. More importantly however you can play Elevenses, which allows Bilbo to remove himself from the quest and then exhaust to choose a target again, potentially doubling his willpower bonus and dealing 2 direct damage to an enemy in the staging area. These two work incredibly well together so that they would fit well in any quest. They might be particularly suited to scenarios that feature enemies that linger in the staging area, such as Journey Along the Anduin, The Temple of the Deceived or A Knife in the Dark.
MotK Bombur: Bombur

MotK Bombur isn’t a bad choice, but is certainly a situational one. When you consider whether or not to pay for Thorongil to make him count as two Dwarfs, you should really only do so if your deck revolves around the ‘5 or more’ mechanic. 3 resources early on may be enough to tip you over the edge and get your deck’s engine firing on all cylinders, but paying that price for an ally will achieve the same result, while netting you their ability, stats and action economy. Of course if you are playing a quest that specifically targets your allies or limits the number of heroes you have then having Thorongil on MotK Bombur will be helpful in making sure you don’t dip back below the 5 Dwarf mark, especially so in quests that heavily feature Mountains or Underground locations. Examples of these quests might include The Long Dark, Shadow and Flame or Beneath the Sands.
MotK Boromir: Tactics Boromir

The ability to ready on demand is one that is the envy of any other hero in the game, and the cost of 3 to gain that ability is easily justifiable. However, that ability seems to run counter to MotK Boromir’s, in that he depends on being able to defend against enemies with a higher engagement cost than your current threat levels. Given that this build would work best in a low-threat Hobbit deck, using Thorongil on MotK Boromir essentially gives you a parachute, only to be used in an emergency and you need to finish off an enemy after Boromir defends against it. Be sure to take Tactics Merry alongside him, so that you can afford as much Weapons and Armour as you need, and to make the most of Boromir’s attack strength. This will work best in quests with several high-threat enemies so that Boromir’s bonus defense will be triggered as much as possible, such as Conflict at the Carrock, Celebrimbor’s Secret or A Shadow of the Past.
MotK Boromir: Leadership Boromir
This incarnation can work as well as the one above, but fits into an entirely different manner of deck. Here you would want to pair this hybrid with a Mablung / Leadership Faramir deck, where you can flood the board with as many Gondor allies as you can while you get bonuses from engaging enemies. As we have already established, paying the 3 cost for Thorongil in order to get the attack boosts can seem a little steep, so you will need to get out as many allies as possible to make the most of it. Given that this deck might naturally be lacking in willpower, you would get the most value out of this build in either a multiplayer capacity or in a quest that features Battle questing, as found in Peril in Pelargir, The Antlered Crown and The Battle of Carn Dum.
MotK Damrod: Damrod

Given that Hero Damrod is the cornerstone of the Ranger / Trap deck, stapling his ability onto a cheaper hero might not be a terrible idea. But that deck isn’t exactly struggling with high-threat at the moment, especially with the new MotK heroes you can take to shore it up. Moreover, MotK Damrod’s own ability is a kamikaze ability to reduce your threat for each enemy in the staging area. Granted with the traps garnered by Hero Damrod’s ability keeping enemies in the staging area that may be a fair bit of threat you’re knocking off, but you will have lost the very foundations of your deck to do so, so this will be a move of sheer and utter desperation. One last sticking point is the Spirit sphere, which has very little to nothing to do with the Ranger / Trap deck. There may be a use for this in quests that flood the board with enemies, such as The Seventh Level, Deadman’s Dike or Massing at Osgiliath.
MotK Denethor: Lore Denethor

If you want to Thorongil into Lore Denethor, I’m afraid there is no justifiable reason for you to take MotK Denethor to begin with over his Leadership Hero version. It costs one threat more, you lose the extra resource, and you can potentially discard yourself by accident. If you want a Leadership hero with decent willpower, take Sam Gamgee for 1 less threat or Gildor Inglorion for a consistent card draw ability. There is no practical situation that comes to mind where taking MotK Denethor is useful, let alone using Thorongil on him.
MotK Denethor: Leadership Denethor
See the above entry.
MotK Dori: Dori

I’m afraid that redemption has not come for Dori with the advent of Thorongil. Both of his abilities rely on being able to exhaust the Dwarf, so you will need to either choose which way you are going or give him some readying capabilities. Now in a Lore deck finding some extra defense can be quite hard, unless you decide to run Protector of Lorien, so the additional point of defense certainly would not go awry. This does however prevent you from being able to quest or counterattack with him. His other ability to soak up excess damage can be helpful, but with only 3 hit points you need to be very careful lest you accidentally get him killed. Ideally you would be able to put Ring Mail or Raiment of War on him to boost his defense and hit points so you have the option of where to lean, but at that point you need to ask yourself: would it not be better to simply put Ring Mail on your defender? In my opinion, outside of one or two specific quests that deliberately target Item and Armor attachments like Foundations of Stone or The Dunland Trap, I don’t see how paying the resources for defensive boosts wouldn’t serve you better.
MotK Dwalin: Dwalin

Much like MotK Bifur, MotK Dwalin’s ability will not fire when you put him into play. Now that’s said, the question becomes whether or not Hero Dwalin’s ability is worth paying 3 for. I must confess at this point to having a soft spot for Dwalin, and really like his ability to lower your threat for each Orc you kill. Of course this is obviously quest dependent, as some quests have no Orcs in them whatsoever, such as Wastes of Eriador or Raid on the Grey Havens, so paying for MotK Dwalin to get Thorongil serves no purpose at all. But what about quests that heavily feature Orcs? Well I would say that in a vacuum the chance to lower your threat by 2 for each Orc you kill is definitely worth the cost of Thorongil. Unfortunately however this is not a vacuum and we need to consider MotK Dwalin’s stats, which I’m afraid are found wanting. With only one attack, he would need some hefty investment from weapons to bring him up to a strength where he might be able to carry this out with some level of consistency. At some point the question will need to be asked, why not just play Galadhrim’s Greeting for the same cost and drop your threat by 6 immediately? If you were to try and make a case for this however, your best bet would be quests with plenty of weak Orcs, such as The Seventh Level, The Long Dark and Dungeons Deep and Caverns Dim.
MotK Spirit Elfhelm: Elfhelm


One of the biggest drawbacks of taking any version of Elfhelm is that all three versions of him are packed with utility. The advantages of taking MotK Spirit Elfhelm are self-explanatory, and I’m sure you yourself can imagine the benefits of being able to stem your threat increases. So the question them becomes whether or not the stat boosts you gain from Hero Elfhelm are worth the cost of Thorongil. This one can be boiled down to simple economics. Assuming each one of your heroes has a mount on them, and if they don’t then choose a different target for Thorongil, then you will be getting at least 4 different points of stats increased. That’s 2 for Elfhelm (willpower and defense) and 1 for your other two heroes. 4 unconditional points for 3 cost is a decent cost-benefit ratio, though it can be beaten out by ‘conditional attachments’ that boost a stat by 1 normally, but do so again if a condition is met. An example might include Gondorian Shield or Spear of the Mark. Of course if your heroes have more spheres then you’d get more star boosts, but if you use Songs for this it would always be on a 1:1 ratio. Ultimately, if you think the cost is worth it for the stat boosts spread out across your heroes, go wild. This will work well in quests that are prohibitive of you taking an ally heavy deck, such as The Redhorn Gate, Trouble in Tharbad or The Withered Heath.
MotK Tactics Elfhelm: Elfhelm

Tactics Elfhelm’s entire ability revolved around the fact that as an ally he can bounce in and out of play to be where you need him the most. As such, I’m not sure there is any reason you would take him as a MotK hero, let alone put Thorongil on him. But for the sake of argument, let’s assume you do take the bevy of Mounts you need to make Elfhelm worth your while. The best use of this situation would be to give him an Armored Destrier, which will immediately make this incarnation of Elfhelm have 3 attack and 3 defense, with the ability to ready himself and discard a Shadow effect from another enemy. This would allow him to either counterattack or defend another enemy attack. Being able to boost multiple heroes stats will be help in any scenario, but this particular build just described would be especially so in scenarios that have particularly nasty shadow effects, such as Blood of Gondor, The Morgul Vale and The Battle of Carn Dum.
MotK Elladan: Elladan

Now the great thing about pairing these two together is that their attack boosts stack. What this means is that alongside Elrohir, MotK Elladan starts off with 3 attack and readies every time you engage an Orc. Purchasing Thorongil pushes him up to 5 attack and allows you to spend a resource to ready him for an extra attack. One of the best things about this extra attack strength is that it does not come at the expense of a restricted slot, allowing you to continue to load up on other great attachments like Rivendell Blade, Warrior Sword or, most eminently, Orcrist. The latter is the most obviously powerful, as it allows Elladan to just keep swinging, but it is guarded and requires access to the Leadership sphere. Just bear in mind however the restriction that MotK places on your chosen ally in that they cannot ready more than once per phase. Of course if you are taking Elrohir this shouldn’t be a problem but it is worth noting. To make the most out of this hybrid, you would be best to use it in quests that feature plenty of Orcs so that MotK Elladan can contribute to the quest while still being reliably ready to face combat, such as Into the Pit, To Catch An Orc or The Dungeons of Cirith Gurat.
MotK Elrohir: Elrohir

Once again, these abilities stack. When you get this grafted together, Elrohir can defend for 5 spend a resource to ready himself for a second attack, hopefully after committing to the quest and being readied by an Orc enemy engaging you. Being in the Leadership and Spirit spheres grant you access to a bevy of defensive options, from the dependable Dunedain Warning, to the flashy Ancestral Armour and the under-appreciated Mithril Shirt. If you are choosing between the twins, I would argue that this pairing is slightly better than Elladan’s, for two primary reasons. In my opinion having a strong defense is more important than having a good attack base, because you need to weather the storm before you can strike back. And having access to the Spirit sphere allows you to play with the various toys the Noldor have, most universally useful of all being Elrond’s Counsel. But much the same as with Elladan, to make the most of Elrohir’s full use of stats take this combination to a quest that in bursting with Orcs, such as Blood of Gondor, Intruders in Chetwood or The Fate of Wilderland.
MotK Elrond: Elrond
Given that MotK Elrond gets discarded at the end of the first turn, you really shouldn’t be taking him to begin with, much less burning all your resources to tack Hero Elrond onto him as well. Try somewhere else.
MotK Erestor: Erestor

The uses for this pairing are obvious and powerful. By paying for Thorongil, you will be able to see at least 10% of your deck in your hand each and every turn, assuming you have stuck to the 50 card limit. After drawing 1 card in the resource phase Erestor then allows you to draw another 3, and MotK Erestor lets you tutor your hand, discarding something you don’t need right now to be able to draw another card. You do have to discard every card in your hand at the end of the round, but when you can draw that many cards again it shouldn’t be too much of a bother as you can find what you need as soon as possible. This amount of control over your deck is unparalleled by any other character, though if you are not careful you may end up drawing through your entire deck. This is best paired with at least one Spirit Hero to give you access to Will of the West, so you can keep the cycle of cards going. You could take Cirdan the Shipwright and without any other card draw effects be able to see 7 cards in your hand every turn. The sheer amount of card draw will find its use in practically every quest in the card, except for some of the nastier ones in the Ringmaker Cycle. You will especially be grateful for this torrent of cards in quests that force you to discard more cards than might usually be the case, such as The Long Dark, The Lonely Mountain and The Road to Isengard.
MotK Leadership Faramir: Lore Faramir

For an 8 threat ally, you will be using this almost exclusively to boost the willpower of your characters. Any readying you get on him should be used to double up on that ability. This means that when you pay for Thorongil on this ally, Lore Faramir probably shouldn’t be your go-to choice as their abilities run almost directly counter to each other. The only exception might be in Battle quests, where the ability to increase willpower will be superfluous, but then you probably ought to choose a different ally to use MotK on. Instead, consider the option below.
MotK Leadership Faramir: Leadership Faramir
The great thing about this combination is that the hero’s ability does not require Faramir to be readied at all. This means that when you take the two in tandem, MotK Leadership Faramir can boost an ally’s willpower when you quest, only for Leadership Faramir to ready that ally again for combat after you engage an enemy. This will work in any deck that you bring lots of allies, such as a Gondor Swarm, as you can get extra utility out of them. Of course in the classic Mono-Leadership version of that deck you can instead pay 2 for Strength of Arms to ready every ally, but outside of that build this is a solid option. This would work best in quests that debuff your characters’s willpower, such as The Redhorn Gate, The Nin-in-eilph or Flies and Spiders.
MotK Lore Faramir: Lore Faramir

This is a corner-case ally at best, and the only reason this might be viable is if you want to do some immediate direct damage on an enemy in the staging area during set-up. Setting aside how minimal this damage is, the only reason why you might take the MotK ally over starting with the Hero version of Faramir is for the reduced threat cost from 11 to 8. That effectively translates to investing 3 resources to reduce some of your stats and drop your starting threat by 3. To be frank, this is not cost-effective and there are better options for achieving the same ends. I would suggest that this pairing is not an optimal one.
MotK Lore Faramir: Leadership Faramir
See the above entry.
MotK Galadriel: Galadriel

MotK Galadriel leaves play at the end of the round, so the odds of getting the chance to actually play Thorongil on her are slim. Moreover, her ability does not trigger as she is not played from your hand. You do technically have time to play Thorongil on her though for 3 resources. This would then leaves you set-up to exhaust Galadriel to allow a player to drop their threat by 1 and draw a card. Now when MotK Galadriel leaves play, Thorongil is discarded as well but the Hero version of Galadriel is removed from the game. This means you cannot even get to promote ally Prince Imrahil to Hero status by doing this. While there is technically a use for this incarnation of Thorongil, there are many more ways to achieve the same result. Look elsewhere.
MotK Galdor of the Havens: Galdor of the Havens

The Noldorin mechanic is forged around the ability to discard cards for various effects. MotK Galdor helps support that engine by once a round letting the player draw a card after another is discarded. By using Thorongil, you are also able to draw an entire new hand of six cards if, at any point, you find yourself with an empty hand. Note that this only happens once per game, but that can be crucial. The key piece to the puzzle here is To the Sea! To the Sea!. If you discard every card in your hand, drawing 1 back with MotK Galdor, you can bump down the cost of an ally by a fair amount, and then trigger Galdor’s ability, giving you 6 more cards which you can choose to discard, keep if indeed play a discounted ally if you have gained it. The cost is reduced to a minimum of 1, but by doing this should ought to read Galdor’s ability as essentially ‘Play a Noldor ally for a heavily reduced cost’. Imagine getting Glorfindel, Erestor or Gildor into the board for only 1, and still having a full hand of cards, all for investing 3 resources into Thorongil. Of course there are plenty of Noldor effects that can be fueled by discarding cards, but using Thorongil on Galdor will ensure you will always have enough cards in your hand to keep on ticking. You will find this especially helpful in quests that force you to discard cards from your hand, like The Watcher in the Water and The Lonely Mountain.
MotK Gildor Inglorion: Gildor Inglorion

Either of these two would be an excellent choice as one of your heroes, being able to allow you to dig through your deck to find exactly what you need as soon as possible. To be honest I’m not sure that paying for Thorongil would be worth the investment were Gildor paired with any other hero’s ability. However MotK Gildor allows you to rearrange the top 3 cards of your deck, swapping out one from your hand for one of those cards from your deck. If you were to do this in conjunction with using Gildor’s ability just once a round then you can arrange which cards you are drawing both with his ability and next resource phase without redrawing the card you sent back to your deck. This ability to control what you will draw and when you draw it is powerful beyond all proportion, as you should get your deck up and running much faster as a result. This will cost your more and more resources to consistently do as the game goes on, but the fact that you can dictate exactly what you are drawing should make the investment a profitable one. This would work well in any deck, particularly in an Elrond / Vilya deck, but quests are made substantially easier with specific answers from the players would be particularly suitable for this combination, such as when you need Feint in Shadow and Flame, East Road Ranger in The Treachery of Rhuduar, or Northern Tracker for Roam Across Rhovanion.
MotK Gimli: Tactics Gimli

The ability to ready after an enemy comes off the encounter deck is an extremely powerful one, because it guarantees that you will always have a character ready to deal with that foe. And MotK Gimli has 2s across the board, so that whether it is a normal quest, a Battle or a Siege, his contributions will always be welcome. But in order to make full use of this pairing we need to consider that MotK Gimli has only 3 hit points, meaning that when we pay 3 resources for Thorongil the most of an attack boost we can get out of him is 2. Now once we factor in the resource cost of Song of Battle, we are left with paying 2 resources for 2 extra attack, exactly the same as one Dwarven Axe. We have already talked about how a 1:1 trade is by no means a bad ratio, though there are better ones out there. It also means that at some point MotK Gimli is going to have to change gears from being the one defending attacks to the one finishing enemies off. This is a natural progression as being able to defend against attacks early on is more important than being able to counterattack, and we can assume that as your deck gets itself on its feet, more defenders will be able to enter the fray. Now the more money you invest into this ability by increasing MotK Gimli’s hit points, the more you will get out of it when Gimli comes into his own as one of your primary attackers. Where this finds its sweet spot is in quests that feature Archery so that you can precisely manage how much damage Gimli will take without running the risk of a foul Shadow Card accidentally taking out your hero. Quests that will need you to commit Gimli to the quest because you need every bit of strength thrown into questing that you can and also feature Archery include The Siege of Cair Andros, The Druadan Forest and Breaking of the Fellowship.
MotK Gimli: Leadership Gimli

This aspect of Gimli focuses much more heavily on his defensive abilities, which with Sentinel only suits MotK Gimli all the better. And therein is the key to making this a worthwhile investment: Sentinel. After he has contributed to the quest and an enemy comes off the encounter deck, newly readied without any help from Legolas or any attachments, Gimli can now defend across the board and spend a resource to ready any other hero. The best use of this, and I would argue the only way to be able to justify the expensive cost of Thorongil and the resource needed for the ability, is if you are doing this in a multiplayer game. The ability to ready any hero on command for 1 resource is a powerful one, and the value and versatility of this only goes up as more players are added to the game. Because MotK Gimli has Sentinel, you can choose precisely when you want him to ready, and thus trigger his ability. You could have him go first and ready Thorin Oakenshield for a counterattack, somewhere in the middle and get Beregond with his Spear of the Citadel to defend a second enemy, doing damage to them as well, or save him for last and have Grimbeorn make another attack with his superior strength. Of course you will always profit from choosing Legolas, someone who is made more likely to be on the board simply because there are more players likely to be running him. Some quests are better suited to multiplayer than others, and some quests will severely tax your action advantage. There are a handful that do both, like Escape from Dol Guldur, Return to Mirkwood and The Long Arm of Mordor.
MotK Gloin: Gloin

Given that the Response on MotK Gloin does not trigger, just as is the case for MotK Bifur and MotK Dwalin, you will be hard pressed to make a case for including him in your deck. But were you to do so, without some impressive hit point boosting shenanigans and a fair chunk of healing thrown in to boot, MotK Gloin is just too frail to support Hero Gloin’s ability. You could pay for Hardy Leadership, Ring Mail, Boots from Erebor or Ancestral Armour, but the price keeps rising and it will take longer and longer for you to turn a profit. My advice would be to give this a miss.
MotK Glorfindel: Lore Glorfindel

This build is almost the same as the one above with the two hero versions of Glorfindel that we discussed above. The primary differences are the higher threat that comes with MotK Glorfindel, and the lack of Light of Valinor’s necessity. This frees up the attachments for other characters who would find it helpful, like Spirit Legolas or Argalad. Now as has been said above, there are other cheaper ways to get healing into your decks, especially in a Noldor deck. However if you would like to gear up your deck this way, then you would cope well with quests that hurl plenty of Archery at you, such as Escape from Umbar, Breaking of the Fellowship or Journey to the Crossroads.
MotK Glorfindel: Spirit Glorfindel
Given that you are keeping the same willpower and attack, while starting with a higher threat and gaining a detrimental restriction, I can’t see any reason why you would use Thorongil for this combination.
MotK Gwaihir: Gwaihir

Leaving aside the fact that MotK Gwaihir’s ability does not fire as you will have no Eagle allies in your discard pile at the start of the game, let’s have a look at what you gain by using Thorongil on him. The answer is quite a lot actually. You gain both Ranged and Sentinel, which together can cost between 2 and 4 resources depending on the route you go. You also are prohibited from readying during the refresh phase, but may ready every time an Eagle enters or leaves play. Now truth be told, all of that is well worth the 3 resources for Thorongil. However we need to consider the target that it is going on. Because MotK Gwaihir and the hero Gwaihir both have ‘Cannot have restricted attachments’ we can consider that null and void when comparing the two. Other than that, the former essentially has a blank text box. The tradeoff becomes lowering your starting threat by 3 in exchange for your willpower, attack and defense all being reduced by 1 and the loss of 3 resources. Personally I don’t think this is a worthy exchange, and you would be better off swallowing the 3 threat and getting the better stats. Use the spare 3 resources for a copy of Meneldor instead.
MotK Halbarad: Halbarad

Taken as a hero, MotK Halbarad is perfect for supporting the Hobbit’s ‘engage an enemy with a higher engagement cost’ mechanic. He makes sure that most of the enemies who might come down outside of an optional engagement will still trigger the Hobbits’s abilities, as found on Farmer Maggot and Hobbit Cloak. By paying for Halbarad’s ability, you not only gain the action advantage of being able to quest without exhausting, but you can engage two enemies optionally. This may not seem like a great deal to make a fuss over, but consider the abilities of Sam and Pippin. Now Sam can increase each of his statistics by 2 only with optional engagements, and Pippin can draw 2 cards. Whether this is worth paying the 3 for Thorongil is up to you, but the increased opportunity to trigger these abilities will work well in any quest where this mechanic would flourish, such as Across the Ettenmoors and Flight to the Ford.
MotK Haldir of Lorien: Haldir of Lorien
By taking MotK Haldir over his Hero version, you lose his ability to attack into the staging area and a point of attack strength, Instead you gain Sentinel and a point of defense. Now while theoretically you could make him a decent defender with a Cloak of Lorien and a Burning Brand, but I’m afraid this runs counter to the ability that you would get by paying for Thorongil, an ability made less effective by the reduction in his attack strength. I would recommend you give this one a pass.
MotK Hama: Hama

These two should really be questioned before they are paired together. With the existence of Fastred, MotK Hama is a suspect choice at best, and his ability runs counter to Hero Hama’s in that the former focuses on defense while the latter is primarily an attacker. Theoretically you could tool MotK Hama up to a point where he has the capabilities to dig out events from your discard pile for you by participating in attacks, but by that point you should realise there are other, cheaper options. You are in the sphere for Dwarven Tomb, Galadhrim Weaver and Will of the West. That isn’t to say it isn’t worthwhile, but it is a very roundabout way of recurring your cards. Also bear in mind Hama is limited to doing this 3 times during the entire game, so you are effectively paying 1 resource in advance for each time you want to do this. Typically this will find its best use in quests that force you to discard cards such as The Road to Isengard and Shelob’s Lair.
MotK Legolas: Tactics Legolas

As good as Tactics and Spirit Legolas are, for my money MotK Legolas is better still. For one less threat, you get to draw a card every single time he participates in an attack that finishes an enemy. Being in Tactics means he is still in the sphere for all the sweet weapons you want on him. Now when we talked about Spirit Legolas (see above), we already established that buying Thorongil to get Tactics Legolas’s ability is a very economical investment. Pairing the ability to gain extra progress as well as drawing a card makes this combination one of the most consistently beneficial abilities there is, especially once you pair this with the various attachments that give you further boons, such as Arod or Blade of Gondolin, or if you are able to dabble in other spheres Glamdring or Orcrist would be especially powerful on him. This combination would work well for you in any quest, but particularly so in quests that have you face off against multiple enemies that can be killed relatively easily, as well as having the need to reliably make progress to survive. Such quests might include Flight from Moria, Trouble in Tharbad or Mount Gundabad.
MotK Legolas: Spirit Legolas
While the match-up between Tactics and Spirit Legolas is comparatively circumstantial, pairing MotK Legolas with Spirit Legolas is much more viable. While you still need the readying to make this combination effective, ideally with Leadership Gimli, once it is up and running, the key difference is that MotK Legolas draws the cards you need to fuel Spirit Legolas’s ability. Now again this is a more situational hybrid than the one above. This may find its niche in quests that tax your heroes’s action economy such as The Long Arm of Mordor and Nightmare Passage through Mirkwood.
MotK Mablung: Mablung

Given how unlikely it is that you might be taking MotK Mablung, it may seem like this combination is one to skip. But in certain decks this can prove to be extremely helpful. Typically the only time you might take MotK Mablung is in a Mono-Lore Trap deck, giving you a cheaper 2-willpower hero. If you need to add some extra firepower with some Tactics weapons, adding Mablung with his access to that sphere and an inbuilt resource acceleration. Even if you were to set aside the resource you’d be paying for Song of Battle, you would almost certainly be engaging more than 3 enemies in the course of a game, even with a dedicated trap deck. This would best in situations were you would really prefer not to be engaged with an enemy from the outset, such as Massing at Osgiliath, Peril in Pelargir or Escape from Umbar.
MotK Merry: Spirit Merry

As MotK Merry’s ability does not affect your characters when it is triggered, the only things that you are gaining from this combination are a very low starting threat Hobbit with 2 willpower, which is in itself not a bad thing, and access to the Leadership sphere. This might be a perfectly good mix to justify taking MotK Merry were it not for one other Hobbit: Rosie Cotton. She is able to add her willpower to any other Hobbit’s statistics every time she exhausts, which can happen multiple times when she gets a copy or two of Fast Hitch on her. Now it cannot be denied that Spirit Merry’s ability is worth 3 resources, we have already discussed this above, but unless you are desperate for other hero slots you would be better off taking MotK Rosie and Spirit Merry in place of this, and using your spare 3 resources elsewhere.
MotK: Tactics Merry
See the above entry, substituting ‘Spirit Merry’ for ‘Tactics Merry’.
MotK Nori: Nori

This is one of those abilities that will give you more return the earlier you get it in play. The obvious comparison should be to Galadhrim’s Greeting, assuming you have access to the Spirit sphere. For the same cost as Thorongil you can drop your threat by 6, so this ability is really only worth it if you can play more than 6 Dwarf allies from your hand by the time the game ends. If you have gone for MotK Nori, which will certainly be a help in certain Dwarven decks, it can safely be said the best hero to pair him with would be Leadership Dain, taking MotK Nori up to a comfortable 3 attack, and being in the correct sphere for various weapon attachments, such as Dwarrowdelf Axe or Warrior Sword. This is also the best pairing to make the most of Nori’s ability, as we can assume you will be wanting to flood the board with as many Dwarf allies as possible to make the most of Leadership Dain’s willpower and attack boosting capabilities. While Nori’s ability is a passive effect, and as such he can be kept ready to attack throughout the game, you do need to be careful with the wording of it. It is only triggered when allies are played from your hand, which disqualifies various effects that put allies into play, such as Fili / Kili, A Very Good Tale or Sneak Attack. But with the resource acceleration and card draw that Dwarves have easy access to, it shouldn’t be too much of an issue to gather your army and unleash them upon your foes. This will serve you particularly well in quests where you would profit from building up your forces, or ‘turtling’, before advancing to a more difficult stage of the quest. Examples of this might include The Watcher in the Water, To Catch An Orc or The Black Serpent.
MotK Pippin: Spirit Pippin

Let’s acknowledge once again the fact that Spirit Pippin’s ability is widely considered the worst that any Hero possesses. Now that’s out of the way, let’s assume you are running an all Hobbit-deck specifically designed to work with Spirit Pippin. So why exactly does this and MotK Pippin not work together? Well the latter is reliant on engaging enemies with a higher engagement cost than your current threat in order to attack them, the former raises your threat to avoid engaging enemies. They operate in different realms of deck function, and the cost of Thorongil is not justifiable in this pairing, unless you want to try it for the sake of experimentation in Passage through Mirkwood.
MotK Pippin: Lore Pippin

Conversely, these two fit together as though they had been designed at the same time. Lore Pippin makes it easier to consistently trigger MotK Pippin’s ability, and even allows you to draw a card whenever you do so. The more Hobbit heroes that you have, the higher you shall raise the engagement cost of your enemies, and so the more you can ready Pippin, boost his attack and draw a card. Raising the engagement cost of enemies means that you can pick them off at your own pace, and is an extremely rare effect in the player’s repertoire, largely confined to Hobbits and Rangers. Again, the earlier you use Thorongil here, the better use you will make of this combination, but there is no limit on the amount of cards Lore Pippin can cause you to draw so this purchase has the potential to become very profitable very quickly. This will find its use in any quest, but perhaps especially in ones where the enemies can be handled one or two at a time but you may be overwhelmed in larger groups, such as in Across the Ettenmoors or Fog on the Barrow Downs.
MotK Price Imrahil: Leadership Prince Imrahil
As taking MotK Imrahil clearly contradicts the text of the ally, you really ought to be looking elsewhere for a Spirit Gondor hero.
MotK Price Imrahil: Tactics Prince Imrahil
See the above entry.
MotK Quickbeam: Quickbeam
I’m afraid there is no two ways about this. Given that MotK Quickbeam has only 3 hitpoints, and that you are likely to damage him during Set-Up to have him ready from the beginning, adding on the Hero Quickbeam’s ability that costs 2 damage, unless you have a lot of reliable healing this is not a hybrid that is worth your while.
MotK Sam Gamgee: Sam Gamgee
This may be an option to consider if you are planning on running an all Hobbit deck, especially alongside Spirit Frodo. If you send Sam to the quest, and then a Doomed event or a threat-raising enemy comes off the encounter deck, you can ready Sam up for a Spirit resource as well as boost his stats. Alternatively if Spirit Frodo raises your threat to avoid taking damage, this affords you the same opportunity. By paying for Thorongil you can circumnavigate MotK Sam’s ‘Once per round’ restriction, allowing you to ready Sam if you engage an enemy with a higher engagement cost than your threat, and increasing each of your stats for every enemy you engage in this manner. The low threat of 6 that MotK Sam contributes means that it is more likely that you will be able to achieve this condition, and paired with two other Hobbit heroes it is probable that you can stay in Secrecy for the first few turns of the game. Whether this is a cost effective use of Thorongil can be debated, though extra action advantage and increased stats is certainly never a bad thing and your mileage will vary according to the deck you play and the quest you are up against. Typically expect this to do better in quests with high engagement cost enemies so you can maximise the times you can take advantage of these benefits, such as We Must Away, Ere Break Of Day and A Knife in the Dark.
Miscellaneous
Kahliel: TLAoM Kahliel

Now I know this is a bit of an oddball, but according to the rules insert in Sands of Harad, the Objective Heroes that come with the quest The Long Arm of Mordor technically have both the Objective and Hero cardtypes. Now whether you should consider them eligible for Thorongil is up for some lively debate, but for the sake of completion I have included them here. I wouldn’t advise trying this on with a group of players you are unfamiliar with, as they might not take too kindly to you blocking their Motk Legolas / Tactics Legolas with your TLAoM Objective Hero hybrids. One thing to bear in mind as well, if you do choose to make use of the Objective-Heroes as potential targets for Thorongil, remember that each of them bears the text ‘If *** leaves play, you are eliminated from the game.’ This would then apply to the hero you have attached Thorongil to, but it still is true for the hero you have attached on using Thorongil. This means that if for some reason Thorongil leaves play or is blanked, you would then be eliminated from the game. So all that said, what would such a Frankenstinian creation look like?
Well this first one looks pretty appealing, if you can get it out early enough. For the cost of Thorongil you will be getting an improved Resourceful that can give out its resources to any other hero in the game, giving you some pretty impressive sphere smoothing. After 3 turns of using this you will have made back your money, and from that point forward you will be making a profit, so the earlier you grt this out the better off you will be. Now Kahliel himself is a decent target for this ability because he can pay for Harad allies irregardless of their sphere. One word of caution: make sure Kahliel is your last man standing. The last bit of text Kahliel will gain from TLAoM Kahliel is the caveat that if he leaves play, you are eliminated from the game. No pressure. Theoretically this would be good for just about any quest, but especially so in quests that tax your resources, such as The Hunt for Gollum, The Druadan Forest or Fog on the Barrow-downs.
TLAoM Kahliel: Kahliel

This version is only playable during the quest The Long Arm of Mordor, so this has very limited scope. For the first half of that quest, the first card each player plays does not require a resource match. Much of the utility of getting Thorongil here is giving him the Leadership icon so you can contribute resources toward that sphere. As well as that, he can pay for Harad allies from any sphere of influence, so this becomes less valuable if you are playing with more than one player as the pool of available Harad allies decreases. However he can ready any Harad character, which does include the other Objective-Heroes, by discarding a Harad ally from your hand. In this quest you are heavily pressed for resources however, and you would probably only be able to afford paying for this toward the end of the game, at which point it simply becomes a ‘win more’ card as opposed to being able to bail you out of trouble. If you want access to the Leadership sphere, I would suggest including Song of Kings and spending your spare 2 resources on something more immediately useful.
MotK Firyal: TLAoM Firyal

One of the most powerful MotK heroes, able to quest for 3 and filter through the encounter deck as she does so. Single-handedly MotK Firyal turns any solo game onto Easy Mode as you can see exactly what is coming and choose if you want to gamble on something else. So is it worth 3 resources to let her double that capability? In a word: maybe. It depends on how many players you are running, and what the top card of the encounter deck is. You see, the two abilities trigger one after the other, not simultaneously. So after committing to the quest, Firyal would look at the top card of the encounter deck, choose whether or not it needs discarding, and then do that a second time. She does not get to look at the top 2 cards, only the top card twice, which may or may not have changed. Now this opportunity may be a life-saver and getting to avoid back-to-back Sleeping Sentries or a brace of Mumaks will be worth the cost of admission if you only did it once. But on the other hand, you may never get to use it and your 3 resources will have been for naught. What you are paying for here is your insurance. You may never have to use it, but you will be glad of it when the worst happens. This can be especially the case in quests that feature potentially game-breaking treacheries, such as Road to Rivendell, Peril in Pelargir or The Nin-in-eilph.
MotK Jubayr: TLAoM Jubayr
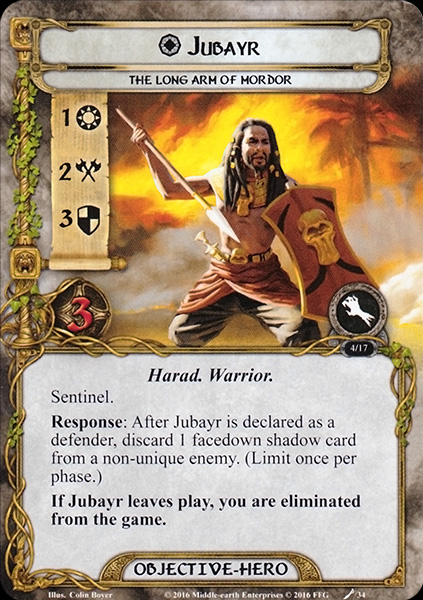 Originally I made a mistake on this one, so for those of you who have been led astray by my bad judgement, I apologise. We all know how much of a difference it can make to discard even a single shadow card. That is why A Burning Brand is still one of the reliably dependable options for a defender to choose, even after the Errata. So being able to do it not only once, but twice per phase can make an incredible difference in being able to determine how well combat goes as you can predict exactly how much each enemy will be attacking for. Once you get an Armored Destrier on him as well, you will barely have to consider shadow cards again for the rest of the game. Of course there is still that phase restriction, so the best time to wring as much value out of this hybrid as possible is to get readying attachments for him when you are facing enemies that attack outside of the combat phase, such as can be found with the Wild Bear in Road to Rivendell or the Huorns with The Forest’s Malice in Into Fangorn.
MotK Yazan: TLAoM Yazan
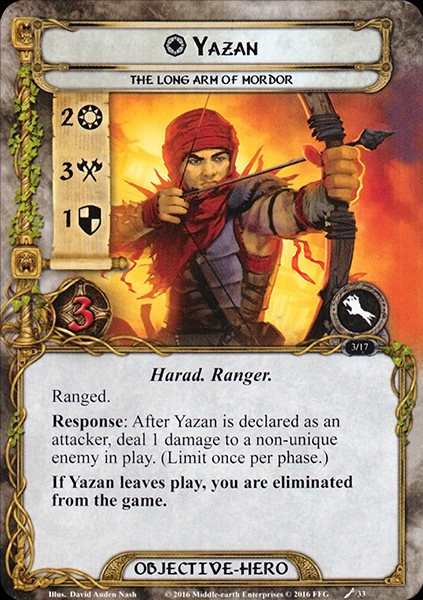 Much like with Jubayr above, I had originally misinterpreted this combination. So let’s try again: by doubling Yazan’s direct damage dealing ability, you rapidly accelerate the amount of damage he will be dishing out each and every turn. What makes this extra special is that his two points of damage get triggered separately, and so can target two different enemies or the same one. This can be enough to finish off either the enemy you are attacking originally, another weakened enemy elsewhere on the board, or soften up an all new enemy for a second attack. The best way to make the most of his direct damage is to use events like Quick Strike or Battle Fury to strike at enemies outside of the combat phase, ready him up with a Rohan Warhorse and go again at the usual time. The vast majority of enemies cannot survive 4 hit points of direct damage, including a fair number of significant ones, such as the Patrol Leader from Into the Pit, Na’asiyah from Raid on the Grey Havens and the Dragon Hatchling in The Withered Heath.
OHUH Gandalf + Narya + Sword-thain: Gandalf

This is a bit of an unusual set-up, but here we are. MotK cannot be played on Neutral allies, disqualifying characters like Radagast and Treebeard. But by putting Narya on OHUH Gandalf, you grant him the Leadership sphere, making him an eligible target. Now granted you could also do this to Core Gandalf, but he goes away at the end of the round, so it really isn’t worth the trouble. Not to say that keeping OHUH Gandalf in play is straightforward either, you need to raise your threat by 2 at the end of each round to do so.

Now whether or not you decide it is worth your while to play Thorongil on Gandalf is completely up to you. In order to make a Gandalf deck truly shine you need to have his various toys in play, such as Wizard Pipe, Flame of Anor and probably Imladris Stargazer. By paying for Gandalf, Narya, Sword-thain, Thorongil and Wizard Pipe you have set yourself back 15(!) resources, which is a pretty hefty pill to swallow, not to mention it requires you getting 5 different cards in place. This is certainly not a competitive build by any stretch of the imagination, and your entire deck will need to revolve around getting this up and running. However if you want to give it a shot then go for it, and may Iluvatar bless your efforts.
Conclusion
Now as I have said, this list is just one player’s thoughts. For this one card unlocks a vast number of possibilities, and there are more things in heaven and earth, dear player, than are dreamt of in our philosophies. But if this is to be the final great swan-song of this game that we know and love, there is little better that it could be than this song, which seems to come like a pale light behind a grey rain-curtain, until at last being rolled back we see this completed card game opened before us, under a swift sunrise.

Fantastic article! I enjoyed the niche cases in particular 🤗.
LikeLike
Wow, there’s so many possiblities here I can’t even fathom.
LikeLike
I think the Yazan/Jubayr abilities can be used together — even though the wording is exactly the same, they are different instances of the response, and *each one* can be used once per phase. It’s not conceptually different than the “once per phase” limitation on Gondorian Fire or Blood of Numenor, where you can have multiple copies of the card and use each one once per phase.
LikeLike