With the assault on Dorwinion now behind you, you start to find the man responsible for the siege. This leads you to the city of Ulfast on the shores of the Sea of Rhûn. But finding one person in a city isn’t easy, especially if you want to avoid getting found. That’s because the City Guard of Ulfast is one of the strongest enemies ever to be printed on a card. Stronger than some versions of Balrogs and Dragons, the City Guard will tear your deck to shreds if it finds you. So the goal of this quest is to lie low and avoid capture. But that won’t be an easy task to do, with 4 quest cards and several side-quests required to complete. This quest does not really borrow much from other scenarios, so it is difficult to compare it to any other quest that you might be more familiar with. The only parallel is that you want to keep a low profile like in Trouble in Tharbad to avoid enemies and get to the end. But the mechanics of this quest are quite unique, which makes the quest a lot of fun, even if you get smashed the first few times you attempt this quest blind.
The City of Ulfast

- Found in: The City of Ulfast Adventure Pack, Vengeance of Mordor cycle pack 2
- Official Difficulty: 6
- Community Difficulty: 7.1
- Encounter sets: The City of Ulfast, Servants of Sauron, Under Guard (Note: City of Rhûn is not a part of this encounter deck, how obvious it might seem at first!)
- Quest cards: 4
- Play if: You want to play a really immersive quest with a big threat hanging over your head. You enjoy City-based quests where you have to lie low in order to progress (think Trouble in Tharbad). You are playing a deck with very few characters and want to be rewarded in some way for that.
- What is different about this quest?: A great narrative of you trying to keep a low profile. Enemies reduce their engagement cost as you stay longer in one place. Heavy focus on increasing your threat. Constant threat of a big enemy that can engage you if you stall too long.
- Solo or multiplayer?: That’s a difficult question. I would recommend going for lower player counts against this one, as more players means more cards to be revealed each round that can cause you to raise your threat. Each player must also be able to defend (multiple times) against the City Guard. However, higher player counts also have the advantage that more players can attack the City Guard and deal with the extra enemies in case another player is already engaged with the Guard. More players also makes it easier to quickly clear the game’s later stages, though location lock will soon become an issue. I would go for 2 players, but with the right decks, any player count is possible.
- Can I bring side-quests to the game?: No, I do not recommend doing this. The quest itself already has 3 side-quests in the encounter deck, each of which adds a difficult passive ability to the game. If you are going to stall for even longer by not clearing the main quest as fast as you can, then the City Guard will find you and continue to make attacks until you give up. There is very little time to clear player side-quests, except maybe on stage 1. Even then, it is better to wait until an encounter side-quest is revealed, which won’t take long in my experience.
- What to look out for: A lot of threat raising abilities in the encounter deck outside of the Doomed keyword. City Guard has a 9 attack and will be making attacks against you throughout the game. Location lock can be an issue, especially if Unwelcome Travelers is in play.

The Quest
Setup

The quest begins with the players adding the City Guard to the staging area. They start with a threat of 1 at this point, but that will grow as the players take longer at any stage. Each player also searches the encounter deck for a different location and adds it to the staging area. There are quite a few options for this, but let me explain which ones to pick first and which ones to avoid altogether.
Streets of Ulfast are an easy pick at the start of the game, as the threat on it won’t be too high. The travel cost will also only require players to raise their threat by 1 on turn 1, which is easy enough. Revealing this location later in the game can cause it to be 4 or more threat all of a sudden, so you can better have one in the staging area, to begin with, and explore early. The second location that is nice to have early on is the Crowded Market. While the travel cost on this location can be dangerous, the ability to give the City Guard +20 engagement cost is very significant later on. It’s nice to have this option in the staging area, and if you do not need it, it is easily explored with Asfaloth, thanks to its 2 quest points.

The remaining 4 locations are all pretty bad to leave in the staging area for long. The Catacombs will prevent players from damaging enemies in the staging area, Side Street prevents progress from being placed on locations in the staging area, King’s Lawn causes extra threat increases during the Refresh phase, and Guarded Archway prevents players engaged with the City Guard to lower their threat. Initially, I would go with the Guarded Archway, as the City Guard won’t engage during the first round (unless you get unlucky or are bringing the wrong deck). From there, I would recommend either the Catacombs or Side Street for the fourth player. Catacombs has my preference, as it is more common to have location control with 4 players than direct damage or Rohan decks that want to deal damage in the staging area. But this depends on the decks that everyone is bringing. Leave the King’s Lawn in the deck though, as the extra threat increases will force you to engage the City Guard faster.
After each player has added one different location to the staging area, the players shuffle the encounter deck and advance to side B of this quest card.
Quest card 1: Searching for Ulchor – 5 quest points

The first quest stage is the easiest, and players new to this quest make the mistake of rushing through it in one or two turns. As your threat will be quite low still, and the quest card is easily explored, you don’t usually have to worry about the City Guard just yet. Take this time to get your decks going and prepare for the rest of the stages. You should at least get a way to lower your threat and get a reliable defender on the board during the opening stages. In the meantime, try to clear the board of as many locations and enemies as possible. This will be easier to do in lower player counts, as the setup for more players includes quite a lot of locations that start in the staging area.

The quest card itself has some text that will reappear on the other quest cards as well in some manner. The City Guard can only take 5 damage at this stage, which isn’t too important, as you are probably not prepared to deal damage to the City Guard yet. But the City Guard cannot heal during this quest, so any damage you do this early on will only help later in the quest. The more important line of text here is that the City Guard will get -5 engagement cost for each resource on the main quest card. All quest cards will accumulate resources during this scenario, symbolizing the time you spend in the city. The more resources are on the quest card, the more that the City Guard is aware of your presence. When the engagement cost of any player is equal to or higher than the City Guard’s, it will be considered engaged, which means you have to start defending a 9 attack enemy.
These resources on the quest card can be obtained in a variety of ways. The most common is the Forced effect on the quest card that places a resource at the end of each round. This acts as a timer to make sure players don’t stall too long at one stage. Other effects can include the travel cost on the King’s Lawn, treacheries like Patrolling the Streets, and from enemies like the Ulfast Sentry and King’s Elite. Players usually have about 3 or 4 resources before they start to become engaged with the City Guard unless they start with a really low threat. Don’t rely on being able to stay in Secrecy for long though, as the encounter deck has a lot of ways to raise your threat to ensure that you meet the City Guard soon enough. These are just small increases in threat over time. That means that early on, you won’t notice the threat increase too much, but the accumulation of this extra threat each round will cause you almost always to be engaged with the City Guard later on. But for now, that’s not yet a concern.
This first quest card only requires 5 progress to clear. This won’t take very long to do, but be careful not to progress too fast. Take 2 or 3 rounds at this stage to complete it. This gives you enough time to advance to the next stage before the City Guard engages you and starts causing trouble.
Quest card 2: Trying to Blend In – 10 quest points
After entering the city, you must now try your best not to attract any attention to yourself. That might cause the City Guard to engage you and start swinging their polearms at you for 9 attack strength per attack. When the players advance to this stage, they each have to decide whether to increase their threat by 5, or to reveal an additional encounter card. Since the players probably just finished the quest phase, they will already have plenty of new encounter cards in the staging area, so the threat will seem to be a better option here. However, 5 threat can push you beyond the engagement cost of more enemies, which can cause a more intense combat phase coming up. Sadly, you cannot counter the 5 threat with Free to Choose, as the threat does not come from an encounter card but a quest card. Considering that you just reset the resources on the main quest, and you are still in the early game, the 5 threat is the more attractive option. This will mean that the City Guard needs fewer resources to engage you, but you hopefully have a way to reduce your threat before that time.

Flipping over to the B-side after each player has made their decision, the players are faced with a relatively empty quest card. The City Guard can now take a maximum of 10 damage instead of 5, and it still gets -5 engagement cost for each resource on this quest card. Luckily, the resources have been removed from the quest card, so you start again with the City Guard at 45 engagement cost (not counting any other encounter cards that could influence the engagement cost). Use these few rounds of breathing space to get rid of other enemies instead and start making progress on the main quest.
The quest itself requires 10 resources, which is double that of stage 1B. This is a large difference, especially for solo players who have to balance the combat with making enough progress. A lot of playthroughs strand on this stage, as players are unable to overcome the threat in the staging area within the time they have before the City Guard engages them again. Make sure to have some progress on this stage early on, allowing you to advance whenever you would like. This gives you an easy escape from the City Guard once it starts engaging all players.
The City guard itself will now be able to take more damage. It is advised that if the City Guard is starting to engage players, the players start dealing damage to the City Guard again. Otherwise, the players have to put a lot of damage on the City Guard at once on the final stage, which might be too difficult without single-use attack-boosts like Black Arrow and Tactics Éowyn. Any damage you deal will stay on the City Guard until the end of the game, so that’s already a big step forward!
After about 3-4 rounds, players will want to start advancing from this stage. The number of resources will start to become problematic, and the City Guard will already have made a few attacks by now. By placing the 10th point of progress on the main stage, the players will immediately advance to the next stage. This again removes all resources from the main quest.
Quest card 3: Drawing Attention – 15 quest points
We move on past the halfway point and are again faced with two options. Each player must either raise their threat by 5 or the City Guard makes an immediate attack against them. The threat option will be less appealing here, as players will likely be approaching the 40 threat at this stage if they haven’t surpassed it already. Raising it again by 5 will cause players to have to engage the City Guard regardless and take on more attacks. It is better to deal with an attack right now and have another round or two to recover. Again, this choice depends a lot on the situation and the deck that you are playing. If you have been reducing your threat a lot during the game, then taking 5 more threat shouldn’t be a problem. Or, if you have a reliable way to defend the City Guard, then your preference will likely be to take the attack. After each player has made their choice, the quest card is flipped over to side 3B.

There isn’t much new to stage three for those keeping track of the patterns in this quest. The City Guard can now take 15 damage and still gets -5 engagement cost per resource on the quest card. The quest card gets a resource at the end of the round, just like the previous 2 stages. The only thing that is worth noting is that the players will have to hurry through this quest card, as the players will be approaching the engagement cost of the City Guard, perhaps even without resources on the quest card already!
With 15 progress required to beat this stage, players will have to dedicate quite a few characters to the quest in order to get through it before it is too late. Solo players will struggle here, though it is impossible to have a good team of questing characters and keep a relatively empty staging area. Take advantage of the low threat of cards like the City Guard and Streets of Ulfast during the first few rounds for a lot of progress. After the 15th point of progress has been placed on the quest card, the players advance to the final stage.
It is beneficial to the players to get the City Guard up to 15 damage at this point so that the final quest stage won’t take forever. If the players have neglected the damage on City Guard for too long, then the final stage will take a lot longer, and you’ll be facing more attacks from the City Guard.
Quest card 4: Ulchor’s Trap – 20 quest points
Transitioning to stage 4, you no longer get a choice presented to you. Instead, the encounter discard pile is shuffled into the encounter deck, and the players discard cards from it until each player has discarded an enemy. Add these enemies to the staging area. This does not trigger any When Revealed effects, allowing you to bypass some nasty effects like Ulchor’s Agent and Messenger of Mordor.

Flipping over to side 4B, the quest finally reaches its climax. The City Guard can now take damage equal to its hitpoints, but note that it cannot get more than 20 damage in total. This is fine, as the quest has no way to heal the City Guard. The players will have to get the City Guard to 20 damage if they want to win, as it is one of the requirements as stated on the quest card. The other requirement is getting 20 progress on the main quest. This means that the players who have already dealt 15 damage to the City Guard before advancing to this stage, only need 5 damage and can then try to burst through the quest card, throwing every bit of willpower they have at the quest. This can be a risky strategy but if you are able to keep a defender or 2 back, it will most likely win you the game within 2 rounds at this stage.
If the players have not yet dealt enough damage to the City Guard, they will have to try and get the 20 damage on them over the course of several rounds. Try to balance progress on the quest with damage on the City Guard so that you meet both requirements at about the same time. If you still have time before you have to engage the City Guard at this point, try to deal with other enemies first, before you have to do everything at the same time.
Remember that while the City Guard may get damage equal to its hitpoints, it is Indestructible, and won’t leave play. It will remain attacking each round against engaged players until they place the final point of progress on the main quest. When that is done, the players have defeated the quest and are taken prisoner to the king of Ulfast.
The Encounter Deck
Global
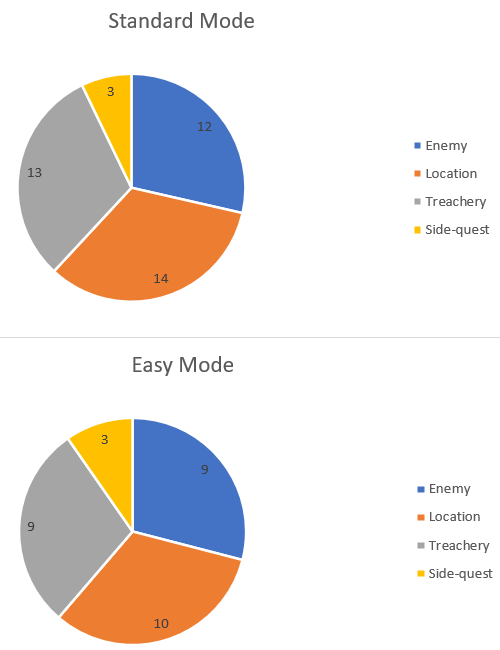
- The encounter deck is made up of 42 cards in total. This is reduced to 31 in Easy mode.
- The chances of hitting a shadow effect are 55%, but will depend on what other cards are already in play.
- The average threat per card that gets revealed from the encounter deck is 1.4 threat per card between both modes. This varies from 0 threat side-quests and treacheries to 4 threat locations. It can also get worse if you are accumulating a lot of resources on the main quest, which can cause Streets of Ulfast to blow up to 5+ threat.
- The surge keyword isn’t very common, only appearing on 3 cards. There are a few other effects that reveal more encounter cards, like transitioning to stage 2A or the travel cost on several locations.
- The Doomed keyword only appears on the two copies of Overwhelmed. But don’t think that threat is an issue here. A ton of other cards will raise your threat outside of the Doomed keyword, making it a common cause for losing against this scenario.
- Immunity
- The City Guard is Indestructable and immune to player card effects
- City Guard can only take as much damage as specified by the main quest card.
- While Guarded Archway is in the staging area players engaged with City Guard cannot reduce their threat
- The King’s Elite cannot have player card attachments
- While Side-street is in the staging area, progress cannot be placed on other locations in the staging area
- While Catacombs is in the staging area, players cannot deal damage to enemies in the staging area (note that this does not include City Guard, who is considered to be engaged with anyone who’s threat is higher than its engagement cost).
These statistics do not include the City Guard, as that enemy never enters the encounter deck. The statistics also assume that there are no resources on the main quest; otherwise, the threat of the Streets of Ulfast will be higher than the assumed 1 I put in for this analysis. Overall, the quest is decently balanced in its composition. However, the three side-quests will be troublesome if they are all revealed around the same time. Locations are also a bit more abundant, causing players to have to make sure that they travel each round in order to avoid location lock.
Enemies
The city of Ulfast is home to many Easterlings. And while some might not really care about your heroes walking the streets, there are many spies of Mordor within their ranks. They would not hesitate to waylay you long enough for the City Guard to find you. The city also has a lot of security forces patrolling the streets or guarding areas. Best avoid them if you can. The other enemies in this encounter deck have been covered in the Danger in Dorwinion quest analysis.
- City Guard: Being the main antagonist of this scenario, I have already spent plenty of time discussing the City Guard. This enemy will be a constant threat to your team and will be considered to be engaged with you each time your threat is higher than the engagement cost of the City Guard. This is brought down through resources on the main quest as well as copies of Extra Vigil. This enemy hits hard, and with shadow effects punishing you for chumping, it is advised to get a hero like Spirit Dain or Beregond operational as soon as possible so that you can tank the 9 attack from this enemy. Note that 9 is only the base value and that there are shadow effects like those on Patrolling the Streets that boost the attack value a lot higher. Eventually, you will have to chump some of the attacks. This is where Silver Lamp will come in useful, as you will get to see the shadow cards when they are dealt to the City Guard. If the shadow effect does not punish chumping, it will be easiest to throw a cheap ally under the bus.
Attacking the City Guard isn’t easy either. They have 4 defence that you have to get through before you can start chipping away at the 20 hitpoints. Note the damage cap for the City Guard on each quest card and the Indestructible keyword on the Guard. While you will have to deal 20 damage over the course of the entire quest, you cannot send everything you have at once against the enemy. It will be best to try and deal damage whenever you end up engaged with the City Guard so that you don’t have to start dealing 20 damage by the end of the game when you are nearly threated out. In case you do fall behind dealing damage to this enemy, some large attacks should help you balance the scales a little bit. Try to use, for instance, Tactics Eowyn’s ability or the Black Arrow for a good chunk of extra damage. The quest cannot be won unless the City Guard has taken 20 damage, so you’d better prepare for this enemy! - Ulfast Sentry: Aside from the main city’s guard, there are also sentries around the city that will try to waylay you. This enemy has considerably worse stats but will be quite dangerous if the players stay at one stage for too long. The Forced ability on this enemy is also problematic, as it will often trigger thanks to the low engagement cost of this enemy and the fact that this quest really tries to push your threat higher and higher. First things first, the Ulfast Sentry has 2 threat and an engagement cost of 25. This will ensure that the Sentry will engage you pretty much in the same round as they are revealed. When they engage a player, that player has to make a choice between either adding a resource to the main quest or the Ulfast Sentry makes an immediate attack. The extra attack is usually the best option here, as you will want to avoid adding more resources to the main quest. Not only will the resources boost the attack of the Sentry, but they might also cause the City Guard to drop its engagement cost below your threat. That will cause it to make an attack against you during the combat phase, and potentially against other players too! I would personally much rather have an extra attack from this enemy than get attacked by the City Guard.
When engaged, the Sentry will attack with a variable attack strength. This value is always one more than the number of resources on the main quest. If you are getting swarmed by enemies and need a break, then this would a perfect time to bust out Revealed in Wrath, allowing you to blank the textbox of this enemy, causing it to attack for 0. The Sentry doesn’t take much effort to kill, thanks to its single point of defence and 3 hitpoints. This makes it a very easy target for direct damage effects but also makes it easy to deal with if you select the “makes an immediate attack” option and use Grimbeorn’s action to kill him. There are plenty of characters who, on their own, can kill the Sentry already, and even some weaker allies can team up and get to 4 attack together. - The King’s Elite: As if the City Guard wasn’t enough, the quest throws another tough enemy your way that will be difficult to defeat if you are preoccupied with other enemies. The King’s Elite is the strongest regular enemy in the encounter deck and will hit your characters for 5 if you end up engaged with it. The enemy also comes with immunity to player card attachments. This is odd to throw on a regular enemy but starts to make sense when we look at the Forced effect on the King’s Elite. This instructs the players that they must add a resource to the main quest each time that the King’s Elite attacks. This is obviously not desired, and it’s where I would usually recommend keeping the King’s Elite engaged and put a Forest Snare on them. Unfortunately, that’s not possible, thanks to their immunity. However, you can still prevent this enemy from attacking by using events and attachments on your heroes! Think of cards like Feint to prevent the King’s Elite from attacking or cards like Quick Strike and Roheryn to attack the enemy before they get the chance. Players can also use direct damage effects to try killing the King’s Elite while they are in the staging area (assuming Catacombs isn’t in the staging area as well) or when the enemy engages you. If you do happen to take an attack from this enemy, try to retaliate immediately by killing them. This isn’t an easy task, as they have 5 hitpoints, but you can easily get through the 2 defence. As long as you kill them in the round that they engaged you, you should be fine. Otherwise, the resources on the main quest will accumulate a lot faster, and you will eventually be overwhelmed by the different card effects in the game that benefit from the main quest having a ton of resources.
The shadow effect on this enemy also deserves special mention. This effect will cause the attacking enemy to attack the same player again! The worst-case scenario for this effect is, of course, the City Guard, as players will likely have to chump twice in one round, which might not be possible. This shadow card also synergizes well with the enemy on the same card. If the King’s Elite gets this shadow effect for his first attack, you will have to place another resource on the main quest if you cannot cancel the second attack. Shadow cancellation should focus on this effect, so you always have a safety net against this card. - Ulchor’s Agent: Finally, we have one of the more annoying enemies in the scenario, and I’m not just talking about the awkward face made by the merchant in the art. Ulchor’s Agent is annoying thanks to its When Revealed effect. This forces all players to raise their threat by 3. There are luckily only 2 copies of this enemy in the game, but it will still feel like there are a lot more if you are unlucky. The When Revealed on this enemy could be cancelled with cards like the Dunedain Lookout, or you can invest those resources in more threat reduction cards. Once in play, Ulchor’s Agent will add 3 threat to the staging area, but with an engagement cost of 32, it won’t be too long before he engages a player. When engaged, the Agent is a pretty standard enemy that hits for 3 and takes a total of 6 attack to kill. If you don’t want to deal with this enemy, a simple Sneak Attack + Gandalf will take care of him, but I would recommend you use that combo to drop your threat by 5 instead for this quest.

Locations
While the City of Rhûn encounter set is not a part of this encounter deck, there are a lot of other locations that you will still have to explore in order to find traces of Ulchor (and clear the threat in the staging area as well). The locations unique to this quest are discussed here. The others have already been mentioned in the Danger in Dorwinion article.
- Guarded Archway: Our first location has relatively standard stats. At 2 threat, this location isn’t really a priority, though the Unwelcome Visitors side-quest can likely persuade you to travel here in order to avoid the extra threat from the side-quest. The 4 quest points on this location will take some time to clear with cards like Asfaloth, so I would recommend players to use Evening Star for this one. And you will want to look into clearing this location as quickly as possible, as it has a nasty passive ability while the Guarded Archway is in the staging area. Each player engaged with the City Guard (having a threat higher than its engagement cost) cannot lower their threat. This means that once you are engaged with the City Guard, there is no escaping it by lowering your threat back down. This location is the reason why you should use your threat reduction before the staging step of the quest phase. You might end up revealing the Archway and having no escape from the City Guard. Luckily, players who are not yet engaged with the City Guard are free to lower their threat, as usual, allowing them to avoid the Guard for a little while longer.
Aside from clearing this location in the staging area, another path to get rid of this passive ability is to travel to the location. This does come at a cost though: the City Guard will make an attack against the first player. If you are at an early-round of the stage and you won’t suffer many attacks from the City Guard after the travel phase, you should be able to use a big defender against the enemy and fulfill the travel cost. Players can also use Thror’s Key to blank this location, which is an often-used strategy to just accept that this location will remain in the staging area but not do anything. - The King’s Lawn: Better explore this location quickly before the king comes out and starts screaming at you to get off his lawn! This location has the highest printed stats of the new locations will be difficult to clear thanks to its 5 quest points. That’s 5 progress that won’t go to the quest, which can be problematic during the later stages that require a ton of progress to clear. Woodmen’s Path will help with clearing this location when it is the active location. Players will want to make the Lawn the active location, as it has a passive ability while it sits in the staging area. This passive ability makes sure that the players will be engaging the City Guard faster, as they will have to start raising their threat by an additional point during the refresh phase. Since this will increase the rate at which enemies are engaging you, and with players eventually threating out faster, this location will have a high priority to travel here or to try and clear the location while it is in the staging area (assuming Side Street is not in the staging area).
Travelling to the King’s Lawn is also an option, though it does come at a high cost. The players will have to add a resource to the main quest in order to travel here. This reduces the engagement cost of the City Guard by 5 and also boosts the attack of the Ulfast Sentry. If the players are counting on advancing soon, then this is not as high a cost, but if you are still avoiding the City Guard and cannot afford to engage it a round earlier than normal, then it will be better to clear this location in the staging area or find a way around the travel cost. If you are going to attach Woodmen’s Path to this location, then South Away is an easy way to travel to this location and get a slight reduction in threat as well! - Streets of Ulfast: Aside from the City Guard, this location will also be affected by the players stalling at a stage and accumulating more resources. The Streets of Ulfast have a variable threat of X, where X is one more than the number of resources on the main quest. This makes it just a 1 threat location at the start of each stage, but it will quickly grow to a 3 or 4 threat location. Especially during the final two stages, where players have to put quite some effort into clearing the main quest, this location can get quite annoying. It is usually best to travel here whenever you advance to a new quest stage, as that means that the travel cost of this location isn’t horrible. This travel action requires each player to raise their threat by X, which will again be one more than the number of resources on the main quest. It is easier to raise your threat by 1 than raise it by 5 if you decide to travel here before you advance the quest. It should be noted that this threat increase can cause other effects, like the Servant of Sauron making an immediate attack. This also has the potential of being the biggest jump in threat that players can encounter during this scenario, so save events like Free to Choose for this occasion. The 5 quest points on this location make it difficult to clear in the staging area, though you can slowly chip away at it if you really don’t want to travel here. Streets of Ulfast are also an ideal target for Thror’s Key, which turns this location into a 0-threat location for the rest of the game. There will be multiple copies in the deck, though, so you will have to get creative with the other locations.
- Crowded Market: This final location is actually a beneficial one, where players are able to avoid the City Guard for longer. Crowded Market does have the lowest stats of any location in play, so if players are exploring locations through the use of Northern Tracker, they better travel to this location quickly before it is explored within 2 turns. The benefit of having the Crowded Market as the active location is that the City Guard is distracted by the other people there, thereby increasing its engagement cost by 20. That is 4 resources worth of engagement cost, which will likely allow the players to avoid the City Guard while the Crowded Market is in play. However, thanks to the low number of quest points and the fact that the players cannot really avoid putting progress on the active location if they want to make progress on the main quest, the Crowded Market will likely only buy you one turn of peace, before the players clear it and lose the benefit. A strategy around this is to push the Crowded Market back to the staging area after the combat phase and swap it for another location that you can clear during the quest phase. West Road Traveller and The Hidden Way will help with this, allowing you to push the market back so you can travel to it again and benefit from the +20 engagement cost again next combat phase.
All this travelling to the Crowded Market is not free, though. The location has a Travel cost that must either be paid in full, or avoided in order to make the Crowded Market the active location. This cost will see the players shuffle the encounter discard pile back into the encounter deck and then discard cards until an enemy is discarded. Add that enemy to the staging area. With a bit of luck, you hit an enemy like Servant of Sauron or Ulchor’s Agent with this effect. It circumvents their When Revealed effect and Surge keyword, which are often the worst parts of these enemies. This travel cost is also a bit easier to take on if you have no other enemies in play. You no longer have to worry about the City Guard (most likely at least), so an extra enemy to keep your combat characters busy with will be welcome!

Treacheries
Aside from the treacheries you have already encountered in previous scenarios, there are 3 new treacheries to watch out for in this quest. Most of them deal with increasing the threat of all players and making sure that the City Guard finds you sooner than you anticipated.
- Patrolling the Streets: When a quest has mechanics that either add or remove resources to a card, you can count on it that there will be a treachery that adds or removes tokens a little faster. Patrolling the Streets is that card for City of Ulfast. When this card is revealed, the players must add 1 resource to the main quest. This lowers the engagement cost of the City Guard but can also increase the threat of certain enemies and locations. Then, the players must make a choice as a group. Either they cannot make progress on the current quest this phase or each player raises their threat by X, where X is one more than the number of resources on the main quest. This will always be at least 2 threat, but can reach some big numbers if the players aren’t progressing as fast as they should. The option to not make progress this round is the more appealing solution, as the players might not have aimed to make much progress on the quest at all this round and are just trying to break even or clear the active location. You can still do that; it’s just that the current quest cannot get more progress on it this phase. This is especially annoying for players when they are trying to break through a side-quest. In situations like that, the threat option might be more appealing, but do be careful that you know when the City Guard will engage you. They just got a lower engagement cost, and you raising your threat won’t help the situation either. Also, take note of the shadow effect here, as it can ruin your day against even the most basic enemy. If the players don’t advance fast enough, enemies can get a potential +5 attack or more! This won’t matter much if you are chumping, but it can turn a pretty easy enemy into a fight where you have to sacrifice a hero.
- We’ve Been Seen!: This treachery is one that is quite comparable to one from Trouble in Tharbad (Conspicuous Lot). The treachery provides players with a choice: Either the City Guard makes an attack against them, or the player must raise their threat by X, where X is one more than the number of allies they control. This choice is easy in the early game, but as your threat keeps climbing as the game progresses, the City Guard making an attack will look like an easier solution. You could, in theory, chump an ally so that the next copy of this treachery won’t hit for as much threat. Players who run a deck with very few allies (or the Forth! The Three Hunters contract) will have an easy choice to make here. Do be careful if you chump against the attack made by this treachery. The shadow effect on this card will make the City Guard splash any extra damage it deals to other characters you control. That can quickly lay waste to more of your allies or put your characters in a difficult spot during the next combat phase.
- Extra Vigil: This last treachery is an annoying one, and you would rather see it go away as a shadow effect on an enemy other than the City Guard. When Extra Vigil is revealed from the encounter deck, it will attach to the City Guard as a Condition attachment. This attachment will reduce the engagement cost of the City Guard by 10, almost as if there were 2 extra resources on the quest card. Players will have a harder time avoiding the City Guard with this constant debuff to its engagement cost, even when advancing to new quest stages. In order to remove the condition attachment, the players could run Condition control with cards like the Miner of the Iron Hills, but as this is the only real Condition attachment in the game, it will be difficult to time cards like this correctly. Luckily, the treachery itself allows players to discard it when the players attack and damage the City Guard. This is no small feat, though, especially in the early game, when attack strength is likely still low. Mustering 5 attack will be doable, but consider that this attack strength could probably have been better used elsewhere. Regardless, if any player has spare attackers to deal some damage to the City Guard, then that player raises their threat by 1 and may discard Extra Vigil. There are only 2 copies of this treachery, but they can stack on the City Guard, reducing engagement cost by 20. The City Guard can also get Extra Vigil from the shadow effect, although the players will likely already be engaged with the City Guard at that point, so a counterattack is easier to make, removing the Condition.

Side-quests
While stalling in this quest might not be the best idea, there are some side-quests in the encounter deck that are difficult to ignore. Best get these side-quests completed quickly; else, the City Guard will continue to make attacks against you. The best time to try and beat these side-quests is when you just transitioned to the next main quest stage, and the number of resources on the card is still low.
- Cat and Mouse: This is the only new side-quest in the scenario. The other two have already been covered in detail in the Danger in Dorwinion scenario analysis. They don’t change the game too much, so I will focus only on the new quest here. Cat and Mouse is a dangerous side-quest that gives every enemy in the staging area -10 engagement cost. While this affects all enemies in the staging area, the main target for this effect is, of course, the City Guard that will now start at 35 engagement cost. This increases the tempo of the quest a lot, forcing players to handle the City Guard almost as soon as they advance to the next stage. But with the effect targetting all other enemies in the staging area as well, the side-quest can quickly force you to add more and more resources to the main quest thanks to the Ulfast Sentry and King’s Elite engaging sooner as well. Note that the -10 engagement cost only affects the enemies while they are in the staging area, not when they are engaged (except for the City Guard, who is considered to be both in the staging area and engaged with players). This means that for the regular enemies, you will be forced to engage them earlier, but Ranger and Hobbit decks can still handle these enemies as if they had their regular engagement cost. This is important for cards like Tom Cotton, Hobbit Cloak, and Dagger of Westernesse.
The side-quest is quite a nuisance, so exploring it will be in your best interest. It is not an easy quest to clear, requiring 10 progress. However, if you manage to beat this quest, each player gets to discard a non-unique enemy engaged with them. That can really help lighten the load on players that had to engage enemies earlier than expected. The best time for clearing this side-quest is right when you advanced to the next stage, as it can buy you some time from the City Guard if you manage to clear it quickly. Keep in mind that the main stage has sort of a timer, so you don’t want to try and clear this quest over and over again; if you don’t have enough willpower to clear it, put some progress on the main quest instead.

Tips and Tricks
- Be careful when cleaning up your table that you split the encounter cards of Under Guard and City of Ulfast in distinct piles. Their encounter card symbols look a lot alike, and you wouldn’t want to accidentally mix them up.
- Get a defender up and running as fast as you can to defend the City Guard. A lot of the shadow effects in this scenario will punish you for chump blocking (either splashing damage over to other characters or other nasty effects). Chumping is not a reliable strategy for this quest, so bring a hero like Beregond or Spirit Dain to the table. If you can get them fully equipped as soon as possible, then the attacks by the City Guard will be less of a pain.
- With so many small increases in threat, Spirit ally Elfhelm is again an amazing value in this quest. He allows you to lower your threat each time by 1 when you raise your threat. While you can probably not break even, you will at least slow down the rate at which your threat increases. Other constant threat reduction abilities like hero Galadriel are also more than welcome!
- For the larger jumps in threat in this quest, you might have to invest in other ways to lower your threat. Free to Choose is an amazing event that allows you to drop your threat by as much as you have to increase it from an encounter card effect. This means you stay at the same threat level, where you would otherwise have raised your threat by 5 or more! Other large threat reduction cards like Galadhrim’s Greeting, Keen as Lances, Core Set Gandalf, and Shirefolk are worth including in your deck here.
- Try to deal some good damage to the City Guard at earlier stages. Otherwise, you will need to rely on all your tricks at the very end and likely spend some extra time at the final stage trying to finish off the enemy. Better to chip away slowly at them when you are engaging them earlier.
- Since all locations in this scenario have a travel cost, it will be good to try and avoid those to make travelling a lot easier. Ghan-buri-Ghan and Thror’s Map will be excellent for this. You can also avoid paying the travel cost for some locations with effects like South Away! and The Hidden Way.
Playthroughs
While the quest is relatively new, it has been played by many content creators already with various degrees of success. See this list for some of the playthroughs that will walk you through the quest with different numbers of players.
- 3 players: https://www.youtube.com/watch?v=3cozjQizbgE
- True solo: https://www.youtube.com/watch?v=iNzcjwi8EWo
- 4 players, mono(x4) Leadership decks: https://www.youtube.com/watch?v=daTgTNJez1s
We are now coming close to completing the Vengeance of Mordor cycle. I don’t think that the cycle will take much longer to complete, allowing us to spend some more time on parts of the collection that have been neglected for a long time. This includes the Saga analyses, which have stalled for a long time. In the meantime, I will also continue my efforts to complete cycles of Nightmare content, with the Dwarrowdelf cycle being next on the list. Stay tuned for more updates on that front as well! And who knows? Maybe I will start looking closer into some fan-made projects in the coming months.

One thought on “The City of Ulfast”