The first quest that every player of this game plays is Passage Through Mirkwood. The objective of the quest is to get through the forest alive, as you bear a message to Galadriel from Thranduil. Yes, the first quest has you doing the work of a carrier pigeon, but I digress.
This quest is often counted as the easiest of the game, but some new players may struggle against it. Some of the enemies can be very nasty if they come out early (Ungoliant’s Spawn) or if they come out during the late game, when your threat is high and you have to engage them (Hummerhorns). So lets start this analysis of:
Passage through Mirkwood
- Found in: Core Set
- Official difficulty: 1
- Community difficulty: 2.2
- Encounter sets: Dol Guldur Orcs, Spiders of Mirkwood, Passage through Mirkwood
- Quest cards: 3, with 2 stages 3A/3B to pick at random
- Play if: You are new to the game, or if you have been beaten to a pulp and want to win against a scenario at the end of a session
- What is different about this quest?: Nothing, this is as basic as it gets
- Solo or Multiplayer?: No real preference, multiplayer makes for a shorter game but there is no scaling for the amount of players in this quest.
- Can I run Side Quests for this Scenario?: Yes, there is plenty of time to stall and build up.
The Quest
Setup
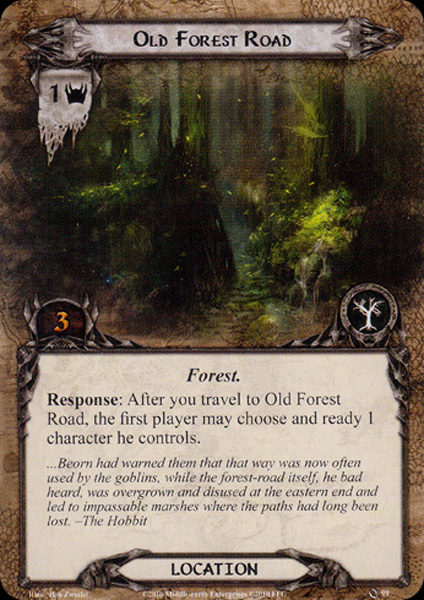
During Setup, you are to search the encounter deck for 1 copy of Old Forest Road and 1 Copy of Forest Spider for a total of 3 threat in the Staging Area. The game starts you off with both a location and an enemy, so you will have the option to engage and travel during your first round. The spiders can be difficult to manage if you don’t have a very combat heavy deck. Most early game decks won’t be able to kill the spiders on turn 1, but that is OK. They become milder as you progress. The Old Forest Road is one of the few beneficial locations in the game (don’t get used to that), and will allow you to quest with a Defensive or Offensive type hero.
Quest card 1: Flies and Spiders – 8 quest points
Nothing but flavour text from the Hobbit who were travelling in the opposite direction. The quest card itself takes 8 progress tokens before you can advance, depending on your player count, this takes 1-4 turns.
Quest card 2: A Fork in the Road – 2 quest points
Nothing to note about this quest card, besides the fact that the 2 required progress tokens can be placed by Tactics Legolas during the Combat phase. This could lead to you winning the quest in 1 turn if you have the right decks. But for normal decks, you will beat this quest card in the next turn if you can clear your location.
Quest card 3A: A Chosen Path
There are 2 quest cards with this name, so you’ll have to choose 1 of the A sides as your next quest card. Depending on that choice, you will either have to fight your way out, or quest your way past the final card. I recommend using a coin toss to decide where to go.
Quest card 3B: “Don’t Leave the Path!” – 0 quest points
Well, you’ve chosen the way of … PAIN. If you have managed to avoid the Ungoliant’s Spawn during this quest, your luck has run out. This quest stage forces each player to search the encounter deck and discard pile for a Spider of their choice. These spiders get added to the staging area. Usually you will want to choose Ungoliant’s Spawn in order to beat the scenario, but if you aren’t ready for it, you can pick a different spider and mill the encounter deck until you encounter the spawn. Heed my warning though, if the Spawn appears as a Shadow card, you are out of luck and will have to wait a long, long time before it appears again. If you have already encountered the Spawn before you advanced to the quest, you can pick a different spider. However, if you encountered and killed the spawn on stages 1 or 2, you will have to fish it out of the discard pile and fight it again.
If you happen to run Out of the Wild and thought: “hey, Ungoliant’s Spawn is nasty, lets put that in the Victory Display” and you run into this quest card, you are stuck in an infinite loop where you cannot win. Reset and pick a different card to remove next time.
If you manage to beat the Spawn, you immediately win, you don’t need any progress on the stage to win, only a dead spider. Congratulations, you just beat the easiest quest in the game!
Quest card 3B: Beorn’s Path – 10 quest points
This is the more questy stage of the scenario. By this time, you should have got a decent enough boardstate to beat this stage in 1 or 2 turns. However, there is still a chance that it won’t be enough. Beorn’s Path has the additional text that players cannot defeat the stage while Ungoliant’s Spawn is in play. If you have the spider in the staging area, or engaged with a player, you will first have to beat it to win the scenario.
The Encounter deck
Global

- There are 36 encounter cards in Normal mode, 25 in Easy mode
- There is a 36% chance of a Shadow Effect in Normal mode, 48% chance in Easy mode (Who said Easy mode was easier?). Shadow effects rely mostly on increasing attack, discarding attachments, and dealing direct damage.
- The average Threat per card revealed is 1.6 (treacheries count as 0 Threat), this roughly equal for the two modes
- Surge is only present on 1 card if the conditions aren’t met
- The Doomed keyword is not present
- No immunity for any cards
The Encounter deck has a good balance between Location and Enemy cards, with only a few treacheries added to the mix. Side Quests have not been invented at this point in the game.
Locations
The locations of this quest are mostly Forest traited, with a couple of Mountains added in the mix. This makes cards like Cloak of Lorien and Woodland Courier more powerful. The average amount of quest points on the locations is just below 3, with plenty of locations requiring 2 progress to clear. This makes Asfaloth a good card to include when placed on Glorfindel.
Some of the locations actually benefit the players when they travel to them. Old Forest road allows the first player to ready a Hero they control and Forest Gate lets the first player draw 2 cards.
Enemies
The spiders and insects are not the only evil you will encounter during the passage, Orcs also inhabit these parts and will cause you a lot of problems. The major enemies to look out for are:
- Ungoliant’s Spawn: The “boss” enemy of this scenario. Her When Revealed effect can be nasty if you were planning on questing a lot this round. The 5 attack is also a problem for most players, as it will have you take a lot of damage if you don’t chump or have a dedicated defender.
- Hummerhorns: These nasty, nasty insects have caught many players off guard when they are venturing into threat levels of 40 and higher. The 5 direct damage to a Hero will result in you losing that hero in most cases. Exceptions are Beorn, or heroes with extra hitpoints from Citadel Plate, Hardy Leadership, or Ent Draugth to name a few. It is advised to either Straight Shot the Hummerhorns, or do what ever you can to avoid them engaging you.
- Chieftain Ufthak: This Orc mini boss has the nasty effect that he gets stronger as he attacks more often. The initial 1 or 2 attacks might be reasonably easy to defend, but a 7 attack+ shadow card is often enough for him to kill heroes. The strategy on taking him down is to do it on the turn you engage him. If your math fails you, you still have an additional turn before he gets really nasty.
- East Bight Patrol: Beware ye Secrecy players. East Bight Patrol has an incredibly low engagement cost and will surprise you with a 3 Attack strength if you are not prepared. His 3 threat is also tough to swallow during early rounds. However, you can be sure to finish the patrol off after 1 attack, as his defensive stats are poor.

Treacheries
Not a very common threat, but very dangerous should you encounter a treachery card. The 4 different treacheries will harm you in different ways.
- Eyes of the Forest: Honestly, I forgot this one excised until I had to discard half my hand to it. It can be nasty enough to discard all your Events that you were planning to play. If you happen to have a Test of Will in hand, just cancel the effect, otherwise you’ll have to discard that too.
- Caught in a Web: This one is really painful as there are 2 copies of this in the deck. The attachment will hinder your readying during the refresh phase unless you pay resources to ready the hero. Note that you have to pay those resources from the attached hero’s pool, so this basically negates your Steward of Gondor. Run Condition Discardment to cancel the attachment or wait for a Shadow effect that forces you to discard an attachment. Alternatively, you can run Tactics Boromir or another hero that can ready at will in order to bypass the effect.
- The Necromancer’s Reach: This card deserves an applause as it is capable of destroying my entire questing army and leaves me with a broken board state. Tips to limit the effect of this card is to run Hero Galadriel, ready your heroes before the Staging Step, and run allies like Lindon Navigator or Sailor of Lune who are mostly immune to the effect.
- Driven by Shadow: This can be a horrible treachery, or a whiff. It all depends on how you manage your board state. If you get locked with locations, this treachery can really up the anti by adding 5-6 threat or more to the staging area. If you manage to keep a clean staging area, this card can either surge, or add only 1 threat to the staging area.

Tips and Tricks
- Don’t bother with easy mode, sure some of the nasty enemies are removed, but you should be able to deal with them if they ever come up. Shadow card effects will be more common and you will have to recycle the encounter deck more often, you might end up revealing Ungoliant’s Spawn twice.
- Don’t bother with Secrecy. There are many enemies with low engagement cost, which will harm your progress. Secrecy decks are also not likely to survive Ungoliant’s Spawn if you choose the wrong path.
- Do not put Ungoliant’s Spawn in the Victory Display, I speak from experience. There are plenty of other cards that will be better prices.
- Keep your threat below 40 to avoid the Hummerhorns or raise their engagement cost.
- Be ready to defend a 3 attack Forest Spider on turn 1, you will probably have to engage it early in the game.
Playthrough
- Progression style, 2 players: https://www.youtube.com/watch?v=aJ242SoRyVQ
- True solo: https://www.youtube.com/watch?v=z2WeFLEckfA
- 2 player, updated (bad) decks: https://www.youtube.com/watch?v=ssEGmyEX744
So ends the first Vision of the Palantir, let me know what your experiences are with this quest, and if there are any nasty things about it that I may have forgotten.

8 thoughts on “Passage through Mirkwood”