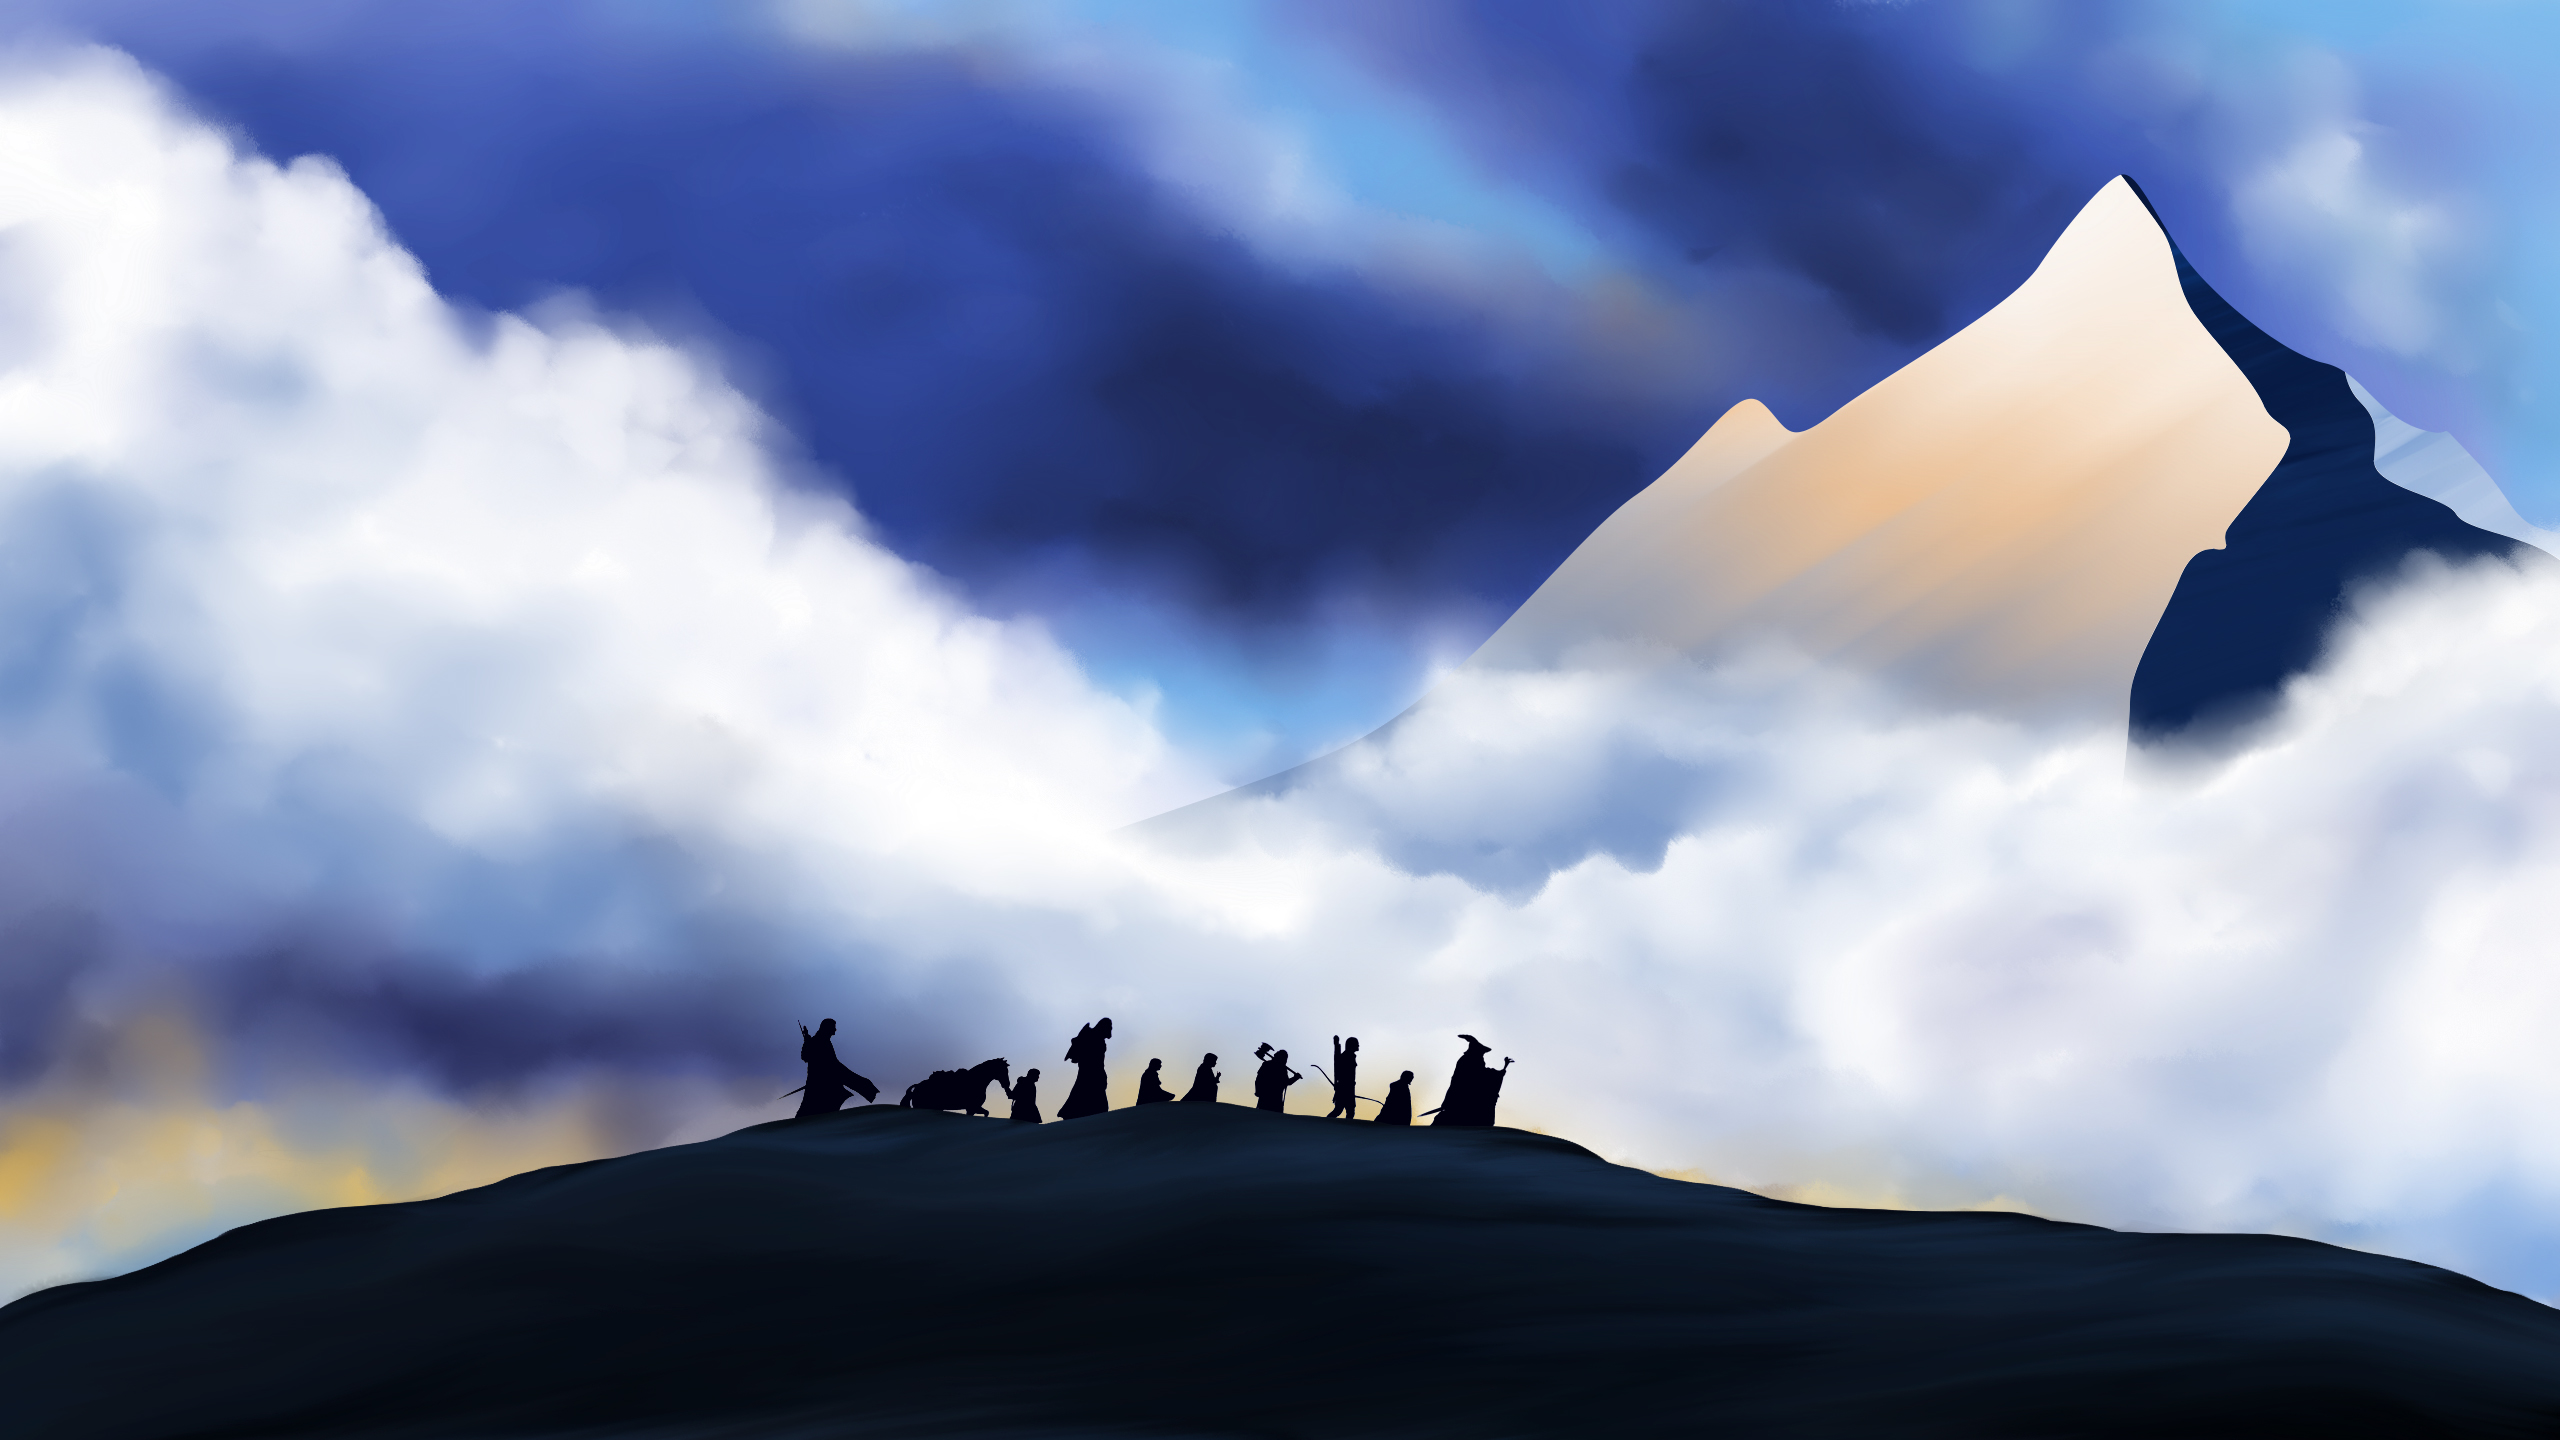
It has been decided. A fellowship will set out from Rivendell to deliver the One Ring to its destruction in the cracks of Mount Doom. The walkers set out to brave the pass of the Redhorn Gate but are driven back by the might of Caradhras and have to set out towards the Doors of Durin by way of Eregion and the Hills of Hollin. But evil wargs are lurking there and the land itself is perilous and full of danger.
This quest is really is an excellent design. It features several different stages that let the  players experience the Council of Elrond, the attacks by the wargs at the Tree-crowned Hill and the final battle against the Watcher in the Water before making it into the Mines of Moria. It also features a very balanced encounter set with an almost equal number of enemies, locations and treacheries. This balance is shown even more by the fact that easy mode does not remove any card from the encounter set completely, leaving in at least one copy of each. While this is certainly not the hardest quest in the Lord of the Rings Living Card Game, that does not mean that this quest is without its challenges. You will place damage on locations that will likely lead to the players suffering a nasty effect each round and it can put some severe pressure on your threat and allies.
At the same time, you will be offered some interesting and powerful boons for your campaign playthrough, which I, again, will go over at the end in a separate section.
The Ring Goes South
- Found in: The Road Darkens saga expansion
- Official Difficulty: N/A
- Community Difficulty: 6
- Encounter sets: The Ring Goes South
- Quest cards: 4
- Play if: You want a balanced experience that will test your deck in all aspects but is not too punishing, you want to play with your Voltron hero deck, you enjoy debating about the best course with other players, you want to continue your campaign, you love the Council of Elrond mechanic
- What is different about this quest?: The Council of Elrond, damage on locations, two active locations, ally hate, pressure on threat, boss enemy at the very end
- Solo or Multiplayer?: Multiplayer is definitely more fun because you can actually have a debate about the optimal course at the Council of Elrond (although a lot of times the optimal solution will be clear). With regards to gameplay, this quest is quite balanced in that regard. Some locations will have an effect that punishes the players as a group, which can be easier to manage in multiplayer, but at the same time you will also reveal more locations from the encounter deck, which means you will likely have to suffer more of these effects if you want to stay on top of location lock. The Watcher in the Water can also be easier to deal with in multiplayer but is certainly also manageable in solo play.
- Can I run Side-Quests for this scenario?: Sure. It isn’t exactly a quest that is tailor-made for side-questing, but it also will not punish you severely for attempting to run your side quest deck against it. You will likely have to deal with more forced effects from locations if you need to set aside rounds to beat your side-quests, but the positive effects of your side-quests can offset this disadvantage. All side-quests can be valid against this scenario; a special shout-out goes to Scout Ahead, which might be able to remove Great Warg Chief or a copy Regiment of Crows or Bitter Cold from the encounter deck, which would be a great boon in this quest.
The Quest
Damage on locations
The central unique mechanic of this scenario revolves around placing damage on locations. Every time you explore a location you will suffer an ill effect that scales with the number of damage tokens on that location. This makes clearing locations more dangerous compared to other quests, but there simply is (almost) no way around it, because all quest phases force you to travel to a location if able. The effects of the locations can vary in the danger they pose towards you and your play style and also in terms of whether they target each player separately or the players as a group. Redhorn Pass, for example, will have each player assign damage among characters they control according to the number of damage on it, while Tree-Crowned Hill forces the players to exhaust characters as a group. If you do not tech specifically against it, the worst of the bunch is probably Eregion, which will have the players as a group discard allies according to the damage on it, although Redhorn Foothills can be quite dangerous if damage on it gets out of control (for example byways of Regiment of Crows) and the players have to discard almost all or all of their hands. Lastly, the Doors of Durin will have you straight up lose the game once nine damage tokens are placed on it, which is unlikely in solo play, but can get out of control if there are too many enemies revealed in multiplayer.
While location control effects are not desperately needed as a tech against this, because all effects except for the one forced damage on each location that enters play on stage three will only target the active location, it can still be beneficial to have these effects available. Not needing to travel to Eregion or Redhorn Foothills and being able to clear them from the staging area with Asfaloth or Northern Trackers can have the players avoid some really dangerous effects, especially on stages two and four, where there will  be no damage put on locations in the staging area. However, the forced effect on each quest stage can force you to travel to those locations anyway if you don’t reveal another location from the encounter deck, which is more likely in lower player counts where the high quest points on both of these locations will make it even more difficult to clear them effectively before this happens. In multiplayer games, it is very likely, however, that you have another location to travel to and can make the most out of this strategy. You can also use Strider’s Path to switch out a location that has more damage on it than you might be able to handle. It is the only card that offers you this opportunity before accidentally clear a location the same turn you revealed Regiments of Crows and you are of course banking on not having to travel to it again, but it can still do some work in this quest. If you are banking on not revealing this treachery, it can be a good idea to switch out a damage-less Eregion to the active spot during the planning phase with West Road Traveller to hopefully clear it without suffering from its effect. The best tech against these nasty effects is without a doubt, Thror’s Key which will allow you to avoid the effect altogether, so if you are playing Spirit and build specifically against this quest, three copies are always a good idea for your deck.
Lastly, the effect on locations only triggers when the location is explored. This makes cards that discard locations very powerful in this quest. Heirs of Eärendil works great against locations in the staging area that you might want to avoid (and you can even get rid of a location switched out with Strider’s Path. Mariner’s Compass can achieve similar results.). Be aware, however, that the most dangerous locations have relatively high quest points and this scenario already puts pressure on your threat, so bringing threat reduction is important. Distant Stars can also do some work and offers a similar solution against escalating damage on a location as Strider’s Path because you can play it after the staging step.
All in all, there are a number of ways to deal with this mechanic. Including tech against it is more important in multiplayer where you will engage more enemies on stages two and four and thus are more likely to increase damage on locations. In solo play, you can be fine with less location control. My personal recommendation would be to include Thror’s Key in any deck against this quest (Especially if you have some way of recursion like Dwarven Tomb, Erebor Hammersmith or Second Breakfast), and then add additional effects of your choosing in higher player counts.
Setup
Because most of the actual setup will happen on stage 2A, there’s not much to say here. Set aside the four cards and go on to side B.
Quest stage 1: The Council of Elrond – No quest points
While the Council is the more interesting part of this quest stage, the fact that the planning phase happens before the quasi-setup of this quest and before the Council offers some interesting possibilities. For one, you can use encounter deck scrying to affect what cards will be revealed during setup or at least be able to plan for it. (Attention: All of this will only work when you raise your threat by five at the end of the council. Otherwise, you will be forced to shuffle the encounter deck.) While knowledge is always good to have, even during the following setup and cards like Henamarth and Rumor from the Earth can still be interesting, being able to influence setup can be quite interesting for this quest. In stage 2A you will have to reveal cards from the encounter deck until you’ve got X threat in the staging area, where X is twice the number of players. Revealing a couple of treacheries, especially Regiment of Crows, or a late surging Hound of Sauron into a high threat location can be pretty devastating at this point. Lore Denethor can be a good option to affect the outcome of stage 2B. However, at this point in the game, secrecy really shows its power. Even if you choose to raise your threat by five at the end of stage 1b, getting a Risk Some Light out for no cost, and knowing exactly what is coming up as well as ridding you of a dangerous encounter card for a while, will make the following game much easier. Likewise, Ithilien Lookout and Celduin Traveller will at least give you information about one upcoming card with the potential of ridding you of Eregion or Great Warg Chief. These options are a better option in solo, with the possibility of Risk Some Light working in a two player game as well, but information can be good in all player counts, even with its diminishing returns in higher player counts.
In a similar way, player deck scrying or manipulation can be used to affect the outcome of the Council of Elrond. Most of the options cost at least two resources though, meaning they will be more situationally good than the encounter deck scrying effects above, but getting an Imladris Stargazer out can be an interesting option at this stage. In solo, you will be able to choose four out of five cards for the council, making this less of an interesting option (although you could, of course, find your ally Beorn five cards down) and in four players it will only affect one card in addition to the standard effect of the Stargazer. Its hour, however, comes in two and three player games. In both of these variants, the first player will contribute two cards to the Council, making the option of choosing these two cards out of five much more interesting. Other effects include Wizard Pipe in a Gandalf deck, potentially allowing you to be able to get that high-cost ally in your hand into play for free as well as Gandalf’s Search and Gildor Inglorion, both of which you are unlikely to use because of their high cost. One last option would be (and I never thought I would actually talk about the value of this card in a deck) Keen-eyed Took. It’s true, in a four player game he would allow all players to know which card they will contribute to the council, allowing you to enter a discussion about whether you want to do it with these cards or want to take a quasi-mulligan on them. The value lessens with fewer players, although it can still be decent in three and two player games.
Whether you are able to play these cards or not, you will go on to the Council of Elrond. In this wonderfully thematic moment, the players in order will put cards from their deck in front of them until there are four cards on the table. This means an equal number of cards per player, except for three players, where the first player will be able to contribute two cards. Now you are given a number of choices: One card will be played for zero cost, one added to its owner’s hand, one shuffled back into the deck and one discarded. While the quest card says that the first player makes the ultimate decision about what will be done with these cards, in a thematic sense you are clearly encouraged to have a conversation about the optimal course at this point.
 There are of course too many options to go over here and the best solution will always depend on the specific decks you are playing and the specific cards put on the table. As a general guideline you will want to put a high-cost card into play, which more likely than not, will be an ally (the most awesome moment, of course, being putting ally Beorn or one of the big Harad allies into play for free). There are of course also cards like Hasty Stroke that won’t do anything at this point, so it’s easy to exclude them from this category. The card added to its owner’s hand should be a cheap, but essential card. This could be a card like Light of Valinor if you did not happen to draw it yet. Just be aware that you will not be able to play it until the next planning phase. Other options are of course cheap but powerful events like A Test of Will. The discarded card ideally is an additional unique that already is in the player’s hand. If that does not happen, you should think carefully about, which card you will need the least in your specific decks or whether its function can be fulfilled by another card. This leaves you with the last card, that will get shuffled into its owner’s deck. This can be any card that does not fit the cards described above, but it certainly is the least exciting option among the three. You will have the option of drawing it again so it will not be lost. You might, of course, have some overlap between the cards described above, which will force you into carefully considering what the best option is for the specific decks you are running. And a situation might come up, where you forego the guidelines I described here. If you already got, say, an Ethir Swordsman in play from the planning phase and will be relying on your allies to do the bulk of questing for you, it certainly can make sense to play the second one for free at this point. All in all, consider these guidelines carefully, but be prepared to adapt them according to your decks, board state, hero line-up and decks.
At the end of all this you will have to make a choice: Either shuffle Lust for the Ring into the encounter deck or raise each player’s threat by five. This is an interesting decision point, especially in multiplayer, where you could trade one encounter card for a total of twenty threat. There are a couple of things to consider here. The first thing is the effect of Lust for the Ring itself. It surges, so it will always be an additional effect, you’ll have to deal with. Other than that, it is a condition attachment that plays around exhausting the One Ring. Every time you do so, you will raise each player’s threat by one and reduce the attached hero’s willpower to zero for the remainder of the round. Prime targets for this are of course characters that won’t quest anyway or, even better, have zero willpower to begin with. (Which would be Beregond, Bombur and the upcoming Grimbeorn, because Beorn cannot have attachments, but of course heroes like Eleanor, Boromir, Eomer and many others work just as well.) You will still have to deal with the threat increase though, potentially getting even higher than the five threat you traded it for. If you plan for it, you can, of course, bring condition removal to get rid of the attachment anyway, just be aware that Power of Orthanc might not be the best choice in a quest that can already punish your threat quite a bit. You’ll also have to consider how much you want to use the effect of your Fellowship Frodo. If you are planning on using the effect more conditionally, for example with Black Riders Frodo, you can get around increasing your threat by too much by this effect.
The other option would be to raise each player’s threat by five. This can be quite dangerous in a quest that has some threat increasing effects like Hills of Hollin and Bitter Cold in the encounter deck, but you can plan for this by including enough threat reduction into your player decks. It also makes sense to consider your early game plans. If you want to make use of secrecy cards in the early rounds (which would be very thematic, because clearly, you should put your “hope in secrecy, not in battle” – Gandalf, in this very chapter), you’ll likely not want to take five threat that early. You should also take the engagement cost of enemies into account. The lowest is 28 on Crebain from Dunland, but you will often immediately engage that one anyway. After that, we are looking at Great Warg Chief with an engagement cost of 30. You will have to deal with this one at stage three anyway, but being able to avoid having two enemies engaged with you early on is certainly good, so either be ready to do so when revealing it earlier than that or keep your threat under 30, which will often mean not taking the threat increase. The other ones are 38 on Howling Warg and 45 (minus X) on Hound of Sauron (already including his own discount), which most decks will be able to avoid for a while even when increasing their threat by five. Good advice would usually be: If you are able to keep your threat under 30, take the threat. If you won’t, consider Lust for the Ring. If you start above thirty, this more becomes a measure of how good you are able to decrease your threat, because you will have your threat at pretty high numbers quickly if you increase it by five more. As above, this is more general advice. Decks that play around with engagement cost shenanigans will be punished more by increasing their threat and if you have decent threat reduction in your hands, you might also just want to avoid adding a surging treachery.
Quest card 2: The Nine Walkers – 8 quest points
When you reveal this stage you will first make Redhorn Pass the active location. It is immune to player card effects so you will have to clear it using conventional means. After exploring it you will have to assign damage among characters according to the number of damage on this location, which will most of the time be manageable barring severe floods of enemies or Regiment of Crows. At any rate, you want to quest through its six quest points quickly in order to prevent location lock in multiplayer and escalating damage on your characters.
 You will also have to do the actual setup of the staging area for this scenario. To do this you will reveal cards from the encounter deck until there’s at least twice the number of players of threat in the staging area. This can be quite swingy, especially because you are not just adding cards, instead revealing them, which means all when revealed effects, as well as the Surge keyword on treacheries and enemies, will trigger. To give a worst case example in a two player game (where four threat is the minimum) you could reveal Regiment of Crows putting three damage on Redhorn Pass (0 threat) into Howling Warg (2 threat total) into Hound of Sauron (3 threat total) into Storm of Howls (3 threat total, either suffer an attack or both enemies get -20 engagement cost) into Redhorn Foothills (7 threat total, instead of the planned for four). Of course, you might also just reveal Redhorn Foothills and be done with it. This can make for a huge variance in the early game and make it either quite easy or very hard depending on your setup.
Outside of hoping to reveal the exact number of threat, good cards to reveal at this stage are:
- Howling Warg: High engagement cost coupled with relatively low threat means you might be able to avoid this enemy for a while.
- Tree-crowned Hill: Despite the nasty forced effect, the threat reduction when active can give you some early game momentum.
- Hills of Hollin: The least dangerous location in the encounter deck.
- Bitter Cold: If you have to reveal it, it’s good to get out of the encounter deck early, where it won’t be as punishing.
Bad cards to reveal are:
- Great Warg Chief: Low engagement cost, high threat (more annoying when revealed as the last card) and dangerous to engage.
- Hound of Sauron: Its low threat and Surge can escalate into a lot of cards in the staging area quickly.
- Eregion: Not too bad while in the staging area, but exploring it is always perilous.
- Regiment of Crows: If you can’t cancel it, it will escalate the damage you will have to deal out when exploring Redhorn Pass.
- Snowdrifts: Will force you to take two rounds to explore Redhorn Pass. (But it would be very thematic!)
Lastly, Storm of Howls is more situational. You won’t mind if it comes out first or when there are only locations around, but it can become very dangerous when you already added a couple of wargs to the staging area. Crebain of Dunland is more annoying than dangerous. If you can spare a character consider putting it into the staging area for its three threat, otherwise, engage it and just add another card to the staging area. (However, be aware that the Peril keyword means that it will engage the first player who will also have to make that decision.)
With regards to the actual stage, you will, as with all stages, have to travel to a location if able. As pointed out above this means you will not be able to avoid the forced effects on locations. If you have multiple locations around, you should decide carefully which location you are travelling to. If you know, you will have to engage three enemies this turn, travelling to Eregion is not a great idea. All of the tips pointed out, in the beginning, apply at this stage. Plan your travel phase well and use your location control, and you will hopefully be fine.
Quest card 3: The Hunt is Up! – 12 quest points
 When you reveal this stage, each player must search for an enemy and add it to the staging area. If Great Warg Chief is currently in the encounter deck or discard pile, you will have to add this enemy. Aside from having it currently in play, the only way to avoid getting it into play at this stage is getting it into the victory display with Out of the Wild or Scout Ahead (None Return won’t work because it only targets non-unique enemies.), so you will likely have to deal with the Warg Chief at this stage. In a multiplayer game you have more option. Crebain from Dunland, while relatively harmless in terms of stats and the added benefit of avoiding its when revealed effect, is often not the best choice, because you don’t know which encounter card will be revealed upon engagement, making this more of a gamble. The other two options are Hound of Sauron and Howling Warg. The former is always a good choice because you can avoid a Surge, while the latter has less attack (but more defence and hit points), making it easier to manage. Hound of Sauron is probably the better choice because of the Surge keyword. You will also have to plan for getting an additional warg enemy engaged with a player after engaging the Warg Chief. This can only be avoided if all of the wargs are currently either in play or in the victory display, which is probably only a realistic possibility in four player easy mode.
The Great Warg Chief is not the most dangerous boss enemy in the game, but can still pose some threat, especially because the engaged player will end up with at least two enemies to deal with. If you plan for it and think this will be difficult to deal with, consider stalling a bit on stage two in order to build your board. It can also be a good idea to play a trap into the staging area before advancing to this stage (in multiplayer) because you can effectively avoid one of the other enemies when it is trapped in some Ranger Spikes. The Great Warg Chief itself cannot have attachments. At least one player should be comfortable with dealing with multiple enemies when you advance to this stage.
In addition to adding damage to the active location when you engage an enemy, you will also have to add one damage to each location that enters play. This includes locations that get into play by card effects, so some of the strategies in the section above are less effective at this stage, although they can still work. Since it quite possible you will also have a Howling Warg in play, this can get aggravated even further. This means you can escalate the threat of the active location because you will likely have to engage a bunch of enemies and the quest card again will force you to travel when possible. Consider delaying advancement to this stage until you can get a location in the active spot that you can deal with even when there is quite a bit of damage placed on it. (Distant Stars can work wonders here if you got the character to play it.) While this also makes it a good idea, to pass this stage as quickly as possible, you should at least take the time to dispatch the bulk of the added enemies, so you are free to deal with the Watcher in the Water on the next stage.
Stage 4: The Gates of Moria – no quest points
After advancing to this stage you will first have to make the Doors of Durin the active location. This is pretty unique because there can now be two active locations, which will force you to travel to another one and put progress on it before being able to place progress on the Doors. This means that this location essentially functions like the progress on the quest card and after you explore it, you will have won the game, with the added difficulty that you can put damage on it and will lose when you put the ninth damage token down.
 This is made more difficult by the fact that you have to save Frodo from the Watcher in the Water before you can actually put progress on the Doors of Durin. This considerable enemy makes questing more difficult by contributing five threat to the staging area and you will have to inflict at least six damage on him before getting Frodo back under the first player’s control. It is considered to be engaged with each player so you will have to suffer through its six attack every round until you are able to get through the quest. However, this also means that each player can declare attacks against the Watcher, which hopefully will lead to you putting enough damage on it despite its high defence of five. Because you will likely also have to engage other enemies and Regiment of Crows is always a threat that could bring you close to losing the game, it is pivotal to deal the six damage needed to the Watcher as soon as possible. (After that don’t bother; it is indestructible anyway.) Having high attack power on the board already helps, as does Tactics Eowyn’s boss killer ability. If that is not an option, consider playing cards that grant attack bonuses like For Gondor!, Khazad! Khazad!, Unseen Strike (the engagement cost of the Watcher is 50, so it will always work), Boomed and Trumpeted and Black Arrow. This is usually more needed in solo games where you won’t be able to muster up as much attack power across all players. Of course, you can also have a dedicated attacking hero with some strong allies (or a Sneak Attack Beorn) and be fine either way. There are lots of options available to put the needed damage down and it usually isn’t too hard. Just be aware that any direct damage or defence reduction effects won’t work because of the Watcher’s immunity to player card effects.
After getting Frodo back you probably want to put the needed progress on the Doors of Durin as quickly as possible. More often than not this will result in a pretty much all out quest push, possibly with the added benefit of willpower bonuses like Faramir, Astonishing Speed, Untroubled by Darkness, Children of the Sea, Lay of Nimrodel, Lords of the Eldar, Scouting Party or Frodo’s Intuition. After putting the ninth progress on the Doors you will have successfully fled into the perilous Khazad-Dum and won the game.
The Fellowship Hero
Again, you can have your pick between all four versions of Fellowship Frodo. The only card that can possibly interact with the One Ring is Lust for the Ring, which might not even be in the encounter deck, so you can use his ability safely. Don’t rely too much on this ability, however. For one this leaves you the option of choosing the burden after the Council of Elrond and secondly, you will not have his ability available when you first have to fight the Watcher. Black Riders Frodo can be fantastic to get rid of any Bitter Cold (particularly if you rely on an ally-heavy strategy) or Regiment of Crows thrown at you from the encounter deck. Of course there’s always the risk that you will reveal it again, especially in higher player counts, but he still is very good against any nasty card in the encounter deck. Road Darkens Frodo is probably the least useful of the bunch. None of the enemies have a particularly high attack (and the five attack Great Warg Chief is only a one-off) and even after you get him back he will be useless against the Watcher in the Water because of its immunity to player card effects. He can still be an emergency button and can work in good synergy with the Sting and/or Mithril Shirt boons in campaign mode, but his value is less high in this quest compared to the previous three. Land of Shadow Frodo brings his usual utility. Being able to contribute decently to questing and attack is always useful, especially if you can get a Fast Hitch on him and use both boosts in the same turn. With regards to utility, the same can be said about Mountain of Fire Frodo, although, again, you will want to bring enough neutral and fellowship cards to make use of his resources. Should you be playing in campaign mode, these resources could also be used to pay for the four boons that you can choose from in Imladris.
The Encounter Deck
Global
- Not counting Lust for the Ring, Redhorn Pass, Doors of Durin and Watcher in the Water, there are 30 cards in the encounter deck on normal mode, 24 in easy mode; another sign that this is a well-balanced quest since not many cards are removed
 for easy mode. In campaign play you will have to deal with a larger and surgier encounter deck, because of the burdens you already accumulated.
 - In normal mode, 50% of the cards have shadow effects. Easy mode drops that number down to 42%.
- The average threat is fairly balanced between both modes, with normal mode having 1.7 and easy mode 1.8. (Because of rounding issues the actual difference between both modes is more like 0.06, making it quite marginal.)
- Aside from whiffing treacheries, the only card with Surge is the Hound of Sauron, plus any burdens.
- No Doomed in this quest, but Hills of Hollin and Bitter Cold still have the potential to raise your threat by a high amount.
- Redhorn Gate, The Doors of Durin and Watcher in the Water are immune to player card effects. In addition, Great Warg Chief cannot have attachments.
A balanced encounter deck of different card types, 50% shadow effects and pretty standard average threat makes this quest certainly one of the most statistically balanced quests in the game.
Locations
The unique mechanic of this quest revolves around locations that get damage tokens placed upon them. Each of the following locations includes a nasty effect according to the number of damage tokens when explored, making the locations in this scenario quite unique.
- The Doors of Durin: Because of it being immune to player card effects, there really is not much to say about this location. The nine progress needed along with the buffer from the second active location essentially function like the progress on a quest card. You will want to progress through stage four quickly, getting enough damage on the Watcher and then questing through the nine quest points before you get screwed over by engaging enemies or Regiment of Crows.
- Redhorn Pass: You will start with this location in the active slot and probably want to quest through it in the first round. Getting a bunch of damage from enemy engagements or Regiment of Crows can be dangerous in the early game if you don’t find your healing immediately. Achieving this is obviously dependent on the threat you revealed on stage 2A, but strong early game willpower can nonetheless be very valuable here. If you reveal Snowdrifts you will have to take two rounds (or play a condition removal effect after staging), which can become quite dangerous in multiplayer games. In true solo it won’t make a lot of difference, because at least it wasn’t an enemy or a Regiment of Crows.
- Tree-crowned Hill: This location can be quite useful in higher player counts, particularly on stage three, when you do not want to engage too many enemies right away, but still want to make a decent amount of progress. This values is a little bit diminished by its six quest points however. Its effect will usually be easier to deal with in a multiplayer game. Good tech against it are characters that don’t exhaust to quest, which can be done with Naith Guide, Galadriel, North Realm Lookout and Lindon Navigator, although any action advantage can work of course. While threat debuff can be great for a quest push, you will want to time your travels to this location carefully as not to be overwhelmed by enemies after exhausting a couple of characters.
- Hills of Hollin: Threating out is probably a bigger danger in this scenario than actually being killed by enemies. Hills of Hollin is one of the reason why threat can be such a huge, well, threat here. Especially if you start with a relatively high starting threat, this location can escalate your threat quickly. Couple this with the Bitter Cold treachery and you are looking at a recipe for disaster. Still, this is one of the less harmful locations in the encounter deck and you will usually be happier to see this than another location. Bringing threat reduction is certainly valuable in the quest. The staples like Galadhrim’s Greeting, Elrond’s Counsel, Lore Aragorn or Gandalf will all work. Other good ways include Spirit Elfhelm (who is also excellent tech against Lust for the Ring) and, more of an unusual choice, Free to Choose. The latter can work quite well, because when this location (or Bitter Cold) become dangerous, they will most likely become very dangerous. As long as you don’t threat out by the effect, Free to Choose can drop your threat right back down to where it was before. With regards to this location, also don’t forget the boost to engagement cost, which could safe you in a pinch and can also be quite useful to hobbit decks in the right situation.
- Redhorn Foothills: Four threat and five quest points is nothing to sneeze at without any effect. To make matters worse, each enemy added to the staging area while this is active will get -5 engagement cost until the end of the round, which will likely lead to you engaging enemies and putting even more damage on a location (which will be a different one than this one, however, should you manage to clear it). The effect can also be quite nasty, especially because of its randomness. Any deck with Erestor or Galdor will have no problem dealing with this. Other useful cards include Galadriel, Beravor, Bilbo and King under the Mountain for their card draw. Cirdan will at least allow you to be more sure to draw a useful card every turn after you had to discard a lot, as would ally Erestor.
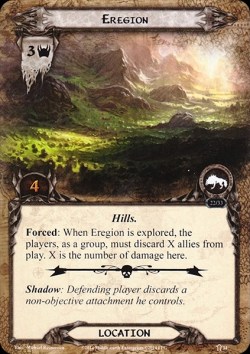
- Eregion: This is the big one. The effect, when escalating, can be quite dangerous to any board state that relies on allies, even more so in solo play. An obvious solution against this would be to not overly rely on allies and instead building up your heroes with something like Gondorian Fire or Blood of Numenor. Alternatively you could go the opposite way and play a deck that is pumping out cheap allies quickly and thus replacing the discarded allies in a timely fashion. Should you still rely on allies, either quest through it quickly, cancelling any Regiment of Crows that comes up, or blank its text box with Thror’s Key, which works excellently against this location.
Enemies
None of the enemies in this quest are actually game-breakingly dangerous. While they can still pose a threat to your adventurous efforts and you can always end up in a situation in that you are simply overwhelmed, the biggest problem you will likely face is damage on locations by ways of enemy engagement. General strategies against this can be direct damage effects like Gandalf, Hail of Stones, Arrows from the Trees or Ride them Down or utilizing the abilities of Argalad, Anborn and Galadhon Archer while keeping your threat low as to not engage enemies. Hunting Party can also take care of those enemies in the staging area and low threat decks potentially can utilized staging area attacks by ways of Dunhere and Haldir. What won’t work as well against this quest, however, is the archetypical staging area attack deck of Fastred coupled with Dunhere, because you will lose the benefit of not having engaged an enemy. Lastly, Hands Upon the Bow can work really well with any ranged hero.
- Watcher in the Water: The big boss enemy of this scenario is indestructible and cannot leave the staging area, so you will have to quest through its threat of five every round until you beat the quest. It is also immune to player card effects, so damaging the Watcher by regular attacks is the only way to get the six damage needed on it to rescue Frodo from the tentacles and be able to beat the quest. In multiplayer this is made easier by the fact that the Watcher is considered to be engaged with each player, so everyone can attack it during the combat phase. In solo, especially if you have to deal with other enemies as well, it is likely that you will have to take longer to rescue the ring-bearer, so you will often have to defend its attacks over multiple rounds. Chumping is certainly an option if your heroes are too flimsy to survive this, but you have to be aware that the shadow effect on Howling Warg will place damage on an active location. (It says “an active location”, however, so you can choose the one that is not the Doors of Durin, which can lose you the game once the damage reaches nine.)
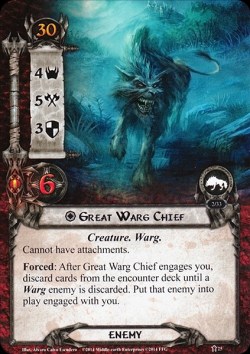
- Great Warg Chief: Whether you reveal this pack leader by regular means or not, you will have the Great Warg Chief in play by the beginning of stage three. The only way to possibly avoid this would be getting the Great Warg Chief in the victory display before reaching this stage. The only cards, capable of adding a unique enemy to the victory display are Scout Ahead and Out of the Wild, so this is usually not something you can plan for. While this enemy has some considerable stats, other quests often have more enemies with similar stats (the recently released Journey up the Anduin for example has two of Pack of Wargs and Goblin Troop each), so a decent deck should be able to take care of the Great Warg Chief, even with its relatively low engagement cost. The biggest danger this enemy comes with is the fact that you will engage two enemies and put two damage tokens on the active location. If you can choose a more harmless location to travel to, when this enemy got added to the staging area, this is your best bet of mitigating the effect if your threat is over thirty, which is likely in this scenario. You can of course try to destroy it before the engagement phase while it is still in the staging area. With its six hit points this is difficult however and you will likely have to combine a Sneak Attack Gandalf with some other direct damage effect or use Hands Upon the Bow with a ranged attacker with two Rivendell Blades and Straight Shot, all of which are multi-card combos which you might not have in your hand. In most cases you will simply have to take the damage on the location, so be prepared to do so.
- Hound of Sauron: Surge is always annoying, but since this enemy is relatively weak, it might not pose too much of a hindrance to your efforts, especially since this is the only surging card in the encounter deck and you are not likely going to run into a surge train because of this. While it has 50 printed engagement cost (which can be interesting if you are using engagement cost shenanigans and have no enemy in the staging area after engaging this one), its actual engagement cost for the purpose of checks will always be 45, because the Hound affects itself. Should you reveal several enemies in a multiplayer game, the engagement cost can plummet rapidly and force you to engage multiple enemies, especially if you revealed several of these. This can be dangerous in the early game, when you are not capable yet of defending multiple attacks of strength four, but later on you should be able to get through the combined survivability of four with relative ease.
- Howling Warg: A mediocre enemy, the biggest problem with it, that it can escalate the damage on the active location quickly. Both its effect and its shadow effect say, that you have to place the damage on ‘an’ active location, so you can choose the location on stage 4. While you will usually not want to choose the Doors of Durin, this can come in handy in the case that you know you will take multiple rounds to beat the quest and don’t want to put damage on the other location because it could cost you the game. Other than that, you can avoid the attack that puts the damage on the location by using effects like Quick Strike, Feint or Thicket of Spears.
- Crebain from Dunland: Despite its generally measly stats, this enemy still contributes three threat to the staging area should it actually remain there. This enemy offers an interesting choice: You can immediately engage it when revealed, but you will have to trigger its effect of revealing an additional encounter card when you do so. More often than not, this is the better choice, because you will have to engage it at some point anyway and the encounter card would be revealed then. If you did some encounter deck scrying you might of course have the information you need to choose to add it to the staging area; or you might be worried about revealing an additional enemy should you not keep the Crebain in the staging area for now. In that case you will have to exhaust a hero you control, to cancel that effect, so you should consider that option carefully. If your threat is above 28 and you don’t plan on sniping it from the staging area before it engages you anyway, choosing to engage it will in most cases be the best choice. The situations where you want to exhaust a hero to add it to the staging area are certainly uncommon. This means this enemy basically surges except for a few rare instances.
Treacheries
There are a couple of quite dangerous treacheries in this quest. While most of them are certainly manageable, revealing them at the wrong time can be quite perilous. Having a plan for that in place (either Test of Will, Eleanor or Black Riders Frodo) is definitely valuable.
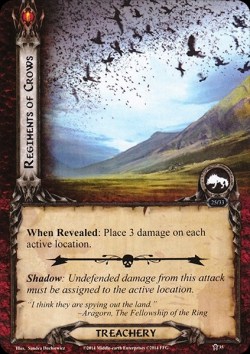
- Regiment of Crows: This is certainly a bad one and one of the treacheries you are most likely wanting to cancel. While you probably will need to keep your test of will back when you have a less harmful location like Hills of Hollin (except for when your threat is dangerously high), this can still be quite dangerous. If you are able to switch the active location back to the staging area after revealing this with Strider’s Path (if you reveal another location) you could then attach Thror’s Key to it, although this is certainly a corner-case situation. Another great option would be to discard the active location with Distant Stars after the staging step before exploring it to just get rid of the damage altogether. You should also be aware that different to Howling Warg, this places damage on each active location, making it even more dangerous on stage four. Lastly, this card does not gain surge when there is no active location. You probably will have one around most of the time, but especially in solo games, this can possibly be a blank draw from the encounter deck.
- Snowdrifts: All of the locations in the encounter deck have more than three threat points. This means that you will have to take at least two rounds to clear them once this attaches to them, which can escalate the damage on them and possibly bring you closer to location lock by revealing more locations. Outside of cancellation, you can use condition removal effects. Your options are more limited though because if you don’t play your condition removal after the staging step before placing progress, you will still have to take two rounds. This means your options are Power of Orthanc, Bulwark of the West or (less likely) sneak attacking a Miner of the Iron Hills or Elrond.
- Bitter Cold: The other big one, this treachery combines two of the themes of this quest: Ally hate and pressure on threat. Aside from cancelling Bitter Cold or running lots of threat reduction cards, you can also rely on building your heroes instead of focusing on allies, play few but capable allies or choose an approach where you can quickly play a decent amount of cheap allies again. As with the Hills of Hollin, Free to Choose can also work quite well here. While this treachery only has two (or one on easy) copies in the encounter deck, it is certainly one you will have to plan for and can even choose to build your deck around or it can punish you severely.
- Storm of Howls: Boosting the Peril keyword, this treachery offers the player revealing it an interesting choice. Either the warg enemy in the staging area with the highest engagement cost (likely a Hound of Sauron or Howling Warg) makes an immediate attack or each warg enemy gets minus twenty engagement cost for the remainder of the round. The optimal choice depends on your deck, your board state and the number of enemies in the staging area. If you can take the attack and possibly still defend enemies you’ll have to engage, it makes sense to defend against the enemy. However, you should be aware that you might still have to engage this round. If there is only one enemy in the staging area and you will have to engage that one anyway, you can safely choose the minus twenty engagement cost. As a general rule consider this: If you have to or plan to engage the enemies in the staging area anyway, you will usually (barring forced engagements by the lower engagement cost you did not plan for) want to take the lowered engagement cost. If you don’t, try to take the attack. One last thing to note about multiplayer games: If this gets revealed early during staging, consider taking the attack, because the lowered engagement cost will affect all additional enemies you will reveal during the staging step.
Tips and Tricks
- Manage locations with care. You’ll want to think about what you can travel to each round along with the number of enemies in play. If you will have to engage multiple enemies and can travel to something else than Eregion, do so.
- Thror’s Key is always good, but even more so in this quest, because all locations have nasty effects with some that can potentially destroy your board state.
- Since stage three will put even more pressure on you with the added damage on locations, you will want to progress through it quickly. Don’t overdo this, however, because in addition to the enemies added by stage three you will also have to deal with the Watcher once you advance.
- With all the ally hate in this scenario, focusing on turning your heroes into superhuman machines through attachments can be a viable strategy. You can even throw in a couple of strong allies if you are prepared to lose them after a while.
- Another option would be to play allies so cheap you can quickly replace them, although this can lead to dangerous situations if you aren’t able to cancel Bitter Cold.
- Effects that remove locations like Distant Stars or Heirs of Earendil can be really good in this quest because you will never have to deal with the forced effect when explored.
- Alongside ally hate the other big theme of this quest is pressure on your threat. This means you should include your threat reduction cards like Galadhrim’s Greeting, Elrond’s Counsel, Secret Vigil and others.
Campaign Mode: Boons and Burdens
In campaign mode, you will have the option to switch heroes for the first time in the house of Elrond. In addition, you will earn some powerful boons that will aid you on your further adventures. Lastly, you can possibly earn the Lust for the Ring burden, but this is avoidable relatively easy.
Boons
 You will earn all of the boons that are available at Imladris and add them to the campaign pool permanently to use them in further scenarios. In addition, each player can add one of them to their starting hand, potentially providing a powerful boost for the scenario specifically.
- Sting: Stat boosts across the board in addition to a powerful direct damage ability for a hobbit hero. Even if you are not planning on taking hobbits other than Frodo through your campaign, the stat boosts certainly make Frodo more flexible. With a Hobbit Cloak, he can suddenly defend for five and deal out a good amount of damage provided some luck from the encounter deck. Add the Mithril Shirt boon into the mix and you are looking at a very powerful defender even against low engagement cost enemies. If you are not using this for Frodo, the best target is probably Sam Gamgee since he can make use of more than one stat each round or Tom Cotton because he already is a fine defender that can use the direct damage effect for good effect. What makes this card truly ridiculous is the fact that you don’t have to exhaust Sting for its ability. With some readying, you can potentially dish out a lot of damage when engaged with multiple enemies.
- Mithril Shirt: Certainly the weakest of the boons and the one you are most likely not to take into your hand when playing with less than four players. It can only go on the ring-bearer and is of limited flexibility because of that. Still, it boosts Frodo’s survivability and can make the use of Road Darkens Frodo as a dedicated defender less of a threat liability.
- Glamdring: A hard two attack for two cost is fine in and of itself. Add to that that you will be looking at a lot of orc enemies over the course of your campaign, this can will potentially fetch you a lot of cards. You are not fighting orcs in this quest however, so taking it you’re your starting hand becomes somewhat less valuable because of this. Aside from Gandalf (note that this potentially good go on OHAUH Gandalf, although this is likely not your best option) there are a lot of warrior heroes this could go on and other than the Beregonds, Erkenbrand, Thalin and Theodred your warriors will likely be dedicated attackers, so you are bound to get some use out of it. You also might have chosen the Valiant Warrior boon after Knife in the Dark, meaning this weapon can potentially go on anyone.
- Anduril: While this boon possibly has the biggest effect, its biggest drawback is its cost of three. It will definitely come in handy later in the campaign though, where you will often have the option of taking it into your hand at the beginning of a quest or even directly attach it to Fellowship Aragorn. While you will certainly be using it for your fellowship hero later in the campaign, at this stage you have more options available. Leadership Aragorn is fantastic with this because he will be able to make use of all of his stats in one turn. The best option aside from him is probably Tactics Gimli, but you can get it on any noble that has decent attack and defence. Again, you might have chosen the Noble Hero boon earlier, offering you more flexibility.
Burdens
The only possible burden you can get in this scenario is the aforementioned Lust for the Ring. While you generally want to avoid too many burdens in campaign mode, this does not mean that you cannot choose it instead of raising your threat during the Council of Elrond. The players will only earn that burden when it is attached to a hero at the end of the game. You can plan for that by playing a Power of Orthanc or Bulwark of the West after the last staging step. This way you will be completely safe from earning it. Should you go this route, including condition removal in your decks is a must, however.

Playthroughs:
- True solo, campaign: https://www.youtube.com/watch?v=hyxg_Hq9f0I&t=541s
- Two players, non-campaign: https://www.youtube.com/watch?v=sARb9_t1OUM
- Two-handed, campaign: https://www.youtube.com/watch?v=QRYdChjLfvc
- Two-handed, non-campaign: https://www.youtube.com/watch?v=V39k4VsYQZ8
After beating this quest your fellowship will have made their way into the Mines of Moria. You can experience the ancient dangers lurking there in the next quest: Journey in the Dark.

7 thoughts on “The Ring Goes South”