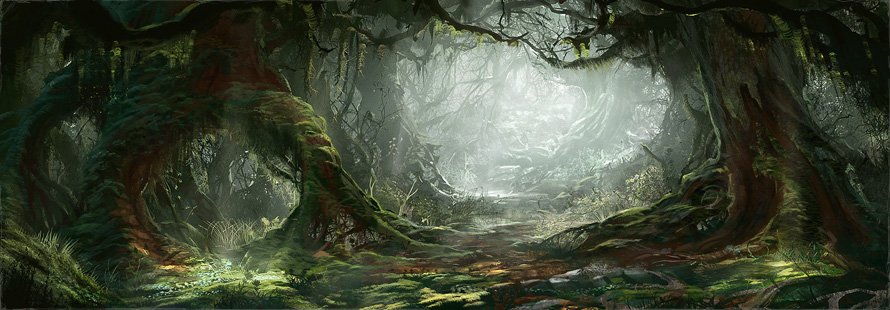
The Black Riders Saga Expansion was the first time Fantasy Flight Games delved into the events of The War of the Ring, and while they did a near-perfect job of portraying Frodo’s first few steps into the wider world of Middle-earth, from leaving Bag-end, surviving Weathertop and escaping to Rivendell, they were not able to cover everything. FFG had given us the highlights of the story thus far, but there were certain key elements that were left out. The first part of the Fellowship of the Ring transitions the story from a child-like escapade into a dangerous journey with real consequences, and The Old Forest and Fog on the Barrow-Downs adventure packs portray the events surrounding this escalation.
So what exactly do I mean by this? Well the events of The Hobbit is, among other things, the tale of a young man being swept off in an adventure during which he finds his courage and pulls through in the end. Bilbo and the dwarves bumble along from one escapade to the next, never in a terrible amount of danger, except for that one run-in with the spiders, and in the end someone else kills Smaug for them. The Fellowship of the Ring opens with the same sort of style; Frodo is being hunted by the Nazgul, but there’s only ever suggestion, mystery and hints of the danger that is pursuing him. This changes once they enter The Old Forest, where the hobbits are enchanted off the path, Merry and Pippin become ensnared by Old Man Willow, and for the first time death is a visible possibility. The juvenility of their adventures is underlined by father-and-mother figures Tom Bombadil and Goldberry taking them in, dusting them down, feeding and sheltering them after their run-in with the ancient Willow. The Old Forest then, as a quest, represents the beginning of a shift away from a more childlike tale where the only opponents are literally faceless villains robed in black, to one where the villains are intelligent, people are fallible, and nature itself has been twisted and corrupted, even to the point where the line between life and death has been distorted.
Reflecting the fact that the dangers the hobbits face in The Old Forest are less tangible, everything in this quest revolves around the locations as the forest itself turns against you. Of the 41 different cards in the encounter deck, only four do not reference locations in some shape or form. And while there are enemies in this scenario, none of them are as fierce as the Nazgul faced in the Black Riders expansion. Other than one or two decent defenders to hold back the efforts of Old Man Willow, what you need in this quest is willpower and threat reduction. This quest has been dubbed ‘slow’ or ‘boring’ by some players, and while it may be the former, it is most certainly not the latter. The gentler pace is because your heroes are lost in a forest, of course the going is going to be slow. If you want a break from sneaking past Ringwraiths in A Shadow of the Past, battling hordes of goblins in Journey in the Dark or even chasing down Uruk-hai in…The Uruk-hai, well then this is the best location-centered quest that has been released. This is Hills of Emyn Muil done right, this is The Nin-in-Eilph‘s redemption, this is both a challenging quest and a thematic home-run, this is The Old Forest.
For the sake of this analysis, I will be considering this quest on a stand-alone basis. I will discuss its place within the Saga Campaign at the end of the article.
The Old Forest
- Found in: The Old Forest Print-on-Demand Expansion
- Official Difficulty: N/A
- Community Difficulty: 6
- Encounter Sets: The Old Forest
- Quest Cards: 6
- Play if: You want an extra chapter for your campaign, you want a more relaxed quest that focuses less on combat and more on locations and theme.
- What is different about this quest?: Victory Display based progression, a final boss that punishes you for doing well in the build-up to it, Tom Bombadil Objective Ally, multiple Stage 2 quest cards
- Solo or Multiplayer?: This quest scales in its difficulty based on the number of players in the game as you need more location-based victory points for every player. Solo play might find the number of locations a bit overwhelming, as you really need to be able to clear one every turn, and so if you aren’t able to keep your questing up then location-lock becomes a very distinct possibility. Two players is probably the sweet spot, as is the case in so many quests, with three and four players becoming more difficult.
- Can I bring Side-quests?: Absolutely, though it won’t help you in dodging any of the ‘Forced’ effects on the main quest cards. Though much aligned, I’d consider Explore Secret Ways is probably the single best Side-quest for this scenario, as the staging area threat cancelling would prove invaluable in this quest. Otherwise, take as many/few as you would like.
The Quest
Victory Display Progression
Once you reach Stage 2, which is almost immediately, progress will be blocked until you can get locations with X victory points in the victory display, where is is 5 times the number of players. Note that it is the victory points yielded by locations that count, you can’t trick in either Black or Red Arrow, or any other player card with victory points to help you on your way. So solo play will see you needing to explore at least 3 locations, 2 players will need at least 5, as will 3 and 4 players . The reason for this uneven scaling is the location Wall of Trees, which will be worth from 1 to 4 victory points depending on the number of players. Of course the flip side of this is that the threat it contributes also scales up, so you can’t afford to leave it in the staging area too long in high player count games. Now this is where Explore Secret Ways comes in, as if you have one copy of Wall of Trees as the active location then the other copies will contribute exactly nothing, other than blocking progress placement on the main quest. The other locations in the game vary from offering 1 or 2 victory points each, so the locations you want to target first will change on how many players there are. One thing to be aware of though is that once you reach Stage 3, Old Man Willow will start raining down attacks on every player each turn, and with each attack, a location is taken from the victory display and the defender’s threat is increased by its victory points. So all those points you’ve earned are going to come back and bite you. That means threat management is almost as important as location control in this quest, so don’t forget to bring that either.
Of course the encounter deck is not just going to sit back and let you waltz your way through the forest, and certain cards will hamper your progress or outright punish you for progressing. Grasping Root will deal more direct damage upon engagement depending on the number of locations in the victory display, prompting players to try and explore fewer locations with higher victory points. Long Trailer accomplishes the same thing, albeit from the opposite end of the deal. Every time the player explores a location while Long Trailer is in the staging area, it makes an attack of 4 against the first player.  While this is by no means insurmountable, it adds to the weight of attacks being thrown at you for every step you take, again pushing players to go after locations with higher victory points. This effect can be especially punishing if Long Trailer pops up just as you are about to clear out several locations at once, and Eru help you if you allow more than one Long Trailer is allowed to build up in the staging area. But if the player does go after those locations with higher victory points, they shall be more likely to face the higher threat increases when Old Man Willow inevitably starts hitting back.
There are other cards that will seek to slow your progress as much as possible, forcing you to endure more and more attacks from the Trailers and Roots. Lost and Witless will clear out any and all progress from the staging area, negating any progress put there by friendly neighborhood Northern Trackers or Rhovanion Outriders. In addition, it pulls a West Road Traveller on you, swapping out a freshly wiped location into the active location spot,  ensuring you will have to make the most progress possible to make any headway. Stage 2B Choked with Brambles accomplishes the same thing, only it ups the ante and just removes all progress from any location in play outright. And locations aren’t even safe once they enter the victory display. Swaying Without Wind and Stage 2B Shifting Trees both remove a hard-earned location from the victory display, the only difference being that the latter is random and the treachery affords you some degree of choice in how much you will be set back.
Setup
To setup this quest, Old Man Willow and Withywindle are put aside, out of play. They’ll come out to have fun later. Then each player searches the encounter deck and adds 1 different location to the staging area before shuffling the encounter deck. It’s worth noting at this stage that with more locations out in the staging area, the encounter deck becomes that bit thinner, meaning enemies will appear slightly more frequently, as will the treacheries. The good news is that the players get to choose which locations gets added to the staging area, so it’s not all bad.  Since the quest doesn’t need progress place on it just yet, Wall of Trees would be a good choice to go for here, making it less likely for this to reappear on Stage 3, where you need to make 18 progress on the main quest itself. Strange Woods would not go amiss here either, as you’ll be starting with nothing needing to be healed (barring a masochistic Hero Treebeard or Quickbeam). It also removes a potentially nippy shadow from future rounds of combat. The only location that would be absolutely prohibitive at this stage of the game would be an Oppressive Forest. Granted it is never nice to see this son of a gun, but the ability to strangle your output without the means to retaliate can result in decks spluttering into submission before the game even properly begins. But now you have your locations ready and waiting for you in the staging area, it’s time to leave the Shire.
Quest Stage 1: Farewell to the Shire (0 quest points)
 And so your quest begins. Set-up is complete and you turn over to Stage 1B…advance to a random Stage 2A. This has to be one of the shortest quest stages in the entire game as the only thing you do here is draw an extra card, representing your time resting in Crickhollow. You know it’s never a good thing if the scenario gives you bonuses, whether it’s resources, card draw or allies. It’s as though they’re trying to be nice before the pain comes. Since there is no time to do anything here, we’ll move on to the next quest card. You can choose which one through the usual means; dice, coins, number generators. Personally I’m a fan of the good old card shuffle, but that’s me.
Quest Stage 2A: The Living Forest
Every time you come to this point, if there are less locations in the staging area than the number of players, you will be adding one from either the encounter deck or discard pile.  Note that while each new Stage 2A gets revealed during the quest phase, i.e. while characters are committed to the quest, they are added and not revealed, so any Warden of Arnor shenanigans will not work I’m afraid. On the other hand, you get to choose which location you get thrown at you so you can pick put the one that will present you with the least amount of problems. You are allowed to search the encounter discard pile for locations, but the only ones that will be added from there are the fairly innocuous, but annoying, Misleading Path. Given its name it comes as no surprise that this location contributes nothing to your progress, but rather slows it down. You are forced to travel here if able, and any progress beyond the 2 required to explore it is wasted, unless there is a Wall of Trees in the staging area, in which case you may end up bagging yourself an extra location. The Explorer’s Almanac allows you to do the same thing with any of the locations in the staging area, and if you can get more than one out then you can ensure that not a single point of progress is wasted. You will need to clear out these locations as quickly as possible however, because if you go to Choked with Brambles or a Lost and Witless is revealed, you will be dropped back to square one. The recently released Woodmen’s Path can help you with this, so more progress spills over onto the staging area locations.
Another thing to note for any folk who like a bit of scrying in their decks, whether it’s Henamarth Riversong, Denethor, Palantir, (I could go on…), is the encounter deck is always shuffled after you quest successfully until you get to Stage 3. This means you need to be careful about when you choose to look ahead, whether it is before or after questing, or else you may find your foresight for the combat phase a bit clouded.
Quest Stage 2B: Dark Bad Place (0 quest points)

Of all the Stage 2Bs you might end up with, this is probably the easiest one to negate. Readying is by no means scarce in this game, whether we’re talking the staples Unexpected Courage and Fast Hitch that are repeatable turn after turn, or effects that accomplish the same but for a cheaper cost or without a racial requirement, such as Cram or Swift and Silent. You may even choose to forgo readying altogether if you are able to choose a hero whose ability is passive and you aren’t depending on their stats to carry the game. Tom Cotton would be a good example of such a hero, as would Bifur and Nori. Alternatively a hero with inbuilt readying would suit being the target here, such as Tactics Boromir, Idraen or Leadership Prince Imrahil.
Even if readying is not easily available, combat in this quest is not overly taxing, with the highest strength you’ll be facing before Old Man Willow coming in at the Long Trailer‘s 4. The biggest detriment this exhaustion will bring about is the neutering of your questing prowess. Now the obvious answer here is to exhaust a hero with low willpower so the damaging effect is minimalised. The problem with this is that these heroes often have their stats loaded in other areas, usually combat, and despite what I said earlier about combat not being too hard in this quest, if you haven’t had a chance to set up either readying effects or defensive allies such as Defender of Rammas, Redwater Sentry or Hama then if you come across this quest stage early on then you may be left with the choice of taking an undefended attack or not making questing successfully.
Willpower boosting therefore is desirable, especially when one hero will have to sit out the round, so that if you leave one hero ready for defense and you can keep your primary quester ready and able. The Necklace of Girion is a more recent example of increasing the willpower of a single hero, joining staples like Celebrian’s Stone, Fireside Song and Elrond’s Counsel. Once you get a few allies on the table, it might be an idea to share some of the love around, looking at Brand, son of Bain and The Arkenstone as newcomers to the stable that includes Core Faramir, The Sword that was Broken and Scouting Party.
The most important thing to remember about this quest stage is that it is taxing your action economy. To counteract this, you need to either invest in action advantage with readying effects like Lure of Moria, or make it so that your actions count for more by improving their impact, especially your willpower but cards like Mirkwood Longknife and Friend of Friends offer multiple enhancements for the price of a single card. And now if you place any progress at all as a result of questing successfully and have yet to get enough victory points from locations, you’ll be propelled along to the next quest stage. Notice that it doesn’t matter if the active location is cleared or not, or even if you are on a side-quest, that still counts I’m afraid. So onward to Stage 2B…again.
Quest Stage 2B: Choked with Brambles (0 quest points)
If Dark Bad Place targets your action economy, this quest stage zeroes in on the player’s location control methods. At the end of the round, every location’s progress is wiped clean. Now while the obvious implication here is that this is a deliberate counter to Northern Tracker, the scope of this card goes beyond that.
First thing to note is the timing of this: at the end of the round. This means that any progress built up during combat by Core Legolas, Asfaloth, Arod or even the Blade of Gondolin is all erased. In addition, it also means that anyone wanting to play Meneldor will have to try and clear out the location he just chipped away at or his efforts will be for naught. Players who use cards that swap the active location around need to be aware of this quest stage and plan for it, particularly with the advent of Haldan and the Woodman archetypes, who seem to particularly benefit from cards like West Road Traveler, South Away and The Hidden Way. The timing also means that any event that places progress needs to wait until the next round before it can be played, so The Evening Star, Strength of Will and Ride to Ruin will have to be kept in reserve unless they are guaranteed to close out said location before the end of the round.
The second thing to note are the two responses to this quest stage. The players can accept that things are going to be set back, but rely on your high willpower next turn to ensure that at least the active location is taken care of, as per the boosts given as examples above. The alternative is to double down on the location control, to ensure that there are little to no locations left that progress can be removed from. The only location with 5 quest points is Oppressive Forest, but that’s a location you need to be travelling to as soon as possible anyway so the bulk of your questing power will be running up against it. Everything else is 4 or less. This means that if you have enough Northern Trackers, Rhovanion Outriders, Greyflood Wanderers, even the occasional Mirkwood Explorer, then no location should survive more than one quest phase in the staging area. Multiple copies of Map of Rhovanion will help when the inevitable Wall of Trees makes its appearance, and Snowbourn Scout and especially Woodland Courier will help make pinpoint location targeting more of a possibility, especially with her enhanced ability in forests.
Quest Stage 2B: Shifting Trees (0 quest points)
 This next stage is probably the one you’d most like to see at the start of the game, when the pool of locations with victory points is comparatively low, and least like to see toward the end, right when you are on the cusp of progression. The forced effect of Shifting Trees is comparatively harmless, only setting you back by a turn assuming a consistent rate of clearing one location per turn. Now yes that is an extra turn of being attacked by Grasping Roots and being subjected to the Song of Sleep, but if the players are able to keep up their momentum this should not be too devastating. Indeed the goal should be clearing at least three locations every two turns, which is by no means unreasonable given the amount of location control we have now and the sheer amount of locations being thrown at us in this scenario.
One way to game the system would be to use Out of the Wild or Scout Ahead to add extra locations to the victory display without having to explore them, or even throwing up there a copy or two of Misleading Path so the locations in the victory display are diluted slightly and there is the chance of losing a location that ultimately is not contributing to your progression. Alternate means of offsetting this would be the ‘point-and-click’ options for location management that can nuke a location in one shot, such as Heirs of Earendil , a powered-up Evening Star or, assuming they’ve been softened up by a Northern Tracker or something similar, the Steed of Imladris and The Riddermark’s Finest can also put this off in a pinch.
Quest Stage 2B: Closing In Around Them (0 quest points)
 The last of the four random quest stages is possibly the worst one. While other quest stages attempt to slow down your progress in some way, shape or form, Closing In Around Them actively accelerates the encounter deck. While an extra card may not seem like such a big deal in 3- or 4-players games, where the odds of having coping mechanisms in place at that bit more likely, in a solo game doubling the amount of encounter cards revealed can be quite a shock to the system. But the difficulty with this quest card is there is not really a whole lot you can do about it except grin and bear it. You do have until the following quest phase to prepare, but its coming for you. Have A Test of Will ready, and beef up your willpower if at all you can. This is not a quest card you want to see stuck around for multiple turns. One way to slightly mitigate this effect would be the use of preemptive encounter deck baiting. I’m thinking of Wait No Longer and The Hidden Way here, depending on what you are best set up to handle, but really the card you’d want is Gildor’s Counsel which just cancels out this quest stage altogether. Scrying effects could be used to plan ahead, or completely change what you may be facing in Denethor‘s case, but otherwise, there’s not really a lot that can be done other than prepare to weather that extra card.
Quest Stage 3: The Wicked Willow (18 quest points)
 So assuming you have enough victory points from locations after placing progress, (that is 5 for one player, 10 for two, and so on,) we now come to the final stage of the quest. Old Man Willow and Withywindle are added to the staging area and up to 3 additional encounter cards might be revealed, depending on how many players there are. This means that be the end of this quest phase there will have been at least 3 encounter cards thrown at the players in a solo game, and up to 10 in a 4-player game, without counting surge. That’s scaling for you. Now this is the boss fight, but victory is not contingent on defeating Old Man Willow, nor should you even attempt it unless you are playing campaign mode.
 Quite simply, to win players must place 18 progress on Stage 3B and explore Withywindle for a further 5 progress. Now as players can travel to Withywindle on the same turn as it is revealed, theoretically players could win the quest during the very next quest phase by throwing everyone into questing and coming up with 23 more willpower than threat in the staging area. Now as Old Man Willow cannot leave the staging area, the absolute minimum players need to commit to pull this off is 26 willpower. The one exception I can think of is the use of Followed, although that grumpy tree is immune to player card effects the trap does not target specific enemies in the staging area but the total threat of it, so by my reading you may be able to cancel out Old Man Willow’s threat of 3. Now 26 is no small amount, so now is the time to play any global willpower buffs that you can, such as The Free Peoples, Astonishing Speed or Lords of the Eldar.
But the encounter deck isn’t going to let you get away that easily. Withywindle throws an extra encounter card at you each quest phase that it is the active location, so the longer it sticks around the harder it will to be to explore. It too is immune to player card effects, so all your location management you’ve spent time and effort building up is useless here. Map of Rhovanion, Lorien Guide, Core Legolas, even Ride to Ruin are all as chaff in the wind now. Only sheer brute willpower will help you, which is fitting considering the queer nature of the place that tries to send passersby into a deep sleep. And as you are fighting sleep here the Forest doubles down on its efforts to defeat you, really nailing the theme of the quest.
But as if the neutering of your toys and the extra encounter card wasn’t enough, Old Man Willow is also coming for you. He is considered to be engaged with every player, but does not actually engage them. This means that effects triggered by engagement…aren’t. So Sam Gamgee, Leadership Faramir and Steed of the North don’t get to trigger any of their abilities as a result. As mentioned above, he is immune to player card effects, so his attacks can’t be dodged with Feint, but his shadow cards are fair game. Each shadow card is dealt and resolved individually for each attack, so Dawn Take You All, Armored Destrier and Shadows Give Way might be less economical than the humbler Hasty Stroke or Sterner Than Steel. Of course nothing yet trumps the universally good Burning Brand, though if you don’t have access to Lore then Staff of Lebethron would be a very good alternative for Hobbits as his engagement cost is 50 so this would always trigger. But even taking out the shadow cards, Old Man Willow will be attacking each player every turn for a hefty 5, so unless you have some consistent defenders in place, allies with need to be thrown under the bus while your heroes carry the questing. This probably isn’t advisable as a sustained tactics however, s some of the shadow cards specifically trigger off attacking or destroying allies. A dedicated defender isn’t hard to come by these days, we are after all living in a new world where a naked hero can take two Hill Troll attacks and live, something that took 8 years to come to pass.
 So the encounter deck is revealing an extra encounter card per turn while we’re at Withywindle, Old Man Willow is attacking each player every turn and they able both immune to player card effects. Surely that’s everything? Not quite, I’m afraid. See those locations you put up into the victory display? Especially the ones with high victory points? Well now they are coming back to bite you. Every single time Old Man Willow attacks, one of those locations gets discarded, and you need to raise your threat by its number of victory points. Unless you can close out the quest quickly, this has the potential to send your threat high enough to make threating out a possibility.
Now the usual threat reduction toys will help here, The Galadhrim’s Greeting, Needful to Know and Island Amid Perils, as well as the upcoming The Shirefolk. Probably the best one here though is the under-costed Elrond’s Counsel, as you get both threat reduction and willpower boosting rolled into one handy product. But it’s this potential for threat increases that is the root of my advice above to use victory display shenanigans to place Misleading Path into the victory display, giving you a chance that a location worth nothing is discarded and you can escape that time. Note that it is possible that after exploring Withywindle, if you are unable to complete the quest, Old Man Willow may indeed discard it from there as well. Now normally this isn’t too big of a deal, but I’ve seen it happen on the same turn that Tom Bombadil gets discarded, prompting an encounter deck reshuffle, and guess what is first back? That’s right, Withywindle. This prompted two more turns of play, raising one player’s threat to 48 before we closed things out.
To summarise this quest stage then, and indeed the quest as a whole, speed is of the essence or you will risk being smothered. The encounter deck will not attempt smash your teeth in on the first, second or even third quest stages, but by increments will you find yourself slipping further into defeat. But if you can move fast enough here, explore Withywindle, place 188 progress on Stage 3B and pray a Wall of Trees does not get revealed, then you shall escape and go unto The House of Tom Bombadil.
The Fellowship Hero
Unless you chose The Ring Draws Them as your burden in A Shadow of the Past, there are no cards in the encounter deck at all that penalise you for exhausting The One Ring. With that in mind, feel free to use The One Ring as often as you like. Combat isn’t particularly heavy, except against the immune boss at the end, so I’d suggest giving Road Darkens Frodo a miss. Mountain of Fire Frodo is always decent if your decks struggle with resource acceleration, but for my money the choice is between Black Riders Frodo and Land of Shadow Frodo. Again, it all depends on what you deck is lacking. Land of Shadow Frodo can boost his willpower to 4, which will be invaluable throughout the quest, especially in the last quest stage where most characters will be needed to shore up the defenses. Alternatively, Black Riders Frodo can help you out if you lack treachery cancellation, and there are quite a few nasty ones in this quest. Song of Sleep neuters a hero entirely, Swaying Without Wind can set you back another turn and Falling Branches can outright kill a questing ally, especially as they tend to be the weaker ones. I’d probably have to give the edge to Black Riders Frodo, while extra willpower is always nice, the 2 extra attack will often go wasted. It is always be worth having that parachute of cancelling an encounter card, especially on the last turn where you may need to go all in.
The Encounter Deck
Global
 The encounter deck has 39 cards to reveal, 31 in easy mode. This is not counting Old Man WIllow or Withywindle as they are both set aside at the beginning of the quest.
 Only 39% of cards have shadow effects, with this actually dropping to 35% in easy mode, just over a third. As for the effects themselves, they tend to focus on either ally hate, with other effects seasoned for flavour.
- In normal mode the average threat in a solo game in 1.3, going up 0.1 for every extra player added. For easy mode it’s actually higher at 1.4, going up 0.1 for every player added.
- Indestructible thankfully only appears on Old Man Willow. Only 2 encounter cards have Doomed 2 (Ending and Failing), but 7 (17%) of them have Surge (Lost and Witless, Army of Flies, Misleading Path), though if Swaying Without Wind doesn’t trigger then it too gains surge. This goes down to 6 (18%) in easy mode as a copy of Misleading Path is dropped. Swaying Without Wind has peril, as does Song of Sleep.
- As discussed at length above, both Old Man Willow and Withywindle are immune to player card effects.
Objectives
- Tom Bombadil: Jolly Tom Bombadil. He shows up in the story quite by chance and promptly disappears just as the Hobbits get to Bree. For those of you who have not read the book, Tom Bombadil rescues the hobbits from Old Man Willow in the Old Forest, and later from the Barrow-wights in The Barrow-downs. He does this, as he does everything, by singing. If I go on much longer I will say something someone disagrees with, as there is a lot of conjecture about who exactly he is and what he represents, and does he even belong in Tolkien’s books? But I’m here to talk about the card, so let’s end the tangent here and start again, shall we?
 Tom Bombadil: Jolly Tom Bombadil. He shows up in the print-on-demand quests quite by chance and promptly disappears just as the Hobbits get to Bree. He enters play committed to the quest, and then swans off again at the end of the round, shuffling the encounter discard pile back into the encounter deck. Quite why he’d want to do this I have no idea. As he is unexhausted, you can use him for attacking or defending as you see fit. Bear in mind that he will be going away regardless, so feel free to throw him at the tougher enemies. Though even with Old Man Willow getting boosted by Falling Branches, that still only takes us up to 7 attack, as opposed to the 9 needed to defeat Old Bombadilo. So unless he had previously gotten whacked with another Falling Branches in the quest phase, the encounter deck can’t ever knock him off. But he still skips off at the end of the round, so it’s a bit of a moot point.
Enemies
- Old Man Willow: Pretty much everything that can be said about defending against this guy and dealing with his ability has been said above. The only reason you might want to attack him is if you are angling for the Old Bogey-stories boon, which you can ready about below. You cannot destroy Old Man Willow, but if you put 12 or more damage on him before the game ends you will have earned that boon. But with 4 defense it’s not going to be a cake walk. As he is considered to be engaged with all the players, everyone is able to take a crack at him. Bear in mind that each person will need to have at least 5 attack strength spare before they can scratch him, so it would be more efficient for ranged characters like Lore Faramir (who gets an automatic +1 attack for Old Man Willow), Haldir and Hirluin the Fair. Bard the Bowman is the only ranged hero who is able to dent the tree without any upgrades, Beorn being the only other such hero who can do so. Otherwise, upgraded heroes ganging up seen the best way to go. Old Man Willow has an engagement cost of 50, so Dagger of Westernesse will be providing 2 extra strength every time, bringing your 3 attack strength heroes quickly up to scratch. Again, he’ll be staying in the staging area so Spear of the Mark is also a good way to go. There are plenty of ways to deal the necessary damage, but you’ll want to finish out the quest sooner rather than later so don’t stick around too long unless you are after the boon Old Bogey-stories.
- Long Trailer: This is a pretty generic enemy at 2/4/2/6. Slightly beefier than usual, but not absurdly so. The tricky thing here is its forced response piling on the attacks. With the amount of locations you should hopefully be clearing, this is almost guaranteed to attack you in the quest phase it comes out. There is no reason at all not to engage it straightaway, literally none. Leaving it up there will enable it to keep raining down attacks every time the active location is explored without allowing you to hit back. Take it on soon, once it is engaged with you feel free to take your time destroying him.
- Grasping Root: While Long Trailer needs to be engaged as quickly as possible, Grasping Root requires a bit more finesse. It deals damage to the engaging player’s characters (in the same manner as Archery) equal to the number of locations in the victory display. Now while at the beginning of the game this might easily be adsorbed as 1 or 2 damage here and there, as the game goes on this could quickly shoot up to upwards or 5 or 6. Healing needs to be considered in your decks as a result of this one card. Warden of Healing is still the go-to in the majority of decks out there, but there are plenty of other options out there. Lore of Imladris has been kicking about since the Core Set, and more recently we’ve seen things like Dunedain Remedy, Athelas and Old Tobey come into the cardpool. As for the enemy itself, its pretty similar to Long Trailer with a 3/3/3/5 stat line. Both enemies need 8 strength to finish off in one shot, but with 3 attack, Grasping Root is slightly easier to defend against.
- Army of Flies: This annoying enemy only has 1 threat, but with 20 engagement cost it will nearly always be coming down to engage you. He only has the 1 attack, and no defense with only 2 hitpoints. So why is he so terrible? Because he discards an attachment from the engaged player upon engagement. I suppose it must really be an army to make our heroes drop their swords and forget their courage. The shadow effect on this card does the same thing. Other than using Black Riders Frodo to cancel the card, or hoping that all three of them come off as shadow cards and that you have A Burning Brand ready, there is no way to avoid this attachment-hate. You could of course take Dunhere, Argalad or Ranger Bow to them and knock them off in the staging area, but given that there are three of them it will be difficult to avoid this completely, especially as the shadow effect accomplishes the same thing as the standard enemy. Bring surplus of any attachment you want to keep around, or bring so many that this has little net impact. But make sure you have something you can discard to protect your Steward of Gondor or Sword that was Broken. After that though, the Flies are so weak that sometimes it feels a waste to spend the 2 attack to squash them. An all round annoyance, from beginning to end. Also it surges.

Locations
- Withywindle: Not much more to be said here. It only has 1 threat so don’t feel too bad about leaving in the staging area for a turn or two. Just be aware that for every turn this isn’t explored, that is another turn that Old Man Willow can attack and raise your threat.
- Misleading Path: So first of all, this location surges. Then, if there is no active location, you are forced to travel here. This means that the 1 threat isn’t going to be hindering you for long, but this location has no victory points. During Stage 2 the quest cards don’t require progress, so anything over the paltry 2 progress needed to clear Misleading Path is wasted. You can get around this however. If Wall of Trees is out, that can absorb some of the excess progress, Explorer’s Almanac can achieve the same thing. However, bear in mind that time is important in this quest, so it may be apposite to take some location swapping cards, such as South Away, West Road Traveller or The Hidden Way.
- Deep Gulley:
 This is a 2 threat, 4 progress location that prohibits optional engagement of enemies by penalising your threat whenever you do so according to the attack value of said enemy. Not that it is not specified as “printed threat” so Keep Watch, Horn’s Cry and Entangling Nets will reduce the threat hurt here. With all the location control that you should be bringing, even if this is left in the staging area it shouldn’t be sticking around for too long, and the increases can be directly countered by playing Well Warned. Secret Vigil will drop your threat back down once the attached enemy is dealt with, or if a team-mate is feeling especially generous, they can trigger Song of Earendil to soften the blow for you.
 - Strange Woods: With 3 threat and 3 progress, this is a net-neutral location to travel to, with 3 threat impeding advancement from the staging area, and three progress doing so for the quest card. It should be lower on your list of priorities to travel to, not only for this reason, but also because there are far nastier locations out there. Preventing healing will only be a massive problem if you aren’t able to get a good defender of some description on the board, and there are many ways to cancel damage instead of actively healing. Frodo Baggins is a time-honoured example of this, but because this is a Saga quest taking him is not an option. Instead consider Honour Guard, Raven-winged Helm or Livery of the Tower for your damage controlling needs. If you have a sadistic streak then Loyal Hound might be the way to go for you, but only if you want to loose all your friends and your humanity in the process.
- Wall of Trees: Now we come to a location that, until the last quest stage at least, would be beneficial in the staging area. With 4 progress and both threat and victory points equal to the number of players in the game, progress is placed on this location before it is out onto the active quest. This could potentially mean players clearing two locations in one shot, more if they’ve been able to play down an Explorer’s Almanac, but now we’re talking a hefty amount of willpower. Bear in mind that this location will always count towards 20% of your progression, as the bar for moving on to the final stage will go up by 5 victory points for every additional player. Don’t be afraid to leave this in the staging area during the mid-part of the game, this should be explored easily enough on its own. Once Stage 3 hits however, this location turns from helpfulness to nastiness. If it is explored and in the victory display to can either be a pin-prick in your threat in a solo game, or in a multiplayer setting this getting discarded by Old Man Willow could be
 devastating. And if it appears in the staging area blocks your completion of the final quest stage by counting essentially as 6 threat (2 for the printed threat, 4 for the progress this location will swallow). As this is a relatively straightforward location, all it takes is relatively straightforward means to deal with it. Mainstays like Northern Trackers and Rhovanion Outriders, as well as the underused Warden of Arnor, can help to preemptively mitigate the progress-soak that is Wall of Trees.
 - Oppressive Forest: This is the single worst location in this quest. With an encounter deck that is engineered to choke and smother the players, the tempo hit that this location causes cannot be understated. Outpacing the encounter deck is the name of the game here, and this location throws the proverbial lasso round your neck. While 2 threat in the staging area is not that bad of a deal, the 5 progress it takes to clear it out is sizable. This makes it difficult to counter with traditional location control cards that might ping off 1 or 2 progress each turn as it just takes too long. Traveling to it is the only quick and reliable way to counter Oppressive Forest, so Eru forbid you draw this and Misleading Path on the same turn, on a round where Closing In Around Them is the active quest card for instance, or even both copies at once. There are only 3 (and a half) sure-fire ways to nuke this card in such a way that it does not effect your board-state by the time your next questing phase comes up. The first is Thror’s Key, and the second is Thror’s Map. (The ‘half’ I mentioned is Heirs of Earendil, but that is dependent on having a unique Dunedain and unique Noldor characters, as well as being able to afford a 5 threat hit.) The Map allows you to get Oppressive Forest out of the staging area, even if you have been forced to travel to a Misleading Path, as you are able to exhaust and trigger the Map and make the Forest the active location after having traveled to the Path. The Key is the more absolute option, allowing you to blank the text box of the Oppressive Forest and go on your merry way. The best part is you don’t play the card or spend a resource when you trigger it, as the Key should already be set up on a hero as soon as possible, so as soon as the Oppressive Forest shows up it is neutered. Of course the Key is unique and so if a second Oppressive Forest shows up before the first is dealt with, things will get a bit hairy. The third option is an underused card called Distant Stars, whereupon exhausting a Ranger or Scout character (and there are tons of these so no excuses), the non-unique active location gets shuffled into the encounter deck and replaced with another location pulled from the encounter deck or its discard pile. Now given the only location that will be appearing in the discard pile will be Misleading Path, this allows you to pick whichever of the locations above that will suit you best at that time, enabling you to make the most progress toward victory as you can.

Treacheries
- Swaying Without Wind: This is just one reason for bringing Out of the Wild or Leave No Trace to the party, so that you are able to choose Misleading Path from the victory display and you are no worse off. If you have not been able to add Misleading Path to the victory display for whatever reason, this has the potential to set you back an entire turn. Otherwise, it is a fairly harmless treachery, merely effecting your pace and giving the encounter deck longer to smother you, as opposed to nastier treacheries that directly attack your board state. Now because you get to choose the location added, you can make sure you get the least bad option. Maybe you need to make as much progress as possible, in which case go for Deep Gulley with only 2 threat. Perhaps you’re still in Stage 2, in which case Wall of Trees would be the choice to go for as if you are questing for enough, it will probably hop straight back into the victory display. If you are able to get your deck’s engine going them consider this treachery a comparatively good thing if you pull it out in staging.
- Falling Branches: Here comes the ally-hate. There are 3 copies of this in normal mode, only 1 in easy mode. Make of that what you will. The removal of a character from the quest is annoying, but it’s the direct damage that is the worst part of the treachery. 2 damage is no insignificant amount to heroes, which will take off at least 40% of any heroes health, except Beorn of course but he’s special. There are 24 heroes that would be left on 1 hitpoint left after this, and a further 8 that would be instantly taken out of the game (not including the Saga Frodos mentioned above in the Fellowship Hero section). So this is not a treachery heroes should take likely without some healing on the table, and Strange Woods may have something to say about that. And where does this leave allies? Well of all the 250+ allies in the game there are 14 who have more than 3 hitpoints, and 3 of them are Istari who will probably run off at the end of the round. So that leaves 11 allies who can take this on the chin and still be around at the end of the round, about 4%. The power of a treachery that could instantly take out 96% of the ally pool is not to be sneezed at. The only ally who laughs at this treachery, and even then only when circumstance allows, is Sailor of Lune. Now to make him predictable and make sure you can have an event on the top of your discard pile, you need a reliable way to discard cards, something like Arwen, Eowyn or Legolas here. Otherwise, this would be one for Black Riders Frodo, A Test of Will or Eleanor. At least it would be, were it not for this next one here.
 Song of Sleep: Of all the treacheries to save A Test of Will for here, this is probably it. Song of Sleep shuts down a hero for the rest of the game, leaving everything but their resource generation impotent. If you had a hero like Halbarad who was able to quest without exhausting I suppose theoretically you could attach this to him and get him to quest every turn, but do nothing else with him at all. Another option would be to attach this to one of your minor heroes whose role has been surpassed or replaced by the allies you should have been able to recruit. I’m thinking here of Bombur, Oin or Leaderhsip Denethor as decent candidates, but there are a handful. Other than taking this on the chin, we also have condition removal to counter this. Power of Orthanc is a little dodgy in this scenario, threat is already at a premium, but if there are multiple copies of Song of Sleep out, then go for it. Ally Elrond and Miner of the Iron Hills both take out the attachment on their arrival, and if healing is a non-issue opt for the cheaper Miner who actually sticks around. Athelas requires a Dunedain (plenty of these) or Healer (only 5 of these guys) character on the table, but can be set up in advance as an investment, ready to be triggered without any resource drain after the Song attaches to the hero. Finally Bulwark of the West essentially turns this treachery into a more absolute version of the previous one: discard an ally. Now the value of this all depends on how many allies you have lying around, and obviously in this case the cheaper the better. This card is in Leadership and they have a plethora of cheap allies waiting to be sacrificed for the greater good.
- Lost and Witless: A bit more mundane compared to the last two, but this serves the general theme of the encounter deck outpacing your efforts and slowing you down. It also changes what the active location might be, so if you were planning on exploring that Deep Gulley and getting those last two victory points to round things out, you may find yourself actually in some Strange Woods and needing to take yet another turn. There’s nothing really to be done about this, other than swapping back if you get the chance with some of the methods detailed above, but this treachery also wipes clean the staging area of all progress that has been building up on locations there. Again this kind of thing has been talked about under Choked with Brambles, but this effect is immediate whereas the quest stage waits until the end of the round. This means that other than cancellation, you will have no time to react or prepare, no chance to preemptively explore locations. Again, you must either take it on the chin, or lean into the curve. Players could try and put down as much progress in the staging area as fast as possible so that locations are explored before they are given a chance to be wiped clean again. It’ll take a fair bit of set-up, but with the right deck it is definitely viable.
- Ending and Failing: Lastly we have here a good old-fashioned threat bump. Initially players might get away with the simple Doomed 2, but in Stage 3 this is guaranteed to be at least 3 threat you’ll be taking on, and this is as Old Man Willow is bumping it up with every attack. One way to get round this is to engage every enemy as soon as possible to minimize the threat increase you’ll take, but if you are unprepared to handle that level of combat, that may be just as bad. Also you run into problems here if there’s also a Deep Gulley hanging about in the staging area. On the other hand, there’s the more traditional threat reduction options. Some have been talked about above, but other means of keeping threat in check could include Spirit Beregond, Folco Boffin or even ally Damrod, who would be the direct counter to this treachery. Another thing to note is that you can play off the Doomed mechanic with some Orthanc toys. Keys of Orthanc will net your heroes a resource, Isengard Messenger gets a willpower boost and, for what it’s worth, Guard of Orthanc gets to ready. I don’t think that there is enough Doomed in the encounter deck to justify their inclusions for that use alone, but its interesting to note regardless.

Tips and Tricks
- In case I haven’t mentioned it before, location control is vital when taking on this quest. Having one or two Northern Tracker is all well and good, but this quest requires more dedicated tech than that. Rhovanion Outrider is one of my favourites because he has the scout trait, opening him up for Map of Rhovanion, which is just pure gold in this quest. Also, its unlikely the Outrider’s solitary progress will actually explore anything, he will almost certainly be getting his boost to 2 willpower, coupled with Leadership Brand, son of Bain pushing him up to 3 willpower and the Map placing a progress automatically, that is essentially 4 willpower right there with a bonus progress in the staging area for seasoning.
- The vast majority of location control cards are in Spirit, as well as the treachery and shadow cancellation. At least one Spirit hero is near mandatory then for this quest, unless you want to patch over these gaps with other spheres, which is certainly doable but a bit restrictive. So your Spirit hero of choice depends on what style of deck you want to go for. Do you want Silvans bouncing in and out using Woodland Courier and Hithlain to pick off locations in the staging area? Then Galadriel is your girl. Or cycle through cheap Rohan allies like Snowbourn Scout and The Riddermark’s Finest to power Ride to Ruin and Strength of Will? Well Theoden awaits your counsel. Dwarf swarms should take Nori to cheap their threat in check, and hobbits should have a good look at Spirit Merry.
- There is some ally hate in this quest, but given that you need to ramp up the willpower quickly (location lock is a thing), allies are one of the easier the way to go about that. A Very Good Tale is unparalleled in mustering large amounts of allies quickly, though if you are in Secrecy then Timely Aid is also excellent. Locations are being explored left and right, so Elf-stone would be an excellent investment here to get an expensive ally in for a heavily reduced cost.
- I’ve already mentioned this, but I’ll reiterate that Out of the Wild, Scout Ahead and Leave No Trace would be an idea if you want to go down the whole ‘victory display dilution’ route. Certainly Rossiel would do some work in this quest, just get one location into the victory display and she’s questing for 4 for the remainder of the game. And if there’s a particular location you really don’t want to show up then, providing you already have a copy of it in the victory display, The Door Is Closed will cancel that card altogether.
- Threat control is hugely important in this quest. With effects ranging from Old Man Willow‘s attacks, to Deep Gulley and Ending and Failing, you can easily see a threat jump in a single turn that reaches double figures. Well Warned will help with this, as would a good old-fashioned The Galadhrim’s Greeting. Most of the best options are discussed above, but its worth the reminder.
- Side-quests are your friend in this scenario. You are almost guaranteed to spend at least 2 turns on Stage 2 where surplus progress gets wasted. Why not make the most of them and use a side-quest? Take Thurindir and choose Gather Information to add to your hand then you get a 3-willpower hero and every player gets to find the card they need the most. Double Back is gold in this quest, and Scout Ahead can make sure you never see Oppressive Forest before you are ready for it. Explore Secret Ways is a controversial choice, but with extra progress being wasted and the prevalence of locations in this quest, there is no reason not to at least give it a shot. I think this may be the single best side-quest for this scenario.
- Bring Leather Boots. Just take them.
- So putting all this together, where does one start? Well, you could try this solo deck on RingsDB starring Beravor, Idaren and Thurindir and see how you go.
Campaign Play:
Burdens
No burdens can be earned as result of this quest. Enjoy this relaxation while you can.
Boons
 Old Bogey-stories: You can only earn this boon by placing 12 progress on Old Man Willow. Anything less by the time you place the 18th progress on Stage 3B and it will have escaped you. Now this Boon essentially acts as a second mulligan. I have yet to see a player have 6 cards in hand and decide to toss the whole lot in favour of drawing 6 new cards. The only time this would be advisable would be in a Noldor deck where the player is actively trying to get cards like Lords of the Eldar, Veteran Sword-elf or Elven-light. I suppose a Caldara deck might find this useful as well, dumping high-cost allies such as Glorfindel, Prince Imrahil and Sulien into the discard pile for Caldara to summon. Otherwise, a second mulligan is certainly not a bad thing. This is especially true in quests where you need to get your engine up and running quickly, and so every card counts, such as Journey to the Cross-roads and Mount Doom.
Playthroughs
- True solo, Campaign;
- 2-player, Campaign;
- 2-player, Campaign, Progression;
- 2-player, Campaign, Thematic;
- 2-player solo, Campaign, Part One;
- 2-player, Campgain, Part Two.
If for some bizarre reason you don’t want to see it played on video but would like a blow-by-blow account of a playthrough, like you’re missing your headphones or something, here is my own account of what happened when I took Frodo and co. through The Old Forest.
I hope this guide has been of help to you and that you enjoy this quest as a truly thematic chapter in the game’s catalogue of quests. Next our heroes are off to a decidedly more (un-)deadlier quest in Fog on the Barrow-Downs.

A thing that wasn’t immediately obvious but made life easier once we realized it: Song of Sleep is an attachment, and therefore you can discard it to Army of Flies. This isn’t reliable enough to count on, but it can make life a lot easier.
(Thematic as well! Fall asleep until the flies bite you and wake you up!)
LikeLike
Sadly that does not work. Army of Flies specifies that you must discard an attachment you control. But you cannot have control of encounter cards, except when it explicitly mentions it (like some Ship objectives in Storm on Cobas Haven). So you will either have to bring a condition removal card yourself, or have your hero snooze for the rest of the game.
LikeLike
Wait, really? Um.. ooops?
LikeLike
Boy, that’s a thorough analysis, and it makes me want to try this quest again soon. A couple of random thoughts:
LikeLike
I read through your playthrough and came up with a question on Turn 6. How can you play Feint on Old Man Willow? Doesn’t “Immune to player card effects” mean you can’t?
LikeLike
Hi, I read through the article again and see that the passage reads as thus: “As mentioned above, he is immune to player card effects, so his attacks can’t be dodged with Feint, but his shadow cards are fair game.” Which is the correct phrasing. Either you mean another part of the article, or you misread the ‘can’t ‘ part. Thanks for bringing it to our attention anyways.
LikeLike
I wasn’t clear enough as I wasn’t referring to this article, but the one linked with “here is my own account of what happened”. In that “blow-by-blow account of a playthrough”, in Turn 6 it says “Deck Two plays Feint on Old Man Willow, preventing him from attacking Deck One”.
LikeLike
Ah ok, that was written by RedSpiderr, who also did the article, so I can’t change that. Good catch though
LikeLike