Ever since the inception of the Lord of the Rings: The Card Game players were expecting to be treated to experiencing the events of the books in game form. With the release of the Black Riders Saga Expansion Fantasy Flight Game finally delivered. In this expansion, the players can experience the events of the first half of The Fellowship of the Ring. Thematically, this expansion is nearly flawless. The quests really bring across the themes of trying to avoid the Nazgûl and the player cards introduced a near-complete Hobbit archetype (that was taken to one hundred with the release of Mountain of Fire and Rosie Cotton).
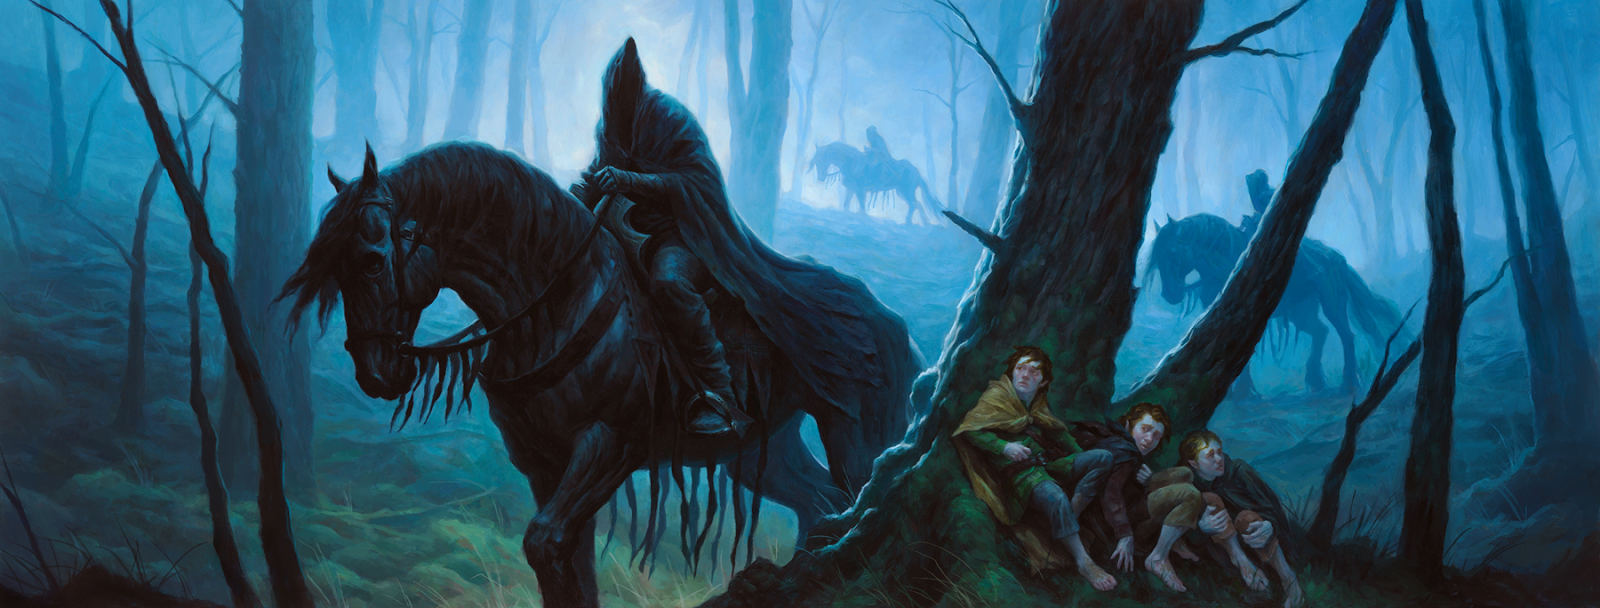
In this first quest, A Shadow of the Past, you will take Frodo (and his friends of your choosing) on the route from Bag End to Bree while trying to avoid getting spotted and hunted down by the Black Riders. In terms of theme, this gets represented by Hide tests, which will use your characters’ willpower to avoid being found and attacked by the mysterious horse riders. This quest also focuses heavily on a lot of different 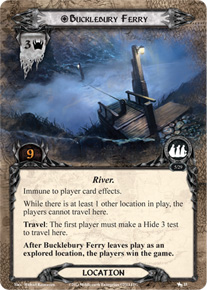 locations that you will have to work your way through to reach Buckleberry Ferry which you will have to take to finally reach the (false) safety of Bree. This theme gets amplified by the lack of enemies in the encounter deck, having only five (or three on easy) Black Riders as well as a couple of harmless although (apparently) loud crows that you can startle and draw attention to your position.
In terms of gameplay, you will find a lot of focus on willpower which you not only will need for questing but also the Hide tests that will be thrown at you from the encounter deck. You will also have to explore a lot of locations before being able to travel to the Buckleberry Ferry and in higher player counts bringing location control is unavoidable. At the same time, you will have a strong enemy sitting in the staging area from turn one with their number only growing over the course of the quest so you will need some measure of capability for taking them out, although it does not necessarily have to be combat.
A note on campaign play: For matters of analysis I will treat this scenario as a one-off at first. This means I will talk about the Fellowship hero, but I will talk about the boons and burdens included in campaign play only at the end in a special section.
A Shadow of the Past
- Found in: The Black Riders Saga Expansion
- Official Difficulty: N/A
- Community Difficulty: 6.3
- Encounter sets: A Shadow of the Past, Hunted, The Black Riders, The Ring
- Quest cards: 3
- Play if: You want to start your campaign, you enjoy the very beginning of The Fellowship of the Ring, you want to have a thematic experience that isn’t too heavily focused on enemies
- What is different about this quest?: Hide tests, the Fellowship Hero, ally hate on stage 2, the requirement to clear all locations before being able to defeat the scenario, the introduction of the Peril keyword
- Solo or Multiplayer?: It’s mixed bag, really. If you want to go for the full thematic experience, playing solo is definitely recommended. However, you might find yourself in trouble balancing questing willpower and Hide test willpower as well as risking an untimely engagement of a Nazgul that you are not ready for. In multiplayer, the focus on locations really shows its problems. The requirement to explore all locations on stage three can be a serious problem and you can find yourself revealing location after location bringing you ever closer to threat death. The amount of enemies also doesn’t scale with the number of players in the game and a dedicated combat deck can probably deal with the Black Riders as they appear from the encounter deck, even allowing you to fail Hide tests on purpose (which also can be thematic in an alternate timeline kind of sense), although there are treacheries and shadow effects that punish this strategy.
- Can I run Side-Quests for this scenario?: You can and it’s is certainly a viable strategy to stall progress on stage one. If you can get a couple of side quests out, in the beginning, this can definitely make the quest much easier. After that, you probably want to complete stage two as quickly as possible and will forego side quests in the meantime. If you are stuck on stage three later you also can clear a couple of side quests since there is no reason not to. However, it might be a little late in the quest for them to have a meaningful effect. The only exception is Scout Ahead, which can control the number of locations revealed and can give you a little respite enabling you to clear the rest of the locations and finally travel to Buckleberry Ferry. Rally the West is also a great option, as it will allow your heroes to more easily pass the Hide tests
The Quest
Hide tests
Several cards in the encounter deck will instruct one or more players to make Hide tests. (Be aware that revealing cards from the encounter deck function a little  different in the saga expansions. Each player will reveal “their own” encounter cards and might be instructed to make a Hide tests by the card that does not affect the other players. In case of multiple players making Hide tests, the order in which you have to complete these tests can matter in quite a few cases.) To do this you will exhaust a number of characters and then discard a specified number of cards from the top of the encounter deck. If the total amount of threat on the discarded encounter cards is equal or lower than the amount of willpower committed to the Hide test you will have passed the test successfully. Should you fail the test, each Nazgûl in play will engage you and make an immediate attack.
The Hide tests you will have to make over the course of the scenario pose a number of different challenges. You will want to keep back willpower in case a card instructing you to make a hide test shows up, but this will certainly make questing more difficult. Cards that can commit characters to the quest after the fact can be very valuable to ensure you have characters held back, but still be able to use them for questing should no Hide test come up from the encounter deck. Examples include Hobbit Pony, Battle-Fury and Late Adventurer. Grappling Hook is a little more niche and only of value on characters that have both decent willpower and attack, but Tactics Eowyn can be a good target for it if you want to go for a huge quest push on stage two. You could also go the other way round and play Don’t be Hasty. Similarly, you can use effects that don’t have characters exhaust to commit to the quest. Definitely, include Light of Valinor if you have an eligible target for it. More niche effects that are more of an insurance should you find yourself in a tight spot are We Do Not Sleep (although overcosted) and Captains of the West. Strider will not work in a lot of cases, because you will control the additional Fellowship hero quite often if not always. Characters that do not exhaust to commit to the quest in the first place are a great choice as well. Your options are Lindon Navigator, North Realm Lookout, OHAUH Gandalf as well as Halbarad, although it will often be difficult to keep an enemy around. If you are running side quests you can also use Rider of Rohan. Lastly, Galadriel and Rosie Cotton are fantastic characters for this quest, since you can use their abilities at any point and can keep them back for the Hide tests because of this. Of course, you can also use the trusted readying effects of Unexpected Courage and Fast Hitch.
In multi-player, you can also choose to have a dedicated combat deck to fail hide tests on purpose and just tank the out-of-turn attack. Be aware, however, that the shadow effects on Green Hill Country, The Marish, and especially Evil Crow punish failed Hide tests, so you should bring some shadow cancellation. Sterner than Steel is always a good option for combat-heavy decks. The Forced effect on The Marish should be no problem with a dedicated combat deck, while the treachery Have You Seen Baggins? can be very devastating. Should you go this route, bringing cancellation and condition removal is an absolute must.
While the quest tries its best to always keep a Black Rider around, you can also find yourself with no Nazgûl around when instructed to make a Hide test. With the effect on Crawling towards him and Have You Seen Baggins? you can potentially still be forced to pass the Hide test or suffer the consequences. Remember that you reveal the encounter cards in player order and decide on whether committing characters to Hide tests at the appropriate times.
Setup
Setup for this quest is quite simple. Make Bag End the active location and add a Black Rider to the staging area. (This is the only time you do not actually reveal it, thus ignoring the Hide keyword.) You will also remove Buckleberry Ferry from the encounter deck and set it aside out of play. Note, that this setup doesn’t scale very well with the number of players. You will always only have one Black Rider in the staging area.

Quest card 1: Three is Company – 1 quest point
With only four quest points total across Bag End and the quest stage, you can potentially advance to stage two quite easily. However, this is usually not recommended. Since you will reveal another Black Rider on the next quest stage, you would already be looking at eight threat in the staging area. This can lead to threat lock in lower player counts. Because of this, it is not advisable to advance before you have dealt with the first Nazgûl and other potential ones from the encounter deck or until you have sufficient questing power on the table. This is not made easy by the fact that you have only four quest points total and probably don’t want to raise your threat by failing to quest multiple times. This is where you either want to play a couple of side quests to avoid putting the one progress on the quest card or switch out Bag End with another location, since you can’t advance if it’s not in the victory display. This can be achieved with cards like Strider’s Path, West Road Traveller or Thror’s Map. If you aren’t able to swap Bag End with another location either by your lack of appropriate player cards or simply bad draws, you will have to pace your questing for a while. This can mean that you will have to raise your threat by questing unsuccessfully. Bringing some threat reduction is definitely recommended because of this. (Again, Galadriel can be an amazing utility hero for this quest.)
In the meantime you want to build your board state to take on the further quest stages of this scenario. How this looks exactly will depend on your approach on how to tackle stage two (see below), but generally your goal is to rid yourself of the initial Black Rider as well as any others that might appear by chance of the encounter deck (I will go over the different ways to do this, when talking about the encounter card.) as well as get sufficient questing power into place to defeat stage two quickly and not be punished by the effect on it too much. Once you’re comfortable with your board state your free to advance, although you should take care to keep some willpower back to pass the Hide test once you get to stage two.

Quest card 2: A Shortcut to Mushrooms – 14 quest points
On stage two the first player will first reveal a Black Rider (remember you can take them from the encounter deck, potentially thinning it of enemies), reveal it and add it to the staging area. Since you’ll reveal it, you will have to make a Hide test immediately after advancing. You should keep that in mind when planning to advance and let the first player keep sufficient willpower back as to pass the test and not be stuck with a Black Rider immediately. You can also hold off of advancing before you have a first player that can safely beat the Hide test when stage two is revealed.
The whole thing doesn’t get any easier when you include the effect of stage two. In order to force you into playing more thematically appropriate ally-light decks that don’t rely on a huge army, every ally under your control (the player making the test that is) adds one to the total threat of cards revealed during a Hide test. This means you cannot have a huge army, especially of low willpower, allies in play, if you’re planning on passing Hide test regularly. Running fewer but more powerful allies (maybe cheating them into play with Elf-stone) is a valid solution to this. High willpower allies in particular like Gildor Inglorion, Ethir Swordsman, Wellinghall Preserver, Glorfindel, Firyal or Súlien can be great for this, since their high willpower can essentially cancel out the threat boost during Hide tests. The latter especially can also function as a form of tech against location lock in this quest. This approach can be complemented by willpower boosts for your heroes. Rosie Cotton would, of course, be the obvious choice for a hobbit deck. Other options include Celebrian’s Stone, Protector of Lorien, Astonishing Speed, Durin’s Song, Elrond’s Counsel, Lay of Nimrodel, Fireside Song and Elwing’s Flight. Readying effects again work wonders here. You could also completely forego any restraint on playing allies and rely on effects like ally Faramir, Sword that was Broken or Visionary Leadership to somewhat cancel out the effect on the stage. With sufficient willpower in play there’s basically two ways to get through this stage: The brute force approach and the sneaky approach.
With the brute force approach you’re planning to get through the stage as quickly as possible, preferably in one turn, because stage three won’t be punishing you for allies in play anymore. Ideally, you want to do this in one round. This gets easier in higher player counts, because you will reveal on average 1.4 threat per encounter card and  will have more excess willpower if you advance with a relatively clear staging area, making it easier to reach 14 quest points in one go. It also is often the preferable way if you don’t build your deck specifically for this quest and rely on your allies because of this. This approach will probably make you more vulnerable to Hide tests, so keep at least some chumps back to tank the Nazgûls’ attacks and ideally have at least enough willpower available to cancel out your ally threat plus a little. You might also want to keep one copy of Test of Will in hand to be able to cancel Hunting for the Ring. (Note that Hide tests are usually not when revealed effects and cannot be canceled because of this.) Black Riders Frodo is also a good choice for this approach as your Fellowship Hero. You should be able to kill the Black Rider revealed by stage two in the same turn, as to not having multiple copies of it around when reaching stage three, so plan your advancement accordingly.
The other and often safer (as well as more thematic) approach is the sneaky one, which revolves around heroes with boosted up willpower, a small amount of high willpower allies and pacing your advancement through the stage in order to always have enough willpower to pass any Hide tests thrown at you. Good heroes for this approach are Eowyn, Cirdan, Sam Gamgee, Glorfindel, Elrond, Celeborn and Arwen, since they all start with relatively high willpower. For hobbits, Rosie is again the perfect choice to include. By doing this you will also have more time to deal with the initial Black Rider as well as every further one that appears.
Quest card 3: Escape to Buckland – no quest points
Again, the first player will have to reveal a Black Rider and make a Hide test, which you have to keep in mind while planning your advancement to this stage of the scenario. You will also add Buckleberry Ferry to the staging area. You have to explore this location to win the game. It is immune to player card effects, so you will have to  travel to it to achieve this. This is made more difficult by the fact that you cannot travel to it, while there are other locations in the staging area. This is often trivial in true solo (although it can still take a few rounds depending on your draws from the encounter deck), but in higher player counts this effect can have you hanging in location limbo for a long number of turns getting you ever closer to threating out.
Thankfully, there is an effect on the quest card that makes all this a little bit easier. Each time you pass a Hide test you can place the number of players times two progress on any non-unique location (so placing it on Buckleberry Ferry is not a possibility). This means from two players upwards you can explore any non-unique location except for Broken Lands while it is still in the staging area (the last one is only possible in a four player game) by passing a Hide test. Since you will only have to clear the location each round you can safely keep excess willpower back to make sure you pass these tests. Despite this you will still want to include location control in your decks, especially on higher player counts. With the constant effect on the quest card, burst location control like Ride to Ruin, Evening Star, Mirkwood Explorer and Asfaloth work better than Northern Trackers.
In order to travel to Buckleberry Ferry the first player will have to make a Hide 3 test. In case there is no Black Riders and no Have You Seen Baggins? around you can fail this test relatively safely, so keeping on top of your Black Riders is very valuable. Should you find yourself in the position of having to pass the Hide test, it is advisable to have the first player keep some willpower back every turn to be able to achieve this. Once you have travelled to Buckleberry Ferry it essentially functions as a nine point quest card. You will want to clear it quickly though as to not become location locked.
The Fellowship Hero
In case you have more than one of the saga expansions available you can actually choose between the different versions of Frodo that all have the Ringbearer trait. All of their abilities revolve around exhausting the One Ring. This provides a great deal of utility in this quest, because with Lure of the Ring there is only one card in the encounter deck that punishes you for having the One Ring exhausted. All of the Frodos have different strengths that can be used to great effect in this scenario. Black Riders Frodo can cancel the effects of an encounter card (and not just when revealed effects, so this includes Surge and Hide), shuffle that card back into the deck and reveal another card. This can be great when you’re hit with a Hide test that you don’t feel comfortable taking or a Black Rider that you’re not prepared to deal with. Of course  you can also always shuffle a treachery back that would punish you too severely or get rid of a location on stage three. The other side to this effect is that its effectiveness hugely depends on the size of the rest of the encounter deck. When there are only three cards left, chances are you are going to reveal that card again and be none the wiser. Still, it offers some great utility that is useful in a lot of situations. Road Darkens Frodo can exhaust the One Ring when defending to cancel all damage from an attack he’s defending in exchange for raising each player’s threat by two. In that sense, his ability functions a lot like the Frodo Baggins that came in Conflict at the Carrock. If you didn’t include a dedicated defender against the Black Riders’ attacks you can use this Frodo instead, especially if you include an attachment that grants sentinel like Dunedain Signal, so it is definitely useful against this quest, although his utility doesn’t quite rise to the heights of Black Riders Frodo. Land of Shadow Frodo is also a great choice for this quest. Since there is an action window after revealing cards for a Hide test you can boost his willpower after you know what you’re up against. With this ability Frodo can become your dedicated Hide tester quite easily. This effect is more useful in true solo however, because you will pass around control of him in multiplayer. Finally, there’s really not much to say about Mountain of Fire Frodo. Being able grant a resource to any hero is always great for resource smoothing and getting higher costed cards out, but there is no real synergy with the encounter cards in this quest.
The Encounter Deck
Global
- There are 42 cards in the encounter deck in Normal mode; 30 in Easy mode. This
 is not counting boons and burdens as well as Bag End and Buckleberry Ferry.
 - Shadow effects appear on 45% of the cards in Normal mode and 50% in Easy mode. Easy mode, however, also removes two of the Black Riders so you will get fewer attacks in general. Also note that Easy mode does not remove the very dangerous shadow effect in Pathless Country from the encounter deck.
- The encounter cards have 1.4 average threat on Normal mode and Easy Mode both. This makes both encounter decks pretty similar, although in Easy mode the threat is distributed a little more average, because it removes two of the four threat Black Riders and several zero threat treacheries. This makes Hide tests a little more predictable.
- Eight cards have Surge in normal mode and four in Easy mode, although several cards will gain Surge when having no effect. All of the Surge keywords are on treacheries. Note that Surge does not apply to Hide tests.
- Hunting for the Ring has Doomed 2 and Lure of the Ring can raise the first player’s threat by three.
- Only Buckleberry Ferry is immune to player card effects, but the Black Riders cannot have non-Morgul attachments. Since they are the only serious enemies in this quest, bringing traps decks would be a bad idea.
While the encounter deck is mostly comprised of locations and treacheries, a lot of encounter cards play around with the Black Riders, so despite enemies not making up a huge chunk of the encounter deck the focus is certainly on the Nazgûl.
Locations
There are quite a few different locations in the encounter deck. While they generally don’t have really high threat and too punishing effects (some even being beneficial), the (probable) constant flood of locations you will have to deal with and the need to clear them on stage three still means that you should bring location control. All of the usual ways of location control will work in this quest, although most locations are resistant to a one time Asfaloth/Glorfindel burst and the ones it works again are great to travel to. Likewise, if you want to keep Woody End or Bamfurlong around in the staging area in order to travel to them at the best time, Northern Tracker isn’t your best tech against locations. The same goes for when you want to stall exploring Bag End on stage one. Also be aware that Pathless Country is quite resilient against location control before you travel to it (unless you blank its text box with Thror’s Key, but there are certainly better options to apply this effect to).
- Bag End: Since this is the active location at the beginning of the scenario, I already talked about the general strategies with this location in the stage one section. You should also pay special attention to its response. With Fellowship Frodo in play at least the first player will draw a card, but if you build your deck around hobbit heroes this is effect is quite powerful and you can take the most out of it.
- Buckleberry Ferry: Again, I talked about this location while talking about stage three. There really isn’t much you can do except clear the other locations and have the first player keep enough willpower back to hopefully pass the Hide test. After that it essentially functions like quest points on a quest card.
- Woody End: This is where Frodo, Sam and Pippin met Gildor Inglorion on their travels, so it is appropriate that this quest stage would have a beneficial effect. The effect is indeed really powerful, although you won’t be able to take advantage of it for the Black Riders that get revealed at the beginning of each quest stage, because it will happen after you cleared the active location and before the travel phase. If you don’t use some form of encounter deck scrying to time your traveling to it according to what will come up, this is a great safety effect when you want to commit a lot of characters to the quest. Since it only has one threat you can safely keep it around when revealed early and use it on stage two to counter the threat boost for allies on Hide tests.
- Stock-Brook: In the book the Stock-Brook is what made Pippin realize the hobbits had lost their way, so this is again a very thematic location. It can definitely be annoying (unless you wanted to swap Bag End out of the active slot but did not draw the right cards), since, if you pace your questing, you might not be able to clear it the same round it appeared or you just travelled to Buckleberry Ferry and now have to do it again. Especially in the latter case if you know you will successfully clear Buckleberry Ferry and win the game you might just cancel the effect using Test of Will, although this will often be a “win more”-instance if you’re not really close to threating out. If you can get it back to the staging area with some form of active location manipulation it won’t pose a huge threat with its one threat and you can travel to it, when there’s nothing more pressing around.
- Bamfurlong: “Old Farmer Maggot’s land” also has a beneficial effect, although it
 is hard to time properly, because you usually will not want to have a Nazgûl engaged with you for an entire round. If defeating the Black Rider wasn’t an option last turn or if you happen to engage a Nazgûl out of turn (by a treachery or by failing a Hide test) this makes for a good form of readying a hero you need to deal with it. Like Woody End, this is great to keep around in the staging area until you really need it and can use its game text for most effect.
 - Green Hill Country: The first of several non-unique locations, this location will boost your characters’ willpower when committed to a Hide test. This effect can become quite powerful and is, like Woody End, a great location to use on stage two where you will have the most problems with Hide tests, but it makes a great and save location to travel to in almost all cases. It’s also one of the locations that you usually won’t want to use location control on, because its effect will be more important than getting it out of the staging area quickly.
- Stock Road: While most the locations mentioned until now had actually beneficial effects, now we’re getting into territory, where the locations will actively hurt you. Stock Road is one of those instances. The threat increase to Hide tests is especially punishing on stage two where you, in almost all cases, already will be up against higher threat. It can also be dangerous when revealed as the first card in a multiplayer game or directly before advancing to the next quest stage, since in both cases there might or will be Hide tests coming up. You will have to take this into account when planning which characters to keep back for Hide tests. Also be aware that the threat increase will apply to the travel effects, because all travel effects are resolved while the location is still in the staging area. This can but a serious damper on your further plans for the round. Still, you will want to travel to it as quickly as possible.
- The Marish: Imagine you have successfully dealt with several Black Riders, there are about five cards left in the encounter deck and you plan for a casual stroll through the Shire without any Nazgûl for the next round. This is when The Marish will be revealed. The effect can certainly be annoying, even dangerous when you shuffle five Black Riders into only a few cards in the encounter deck. More often than not, however, you will only shuffle one Black Rider back in or won’t have to make Hide tests before clearing it (without location control effects the effect will last for at least one round though) or will simply pass all your Hide tests. Since it has three threat, no detrimental travel effect and a constant effect you want to get rid of, this will often be your location of choice to travel to.
- Pathless Country: This is a filler location that will pop up in all of the quests in this expansion. It is hard to clear out of the staging area, but you can often safely travel to it and should there be more dangerous cards around it will only contribute two threat. The shadow effect however is what makes this card dangerous. Engaging the next player and making an immediate attack is probably the worst shadow effect outside of nightmare mode (Sudden Pitfall and Sleeping Sentry notwithstanding). In most cases the other player will not be ready for it and it is impossible to always keep the needed characters back to deal with this effect. While it isn’t as big a danger in this quest compared to the other two, where there will be more enemies around, this shadow effect is what you want to save your shadow cancellation on, because it alone could have a potentially game-ending effect.

Enemies
Although there aren’t a lot of enemies in this quest, the presence of the Black Riders in combination with the constant Hide tests you’re going to have to take really informs the approach you’re going to take against this quest. Because of this it is imperative to have a way to deal with the Nazgûl that you can use reliably.
- Black Rider: THE enemy of this quest. It will force you to make a Hide test when revealed (that includes advancing to a new stage) and boosts four threat which makes keeping several of these around in the staging area not a long-term option. They also cannot have non-Morgul attachments (these will come up in the form of treacheries) and cannot be trapped because of this. However, they are not immune to player card effects, which means you all sorts of ways available to deal with them outside of regular combat, although combat is of course an option if you build your deck around a strong attacker. Alternatively, you can use direct damage. While you can’t destroy a Black Rider with the trusted Sneak Attack + Gandalf combo, weakening it first with smaller direct damage effects from cards like an attack-boosted Argalad, Anborn, Arrows from the Trees or Galadhon Archer is a viable strategy. You can also use Hail of Stones with your characters that you didn’t need to commit to a Hide test this round. In a deck built around high willpower, Ride them Down is also a very good option, especially on stages one and three where questing through the quest points on the card is a less pressing need. With the right traits in play, Hunting Party takes care of the Nazgûl really well too, as can Helm! Helm!, although you will need to tank at least on attack by a Black Rider. Another thing that can work is staging area attacks using Dúnhere or Haldir once powered up with a couple of weapons. Of course any ranged character can attack in the staging area with Hands Upon the Bow or Great Yew Bow. If you have a lot of Rohan characters around, Forth Eorlingas! is also worth a second look for this quest. If you take one of these approaches, it can be dangerous to raise your threat to high or engage an enemy out of turn. However, there are various ways to work around that. You can return enemies to the staging area with cards like Light in the Dark, Fastred (reducing your threat while doing so), Mablung or Terrible to Behold or, at least in the first case, you can increase the enemy’s engagement cost with Pippin, Take No Notice, Noiseless Movement (technically not engagement cost increase, but still) or Anborn.
- Evil Crow: With zero attack this enemy is pretty nonhazardous in combat and even with an attack-raising shadow card you can safely take its attack undefended. The danger lies in having this enemy engaged with you for more than one round. Having to reveal an additional encounter card for a Hide test is something that you definitely want to avoid. Being able to muster up three attack should be pretty easy in most cases, however.

Treacheries
Aside from locations, the other focus of this quest lies heavily on treacheries. This means that bringing Test of Will will definitely be useful and Eleanor (as well as Black Riders Frodo) can do some work in this quest. Be aware however, that quite a few of these treacheries have the Peril keyword, which means they can only be canceled by the player that revealed the encounter card, limiting the utility of treachery cancellation somewhat in this quest. Most of the treacheries deal with the Black Riders, so your way to deal with them will also inform your way to deal with these treacheries.
- Crawling towards him: Did you remember to keep characters back for Hide tests? This card is yet another reason besides the Black Riders to do this. When there is no Black Rider around you could calculate the amount of willpower you will lose and maybe fail this hide test on purpose, but you should make sure that you cannot be punished to severely by effects that trigger of failed Hide tests.
- Hunting for the Ring: In the right situation being able to push a Black Rider back to the staging area can actually be beneficial (although you will raise the threat in the staging area by four) and in true solo the effect is more of a less dangerous Crawling towards him. In higher player counts this treachery is quite hazardous though. Other players might have to make another hide test this round and will probably not have enough characters held back to safely pass both of them. In three or four player games this is probably the treachery you want to cancel most, except maybe for when you revealed it as the last encounter card during staging step and no one had to make another Hide test this round.
- Have You Seen Baggins?: The meanest thing about this encounter card is probably the Peril keyword. If you want to keep your multiplayer friends, attach it to a hero you control. The effect of this treachery is more of a looming threat that you are relatively save from if you plan for Hide tests accordingly. Still, revealing seven or eight threat on a Hide 2 test is always a possibility, though unlikely. If you want to be save, bring condition removal like Miner from the Iron Hills, Elrond or Power of Orthanc.
- Piercing Cry: This treachery can actually be beneficial. You can remove a Black Rider from the encounter deck without revealing it (thus bypassing the Hide keyword) and if the first player is set up for combat you’re not even adding threat to the staging area (and even if you do, chances are you would have revealed the Nazgûl at some point in the near future anyway). Having to get a Nazgûl from the discard pile, because none are available in the encounter deck, is annoying though and of course this treachery can seriously hurt you in the early game when you are not even built up to deal with the initial Nazgûl. In that case, cancel it if you can, although the Peril keyword might prevent it. Also note the shadow, that can be quite dangerous if hitting you unprepared.
- Road Like a Gale: If the players have several Nazgûl engaged with them (which should not happen if things are going at least decently, you got ways to deal with them in place and kept your threat below 35), this can be a huge threat boost in the staging area, possibly making you fail the quest this round. In most cases, however, you will only push one Black Rider back to the staging area or it will just surge, because you’re planning on other ways to deal with the Nazgul. (Like Piercing Cry this can also be a good card to reveal directly after having failed a Hide test if you cannot deal with a Black Rider engaged with you. This is very cornercase, however.)
- Black Steed: Depending on your approach in dealing with the Black Riders this can be quite a dangerous treachery. Since your threat will in most cases be above 25, you will have to engage the attached Nazgûl every round (except if you’re using engagement cost shenanigans). This means that staging area attacks are suddenly off the table (although Hands upon the Bow will still work). You can still use your direct damage effects and everything else that deals with enemies in the staging area outside the combat phase. However, you will have to deal with a Black Rider attack every turn until the enemy is defeated. The same goes for combat approaches if you are not able to muster up ten attack in one go. This also means that you won’t be able to remove the four threat from the staging area by engaging the particular Black Rider. Since there is no way to remove a mount attachment from an enemy and there are more dangerous treacheries to keep your cancellation for, you will probably want to power through the made attacks. There is nothing in the encounter deck that punishes chump blocking so feel free to sacrifice some of your weaker allies to the Nazgûl. Lastly, a good option to deal with the attack or killing the Nazgûl attached is Valour of the North, since it does not specify player card attachments.
- Lure of the Ring: How you want to deal with this treachery revolves around which Fellowship Frodo you picked and how you plan to use him. In some cases the first player might just have to raise their threat because the One Ring is already exhausted. Since the threat raise only targets the first player this will be in most cases pretty manageable if you included some threat reduction. The only instance where you definitely don’t want to raise your threat is when it would push you above 35 and you are not prepared for dealing with a Black Rider.

Tips and Tricks
- Remember to keep willpower back for Hide tests. It is better to quest for less than failing a Hide test and having to suffer through two Black Rider attacks a turn.
- That being said: bring a lot of high willpower characters. They are great for hide tests and can help you push trough stage two quickly. You can use readying effects to use them for both questing and hiding.
- Characters that don’t exhaust to quest are invaluable in this quest, because you will be able to use them both for questing and Hide tests. This also means that Galadriel can be a real MVP in this scenario.
- Try to stall on stage one by using some location manipulation with Bag End since it has zero threat you can time your advancement from stage one perfectly by keeping it in the staging area until you’re ready.
- Use the positive effects on locations to maximum advantage. Since the beneficial locations don’t have really high threat, you can usually keep them around until you can use their game text to best effect.
- With the only serious enemy in this quest being immune to player attachments, don’t even consider bringing your trap deck against this scenario.
- Keep your threat below 35. This lets you deal with the Black Riders on your own terms.
- Be wary of the shadow effect on Pathless Country. In a lot of cases this effect is by far the most dangerous thing that can happen to you in this quest. (If this sounds like I had some horrible experiences with it, that is absolutely correct.)
- A final fun way to deal with the threat of the Black Riders in this quest is using victory display shenanigans. If you can hit one of the five Black Riders with Out of the Wild or Scout Ahead, you just removed on big threat from the encounter deck. This also works with None Return after you have defeated a Nazgûl. Once you have a Black Rider in the victory display The Door is Closed becomes a very powerful card.
- Since both Frodo and Gildor Inglorion are a part of this quest, you are not able to play any other versions of them. Keep this in mind when deckbuilding for your campaign. Frodo is best left in the binder, and Gildor is acceptable in any future campaign playthroughs unless you are picking him as a boon.
Campaign Play: Boons and Burdens
 In campaign play you will begin the quest with both Mr. Underhill and Gandalf’s Delay in play as well as Gildor Inglorion and The Ring Draws Them in the encounter deck. During the resolution of the quest you will choose one of the boons and burdens each and add them to the campaign pool until instructed to remove them.
Boons
- Mr. Underhill: You will start with this attached to your Fellowship Frodo. It is a nice little panic button for the first player (with greater utility in true solo) should you have an enemy engaged with you when you don’t plan for it. If you start the round with an enemy engaged with you and immediately use it, you can also prevent the out-of-turn attack forced on you by a failed Hide test.
- Gildor Inglorion: Way more reliant on chance this card can offer you some respite when revealed from the encounter deck. (Note that it doesn’t surge.) Should it come up as a shadow effect, however, it will go straight to the discard pile. With three willpower he is a good for questing and hide tests and can also survive one naked attack made by a Black Rider. You will have trouble keeping him around though, if you want to use Fellowship Frodo’s ability consistently (except if you’re running the Mountain of Fire version). In that case consider sacrificing him to an attack before having to discard him anyway.
- Which to choose?: Honestly, the answer is probably Mr. Underhill. Gildor Inglorion, while great to have around, is way too reliant on the chance of the encounter deck and difficult to keep around, while Mr. Underhill will always be there to bust you out of a tight spot (at least until it isn’t. Don’t make the mistake of taking your second identity to Mordor.). If you are not a gigantic Fan of Gildor, Mr. Underhill will usually be the right answer to this question. Gildor will also block you from potentially playing his ally version in future games.
Burdens:
- Gandalf’s Delay: Having one less card in your starting hand is annoying, but nothing that cannot be circumvented by card draw effects, which you usually want to include anyway. In true solo, it even gets countered by the effect on Bag End, even if you only have Fellowship Frodo around.
- The Ring Draws Them: This will seriously up the danger that can be thrown at you from the encounter deck. While it can whiff if there are not enemies around (and will be harmless if there are only Evil Crows around), this treachery will hit you hard if you are unprepared for dealing with enemies. Your reaction to this will vary depending on the game state, but in quite a few situations you will want to cancel it or at least be able to push enemies back to the staging area. Also note that the effect does only affect enemies in the staging area, so enemies engaged with another player won’t be affected by it.
- Which to choose?: While The Ring Draws Them isn’t too dangerous in this quest with a small number of enemies around, its hazardousness will significantly rise in the two following quests where you will have deal with a lot more enemies. While it could potentially be a nice counter to Bill Ferny if revealed at the right time, this treachery showing up on the last stage of Knife in the Dark or any other moment where you just flooded the staging area with enemies is a very big risk and usually a must-cancel. Gandalf’s Delay on the other hand, while constant and not based on the chance of the encounter deck is a much less dangerous effect. Sure, you will start the game with fewer cards, but it is something you can build around and plan for. If you are willing to take a risk, choose The Ring Draws Them; if you want to play it safe, choose Gandalf’s Delay.

Playthroughs
- Campaign, true solo, Hobbits: https://www.youtube.com/watch?v=3SRLnXVO5UY&t=529s
- Non-campaign, true solo, Hobbits: https://www.youtube.com/watch?v=s9kyBhsA_NE
- Campaign, true solo, no Hobbits: https://www.youtube.com/watch?v=gwffxXKMLGs
- Campaign, two players, Hobbits and more: https://www.youtube.com/watch?v=ozXDK-W6d2g
- Campaign, four players, Hobbits and more: https://www.youtube.com/watch?v=jSnjLPuO6XU
- Campaign, two players, Hobbits, Noldor, and Ents: https://www.youtube.com/watch?v=5hnekG8kkdI
- Campaign, 2 players, thematic decks: https://www.youtube.com/watch?v=U6dLdFFDIvA
Will Frodo and his friends reach the safety of Bree in time? Will they meet Gandalf at the Prancing Pony? And what will happen to them on their further travels? Well, you probably know, but if you don’t, you should play the next quest of this box: A Knife in the Dark. (The Old Forest and Fog on the Barrow Downs will be added later since they were not part of the original expansion).

14 thoughts on “A Shadow of the Past”