This is a quest that is still very popular with veteran players. It is also a nice quest to play with some newer players who have at least some practice before playing this quest. Foundations of Stone is one of the most enjoyable quests to me because of a clear split between the early and the late game. New encounter cards get added, and players tend to lose some of their board states halfway. This poses players with the problem whether to play their attachments before or after the flood. This scenario also forces players to play with decks that can survive on their own until they are joined by their fellow players. It is one of the more replayable scenarios too, as stage 4 drops you at a random quest card, which can either suit your deck very well or be absolutely terrible. This all concludes in a desperate attempt to climb back to the Dwarven section of the mines, dodging Nameless things down below.
Foundations of Stone
Found in Foundations of Stone adventure pack, Dwarrowdelf cycle, pack 5
Official Difficulty: 6
Community Difficulty: 6
Encounter sets: Foundations of Stone, Hazards of the Pit, Twists and Turns, Goblins of the Deep
Quest cards: 5, with 4 different stages 4
Play if: You want to run against this scenario again, you want to face Nameless things, you have the time to play a long quest and want to show new players how awesome a scenario can be.
What is different about this quest?: Players get split off, players have to wash away most attachments during the third stage, Nameless enemies, different encounter decks between first and second half of the quest.
Solo or Multiplayer?: Both are good options, though the quest will take longer in multiplayer, having more willpower to commit to the quest will definitely help players through some stages.
Can I run Side-Quests for this scenario?: No, I wouldn’t recommend it. This scenario can be very long, and there are no real stages where you can stall. Perhaps players can decide to clear side-quests during the first stage so that the side-quest will help during the rest of the game. This will make it more difficult to progress through and will cause some players to get dangerously close to that 50 threat limit.
The Quest
Setup
This setup is crucial, so please stage 1A carefully before rushing into the game. Players are instructed to set aside the new Foundations of Stone encounter set and create their initial encounter deck with only the Khazad-Dum encounter sets that we have seen before. Adding the new encounter deck will make for a more exciting scenario later on, with different cards in the early and late game. Besides this, the first player will have to attach the Cave Torch to a hero he controls. This restricted attachment hasn’t changed since the previous scenario, so it shouldn’t be anything new.
Quest card 1: The Dripping Walls – 9 quest points
The standard When Revealed effect goes off on this card, which will have players reveal X cards, where X is the number of players in the game. There are a couple of cards that will be fantastic to see early, like Burning Low, Dark and Dreadful, and Sudden Pitfall. Having discarded any of these treacheries will allow for a slightly more relaxed quest phase, especially if you can get Sudden Pitfall out early.
The rest of the stage isn’t really hard, it is just standard questing and building up your board state. There are no new surprises in the encounter deck, so players should be able to move on to the second stage in 1-3 turns.
Quest card 2: The Water’s Edge – 12 quest points
Stage 2 isn’t very different from the first stage, only this time players will have to discard the top 2 cards of their deck when they have committed characters to the quest. This kind of deck milling is pretty harmless and can actually fuel the engines of a Dwarven mining deck or a Noldor deck that uses cards in its discard pile. Besides this discard mechanic, the stage posses no real threat and can feel quite basic. But just you wait until you place that final progress token!
Quest card 3: Washed Away! – 0 quest points
*Toilet flushing sound*
You are being washed away to the very roots of the mountains, to the foundations of Moria. During this, players will have to discard all of their Items, Armour, Weapons, and Light attachments. This includes the Cave Torch. Losing all of these attachments is terrible and will send your heroes back to the start of the game. There are a couple of ways to minimise your losses:
Don’t play attachments during the first 2 stages of the game. This will save you resources to play allies and events. You will be able to play the attachments in your hand during the fourth and fifth stage (if you don’t have to discard your hand). This will leave you a bit naked during the first two stages, but it will pay off in the end.
Play attachments that will not get discarded. There are plenty of traits that will stick to your heroes during this stage. Mounts, Signals, Artifacts, Conditions, and Titles do not get washed away during Normal mode. Rohan decks can benefit from this by bringing a lot of horses to the mix.
Besides stripping your heroes from their attachments, you will be forced to discard all encounter cards from play. This includes the active location, engaged enemies, any cards in the staging area, Rangers of the North(!), and any copies of Watchful Eyes attached to characters. Then, all enemy and treachery cards in the encounter discard pile will get shuffled with the set-aside Foundations of Stone encounter set to form the new encounter deck. The old encounter deck and any locations in the discard pile are set aside, out of play. This effect will only shuffle any cards from the discard pile into the new encounter deck, so having quested hard and fast during the first two stages will definitely help. This will result in fewer cards in the new encounter deck.
After the new encounter deck has been made, each player splits off from the group and receives a random stage 4A off of the quest deck. starting with the first player. Any stage 4A that did not get distributed among players are put aside, out of play.
Quest card 4A: Below the Mines
There are 4 different stages 4B, all with the same 4A side. At this point, players are separated and will have to clear their own stage until they can join another player. Once all stages 4B are defeated, the players advance to the final stage. During this time, play continues as usual, but each player handles their phase individually. So the group first does the quest phase of player 1, then the quest phase of player 2 etc. All players are considered to be the first player while they are alone at their stage. When joining a fellow player at a stage, do so during the travel phase. The joining player(s) must add any encounter cards in his own staging area to the staging area of the player(s) he is joining with, keeping any enemies engaged with him and discarding any active location in the staging area being left.
Quest card 4.1: The Endless Caves – 17 quest points
This is the quest stage that is most suited for decks that can muster a lot of willpower. If you have a swarm deck, this is the card you would like to see. When this stage is revealed, you have to discard all resources from your heroes. Any resources on Treebeard or Radagast may stay in play. You will not be forced to reveal any cards at this point, making it a rather easy stage at the start of the round. Having an empty staging area will help in clearing the 17 quest points on the card. If you are playing a combat orientated deck, with little willpower to commit to the quest, try and stall until a fellow player joins your stage.
After the final progress token is placed on this quest card, you get to decide to what other stage 4 you want to travel in order to help your fellow players. If there are no other stages 4 left in the game, the group is reunited and can move on to stage 5.
Quest card 4.2: Old One Lair – 5 quest points
While you get to keep your hand and your resources, Old One Lair will force you to reveal 4 encounter cards and add them to your staging area. This will make it harder to make the 5 required progress tokens, as you will either get locked with locations or get swarmed with enemies, requiring you to keep some characters back for combat. This quest stage is well suited for Tactics players, as it doesn’t require you to make a lot of progress in order to advance. If you cannot deal with all these cards, try to stall until a fellow player joins your stage.
After the final progress token is placed on this quest card, you get to decide to what other stage 4 you want to travel in order to help your fellow players. If there are no other stages 4 left in the game, the group is reunited and can move on to stage 5.
Quest card 4.3: Sheltered Rocks – 11 quest points
This is probably the mildest stage, as it doesn’t require you to discard your hand, reveal a lot of cards or discard all of your resources. Instead, you only reveal 2 cards off the top of the encounter deck and put them into your staging area. You will need 11 progress to advance to a different stage, but this should be manageable for most average decks.
After the final progress token is placed on this quest card, you get to decide to what other stage 4 you want to travel in order to help your fellow players. If there are no other stages 4 left in the game, the group is reunited and can move on to stage 5.
Quest card 4.4: The Shivering Bank – 7 quest points
All of those attachments you were saving for the fourth stage, yeah discard them all! This stage opens with the unfortunate player discarding their entire hand. This is not really a problem for Erestor decks, but every other deck that doesn’t rely on card draw will have a hard time. You have to reveal 2 cards off the top of the encounter deck, like at the Sheltered Rocks, but will have to only make 7 progress to advance. This stage is best suited for Lore decks or decks that work with their discard pile as an extension of their hand.
After the final progress token is placed on this quest card, you get to decide to what other stage 4 you want to travel in order to help your fellow players. If there are no other stages 4 left in the game, the group is reunited and can move on to stage 5.
Quest card 5: Out of the Depths – 11 quest points
When all players have joined together and beaten the final stage 4B, they advance to this stage. During this final stage, players have to climb back upwards to the Dwarven layers of Khazad-Dum. But the Nameless evils down below are trying their best to stop you. On top of this, time will be running out, as your threat will be quite high at this point. If players have struggled to clear everyone’s stage, there may have been a couple of rounds that increased threat.
When this stage is revealed, every player reveals an encounter card from the top of the deck, just like they did at the start of the game. This will give the players a bit more enemies to work with during this final stage. The 11 progress tokens required for this stage may be difficult to place, as there may be a lot of threat in the staging area that needs to be overcome first. Location lock is a real threat at this point. Having some way to discard locations or make progress on those locations, will be of great use to the group.
The second problem that players might encounter is that they cannot commit more allies to the quest than the number of heroes they are sending as well. Spirit decks will be fine, but the more combat focused decks might not be sending any willpower to the quest at this point. Pseudo-questing will be important here, being able to boost the willpower of the few characters that are going or lowering the threat in the staging area. Eowyn and Cirdan are good heroes if you want to send a lot of willpower, and they have enough ways to boost their willpower. Consider using Galadriel as well to add her willpower to that of another character. At this stage, the scenario gets easier if you are with a lot of players, as 11 quest points aren’t too much to overcome. I would reckon it takes about 2 turns before players beat this stage. If they do, they beat the scenario and made it back to the Mines. But there is still one hurdle between them and the East-Gate. They will have to try and overcome that during the final Adventure Pack: Shadow and Flame. Note that players can also try to place a bunch of progress directly on the quest card by doing the Refresh Action on Mithril Lode. This might even be enough to clear the stage and win the game outside of the questing step.
The Encounter deck
There are two separate encounter decks for this scenario. The first is for the first two stages, without the Foundations of Stone encounter set. The second is with the FoS encounter set and any treacheries and locations that got in the discard pile during the first two stages. You might actually consider using The End Comes to shuffle the entire discard pile into the encounter deck just before you progress to the third stage. For obvious reasons, the second encounter deck analysis only involves the FoS encounter set. It depends on what you discard during the first few rounds on how the actual encounter deck looks like, this will be unique for every game.
Global: Stage 1-2
There are 41 cards in the encounter deck in Normal mode, 28 in Easy mode
Shadow effects are on 46% of the cards in Normal mode and 57% in Easy mode
Average threat per card revealed off the top of the encounter deck is 1.4 threat per card
4 treacheries can surge, they will all be in both Easy and Normal mode
Doomed is not on any cards in the encounter deck yet
Sudden Pitfall cannot be cancelled, this is the only card that is immune to player card effects.
Having the Cave Torch in Easy mode is a far bigger risk than using it in Normal mode, you will also run the risk of discarding treacheries, which will get reshuffled into the new encounter deck at stage 3.
Global: Stage 3-5
These statistics do not include any cards you added from the discard pile at stage 3. The new encounter deck will be unique in every playthrough and may cause these statistics to shift a little. For more accurate data, you will have to do your own math.
The bare minimum of cards in the encounter deck is 24 in Normal mode, 18 in Easy mode.
Shadow effects are very uncommon at 25% in Normal mode and 22% in Easy mode
Average threat on cards revealed is 1.5 in Normal mode and 1.3 in Easy mode
Surge has become quite common, with 6 cards surging. This means that 1 in 4 or 1 in 3 cards will surge, depending on the mode you play.
Doomed 1 is now on 5 cards, nothing really to fear, but if you cycle those treacheries often, you may raise your threat above 40 sooner than you would like.
Unless you reshuffled Sudden Pitfall into the deck, no cards are immune to player card effects.
Again, these statistics will be influenced by the cards you add to the mix during stage 3.
Objectives
There are actually two treasures to be found in these dark depths. You may actually outfit one of your characters with a full set of Durin attachments. Unfortunately, you are not allowed to bring the Greaves from The Long Dark with you to this quest.
Durin’s Helm: While this Objective attachment surges, it does not get guarded by the surging card. This makes it quite easy to claim the Helm whenever you want. You will have to either explore a Drowned Treasury or exhaust a hero to attach the Helm to that hero. It will be a great defensive attachment, as the hero gains a point of defence and two hitpoints if it is attached to a Dwarf hero. This makes it a good attachment for Dain Ironfoot or Gimli. For a non-Dwarf hero, it is a free Dunedain Warning.
Durin’s Axe: Finding the Axe was actually one of the goals of Balin’s expedition, as it is mentioned in the Book of Mazarbul. The Axe will also surge but is not guarded by the next card. It will be a great boost to attack strength for the attached hero, boosting attack by 3. If the attached hero is a Dwarf, he also gains a point of willpower to help during the final stage of the quest. The Axe is restricted, so be careful to who you would like to attach this weapon. You can again claim it by exhausting a hero or by clearing a Drowned Treasury.
Cave Torch: While the Cave Torch has remained unchanged from the very first time we used this Light objective, the quest will only allow you to use it during the first half of the quest. During stage 3 you will be forced to discard the attachment. If you do want to hang on to it (which you can’t!) you wouldn’t be able to place any progress on locations anyway. Both locations in the second half of the scenario aren’t Dark so a new Cave Torch wouldn’t work anyways. During the first half of the scenario, you may use the Cave Torch like you normally would. I would, however, advise to use it as little as possible. Any treachery or enemy you reveal with the Torch will go to the discard pile eventually and will get shuffled into the new encounter deck. You will be able to get rid of a couple of locations this way if you scry the encounter deck well enough. During the first two stages of the game, your chances of revealing an enemy and putting it in the staging area are 29% in Normal mode and 43% in Easy mode.
Enemies
The enemies in this scenario are accompanied by any enemy cards that you had to reshuffle during stage 3. This will have definitely caused you to add a couple of goblins to the mix. Besides those, the enemies that can be found deep underneath Moria are:
Moria Bats: This type of flying enemy shouldn’t be anything new. However, they can still be a handful. These bats will be very vulnerable to direct damage, so having Thalin committed to the quest will be a sure way to discard these enemies. Since only characters with Ranged can attack and defend against the bats, Gondorian Spearmen will not be useful, unfortunately. If the bats do come down to a player, they get a boost of 1 attack for every other enemy engaged with that player. This might make them troublesome, but on their own, you could very well let the damage go through undefended. If you do have a Ranged character, you will be able to shoot this enemy out of the sky without much problem. The bats are very poorly defended. Direct damage is still the best way to handle them though.
Nameless Thing: This is the real meat of the scenario, the Nameless enemies. Besides this scenario, there will be very few cases where you will encounter enemies with this trait (except some Nightmare scenario’s and Ruins of Belegost). The Nameless things have a variable attack and hitpoint pool depending on the cost of the cards attached to it. Playing a very cheap deck may cause you to get rid of these enemies easily, but if you discard a Gandalf to them, you’re going to have a bad time. While the Nameless Thing is in the staging area, it doesn’t have any cards attached to it, and its X values are considered to be 3. If you engage it, the Nameless thing will have you discard the top 2 cards of your deck and its stats will become the combined cost of those cards. If the cost of all cards is 0, you get to discard the enemy immediately. Try to defeat this enemy as soon as you can, as it will get boosted by treacheries like Deep Deep Dark. This might cause it to get more hitpoints and hit harder. Once you do defeat it, you can add it to the victory display for a single victory point. This will make Rossiel more capable to defend against other Nameless enemies.
Elder Nameless Thing: The same idea as the normal “Younger” Nameless Thing, only this time the X value is 4 when the Elder Nameless Thing has no cards attached to it. When you engage this enemy, you will have to take 3 cards off the top of your deck instead of the 2 for the regular Nameless Thing. This will cause the Elder to have higher stats and be a tougher enemy to bring down. You will have to clear this one as quickly as possible too, lest it gets boosted by Deep Deep Dark. The Elder Nameless Thing will be worth 3 victory points.
Locations
There will be only two types of locations in the encounter deck, as no other locations get added from the first encounter deck during stage 3. This makes the deck slightly less location heavy than you might expect at first. Getting trapped with a lot of locations is still an option if you draw a couple back-to-back.
Drowned Treasury: This 2/3 location will be the most common one in the later stages of your game. It is a bit dangerous, but if you can clear it in one turn, you get to either claim one of the Objectives if it is in the staging area without exhausting a hero or draw 2 cards. The 2 cards may be useful when you have landed at the Shivering Bank quest stage. I would recommend players to not travel to this location and instead clear it in the staging area with location control. The location will absorb 3 progress tokens that would otherwise go on your quest stage, which may be enough to join another player. If you happen to have this location active at the end of the quest phase (between quest resolution and the travel phase) you must drown one of your characters (discard a character).
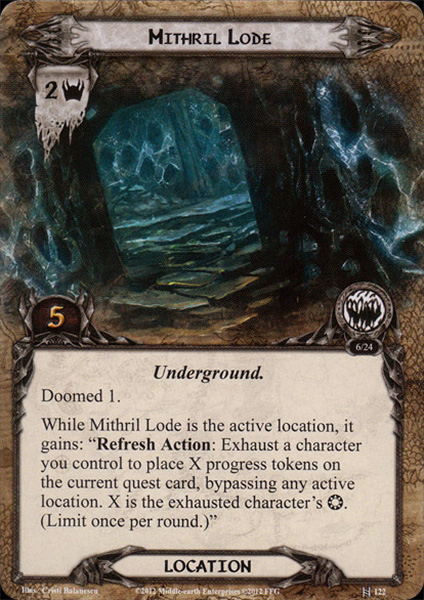
Mithril Lode: This location might cause you to raise your threat by 1 point, but it may also be your ticket out of the stage. While the Mithril Lode is the active location, it gains a Refresh Action. You can exhaust a character during the refresh phase to place X progress directly onto the quest card, where X is the willpower of the chosen character. This bypasses any active location and is a great way to beat the final stage. It can also cause you to advance your stage 4, which will allow you to travel to another player during the travel phase, you will still need to survive another round of staging at your current quest though. I have found this location very useful during the final stage by exhausting Eowyn and having every player discard a card for up to 8 progress on the quest. This can even be boosted with Windfola, Favor of the Lady or Protector of Lorien. This may clear the stage immediately and will let you avoid the quest restriction on the final stage. There is only 1 copy of this location, so use it wisely.
Treacheries
The treacheries in this scenario are joined by the treacheries that were in the discard pile during the third stage. The treacheries will increase the strength of the Nameless enemies in play and will force heroes to wander off into your deck. This can be quite dangerous, as there are many ways in which they may be discarded. Also be on the lookout for Sudden Pitfall if it gets shuffled into the deck. Always quest with an ally if you are the first player.
Deep Deep Dark: Besides the Doomed and Surge keyword, this card will have the first player attach 1 card from the top of his deck on each Nameless enemy in play. This makes the Nameless enemies a lot stronger and will mill the deck of the first player quite a bit. If there are no Nameless enemies in play, however, this card just surges and raises the threat by 1. While this effect may not seem that bad, I have had many cases where I had multiple copies of this treachery surge into each other. This can make your Nameless enemies quite beefy in the blink of an eye. The only real way to circumvent this is by using Minas Tirith Lampwright and calling Treachery every time it surges.
Lost and Alone: This treachery is among the reasons why you don’t see so many 1 or 2 hero decks against this scenario. If you have the ill fortune to draw this card, each hero at that stage chooses a hero he controls and shuffles it into his deck. Then, when the hero is drawn, you gain full control of that hero again. There are a couple of downsides to this. First, you lose a powerful character along with all of its resources and the attachments. The attachments will be discarded and not shuffled into your deck. Second, you will have to mill your deck until you find the lost hero, this may very well last until the end of the quest. Third, you may lose a resource match with some of the cards in your hand. This is a big problem in a tri-sphere deck. Fourth, there are quite some effects where you have to discard cards from the top of your deck. While the hero might not have a resource cost, you will be less likely to bring that hero back to life. Remember that you only bring that hero into play if you draw him. Adding Fortune or Fate or just a Will of the West will help you in this regard. Ally Imrahil will trigger from this effect too! Lastly, even when you do draw the hero, you miss out on drawing a card that round. This may be hard if you were looking for other cards that round. There is a silver lining though, your hero is healed of all of its wounds when it enters play again. This might be useful if you had Beorn near death before you had to discard him. Bottom line, try to cancel this treachery, it is definitely the worst out there and will hinder all players at the stage. Not to mention that there are 2 copies of this card, so players may find themselves stuck with just 1 hero at some point.
Tips and Tricks
Try to rush the first two stages. The fewer cards you reveal during this time, the fewer cards you will have to reshuffle during the third stage. If you are filtering the encounter deck by scrying, try to find as many locations as possible. This will result in a very thin new encounter deck, which will make effects like Wind from the Sea and Ranger of the North more likely to pop up.
Try to add your Rangers of the North after stage 3. They are not enemy or treachery encounter cards, so they do not get shuffled into the new encounter deck at stage 3.
Keep in mind that any Items, Armour, and Weapon attachments you play during the first two stages will get discarded at stage 3. Make the decision yourself if you would like the attachments early or if you would rather use them during the later stages of the quest. Be adviced that there will be a 50/50 chance that you will have to either discard your hand or all of your resources at stage 4, making it harder to put out all of those attachments.
Playing a deck with very cheap cards will make the Nameless enemies less of a threat. If you could, I would advise not using Gandalf as an ally, and instead, run a couple extra 0 cost events. This might even give you the chance of revealing 2 or 3 0-cost cards, which will cause the Nameless things to die instantly.
Scry your own deck to draw your more expensive cards and try to put your 0 cost cards in line to discard to the Nameless Things. This can be done with an Imladris Stargazer. This way, you might be able to stack the deck in such a way that the Nameless enemies become less of a threat. You may be able to deal with them via Direct damage this way.
Direct damage will be very useful against the goblin enemies and the Moria Bats. You will also want to have some Ranged characters in your party to defend and attack the bats if they come down.
This brings an end to my week of vacation. The next scenario analysis, Shadow and Flame, will not be out for a while as my regular classes will force me to spend my time elsewhere. Perhaps next weekend I will conclude this cycle.


Thank you so much for the thoughtful reviews!
LikeLike