I know I said after my Drúadan Forest review some years ago that I would never cover a quest in such a negative tone again. But boy, did I find another quest that I find unfair, and you are all here to read me whining about it. Under the Ash Mountains takes a few mechanics from previous scenarios, like the setting of the Dwarrowdelf cycle and the discard mechanic of Deadmen’s Dike. However, everything is pushed to its limit, forcing you to do well right out of the gate or die trying. The quest shouldn’t be easy; of course, you are close to Mordor, so don’t expect easy quests in this cycle. But I have a problem with this quest that forces you to do well in both questing and combat, or else you won’t get past stage 1. This quest also pretty much forces a deck onto you that includes Spirit, so you are able to at least return some cards from your discard pile to your hand or deck. You will also need strong heroes, as you cannot reliably find allies between all the discard effects. While the quest isn’t busted that only 1 deck can survive against it, and the rest won’t get far, you are extremely restricted in what you can bring to the quest. But that’s enough for an opening rant, let’s look at this quest, and I will try my best to get around to how to best beat it. This one is a big puzzle, so let’s look at the pieces!
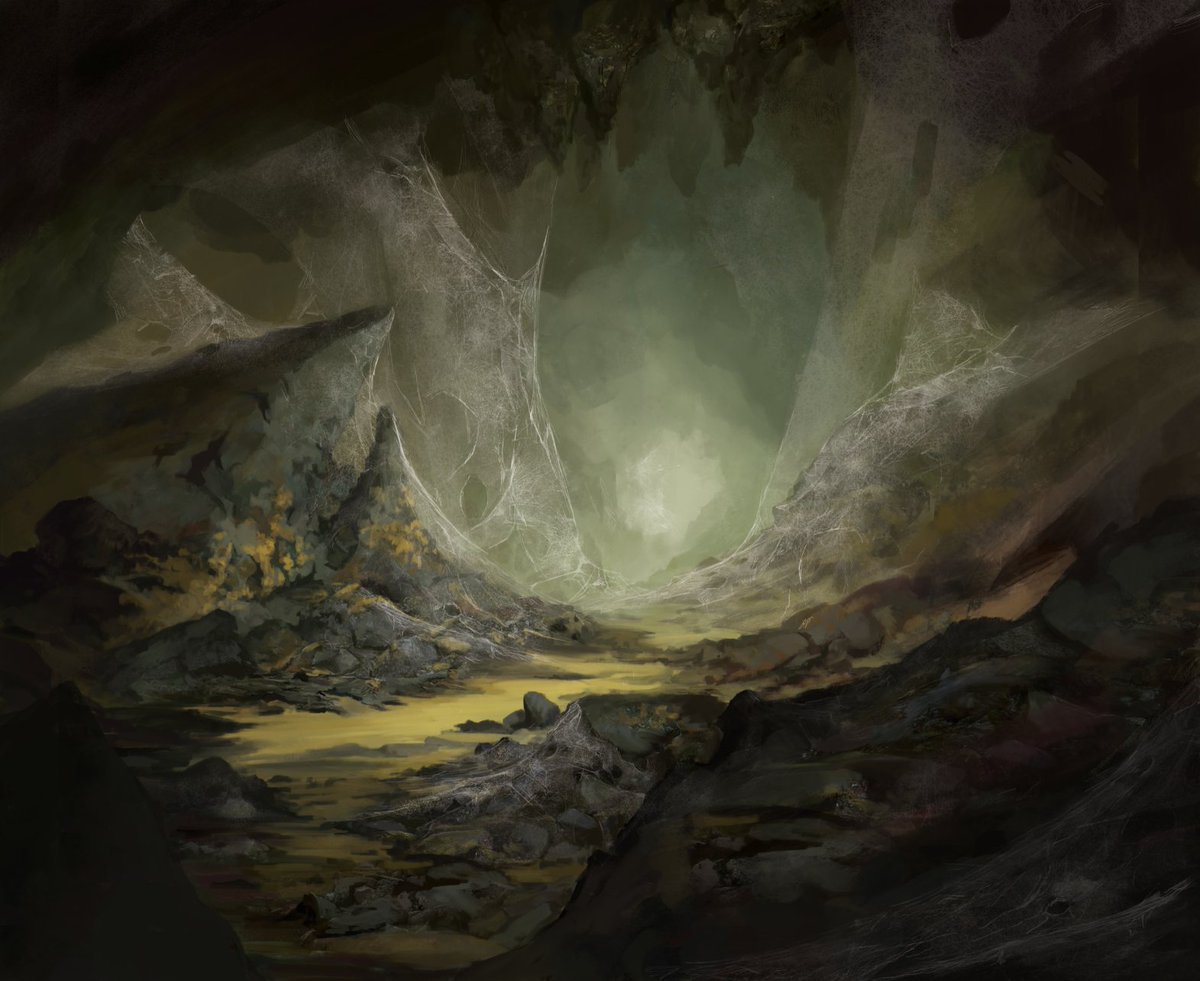
Under the Ash Mountains
- Found in: Under the Ash Mountains Adventure Pack, Vengeance of Mordor cycle, pack 4
- Official Difficulty: 7
- Community Difficulty: 9 (this quest is pushing towards the limits of the quest companion scale)
- Encounter sets: Under the Ash Mountains, Twisted Tunnels.
- Quest cards: 2
- Play if: You are working through the cycle chronologically, you have a Spirit deck that wants to test its recursion abilities, you are looking for a more recent quest that a Dwarf deck could do well against.
- What is different about this quest?: Quest and encounter effects discard cards from your deck. You are eliminated from the game if your deck is ever empty. Side-quests try to get rid of you even faster.
- Solo or multiplayer?: While it is not impossible in solo, it is pretty difficult. You benefit from the fact that you are usually only revealing one card that round, so you have a lower risk of revealing side-quests back-to-back. However, you also need to place at least 50 progress on the main quest by yourself, and be ready to take on the Torech Gorgor Patrol, Trolls, Nameless things, and Werewolves by yourself. This requires a proper balance of your deck.
Multiplayer makes this balance easier, as some people can focus on killing the enemies, while the rest try to make progress. However, revealing more cards during the quest phase can lead to everyone discarding more cards per round than in lower player counts. I would suggest running this quest 2 player, or true solo if you have a solid deck. - Can I bring side-quests to this scenario?: NO, definitely avoid bringing your own side-quests here. You start the game with a side-quest in play, and you lose cards from your deck faster if you end up playing more quest cards. Not only that, but treacheries, locations, and enemies become worse and worse the more quest cards there are. Bringing side-quests actively harms your chances to win this game, so avoid it at all cost. You can still bring side-quest related cards, like Halfling Bounder, Rider of Rohan, and Legacy Blade. These will trigger off encounter side-quests, allowing you to get them online pretty quickly in this quest (assuming you can clear the side-quests).
- What to look out for: Losing all the cards in your deck. Side-quests piling up and losing you cards each round. Enemies making extra attacks against you. Torech Gorgor Patrol that restricts you to just 5 progress on the main quest each round. Losing cards that you intend to play by discard effects.
The Quest
Setup
Get ready for a fair bit of setup here, as the quest needs to prevent players from playing this quest with a 100-card deck to get past the discard ability. After the players have drawn their setup hand (but not their 7th card), they must discard down to 40 cards. This usually means that players must start by discarding 4 cards if they have a 50 card deck, to begin with. However, if you have the Grey Wanderer contract, Messenger of the King contract, Thurindir, or the One Ring, you get to pick your one card for their setup ability before you discard down to 40 cards. The setup here is a little tricky, as several setup effects happen around the same time.

After the players drop down to 40 cards in their deck each, a few cards are added to the staging area. The first player adds a copy of Torech Gorgor Patrol to the staging area, and each other player must choose and add 1 different location to the staging area. There are some good options here that you will want to take in order to avoid their When Revealed effects. Twisted Tunnel is good here, as you avoid a potential enemy. Hideous Deeps doesn’t put any cards under it but also doesn’t return any. It would be a decent location, though. In case you have a 4 player game, you’ll have to choose between Fiery Chasm and Narrow Opening. Crumbling Passage is also a possibility, as its When Revealed effect wouldn’t go off. However, you will get stuck with 5 threat in the staging area. This is quite a lot of starting threat in the staging area, so I tend to pick one of the other locations for a 4 player game.

After the Patrol and any locations have been added to the staging area, the first player shuffles the encounter deck and discards cards until he discards a side-quest. That side-quest is revealed and added to the staging area. This immediately pushes up the threat of the Patrol and any Fiery Chasm locations in the staging area. You can get screwed from the beginning here if you are not careful, as some side-quests are horrible, to begin with. Lost in the Dark is probably the best one to get out of the four, as you will lose 10 cards from your deck but won’t lose immediately. Get this during stage 2, and it is game over. A Haunt for Beasts is also decent for lower player counts, as you won’t reveal as many enemies each round, so you could potentially travel here during round 2 already. Overwhelming Darkness is the worst option here, as you start off by discarding a ton of cards from the top of your deck since you will want to play the cards in your hand during the first round. It does return some of the cards, but you’ll need to have enough starting willpower to get through it quickly. The Tunnels of Torech Gorgor side-quest sticks around for at least 3 rounds (unless players have location control). All that time, it will be discarding more cards at the end of each round. You have no control over what side-quest you start with, but it will be an extra challenge right at the start of the game. When the side-quest has been revealed and resolved, the encounter discard pile is shuffled into the encounter deck, and the players get to start their first round.
Quest card 1: Passage into Mordor – 25 quest points

Depending on the side-quest you got for setup, your first round can look pretty different between runs. Games, where you get the Haunt for Beasts or Tunnels of Torech Gorgor to start with, cannot place progress there on their first round (unless you manage to engage the Torech Gorgor Patrol in the staging area during planning with cards like Son of Arnor). The other side-quests can be explored on your first round, and they should be the active quest so that you can clear them as fast as possible. Having more than 1 quest card in play during this game is bad, so you will want to clear side-quests as fast as possible. And since you can only place up to 5 progress on the main quest thanks to the Torech Gorgor Patrol, side-quests will have to do.

The biggest decision to make during your first two rounds is when to engage the Patrol. Remember that it will make an additional attack when it engages you, so you will have to have 2 defenders ready. You can also use card effects like Feint and Feigned Voices to cancel the attack. Players can even get creative with Reforging a Forest Snare onto the Patrol to take it out of commission permanently. But the threat of 2 attacks hitting for 5 each is often too much for a single deck to handle, plus you might get more enemies revealed during the quest phase that might also engage. There are a couple of enemies like the Spawn of Shelob and Ash Mountain Werewolf with relatively low engagement costs, so you might have to leave the Patrol in the staging area while you deal with the more immediate threats.
You also cannot stall for too long at this stage, thanks to its forced effect that triggers at the end of each round. This requires each player to discard X cards from the top of their deck. X is equal to 1+ the number of quest cards in play. This counts the main active quest as well (but not stage 2 while you are at stage 1). This means that if you have one side-quest in play, you need to discard the top 3 cards from your deck at the end of each round. This causes you to lose useful cards to your discard pile potentially, so you will want to run a lot of recursion. Spirit is the best sphere for this, as it allows you to play Stand and Fight to return allies, Reforged to return attachments, and allies like the Galadhrim Weaver to put cards back into your deck. The only card that you cannot use in this entire quest is Will of the West. The quest card mentions that event cards, in general, cannot be used to shuffle cards back into your deck, but it might as well have said Will of the West by name. This card broke Deadmen’s Dike, so the developers plugged that hole in their design, making the card useless in this quest. Try to use different recursion effects to get to use your cards and to keep your deck filled.

Throughout the entire quest, you will be losing cards from your deck. Not only to encounter cards and the end-of-round effect on the quest, but also each time you draw a card. This is why you should minimize your card draw and make sure you don’t fill your deck with any useless cards. The quest card mentions that you are eliminated whenever your deck is empty. While this is true, it forgets to mention that this is only checked at the end of each round. So if you can somehow fill your deck back up with cards after you ran out (for instance, by clearing Lost in the Dark or the Hideous Deeps), then you are not eliminated. Be sure to rush this quest as fast as possible since your starting conditions only give you about 10 turns to complete this quest. Placing just 5 progress on the main quest each turn is not going to be enough, as encounter card effects will continue to discard cards from your deck, so you will have to engage the Torech Gorgor Patrol sooner rather than later.

The nice thing about this quest is that there isn’t much required from you to advance the quest. All you need is 25 progress on the main quest. This will be quite a lot to do for true solo players, especially since you cannot run a “willpower-only” deck in solo. The balance between questing and combat is very delicate in this one, but once you manage to clear the main quest, you immediately advance to stage 2. Try to buy yourself some time, though, and clear side-quests before you clear the main quest if possible. These side-quests will increase the threat of cards revealed, discard additional cards from your deck, and put nasty passive effects into play that you could better do without. Clearing these is top priority, though the main quest is a good alternative if you cannot select any of the side-quests. If you also know that you won’t reveal a Patrol this round, and there are none in the staging area, you can also decide to rush the main quest and place a bunch of progress there if you really want to.
The locations in this game are also tricky to have active, as they will soak up progress, but leaving them in the staging area can leave you location-locked. Try to travel whenever you are going to a side-quest during the next round, as you probably have enough progress to clear both at that point. If you are going against the main quest, but the Patrol prevents you from placing more than 5 progress, try to travel to lower the threat in the staging area. One attachment that can be very useful to make sure that progress isn’t wasted thanks to the Patrol or to side-quests with few quest points is the Explorer’s Almanac. You can use it on location in the staging area to divert progress there without having to travel. This is particularly useful for locations like Narrow Opening, which you don’t want active, and to clear Hideous Deeps with any extra progress, you might have. Location control won’t get you too far in this quest, though, as several locations still trigger nasty effects when they are explored and leave play. There isn’t really a way to prevent that reliably.
After the 25th progress has been placed on the main quest, the players immediately advance to the next quest. Try to have as clear a staging area as possible, as the transition will bring out more encounter cards and side-quests that you need to be ready for.
Quest card 2: An Evil Place – 25 quest points

Moving on to stage 2, there is a big wall of text that triggers when the stage is revealed. First, the players must search for an encounter side-quest of their choice in the encounter deck or discard pile. They must reveal that quest and put it into play so that it counts towards the X values of enemies and locations. You might have already cleared a few side-quests, so there is a chance you are stuck with the one you really didn’t want. Ideally, you have only cleared 1 side-quest at the start of the game and have avoided revealing another. Now you have the choice of 3 side-quests to reveal. In my opinion, if you get the choice, go for A Haunt for Beasts. This does not limit your ability to place progress on the main quest, nor does it take away any cards from your deck. Alternatively, if you have played most of the cards from your hand, you can go for Overwhelming Darkness, which would discard cards from your deck each time you play a card. But if you already have most of your cards in play that you need, the side-quest does very little. The worst side-quest at this point is Lost in the Dark. It removes 10 cards from your deck that you need to recover in order not to lose. There is a real chance this steals the final 10 cards from your deck, in which case you will lose at the end of the round if you cannot reclaim cards in the meantime. Lost in the Dark is also the most tempting side-quest to divert you from the main quest in order to reclaim your cards. And at a stage where time is against you, it is really hard to make the decision on where to go. If you somehow already have all the side-quests in play or explored, then this effect does nothing.

But you are not out of the woods yet; as the second part of the When Revealed has the players shuffle the encounter discard pile into the encounter deck and discard cards until X enemies are revealed, where X is the number of players in the game. These enemies are then added to the staging area (note that this won’t trigger the Surge on Spawn of Shelob). This ensures you have more combat to deal with and can also cause another Torech Gorgor Patrol to end up in the staging area. If that is the case, the players will again have to engage the Patrol in order to make more than 5 progress per round on the main quest. To try and avoid this, you can either send the Torech Gorgor Patrol to the Victory Display with effects like None Return when you kill it, or you keep it engaged with players where the Patrol cannot do you any harm (though the shadow effect on Burning Reek might cause it to move back to the staging area. Use a Forest Snare if able).

With all the extra cards revealed, the players may flip over the quest card to side 2B. This side is exactly the same as 1B, and will have players discard cards at the end of the round at the same pace. Now that an extra side-quest is in play, you should do your best to try and rush this quest, as you won’t have very many rounds left in you before you are eliminated. This quest card also again informs you that event cards cannot shuffle cards back into your deck from the discard pile (so no Will of the West).

This quest card should be rushed as soon as possible. Make sure that you know where each copy of Torech Gorgor Patrol is, so that you know it won’t be revealed from the encounter deck and prevent you from making a lot of progress that round. Players should now start to use their large willpower-buff effects to boost their characters and try to make 25 progress as quickly as possible. The Free Peoples, Untroubled by Darkness, Captains of the West, Sword that was Broken, and many more effects should be stacked on top of each other to try and make it through the quest now. It won’t be easy thanks to the host of enemies you revealed when transitioning to this stage, but if you can soak their damage for a turn or two, you can free up more characters to quest with. You do not need any other pre-requisites to win this quest, only the 25 progress. The side-quests might be tempting but only travel to them if it buys you an additional round. Also, make sure that you do not travel to locations where the threat is lower than the quest points. That is only a damper on your progress, and you can more progress by not travelling to them. If you must travel thanks to Tunnels of Torech Gorgor, then go to locations with threat equal to their quest points. Twisted Tunnels is always a great location to go through unless you managed to get enough location control in play to clear it in the staging area.
By questing hard, the players should be able to clear this quest stage in under 3 turns. Prioritize willpower above all else, and even sacrifice characters for combat if you really have to. If you run out of cards during your final round, remember that you aren’t eliminated until the end of the round. So you can still take the larger enemies engaged with you and soak their attacks. Not all players might make it to the end in a multiplayer game, but if only 1 player makes it, then everyone wins! After the 25th point of progress is placed on this quest stage, the players win and have found their way into Mordor. They must now traverse the region of Nurn in order to find Ulchor.
The Encounter deck
Global

- The encounter deck consists out of 36 cards in Normal mode. This gets reduced to just 27 cards in Easy mode.
- The chances of hitting a shadow effect are 53% in Normal mode and 56% in Easy mode. These shadow effects also often tend to discard cards from the top of your deck, so the more you can avoid, the better.
- Average threat per card revealed is 1.7 threat/card. This can range from 0 threat side-quests and treacheries to 5 threat locations. The most extreme would be if all side-quests are in play, then the X threat cards are 6 threat each.
- Only the 3 copies of Spawn of Shelob have the Surge Only the 3 copies of Spawn of Shelob have the Surge keyword. You can often rely on the knowledge you are only revealing 1 card per player, though these Spiders surging into one another can be dangerous.
- 4 cards in the encounter deck have the Doomed 1 keyword. There isn’t a ton of threat-raising abilities in this deck, as the quest tries to end your playthrough by discarding cards instead.
- Immunity/Passive abilities
- While Torech Gorgor Patrol is in the staging area, no more than 5 progress can be placed on the main quest each round
- Mordor Cave Troll cannot have attachments
- While Narrow Opening is the active location, each player cannot play more than 1 card each round
- While Orc Passage is in the staging area, encounter card effects cannot be cancelled
- While Tunnels of Torech Gorgor is in play, the players must travel to a location when they can
- While A Haunt for Beasts is in play, each enemy cannot take more than 4 damage each round.
These statistics assume a setup for 1 player, meaning that one copy of Torech Gorgor Patrol and one side-quest are already in play. You can see that the spread of encounter card types is pretty equal between enemies and locations, which gives you the best chances at clearing the side-quests. The encounter deck has many cards with high threat, so you must be prepared to send more characters to the quest to clear side-quests and make enough progress on the main quest.
Enemies
There is a whole host of evil creatures living under these mountains. Not only do the Nameless enemies make a return from the Dwarrowdelf cycle, but you will also be fighting werewolves, as well as your traditional Orc and Troll enemies. This variety of enemies makes it very difficult to get Rossiel her defence, as almost every enemy has a unique trait.
- Torech Gorgor Patrol: Isn’t it nice when the boss of a scenario starts in play, has an additional copy in Normal mode, and basically requires you to engage it round 1? No? Well, join the club! This enemy is one of the reasons I hate this scenario with a passion. As it is very tough to take down, makes extra attacks against you but needs to be engaged in order to make progress on the main quest. Luckily, the Patrol is not immune to anything, but it is difficult to find your tricks reliably in this scenario since there is a risk your events are discarded. The Patrol doesn’t come down automatically thanks to its 45 engagement cost, but with a variable threat of X, where X is the number of quest cards in play + 1, you will quickly find this enemy to be a lot of threat. The biggest reason you want to engage this enemy is thanks to its passive ability, which reads that the players cannot make more than 5 progress on the main quest each round while the Patrol is in the staging area. There is a way around this limit without having to engage the Patrol. If you can play Revealed in Wrath during the quest phase, the Patrol has a blank text box. Not only does this lower its threat to 0, but it also allows you to place as much progress as you like for that phase! More effective ways to deal with this enemy without engaging it are to use The Great Hunt or Eagle of the North to discard the Patrol. This bypasses any damage cap that the Patrol might get from the side-quest and helps you avoid taking his attacks early on. If none of these strategies work out for you, you have to start engaging this enemy to make progress on the main quest. Build up a little if you can by clearing side-quests in the meantime, and only engage if you are confident you can make some progress on the main quest next round. Engaging the Patrol triggers the Forced effect, which causes it to make an immediate attack against the engaged player. This attack can be cancelled, though consider that you will have to take another attack from this enemy in the combat phase. Both attacks hit hard with 5 attack, which requires a hero to defend since there are a lot of shadow effects that punish you for chumping. Worst case scenario is that you get a shadow effect that has the Patrol make an additional attack, at which point you might as well reset the game. Turning the tables on the Patrol and dealing damage to it is also quite difficult. They come with a defence of 4, and you need to chew through 9 hitpoints in order to finish the Patrol off. With A Haunt for Beasts in play, this takes at least 3 turns. If you decide to kill the Patrol, make sure to send them to the victory display with None Return. The enemy doesn’t go to the Victory Display by default, but if you can send it there with the event, you can breathe a little easier. It also allows the Orc Passage location to be a lot easier to clear, without having to risk grabbing this enemy again. Another useful method is to leave the Torech Gorgor Patrol in play and just slapping a Forest Snare on it. This prevents it from attacking you and will keep it in play engaged with you. There it cannot prevent you from placing progress on the main quest, and you also avoid revealing it for the transition to stage 2. There are two copies of this enemy, though, unless you are playing in Easy mode. This means you need to trap or dispose of both of them to be absolutely sure that you aren’t waylayed in your efforts to clear the main quest. Once you neutralize all copies of this enemy, the quest gets a little easier, but your combat characters still have to focus on the many other enemies that this quest has in store for you.

- Spawn of Shelob: Compared to the other enemies in this encounter deck, the Spawn of Shelob feels out of place. Just 1 threat, 2 attack, 1 defence, and 2 hitpoints isn’t too much compared to the much bigger stats on the other enemies. This makes the Spawn more of an annoyance than a threat. The Spawn does come with the Surge keyword and has the lowest engagement cost of enemies in this encounter deck at only 12. To make things worse, the Spawn has a Forced ability that triggers whenever it engages you. It requires you to either discard a card from the top of your deck, or the Spawn gets +2 attack until the end of the round. This is similar to the Forest Spider from the Passage through Mirkwood scenario, in that the attack boost will only last for the round. So keeping the Spawn in play might not be a horrible decision, as you keep the surge keyword out of the encounter deck. Dunedain players will want to keep it engaged no matter what, but other players can also keep these little spiders engaged and not suffer too much from it. As for the ability, it depends on what other enemies you have engaged with you, and how your defenders are looking like. If you have a spare defender or are chumping this attack, then the +2 attack is preferred over having to discard a card from the top of your deck. If you are risking a hero with the defence though, consider discarding a card to the spider. Losing an extra card from the top of your deck isn’t great, but it’s better than discarding a hero. Killing the Spawn is very easy, so if you are working with Tactics Legolas or the Blade of Gondolin, this enemy can be an easy source of additional progress. But prioritize dealing damage to other enemies first, as this one doesn’t do much in the coming rounds.
- Ash Mountain Werewolf: It makes sense to have Sauron’s domain crawling with werewolves, it’s kind of his thing. So we get another Werewolf enemy in this game, and while it may be weaker than the ones we found during the Ered Mithrin cycle, it can still be a dangerous enemy and can cost you a fair few cards from your deck. The Ash Mountain Werewolf has 2 threat and engages at 28 threat, so quite early on. It attacks for 4, which already requires a decent defender and is a value that is tricky to take undefended. Even worse, the werewolf will force you to discard a card from the top of your deck each time it attacks. If the attack destroyed a character, then an additional card is discarded after the attack. So chumping is out of the question and you will need a proper defender for this enemy. Attacking the Werewolf back is a little easier. It only has 1 defence and 5 hitpoints, which is poor compared to the bigger enemies in this scenario. The 1 defence in particular makes the Werewolf vulnerable to Straight Shot after you attack with a Rivendell Blade or something. This allows you to discard the Werewolf, even if A Haunt for Beasts caps his damage taken each round to 4.
- Mordor Cave Troll: Remember the days when the big nasty Trolls were the biggest concern in the deck, and the rest of the enemies were whimps? Well, Mordor doesn’t mess around when it comes to its enemies, and so you will get 2 copies of this big Troll on top of the other enemies in the encounter deck! The Mordor Cave Troll is pretty big, and hits the hardest out of all the enemies in the encounter deck. With 3 threat and 33 engagement cost, it won’t be too long before players start engaging this enemy, though you do get a little more time than with the Hill Troll for instance. When engaged, the Mordor Cave Troll will hit for 6, so you will need to use the same defender that took on the Patrol, and hope that the defender lives. Engaging multiple Trolls or a Troll and the Patrol at the same time is often the recipe for a dead hero. Chumping this big attack is not a viable option either, since the Forced effect on the Troll will cause you to discard the top card of your deck for each point of excess damage that you took in its attack. This means that if you are chumping, it better be with a beefy ally like Jubayr or Gandalf in order to minimize the number of cards you have to discard for this effect. The Cave Troll can also not have any attachments, so the Forest Snare trick doesn’t work on it. However, you can still cancel the attacks with Feint if you have a copy of the event in your hand. This can save your defender for another enemy, or can allow you to hit the Troll back. Killing the Troll will require a total of 11 attack, to pierce the 3 defence and get through the 8 hitpoints. If A Haunt for Beasts is in play, then you need to take 2 turns to defeat this Troll, as you can only do a maximum of 4 damage to it. If you happen to play a copy of Gandalf next turn, you can still kill the Troll before it attacks again. But where most other Troll enemies would go to the Victory Display upon defeat, this one simply goes to the discard pile. That means that you run the risk of encountering this enemy a few more times. You can just keep a low threat and leave the Troll in the staging area, but do watch out that your threat doesn’t pass 33, else you might fall to this grumpy looking Troll.
- Nameless Beast:To round out this party under the Ash Mountains, we have some nameless things that hide in the deep places of the world. This Nameless Beast does not have the exact same mechanics as those seen in Foundations of Stone, but just has a decently big statline of 3/3/3/6. The engagment cost of 30 does mean that the Nameless Beast will engage quite quickly, as many strong decks start around this threat level. So you will find yourself engaged with this enemy and will have to start defending against it. This is where the Forced effect on the Nameless Beast comes into play. This does remind me of the FoS Nameless Things, where your deck can turn against you. You will have to discard the top card of your deck when the Nameless Beast attacks. It then gets +X attack, where X is the cost of the discarded card. The attack boost requires a bit of luck on your end, though you can ensure that the attack boost is as low as possible if you happen to have an Imladris Stargazer you can use to switch out cards on top of your deck. The Nameless Beast can also receive attachments and the attack made by it can also be cancelled, with which you save a card being discarded from your deck. Killing the Nameless Beast is quite tricky, as it has 3 defence and 6 hitpoints. With a Haunt for Beasts in play, the Nameless Beast will take 2 turns to kill, though you have a little roon for error on your first or second attack. You don’t have to deal 2x 4 damage like you have to with the Cave Troll. The shadow effect on the Nameless Beast is also pretty nasty, as it grants other enemies an attack boost as well. This boost is equal to the cost of the top card in your discard pile. There is very little you can do to change this between revealing and resolving the effect (Sneak Attack + Galadhrim Weaver is an option, but a foolish one), so cancellation is your best bet to avoid the Patrol from hitting for 9 attack or more. Bringing a low-cost deck is a great idea with this enemy in the encounter deck.

Locations
This encounter deck consists entirely of Underground locations, which makes it easier for Dwarf decks to get through the quest. Especially during stage 2, you will want to try and use Untroubled by Darkness to get through the stage as fast as possible. Several of the locations in this encounter deck come from the Twisted Tunnels encounter set, which has been covered before in the Temple of Doom scenario analysis.
- Fiery Chasm: I really like the artwork on this location, and it isn’t the worst location to reveal, so I’m usually pretty happy when this card is revealed instead of a Crumbling Passage or something. The Fiery Chasm has a variable threat, which scales with the number of quest cards in play. It is the same formula as the threat of the Torech Gorgor Patrol, 1+ the number of quest cards in play. The location also has 5 quest points, which makes it take some effort to clear if you really want to. There is no travel cost to this location, so if you have multiple side-quests in play, this is a decent destination if you want to get rid of some threat in the staging area. However, if the Fiery Chasm is explored (either in the staging area or as the active location) the players must discard X cards from the top of their deck. This costs them another turn against the ticking clock of the main quest, but with enough Dwarf Pipes in play, you can reduce the consequences of this a little. This location can also easily be countered by Thror’s Key, as it reduces the threat to 0, and if you even clear it thanks to a Northern Tracker or something, it doesn’t trigger the Forced effect.
- Hideous Deeps: During the last rounds of the game, this location can cost you the game by trapping the cards you would use to buy your way into another round, causing you to lose at the end of this round. The Hideous Deeps act as a bank for your discarded cards, providing you with an insentive to travel there to get your cards back. When it is revealed, each player takes the top 3 cards from their deck and puts them facedown underneath the location. The cards will remain there until the location is explored as an active location. The cards are then shuffled back into their owner’s decks. This location bullies you into travelling there, which can cause quite a delay on your progress, as the Deeps have 6 quest points that you must clear before you start placing progress on any quest card. Also note that clearing this location in the staging area does not return your cards to you. The best strategy is to travel here (again, no travel cost), and have a Woodmen’s Path attached to it. This lowers the quest point value to 1, allowing you to easily clear the location and get your cards back. Cancelling the When Revealed effect on this location is also possible, in which case the location can just sit in the staging area forever, since clearing it won’t give you any benefit.
- Orc Passage: The Orc Passage is one of the locations you really do not want to see if you have the Tunnels of Torech Gorgor side-quest in play. This location will bring out another copy of Torech Gorgor Patrol when it is explored, which limits your progress on the main quest, and will require you to take some more of their attacks in order to place progress again. Leaving the Orc Passage in the staging area is also dangerous, as encounter card effects cannot be cancelled while the Orc Passage is in the staging area. This means that you will have to let treacheries and other When Revealed effects go off, which is very dangerous with cards like Burning Reek still in the encounter deck. The best point to travel and explore the Orc Passage will be when either both Patrol enemies are in play and are not going to be defeated in the time it takes to clear the location, or the Patrols are in the Victory Display. In Easy mode, this location gets a little easier to handle since there is only one copy of the Patrol in the game. If players can lock that one in place engaged with them or send it to the Victory Display in time, then the Orc Passage can be explored at will, without risking big enemies showing up.

Treacheries
The closer you get to Mordor, the more aweful the treacheries become. And being stuck underneath the mountains with no supplies and surrounded by enemies is an environment where treacheries are abundant. These treacheries try to slow you down by discarding more cards from your deck and dealing damage to your characters. The Fearful Shadows treachery has already been discussed in the Temple of Doom scenario analysis, so it doesn’t need to be repeated that this treachery can really screw with your plans in this scenario.
- Ransacked Supplies: This first treachery is pretty straight forward, and can either be the end of your run, or completely whiff. When Ransacked Supplies is revealed, each player must discard the top card of their deck. They then have to add the sum of the cost of the discarded cards as threat to the staging area until the end of the phase. In true solo, this is a pretty easy treachery unless you discard something costly like a Gandalf ally. But if you discard a 1 or 0 cost card, you get off pretty easily. This treachery is easier to handle than a location or enemy with 1 threat, as this threat will disappear at the end of the phase, giving you time to clear some more cards in the staging area. In higher player counts, this treachery will impact the players a bit more, as it won’t be the only card you reveal that round, plus you will have the combined cost of multiple cards added as threat. Again, you can get lucky with this one, and only add a handful of threat when you are overquesting by a lot. The only real price you pay in that case is the loss of a card from your deck, which is more dangerous the longer this scenario carries on. You also avoid the shadow effect on this treachery if you reveal it during the quest phase, which is a nice benefit. The shadow would discard an attachment you control, which can be pretty significant if you are not running that many attachments. Then, if the attack ended up destroying a character, you must discard another attachment you control. This isn’t as bad as some effects from the earlier life of the game that caused you to lose all attachments you control, but it can still ruin your plans.
- Burning Reek: Out of all the new treacheries, this is the one to cancel. This has cost many decks the game, as it can cause you to straight-up lose 10+ cards from your deck if you were doing well. The treachery increases your threat by 1 through the Doomed effect, but the real stinger is the When Revealed effect that requires you to discard a card from the top of your deck for each character you control. Even in the early game, this treachery can cost you 3 cards from just your heroes, which translates to about a round you just lost on your timer before the deck runs out. A remedy to this would be to run a Three Hunters deck, but that deck doesn’t do well against this quest with all the direct damage you can take and the multiple attacks you might need. You are bound to have a few allies in play, each of which will cost you a card from the top of your deck. This treachery must be cancelled so that you don’t lose multiple rounds of your game. Only in the final round does this treachery not harm you as much, as long as you can clear the main quest before the round ends. The shadow effect on this card should also be cancelled where possible, especially if the attacking enemy is the Torech Gorgor Patrol. Sending it back to the staging area is a bad idea, as it limits the progress you can place on the main quest next round. Engaging it again will trigger the extra attack that the Patrol can make, which is an attack you might want to avoid. Discarding the top 2 cards from your deck isn’t great, but it beats having to engage the Patrol again. For other enemies, it might be a case-by-case study on if you want to send them back to the staging area.
- Writhing Shadows: The nice thing about this treachery is that it doesn’t force you to discard any cards from your deck. When the Writhing Shadows is revealed, each player must instead assign X damage to characters they control, where X is 1 more than the number of quest cards in play. They must then exhaust each character damaged by this effect. While the effect does remind me somewhat of the Sleeping Sentry treachery, it isn’t nearly as bad. The damage isn’t great, but you should have enough characters on the table by the time you also have more than 1 side-quest in play. The exhausting of characters can really screw you over in the beginning, but the goal here is to first place the damage on any characters that were already exhausted. That way, you avoid the penalty, and your combat characters remain ready. Honestly, this is one of the best cards in the deck to reveal, especially in true solo. It doesn’t discard cards from your deck, the damage isn’t great, but not world-ending (only in very specific cases), and you also avoid the nasty shadow effect on this card that could make a big enemy attack again. Save your cancellation for other effects, as this treachery is not a priority unless it starts killing characters or preventing you from defending in the combat phase.

Side-quests
The one thing you really cannot afford to do during this quest is to wander off on a side-quest when your supplies are dwindling. However, this quest punishes you hard for any quest cards in play, so you will eventually have to go to a side-quest to try and delay losing all your cards. This encounter deck contains a total of 4 side-quests, each more horrible than the next. I will discuss all four of them, as I feel that the Lost in the Dark side-quest plays very different in this quest compared to the Temple of Doom.
- Lost in the Dark: We have seen this side-quest before, but I wanted to cover it again. That is because this side-quest interacts differently with this quest than it did with Temple of Doom. You weren’t eliminated in Temple of Doom if your deck ran out; you are here. So if you get Lost in the Dark late in the game, you can run the risk of placing your entire deck underneath this side-quest, which causes you to lose at the end of the round. So it will probably be best to get this side-quest out early and clear it quickly. When it is revealed, each player places the top 10 cards of their deck underneath the side-quest. If this happens during setup, it takes away a quarter of your entire deck, so it is important to get these cards back quickly. Luckily, nothing is restricting you from selecting this side-quest as your active quest (unlike other side-quests in this scenario). You do have to make 8 progress to clear Lost in the Dark, though, which might not be easy to do right away. To make matters worse, players are up against the clock here, as whenever they raise their threat by any amount, they discard one of the 10 cards from underneath the side-quest (or their threat dial, depends on where you want to put the cards). While there aren’t a ton of Doomed effects in this quest, you do still have to raise your threat at the end of each round, which means you have limited time to clear this side-quest and claim the remaining cards from underneath it. All reclaimed cards are put back into your deck, which gives you some more time to beat the quest before you run out of cards.
- The Tunnels of Torech Gorgor: While this side-quest only has 3 quest points required to clear it, the problem with this side-quest is that you cannot choose it unless there are at least 3 resources on the side-quest. These resources are obtained whenever the active location is cleared. This means that this side-quest will stay in play for a number of rounds before the players are able to select it as the active quest. If players hit a dry-streak of locations, then no resources can be placed on this side-quest, and you will have to lose more cards from your deck at the end of each round. However, this quest also forces you to travel when you have the option. This makes it inevitable sometimes to go to the Orc Passage, meaning that yet another Torech Gorgor Patrol will come out soon after. Even with enough locations in play, this side-quest will take 3 rounds to gather resources on, and then 1 extra round to clear with progress. Players can accelerate this process with location control if they happen to get it into play. Strength of Will and other progress placing cards can clear a brand new active location after the players travel to it. They can then use effects like Thror’s Map and South Away to travel to a new location in the staging area. This way, they save a round of having this side-quest in play. It is not easy to get everything aligned right, though, so usually, players will have to wait and explore locations before clearing this side-quest.
- A Haunt for Beasts: This next side-quest focuses a lot on the enemies in this scenario. It has no When Revealed effect, but it does come with a nasty passive effect to all enemies. Each enemy can only take 4 damage per round. This includes damage taken directly and damage dealt during the combat phase. So you can still use Sneak Attack + Gandalf, but that enemy cannot take more damage that round. It is no wonder then that only the Spawn of Shelob has less than 4 hitpoints in this quest. The rest of the enemies will take at least 2 rounds to kill (3 rounds for the Torech Gorgor Patrol). This means more attacks will be made as enemies will stick around longer. The weaker enemies like the werewolf and Nameless Beast can be killed during the earlier phases of the game with some direct damage effects like Pursuing the Enemy. But you have to make sure that you deal max damage each round, or these enemies will continue to attack you.
The side-quest has only 4 quest points, which makes it easy to explore, even in lower player counts. However, the quest cannot be chosen as the active quest if there is at least 1 enemy in the staging area. This means all enemies have to be engaged before the quest phase begins. This is generally done by engaging all enemies during the previous engagement phase, but players can also play cards like Son of Arnor and Mablung to engage enemies during the planning phase. If enemies are revealed during the next quest phase, you can still make progress on this side-quest, but you’ll have to make sure you clear it. Otherwise, you need to engage more enemies again to have the option to clear this side-quest in the next round. This side-quest is tricky to get early on if you are unprepared for combat and are revealing more enemies than your decks can handle. However, try to have this quest as the active one whenever you can, as clearing it reduces the number of cards you need to discard at the end of each round. - Overwhelming Darkness: The final side-quest hurts a lot in the early game but can also help you out a lot if you clear it, buying you an extra turn. The side-quest forces you to discard a card from the top of your deck each time that you play a card. This means that if you get this during setup, you will likely be losing a few extra cards as you try to load up your heroes with attachments and try to bring out some more allies. Getting this later in the game isn’t too bad, as players should be able to go without playing a lot of cards for a round (assuming they clear the quest in one turn). The side-quest takes some effort to clear at 6 progress, but there is nothing preventing you from choosing it as the active quest. Clearing the side-quest will also return the top 3 cards of each player’s discard pile to their deck. This helps to keep you in the game for longer. I would advise clearing the other side-quests first, as they tend to be more important than this one. But this is still a quest card that is more important to clear than the main quest unless you can clear that in the next turn. Also, make sure to set a reminder for this side-quest, as it is quite common to forget having to discard a card for its effect. While it may be easy to remember to do this when playing allies and attachments, it might not be the first thing that comes to mind when you are playing an event in the quest or combat phase.

Tips and Tricks
- You really need to include Spirit in your deck if you want to stand a chance. Being able to return discarded cards to your deck or to play cards from your discard pile allows you not to have to rely on card draw, thereby further decreasing the size of your deck. While you cannot use Will of the West, the sphere has plenty of other recursion effects like Galadhrim Weaver and Dwarf Pipe that allow you to build your deck back up. The ability to play certain cards like Glorfindel from your discard pile is also nice to have, as you probably won’t have a very large hand during this game.
- Dwarf decks do better against this quest than most other archetypes. Dwarf Pipe allows you to negate the first 3 discard-a-card-from-your-deck effects that the quest throws at you. Dwarves also get the benefit of all locations being Underground, meaning you can get Ever My Heart Rises to ready your heroes very consistently, while also lowering your threat. Dwarf decks can also push out a lot of willpower with Untroubled by Darkness, which can help you in the sprint to the finish.
- Include Hidden Cache and Ered Luin Miner in your deck. Even if you are avoiding the Dwarf archetype in this quest, you will only benefit from discarding these cards by the quest’s effect. It is even worth going over 50 cards for in your deck, as you still have a chance to get some bonus resources and some free allies during the quest. Ered Luin Miner isn’t the best ally in the game, but he can be a good target for Dwarf Pipe, keeping you in the game for longer.
- Don’t bring card draw effects. At least, not in great amounts. You are eliminated when your deck is empty, so why accelerate that process? Heroes like Erestor and Cirdan will only eliminate you faster, and you need all the time you can get. If you really want to change up the cards in your hand, I will advise Dunedain Pipe and Drinking Song, as they don’t decrease the size of your deck.
- If you are struggling to find a deck that can beat this quest, try this one: https://ringsdb.com/decklist/view/16736/aintnoashmountainhighenough-1.0. It has helped plenty of people to beat this quest. Be sure to read the description of the deck for piloting tips.
- Since you are bound to explore a side-quest in this scenario, be sure to bring some cards that can benefit from this. Rider of Rohan, Halfling Bounder, and Thalion all get extra benefits when you explore a side-quest, even if it is just an encounter side-quest. Rider of Rohan especially is a good card to get some extra actions out of.
- Prepare a solution for the Torech Gorgor Patrol, and prepare it fast! You need a solid defender who can take 2 attacks from this enemy during the round that he engages. Beregond is an obvious solution, though you can also chump (not advised, but hey, it’s a solution) and/or cancel the attack with Feint. This enemy is one of the biggest hurdles in the quest, and you have to deal with it at some point.
- Unless you want to start the game with 50+ cards in your discard pile, avoid bringing A Perilous Voyage contract to this quest. Valour in general is tricky to get right in this quest with all the hard hitting enemies.
- It is difficult to recommend any strategies by including cards in your deck, as you might discard all copies through encounter card effects. Still, try to have ways to deal with enemies and locations, and make sure you have ways to recur those effects or have backups with effects that do the same thing, but perhaps less effective. You can for instance rely on Spear of the Citadel to do extra damage to enemies, but might discard all your spears. So also bring Gondorian Spearmen as a way to do the same thing, only perhaps less effective. [THIS IS AN EXAMPLE, DIRECT DAMAGE ISN’T GREAT AGAINST THIS QUEST, BUT YOU GET THE POINT (hopefully)]
- A quick and easy way to get rid of the Torech Gorgor Patrol is to use effects like The Great Hunt and Eagle of the North to straight-up discard the enemy. This negates any damage cap on the Haunt for Beasts side-quest, and allows you to make some more progress on the main quest. It isn’t a permanent solution, but can allow you at least to avoid combat with the enemy until a later point.
- If you can get a Victory Display deck going against this quest, it becomes a little easier. Sending both copies of the Torech Gorgor Patrol to the victory display makes the Orc Passage a lot easier to handle as well. Players can also get rid of other enemies or locations, which means that they won’t reveal them when the encounter discard pile gets shuffled again.
- Bringing a low-cost deck can allow you to reduce the damage taken from effects like the Nameless Beast and lowers the threat of Ransacked Supplies. Low-cost cards might not be the most efficient or exciting cards to play, but discarding 0 cost cards to the treachery can be a very satisfying middle finger to the encounter deck.
- With so many enemies forcing you to discard cards when they attack and with having high attack values in general, it will be a great idea to bring ways to make sure they do not attack as often. Feint, Feigned Voices, Thicket of Spears, and Grimbold are great for this. After the initial attack, you can also use Forest Snare on most enemies to keep them in play but prevent them from ever attacking you again.
Playthroughs
There aren’t many people brave enough to attempt this quest, but I managed to find a couple of playthroughs of this scenario online. This will help you understand the many tricks that this quest has in store for you.
- True solo: https://www.youtube.com/watch?v=EavjfHT_XIk
- True solo, explanation on the linked deck: https://www.youtube.com/watch?v=cyxkOezxsiQ
- 3 player, various attempts: https://www.youtube.com/watch?v=uDMNWSy2Ezs
- True solo, Rohan deck: https://www.youtube.com/watch?v=UtHDrYNDSpc
- 2 player: https://www.youtube.com/watch?v=ZYZX8yl0IuU
Well, that covers a quest that I did not really look forward to discussing. I think I’ll go and try something easier now, like going back to the Nightmare quests from the Dwarrowdelf cycle. We will have more Vengeance of Mordor quest analyses coming out soon, but they just take a little longer to write thanks to their complexity.

7 thoughts on “Under the Ash Mountains”