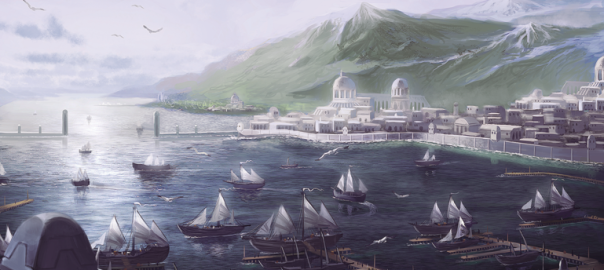
As we start the new cycle, the narrative of the game picks up as well. We will now get full chapters of non-canon flavour text to inform the players of their tasks and gives a bit of backstory to the quest. It is with that knowledge that we come to Gondor, the port-city of Pelargir to be exact. Here we get our first taste of fighting men instead of Creatures and Orcs. Peril in Pelargir is one of the less difficult scenarios in this cycle, but that doesn’t mean that this quest is a cakewalk! Players will be introduced to the Battle mechanic and the Archery keyword. Many players will also tend to raise their threat a lot thanks to some treacheries. Let’s investigate this:
Peril in Pelargir
- Found in Heirs of Numenor Deluxe box, quest 1
- Official Difficulty: 5
- Community Difficulty: 6.8
- Encounter sets: Peril in Pelargir, Streets of Gondor, Brigands
- Quest cards: 3
- Play if: You are playing this cycle progression style, you want to play an Against the Shadow quest that hasn’t got much of the new keywords yet, you like these kinds of escort missions where you have to battle over an objective, you have a deck that does well against Battle Quests.
- What is different about this quest?: Battle keyword, Scroll objective, the introduction of Archery
- Solo or Multiplayer?: It doesn’t really matter too much, but I would suggest players either play multiplayer or get a deck that has a ton of willpower and attack strength. The jump between stages 2 and 3 may prove difficult to overcome for solo players.
- Can I run Side-Quests for this scenario?: Yes, if you want a break from the Battle keyword you can quest against a Side-Quest (not Delay the Enemy). I would recommend Rally the West in order to get some more willpower out of your heroes at stage 3. Double Back can also provide some much-needed threat reduction if needed.
- What to look out for: Rapid increase in threat, switch between Battle and Regular questing, loss of heroes due to untimely shadow effects or engagement of Umbar Assassin.
The Quest
Setup
The quest will start off in the Leaping Fish tavern where Lord Alcaron hands you the scroll. Players will have to choose who to attach the Scroll to. I would recommend players attach it to a hero with a big pool of hitpoints. There are a couple of shadow effects that will require you to deal damage to the attached hero. This will force the players to detach the scroll and put it attached to an enemy. Also don’t put the scroll on your defender, for the same reasons. The Leaping Fish will provide the players with a buffer of 6 quest points for the stage. This will also make it difficult for players to travel if they reveal a lot of locations during the first few rounds.
Quest card 1: The Leaping Fish – 6 quest points, Battle
When this stage is revealed, the players will add 1 copy of Harbour Thug for each player in the game. This might cause problems if players are forced to raise their threat before the first combat phase. The Thugs will engage the player who controls Alcaron’s Scroll whenever that player raises his threat. This can be due to encounter card effects or at the end of the round. This is why players might want to consider using Ranged and Sentinel if the enemies should all engage 1 player at the same time. The Thugs will also count their 2 threat per player to the staging area, making it difficult to make progress during the first few rounds.
This quest stage is the first with the Battle keyword so I will explain just a little bit about it. Battle questing is where players do not commit their heroes willpower to the quest, but their attack strength instead. The enemies and locations in the staging area will still commit their threat in order to hinder you, not their attack strength themselves. This results in players having to change their decks to pump out more attack strength instead of willpower. Some good characters for Battle questing are Tactics Eowyn who can boost her own attack strength to 10 for one round. This can overcome a lot of threat that may have accumulated in the staging area with things like City Street. Having Tactics Gimli boosted by his own damage can also be a great way to quest a lot, though this requires a bit more setup. Remember that you might want to leave some characters back in case you will engage an enemy this turn. Many players overcommit to the quest, only to find out that they don’t have enough attack strength to kill the enemies during combat. Build in readying like Quickbeam and Tactics Boromir is always welcome.
The Leaping Fish as an active location will cause players to discard the top card of the encounter deck for each player in the game while they control Alcaron’s Scroll. All discarded enemy cards will be added to the staging area. This can make the first round quite hectic, as a lot of enemies can get revealed. Even if you are not discarding enemies, discarding Collateral Damage will bite you later in the game. Having to discard locations from the effect on Leaping Fish may also be a bad thing during later turns if players have a Harbour Storehouse in play. The best course of action to mitigate this problem is to either clear the Leaping Fish immediately or get the scroll discarded. You will find it is a lot easier to make progress if not so many enemies get revealed each round.
The 6 progress tokens on the stage should be easy to obtain once the Leaping Fish has been cleared. Try to travel to as many locations as possible, as these may cause you to get locked with locations very quickly (City Streets surging into each other).

Quest card 2: Fighting in the Streets – 13 quest points, Battle
Now that the first stage is beaten, the second stage will allow players to build up their forces a bit more. To make matters a bit easier, the game forces players to detach Alcaron’s Scroll and attach it to the highest engagement cost enemy in play. If there is no enemy in play, the scroll even gets added to the staging area, waiting to be picked up. Not having the scroll will allow players to heal up a bit, before the last stage begins. I would recommend players also start building up some willpower for the next stage. If you don’t then you might stall on the start of stage 3. Clearing a bunch of locations at this time will also be advisable. There are plenty of locations that will require players to travel to first, before any other location may become active. Clearing these in the staging area will provide great benefit to the team.
This stage is not able to be defeated while Alcaron’s Scroll is not attached to a hero. This gives players a bit of breathing room, as they can time precisely when they would like to advance. Provided they have the 13 progress required for this stage, they can claim the scroll at any point during the round and advance to stage 3. I would advice planning this transition so that players are ready for new enemies once they advance. Willpower should also be in order at this point.
Quest card 3: Escape to the Quays – 15 quest points
Once players do advance to the final stage, they have to add 1 enemy per player to the staging area. I usually prefer to use the Pickpockets if I advanced after the Quest phase. Harbor Thug has less threat, but the player keeping the scroll must be ready for untimely engagements. Try to avoid any of the other Brigand enemies, as their engagement effects will be a lot worse at stage 3. This is because, at this point, no player is able to optionally engage enemies. This makes the Brigands a much bigger threat, as they will now steal more resources, deal more damage to allies, and even discard heroes if they are engaged. With your threat having suffered a couple of hits thanks to the Storehouse or Collateral Damage, the engagement cost of some enemies will already be met. Remember that it is possible to delay the enemies, by using Hobbits and/or Rangers and boosting their engagement cost.
In case you were trying to sneak around this stage, the quest card throws players another punch to the stomach. Every first enemy revealed from the encounter deck each round will make an immediate attack from the staging area on the player who is guarding the scroll. That player should have his defence strategies ready to take a lot of attacks at this stage. It may be an option to discard the scroll and pick it up after the 15 progress has been placed on the quest. Having to switch from Battle to Regular questing can be problematic for most decks. So it may be a while before you can finish the quest. Not having the scroll is again a big advantage to players, who can now try to deal with all the enemies in the staging area.
Once 15 progress is achieved on the quest card, players will have to own Alcaron’s Scroll in order to win. This can simply be done by exhausting a hero to claim it if it is unattached in the staging area. If players have the scroll and the progress, they have boarded their ship and are ready to set sail across the Anduin. There will be new scarlet-robbed danger waiting for them at the other bank as they move Into Ithilien.
The Encounter deck
Global
- This encounter deck has only 32 cards to reveal in Normal mode, 27 in Easy mode.
- Shadow effects are on 69% and 77% of encounter cards between the two modes respectively. Shadow Cancellation is advised.

- Average threat on cards revealed is 1.8 in Normal mode and 1.7 in Easy mode.
- Surge is present on 5 cards (City Street, Lurking in Shadows). With so much reshuffling of the encounter deck, this may feel like a lot more.
- Doomed is not on any cards in the encounter deck. There will be plenty of other effects that will raise your threat though.
- Archery is a new keyword in the cycle, though Umbar Assassin is the only enemy with Archery at the moment. As he is a 1 off in the encounter deck, Archery won’t be a major concern.
- Immunity:
- Market Square is immune to player card effects, players will have to travel to it by paying its Travel cost.
- City Street prevents players from travelling anywhere else, this does not provide immunity to progress placing cards though.
- Lost in the City cannot be cancelled, you will have to resolve the When Revealed effect on it.
From this new cycle onward, the encounter decks will get thinner. This will make them less diverse, and players may be forced to reshuffle the discard pile into the encounter deck more often. This will make tough cards and 1 offs more frequent than in previous scenario’s. Surge will also help to get through those encounter cards faster, so perhaps Lanwyn is a good inclusion in this quest as well. Remember to ready her first during Battle quest stages.
Objective
Alcaron’s Scroll is the only objective in this scenario. It has no real ability, nor does it boost the attached hero. It is also not restricted, meaning that you are free to choose who you want to carry the scroll. I would advise choosing a hero with a good pool of hitpoints, as shadow effects can redirect the damage to that hero. Gimli is a favourite choice of mine, as that damage will boost his attack, meaning that he can attack or battle-quest harder next round. Be careful though, the unexpected damage may kill your hero in the later stages if he is pretty beaten up. Healing will be important to bring to this scenario. Remember that this Scroll is only discarded if the hero is dealt damage by an enemy attack. Quickbeam and Erkenbrand will allow players to use their abilities without discarding the scroll. Remember that you can also redirect damage dealt to your heroes if it is dealt to them by an enemy attack (or a shadow effect).
The scroll does prevent players from soaking all damage on the hero which has the scroll. If the attached hero takes damage from an enemy attack, he attaches the scroll to that enemy. If you defeat that enemy, the scroll becomes unattached and players return it to the staging area. There it will remain until players exhaust a hero to attach the scroll to that hero.
Now, you only need the Scroll attached to a hero at the end of stages 2 and 3. Besides those points in the scenario, it is perfectly fine to have the scroll attached to an enemy or sitting in the staging area. Not having the scroll makes the scenario a lot easier, as no damage will suddenly be dealt to a hero, some enemies will not engage you, and the Leaping Fish Forced effect will not add any enemies to the staging area. Try to get the scroll off of your heroes during the first stage, and only claim it when you have enough progress on stage 2 to pass on. Then it is up to you if you want to power quest through the final stage or get the scroll discarded again. This will negate the effect on stage 3 where the first revealed enemy makes an immediate attack against the player controlling the scroll.

Enemies
For the first time we are not battling Orcs or Creatures, but men. There are quite a lot of Brigands in Pelargir that will want that scroll from you. Most of these have effects when they engage or when they attack. Try to always optionally engage the worst enemies, unless you are at stage 3.
- Harbour Thug: This enemy is the only one that is unique to Peril in Pelargir. The Harbour Thug is a part of the setup so you will encounter him sooner than later. He is not really threatening, as his stats aren’t really something to write home about. His effect is quite important though, and can often be overlooked. When the player who’s hero is guarding the scroll raises his threat, the Harbour Thug engages that player. To alleviate the pain to that one player of having all copies of Harbour Thug engaged at the start of turn 2, try to use Ranged and Sentinel to kill them across the board. The shadow effect on this enemy is one of the more unpredictable effects. Players will have to deal the damage that would have been dealt to the defender to the hero guarding the scroll instead. This will cause players to lose the scroll and will require them to exhaust a hero in order to reclaim it. Note that the damage can be cancelled by using Honour Guards.
- Pickpocket: Here we see the return of the Goblin Scout when looking at the stats (and art). It is a very nasty enemy to reveal off of the encounter deck, as he has 3 threat to add to the staging area. With his low engagement cost, the Pickpocket will surely come down during the next combat phase. When the Pickpocket attacks, players have to discard a random card from your hand. This can be annoying sometimes, but this is probably the least terrible enemy in the encounter deck. The 1 attack can be taken undefended no problem. His 0 defence and 2 hitpoints make it an easy enemy to destroy. Try to do this in the same round, as the Pickpocket will continue to harass your resources and cards in your hand should he attack more than once in the game. There is no real way around his effect, except having no resources on your heroes, to begin with, and no cards in hand to discard. The shadow effect on Pickpocket is rather nasty, as players will be forced to discard an attachment they control. This can be Alcaron’s Scroll though so you may have some options. If you would take the attack undefended, the defending player will have to discard all attachments he controls. A Hasty Stroke is a good card to bring in your decks for this shadow effect alone.
- Zealous Traitor: Now we are getting to the real threats in this scenario: the Brigands. These enemies all have terrible effects when they engage a player. These effects get even worse when they are not optionally engaged. This makes stage 3 a lot harder. Zealous Traitor will decimate your allies if he engages you, dealing 1 damage to each ally. He will double the damage if he wasn’t optionally engaged, killing a large portion of your army. Remember that he only deals damage to the allies, not the heroes. Having some strong allies on the board (Ents) will allow you to survive a bit longer. But get your healing in order as there are 3 copies of this enemy in the encounter deck. Besides the ability, Zealous Traitor doesn’t pose a big threat during combat. He is easily disposed of if you kept back some attack strength from Battle Questing.
- Lossarnach Bandit: Remember Bitter Wind from the previous cycle? This is that same card but moulded into an enemy. Lossarnach Bandit will remove 1 resource token from each hero you control when it engages you. 2 resources even if he didn’t came down by the player’s choice. With a 3 along his entire stat line, the Bandit can be a tough enemy to deal with. 3 defence is quite high, and a 6 total required attack strength might be tough to muster if you have had to Battle Quest this round. Try to limit the number of resources on your heroes at the end of planning so that you won’t fall victim to this card. As for combat, you might want to use some manner of defence reduction to overcome his high defence more easily. Try using Tactics Aragorn or Rivendell Blade when you attack.
- Umbar Assassin: This is probably the enemy you’ll have to worry about during this scenario. Not only does this Brigand sport a 4 threat, it will also attack for a base of 5! Umbar Assassin has the highest engagement cost of any enemy in the deck, so you probably don’t have to worry about his high attack during the early game. That doesn’t mean you can leave him in the staging area though. The Assassin has the new Archery keyword which forces players to deal X amount of damage at the beginning of the combat phase to characters they control, where X is the Archery value. This remains active while Umbar Assassin is in play. When you do engage the Assassin, players will have to deal 3 damage to a hero they control. This will kill some of the weaker heroes outright and may put many at death’s door. Combine this effect with other direct damage to a character in the game, and your heroes might just leave play halfway through your game. You can be certain of this if you don’t engage Umbar Assassin optionally! Then he will discard 1 hero the engaged player controls. This will make it hard to dispose of the Assassin. A silver lining though, the Assassin only has 1 defence, making it easy to put damage on him. I often find myself using direct damage or attacks into the staging area to kill this guy, as he is a real pain if he engages you.

Locations
The city of Pelargir provides a very new setting for the game, no longer are we in the wild or far underground. We now find ourselves in the civilised world, where the locations are buildings or other parts of the city.
- The Leaping Fish: I already covered this location which starts as the active location at the start of the game. It will provide a bit of a buffer before players can start making progress on the stage. Players are not forced to explore The Leaping Fish, but I would highly recommend exploring this location asap to get its nasty effect out of play. Players might also opt to discard the scroll, thereby negating the effects of Leaping Fish. This is the only location in the scenario with Victory Points so it won’t show up again.
- Pelargir Docks: This 4/3 location is only to be found in Normal mode, Easy mode removes both copies of this card. This location will boost all enemies with 1 attack strength and 1 defence strength once Pelargir Docks is active. This buff can throw balance out of the window as these enemies will be fighting on home turf. This will make even the Pickpocket a bigger threat and the Umbar Assassin becomes a pain to defend against. My advice is to clear the 3 quest points in the staging area. You will probably not be able to travel there in the first place if any copy of City Street is in play. 3 quest points are not too much to overcome by a deck that can put some progress tokens on locations in the staging area. Northern Trackers will do great work in this quest. The buffs on the enemies can be negated if you have completed the Keep Watch side-quest and have Tactics Aragorn as one of your heroes. This should make the enemies even easier to handle once the location has been explored.
- Harbour Storehouse: While this location may not add a lot of threat to the staging area, it is still a pain to have in play. The Storehouse will require players to raise their threat by 1 each time a location is discarded from the top of the encounter deck. This effect will stack with the 2 copies of this location. This effect can be triggered by The Leaping Fish if players have the Scroll attached to a hero. It can also trigger off of Collateral Damage, causing you to raise your threat even more per location discarded this way. Elfhelm is great tech against this location, as he provides players with repetitive threat reduction. Try to clear these locations in the staging area too, as there will be many other locations that add more threat to the staging area that would be better destinations. The shadow effect on this card is a silent hint at the train of shadow cards where this cycle is notorious for. This effect is pretty harmless in a solo game, but at the first round of a 4p game, it can add up to 4 extra shadow cards.
- City Street: Now here is a card that I always have surge into another copy of itself. While there are only 3 copies of this card, I tend to draw them back-to-back, adding more threat to the staging area and filling the active location slot for the next few turns. Though this 2/2 location may look fairly harmless, players cannot travel to other locations not named City Street while there is a copy in the staging area. This will force players to travel to these locations instead of a Market Square or a Pelargir Docks which would remove far more threat. This location can, however, be cleared by player card effects rather easily, if you build a deck for that.
- Market Square: This last location is a pain to reveal, but pretty harmless in any other aspect. The 3 threat is a big hit to your progress, but there are no harmful effects attached to this location. It will be tough to explore it though. It is immune to all player card effects, so location control is out of the question. Players will only be able to travel here once they have cleared all copies of City Street and are willing to pay the travel cost of 1 resource per player. On the flipside, this location doesn’t take much to explore, so you’ll be able to make some good progress on the quest card and clear this location on the next turn. Note that all players are forced to pay 1 resource to travel here. If anyone cannot pay a resource, the players are unable to travel here. I would suggest travelling here whenever you can, as it removes quite some threat from the staging area that otherwise would remain in the staging area.

Treacheries
These brigand enemies and city locations also provide the players with the new challenge of new treacheries. These treacheries aren’t the worst in the cycle, but can still cause some problems with your planning of this round.
- Local Trouble: This treachery will attach to the highest threat cost hero in play at that time (note that it’s not printed threat cost). This is usually an important character in your deck, worth to invest a couple points of threat in. Well, now that hero is basically useless. This treachery will force the player who controls that hero to raise his threat for each time that that hero triggers an Action or Response on the hero card or if he readies or exhausts. This can cause that player to go straight into Valour territory if he doesn’t remove the Condition soon. Triggering the ability of Tactics Boromir will now cost 3 threat instead of 1 (1 for the readying, 1 for the ability). Consider using Condition control cards if you don’t feel like raising your own threat through the roof.
- Lost in the City: This treachery is not able to be cancelled, so you might as well want to get used to its effect. Lost in the City will have players search the encounter deck for City locations and add 1 to the staging area per player. This can cause rapid location lock, so be prepared by bringing some Northern Trackers. The best option, in my opinion, is to pick City Street, as it won’t surge if you add it to the staging area. This can allow you to bypass that Surge keyword without a problem, which will save you in the future.
- Lurking in Shadows: These Brigands just love to pop back in the staging area if they are engaged with a player. This treachery will allow them to do that, along with its Shadow effect. This can cause a lot of pain to players, especially once they reach stage 3 where enemies cannot be optionally engaged anymore. I would recommend trying to kill all engaged enemies to prevent this effect from going off. If this treachery didn’t return any enemies, it will surge into a new card. But at least you discarded this treachery without it hurting you.
- Collateral Damage: This is a card I really like for its theme. Bringing your army of allies to do battle with Brigands is sure to cause some property damage to the city. That said, this treachery can cause players to lose in a heartbeat. Players will have to put this treachery in the discard pile and then discard 2 cards of the encounter deck for each copy of Collateral Damage. This can be up to 8 cards getting discarded. For each location that got discarded this way, players will have to raise their threat by 2 (3 if a Harbour Storehouse is in play, 4 threat if there are 2 Storehouses in play). Looking at the encounter deck composition, it is clear that you will end up discarding some locations. You may also discard new copies of Collateral Damage that will make the next one even tougher. With this effect, players can go through the encounter deck at rapid speed, especially in a 4 player game. Remember that the encounter deck will get shuffled during the quest phase, so you will still have to discard those cards until you have discarded 2 cards for each copy of Collateral Damage.

Tips and Tricks
- Bring healing. Your heroes will suffer quite a few points of direct damage, especially if a hero controls the Scroll. Having at least some healing allies or attachments in your deck may prevent you from losing a hero. Having Houses of Healing in your deck will also provide you with a way out if Umbar Assassin wasn’t engaged optionally.
- Your threat can get out of hand fast when raising it with Collateral Damage or Local Trouble. Secrecy decks are out of the question, and players should bring some sort of threat reduction if they are planning to stall a few rounds.
- Local Trouble can make your most valuable heroes worthless unless you have good ways to lower your threat. Try to pack some condition control like Bulwark of the West or Miner of the Iron Hills.
- Willpower will get you nowhere in the first few stages of the quest, try to build your deck accordingly by having a lot of attack power on the table from your heroes. Willpower will only be a concern during the final stage, so try to get some high willpower allies out before that time. Using Tactics Eowyn’s ability on turn 1 will also boost you straight through to the next stage probably. She also sports some good willpower for the later stages.
- Remember that you cannot optionally engage enemies during stage 3, this includes the additional optional engagement from Halbarad. Players will have to take the enemies without getting to pick which enemy goes to who. This can make the Brigands extremely dangerous. Try to raise their engagement cost by playing Take No Notice or Lore Pippin. This way you might avoid having to engage Umbar Assassin.
So ends the first review of this new cycle. With plenty of quests to come, I will be back soon with Into Ithilien. I will also still be looking for other people to write analyses on their favourite quests. Let me know if you would like to claim a quest that hasn’t been covered yet. You can check which quests have been claimed already by going the page of each cycle. For now, enjoy your week and look forward to Into Ithilien (boy, that is going to be a pain.)

4 thoughts on “Peril in Pelargir”