The next article fit for a remastered version is this Core Set classic that is still enjoyed by players to this day. Journey along the Anduin is one of the most played scenarios by the community, and deserves a proper in depth look. If you would want to read the original article from 2.5 years ago, see this link.
Like the latest Passage through Mirkwood article, this one will feature a more in depth look into this scenario, and I can hopefully add some new strategies against the terrifying Hill Troll with some new player cards that have been released since the previous article. Sections like Most Dangerous Encounter Cards, a heavier analysis of shadow effects, and more answers to questions you might have will be included, as well as some parts of the previous article.
Journey Along the Anduin
- Found in: Core Set, scenario 2
- Official Difficulty: 4
- Community Difficulty: 5.3
- Encounter sets: Dol Guldur Orcs, Sauron’s Reach, Wilderlands, Journey Along the Anduin
- Quest cards: 3
- What is different about this quest?: This quest throws you into a boss-fight from the beginning of the game, and the other stages don’t open up until you defeat it. Stage 2 is highly thematic with more encounter cards, but limited engagement options. Stage 3 is a combat intense segment of the game where you must kill or be killed. Quest is very memorable and is often used for deck testing for a medium difficulty quest.
- Solo or multiplayer?: I suggest a higher player count for this scenario, but it is far from impossible in true solo. More players means that one can take the Hill Troll while others can pull down the remaining enemies to avoid 1 players being overwhelmed. Higher player counts also feel the impact of the extra encounter card at stage 2 less. In true solo that doubles your cards per quest phase, but for a 4 player game, it’s just a 25% increase. Higher player counts does mean that you get to see more of the horrible cards faster, and that Massing at Night is horrible, so meet in the middle for an ideal player count for this scenario.

- Can I run side-quests for this scenario?: Yes you can. I would advice side-quests during stage 1. It might take a while to take down the Hill Troll, so you can clear a side-quest if you already have enough progress on the main quest and need to kill the Troll. Rally the West is a good one to get early, as it helps you to progress during stage 2. Stage 2 should be rushed, so side-quests aren’t that interesting there. Stage 3 requires no progress, just that you kill the enemies in play. You could try and beat the scenario by discarding enemies through Delay the Enemy, but I wouldn’t recommend it. Other suitable side-quests include Gather Information (finding your combos early against the Troll), Keep Watch (lower the attack strength of all enemies, including the Troll), and Double Back (lower your threat below 30 to stay outside of the engagment cost of the Troll).
- Can I bring Guarded (X) cards?: You can, but be careful with these. There are some nasty enemies here that will be difficult to steal your Guarded (X) cards from. Not only the big Hill Troll and Marsh Adder are a problem, but the Wargs can be quite annoying as well. Locations are a little easier to clear if they have attachments, as most locations aren’t that big of a problem, with the exception of Brown Lands/The East Bight. But with these guarded cards you can get rid of plenty of nasty treacheries, so if the reward outweighs the encounter card to you, definitely include some. The Weapon attachments are great to use for this quest, since the final stage involves so much combat.
- Player cards to avoid: All cards are allowed to be played during this scenario. I would avoid low hitpoint characters and Doomed effects if I were you, as high threat can be an issue in this quest, and direct damage can quickly kill characters if you are not careful.
- Optimal starting threat: It is a law of this game that you DO NOT start with a threat of 30 or higher for this scenario. It is a law that new players quickly learn. 30 is the magic number as the Hill Troll’s engagement cost is that high. You want time to build up your boardstate before handling the troll. Another important threshold is 35, at which point treacheries like Evil Storm will start to have an actual effect. Run some threat reduction to avoid reaching these threat levels.
- Traits to add to the Victory Display: Orc, Troll, Creature, Wasteland, Dol Guldur, Forest, Riverland, Marshland. Having these traits in the VD will give you protection against all traits. There are some additional traits, but these are the most important ones.
- What to look out for: Well, there’s a Hill Troll or two in the deck, so definitely look out for those. Other enemies can also be quite annoying, with either high attack or low engagement cost. Threat increases will swiftly push you past the 30 and 35 threat threshold, which is dangerous. Plenty of direct damage effects (especially past 35 threat and with Goblin Snipers in the staging area). 2 Goblin Snipers in the staging area at the same time block you from engaging either. Stage 2 tries to outpace you and limits your engagement options. Quite a lot of encounter cards added when you transition to stage 3.
- Any changes from the original cards?: Yes, quite a few actually. See a full list of the errata for this quest and its encounter cards here.
The Quest
Setup

The Setup on quest card 1A has every player reveal 1 card from the top of the encounter deck and add that card to the staging area. This is always a good place to see treachery cards pop up. Most of them do nothing or have a very limited effect. It is always nice to have dealt with say, a Necromancer’s Reach without dealing any damage. It is also nice to see the Hill Troll pop up during this time, as that saves you from revealing him later. The worst case scenario is that you draw another enemy. You will be having plenty of combat in the following rounds, and an extra enemy doesn’t help. Drawing 2 Hill Trolls in multiplayer is also a challenge, but at least you have removed both of them from the game afterwards.
After that setup, it is time to search the encounter deck for a Hill Troll if it isn’t already in play. You add him and his 1 threat to the staging area and move on to the first turn.
Quest card 1: To the River – 8 quest points

While side B mentions to find a copy of the Hill Troll and add it to the staging area if you didn’t reveal one during the initial setup, this When Revealed effect is basically Setup 2.0. So once you find your Hill Troll, it is time to start the game. Your main priority at this point is to set up a boardstate as quickly as possible while keeping a low threat. The 8 progress on the main quest is easily obtained, so you can leave that for later. You should prioritize being able to deal with enemies, as there are several that have low enough engagement costs to be troublesome in the early game.
During this initial setup, you should get a hero on the board ready for defending the Hill Troll. If you are playing multiplayer, then the Sentinel keyword can come in handy, so that one player can defend the Troll, while the other(s) can deal damage to it. You can also start to set up your deck like you normally would with your deck, as you are going to need to be ready for questing once the Hill Troll falls. Many decks that are well suited to deal with the Hill Troll will fall short during stage 2, so at least one of the decks at the table should start to prioritize willpower and location control at this point.
Side-quests are quite nice to play if you have them in your hand at this point. Not only can some of them help you with the setup of your deck (Gather Information, Send for Aid), but you can also stall for time and make sure the encounter deck is structured the way you like it (Double Back, Scout Ahead). You generally have enough time to make progress on these side-quests as well as the main quest, so clearing side-quests can really pay off in this early game.

The turn before engaging the Hill Troll, it is advised to try and clear the board of as many other enemies as possible. Due to the low engagement costs of many, it can lead to players being bogged down with too many enemies that they need to defend, while those defenders might have made good attackers against the Troll. This won’t guarantee that the Troll is your only opponent next round, but you’ll at least have some more manpower to deal with it.
Don’t worry about spending a lot of time here trying to build up. It can take a few rounds to get into a comfortable position, but if you can keep your threat low enough, you have enough time. Double Back and the Galadhrim’s Greeting will buy you even more time, so use this to start and clear the board while preparing for the Hill Troll. Placing 8 progress on the main quest already ensures you can advance the quest as soon as the Troll is placed in the Victory Display. Having the progress on the quest card before the Troll is dead allows you to advance sooner, because there can be a case where the second Hill Troll pops up before you could place the final progress. The second Hill Troll can make this stage a lot longer if you find it early, but once you take down one of the Trolls, the second shouldn’t be a problem. Just avoid engaging both at the same time, as that is usually Game Over.
When the players have killed the Hill Troll (more info under the Enemies section of this article) and have made the 8 progress required on the main quest, they immediately advance to the second stage. Ideally, you enter this stage with as few encounter cards already in play as possible. This is because stage 2 will quickly fill up the staging area (especially in solo), so being prepared will give you the best chances.
Quest card 2: Anduin Passage – 16 quest points

Transitioning to stage 2 has no immediate effect. No When Revealeds or Forced effects to speak off. This middle stage is more traditional questing, which might be a bit of a shock coming out of a stage that required a more combat orientated playstyle. But at this stage, the priority should really be willpower, so you better build up your willpower when you feel that you are close to moving on to this stage.

The goal of this stage is to simply make 16 progress in order to advance. You should combine this with the subgoal to clear as many encounter cards as possible each round, as you can otherwise become overwhelmed pretty quickly. Clear locations when you can, and if you have tricks to get rid of certain enemies, use them! The more cards you clear off the board each round, the easier this stage will be as you clear threat out of the staging area, making it easier to place progress.
The problem with this quest stage is that the quest card does have some game text to make progression harder. The quest stage forces you to reveal one additional encounter card during the quest phase. In 4 player games, this won’t be a major issue, as you will have 4 decks to help get rid of the extra encounter card after it has been revealed. In lower player counts, and especially true solo, you will have a much harder time dealing with the extra encounter card. This doubles the number of cards you see each round, meaning that you will be quickly outpaced by the encounter deck if you cannot keep up. The extra encounter card is especially tough if you are getting a lot of enemies or locations in a row. The extra locations can swiftly cause a huge block of threat in the staging area that you cannot overcome (location lock). A ton of enemies one after another can also start to pile up threat in the staging area.

This is because the quest stage changes one more thing about the regular format of the game. Instead of enemies engaging players when their engagement cost is lower than the player’s threat, all enemies no longer make engagement checks at this stage. This means that if you really do not want to deal with an enemy right now, you don’t have to and can leave it in the staging area. You do pay for this by allowing more threat to sit in the staging area. However, you can still optionally engage one enemy per round, as per usual (2 enemies if you play with hero Halbarad). I would advise to engage enemies when you can, so you lighten the load in the staging area a little. There are several enemies in this encounter deck that aren’t very strong, but can be annoying if they engage you in large numbers. Avoid this by picking them off one by one. Remember that each player can only optionally engage a single enemy per round. If you end up revealing more enemies per round than you are engaging, they will sit in the staging area for the rest of this stage, or until you get to optionally engage again.
Like I mentioned earlier, your goal should be to keep a lid on the number of encounter cards in the staging area. This will be an uphill battle, but if you can avoid the threat starting to pile up in the staging area, and avoid effects that remove progress from the main quest, you should be able to place enough progress in order to advance.
Quest card 3: Ambush on the Shore – 0 quest points

You have now come to the final stage of the quest. Where you had to focus on willpower at the previous stage, you now have to switch back to a combat mindset in order to make it to the very end. To start with, the players will each have to reveal 2 encounter cards per player and add them to staging area. This can be a massive heap of encounter cards in a 4 player game, especially if Massing at Night is hit during one of the reveals. The best case scenario at this point is to get a lot of locations, as you will need to fight off all the enemies that are left in play. The more locations and treacheries you reveal, the fewer enemies you have to fight. Note that the quest stage mentions that you have to reveal the cards, meaning that treacheries will trigger if they are revealed for this effect. This can be deadly with both Evil Storm and Necromancer’s Reach being a source of direct damage to your characters. Scrying in advance can help you out, but in higher player counts, scrying becomes less useful.
As I mentioned, the goal of this stage is to fight your way to victory. You do this by defeating every enemy in play. This can either be really easy (if you have no enemies in play after revealing those two cards per player, you automatically win), or very difficult if enemies like the second Hill Troll, Goblin Sniper, and Marsh Adder are still in play at this point. Wargs are also super annoying, since they can bounce back to the staging area, prolonging the quest until you get a shadow card for them or cancel their attack. Make sure that at this point, players no longer play cards like Dunedain Hunter, Wait no Longer, or Guarded (X) cards, as that will bring out more enemies, causing the quest to take even longer.

To make this stage a little easier after each player just revealed 2 encounter cards, the game will skip a vital part of the quest phase: The staging step. This means that players do still need to quest (and raise their threat if they quest unsuccessfully) but they no longer reveal any cards from the encounter deck during the quest phase. This prevents players from continuously revealing enemies, making the quest very difficult to complete. With no new enemies coming in, you just have to deal with what is on the table. You now also know exactly how much threat will be in the staging area. Since the main quest does not need any progress, you can keep some characters back for combat and simply tie the threat with your willpower. If you do decide to make progress, you can still clear active locations which will allow you to travel to any of the left over locations in the staging area. This continues until you have run out of locations. The benefit in clearing active locations and travelling at this stage is that you reduce the threat in the staging area, allowing you to keep more characters back for combat.
This stage can last any number of rounds, but once the final enemy bites the dust, you have completed the scenario and are free to move on to the next one! If you are a new player, I would recommend to skip Escape from Dol Guldur, as it will be extremely difficult to complete. Play this scenario several times again to get the hang of it, and then move on to any of your expansions that you got.
The Encounter deck
Global

- There are 47 encounter cards in Normal mode, 32 in Easy mode.
- There is a 38% chance of a Shadow effect during Normal mode, 41% during an easy stroll down the Anduin. Note that this does affect the rate at which Wargs returns to the staging area.
- The average Threat per card revealed is 1.2 (treacheries count as 0 Threat), this number is equal across both easy and normal mode.
- 5 cards in the encounter deck can surge.
- While the Doomed keyword is not present on any encounter card, there are still a number of effects that increase your threat. So be careful if you intend to bring your own Doomed effects.
- No immunity of any kind for player cards
You can see from the way the encounter deck is built up, that this deck focuses a lot on enemies. You should be prepared for some early engaging enemies, and for a lot of combat towards the end of the game. Important to note about this encounter deck is that you will turn over a lot more cards than usual. Not only because there is a lot more Surge added to this encounter deck, but also because the final 2 quest cards are forcing the players to reveal more cards. Cards like Wait no Longer and Gildor’s Council will greatly help you in reducing the number of cards you reveal during that time.
Enemies
The following enemies will hunt you down during your fight along the banks of the river. Study these enemies closely, as you will be fighting a ton of them throughout the entire scenario. I will reuse some analyses from the Passage through Mirkwood article, as the Dol Guldur Orcs encounter set is used in this scenario again.

- Wolf Rider: Hobbit and Secrecy players must be alert when playing this scenario, as the Wolf Rider is one of two enemies that has a sub-20 engagement cost in this scenario. Any deck with a threat of 10 or higher will be engaging this enemy, so it won’t stay in the staging area for very long. When the Wolf Rider is revealed, it will automatically surge, even if Thalin deals a damage to him (don’t worry, Thalin has his uses against other surging enemies). The surge is annoying, as it means that on top of the next card you reveal, you now also have a 1 threat enemy sitting in the staging area that is going to come down soon. However, this is probably the ideal way to reveal the Wolf Rider, as its shadow effect will be worse (we’ll get to that). In combat, the Wolf Rider is pretty pathetic. With an attack of 2, it can easily be defended by most allies, and it only take 2 attack to kill it. With 0 defence, any hit towards the Wolf Rider will damage it, and will most likely kill it as well. 0 defence also opens up Straight Shot, in case you don’t want to deal with this enemy at all. But the best way to get around the Wolf Rider will be direct damage. 2 hitpoints is easy to get through with just one or two direct damage effects. Gondorian Spearmen with Spear of the Citadel will be a proper defence against this enemy, but you can also use effects like Goblin-cleaver if you want. Even without tricks, the Wolf Rider is just annoying, not really a threat. Shadow: The shadow text on this enemy is quite unique and quite lengthy. When the Wolf Rider is revealed as a shadow card, it will turn into an enemy and attack the defending player. That player can declare a defender. The Wolf Rider gets its own shadow card (don’t worry, it’s not another Wolf Rider. There is only 1 copy in the encounter deck). After the combat phase, the Wolf Rider is returned to the top of the encounter deck. This means that you will be revealing it next round with the surge keyword. However, since the Wolf Rider will be engaged with you, you can still kill it. If you do, it’s gametext is no longer in play, so he won’t be returned to the top of the encounter deck.
- Hill Troll: This is the big enemy you will want to avoid seeing as much as possible, but I’m afraid that conflict with the Hill Troll is inevitable. This quest forces you to have no more Hill Trolls in play to advance to stage 2, which usually means you need to kill this enemy. But we’ll get to that later, since rushing a Hill Troll without realizing how dangerous this enemy is, is a recipe for a quick reset.
The Hill Troll’s most important stat is actually its engagement cost, which is 30 threat. This means that you should either keep a low threat or increase the engagement cost of the Troll in order to have enough time to build up your boardstate. A starting threat of 27 is ideal in my eyes, as that gives you some wiggle room in case you have to raise your threat by a few points during the quest phase. But you will still have enough stats on the table with your heroes to deal with the Troll without having to rely on a host of allies. The threat of the Hill Troll has a value of 1, so you will be able to quest over the Troll without too much trouble. While the Troll is in the staging area, you can start to chip away at its health using direct damage effects if you get those early. While no single effect will place enough damage on the Troll, you can make it easier to kill by using a couple of Ranger Bows or use Hail of Stones a few times. If you get ally Gandalf in play early, this may be a tempting target, so if there are no other more immediate threats (Wargs would be a priority for me), use Gandalf on the Hill Troll to save yourself some time and probably characters. You can also take this time to dig for events like The Great Hunt, Put Off Pursuit, and Hunting Party that can potentially get rid of the Hill Troll from the staging area. If you don’t go through the encounter deck in one go, you shouldn’t see it again (there is another copy that you might see though. But these cards are a good solution to the immediate threat).
If you have not dealt with the Hill Troll before your threat reaches 30, he will engage you. Make sure that this is the only enemy engaged with you, so you can dedicate all of your attention to him. His attack of 6 is pretty big, but gets worse when you realize that the Hill Troll’s game text punishes you for chump blocking with smaller allies. Any damage dealt beyond the defence and remaining hitpoints of the defender is instead dealt as a threat increase. Since this quest has some hard limits to what your threat can be before things go from bad to worse, you will want to avoid raising your threat unnecessarily. So defence should be done by a strong defender like Spirit Dain (who can take no damage from the Hill Troll without needing any tools) or Beregond (ideally with a Gondorian Shield). You will need a solution for the Hill Troll quickly, since your deck will likely not survive an ongoing assault by the Troll, especially if you get nasty shadow cards.
Attacking back should be top priority so that you can get rid of the Troll as quickly as possible. This is where any direct damage you dealt to the Troll will come in clutch. 9 hitpoints is a lot to overcome, especially with a defence stat of 3. But it is not impossible. Some big, one-time effects like Eowyn and Black Arrow will be useful, as well as any other players who can help with ranged attacks. Killing the Hill Troll will put it into the Victory Display, allowing you to breathe a little easier (until the next one arrives). - Goblin Sniper: While the stats of the Goblin Sniper aren’t much, its textbox provides the main reason why this enemy is a dangerous reveal from the encounter deck. The Sniper has just 2 threat, but with a 48 threat engagement cost, you will probably not engage this enemy naturally in your game (except when playing a Valour deck, but even then 48 is living on the edge). Optional engagements seem like the logical solution, but the textbox on the Sniper prevents players from optionally engaging this enemy while there are other enemies in the staging area. This means that there is a real chance that there will be a Sniper in the staging area for a long time unless the players can counter it. A double Goblin Sniper in the staging area locks both versions down, with the one preventing the other from engaging. This is bad, because they also deal 1 point of damage to a character of each player at the end of the round while they are in the staging area. A natural counter to these enemies is direct damage effects like Arrows from the Trees, Hail of Stones, or Galadhon Archer. Stacking these effects will get through the 2 hitpoints of the Sniper in no-time, clearing the board of the menace. Players being able to attack into the staging area is also a great tool to have. Haldir of Lorien, Hands Upon the Bow, or the Rohan synergy of attacking the staging area will clear these enemies out as well. Target other enemies in the staging area so that it is the only one left. A single Warden of Healing will take care of the damage of both Snipers, you only have to deal with the threat.
- Marsh Adder: While the Hill Troll might be a fearsome foe, it is not the only boss-level enemy in this encounter deck. There is also this lovely Marsh Adder of which there is just 1 copy in the encounter deck (0 in Easy mode). Despite this, the Marsh Adder is not unique, meaning it is vulnerable to several player card effects that can only target non-unique enemies. The Marsh Adder is not an immediate threat, as it has an engagement cost of 40. However, it has 3 threat, meaning that in some situations you will want to engage it earlier to remove the threat from the staging area. But do be careful with this, especially if you are close to one of the threat thresholds (30 and 35). That’s because the Marsh Adder is quite aggressive and will cause you to increase your threat each time it makes an attack. The obvious solution to this is to cancel the attacks with Feint and Feigned Voices. Not only will this negate the game text on this enemy, but you also avoid the 4 attack, which can be substantial for many decks. Killing the Marsh Adder isn’t as easy as other enemies, thanks to its 7 hitpoints. 1 defence isn’t a lot, but the Adder will soak up a lot of damage. You do need to commit a lot of attention to this enemy, but fortunately, when you defeat the Adder it is removed from the encounter deck and is placed in the Victory Display. I will advise to kill the Marsh Adder as quickly as possible, so that you don’t have to deal with the threat increase every round. Forest Snare is also a decent solution, though you will have to kill the Adder during stage 3.

- Wargs: The warg enemies in the game are often decently threatening, but they are most famous for their annoying tendancies to hop between being engaged with players and sitting in the staging area. This is the very first enemy that started that trend, simply named: Wargs. They have a relatively low engagment cost of 20, and decent all-round stats. They suffer a little in defence and hitpoints, making them a common target for Gandalf. These enemies are annoying because each time they attack, they return to the staging area if their shadow card had no effect. And since the quest has about a below 38% chance of getting a shadow card with an effect, you are bound to return the Wargs to the staging area at some point. The Wargs having a shadow effect themselves lowers your chances even further! The trick is the same as with the Marsh Adder, don’t let them attack. Their attack strength isn’t really frightning, but if they do not attack, they cannot trigger their Forced effect. They will still get a shadow card, but you don’t really care whether or not it has an effect. Cancelling their attacks is just a temporary solution, but should keep them engaged with you, allowing your characters to kill the Wargs. You can also slowly chip away at their health, though you will likely need several effects to kill off the Wargs. Like I mentioned, their defence is not very strong, allowing you to kill them with just 4 attack. This enemy can prolong your games at the end, so try and kill the Wargs whenever you see them. That helps you to end the game faster. Shadow: The shadow effect on the Wargs themselves is pretty basic. It is a straight-up boost to the enemy’s attack by 1. However, if you are taking the attack undefended, you are looking at a +2 buff. This is quite substantial, as it can more easily kill a hero. And since the quest features quite a few weaker enemies, you might be tempted to take an attack undefended. This shadow effect punishes that hard, so be sure your heroes can take the hit of +2 and have a healing option down the line.
- Dol Guldur Orcs: These are the weakest of the Orc enemies in this scenario, but can still pack a punch if you are not careful. The Orcs have a very low threat, meaning that if you are unlucky, you can get swarmed pretty early by these enemies. They also have a When Revealed effect that is quite annoying, as it will deal 2 damage to a character committed to the quest. The first player gets to select this character, but if that character dies because of the direct damage, their willpower is removed from the total. This makes it quite annoying to reveal this enemy multiple times in quick succession, especially in lower player counts where there aren’t as many characters committed to the quest. With an engagement cost of 10, these enemies will engage nearly all decks right away, except for the early game Grey Wanderer decks. While engaged, the Orcs aren’t that big of a problem, but due to their low engagement cost, you do not get the option to leave them in the staging area. This can cause you to be overwhelmed by lower engagement cost enemies early on, requiring you to dedicate more characters to defence. Killing the Orcs is no problem though. They do not have any defence, meaning that every point of attack you can spare will result in them taking damage. It also means that Straight Shot can discard them immediately. Shadow: The shadow effect on the Orcs is a pretty basic one. The attacking enemy gets +1 attack for this attack. Should players have taken the attack undefended, then the enemy gets +3 attack, which can be deadly for an undefended attack. The best way to deal with that case is to have Dori, White Tower Watchman or Barliman in play, so you can redirect the damage you would otherwise take on your hero. Cancelling the shadow effect is of course also an option.
- Chieftain Ufthak: Chieftain Ufthak is an enemy that you don’t want to leave around for too long, and you should prioritize him whenever he is engaged with a player. At 35 engagement cost, you have some time to prepare for him, and he is a good target to kill after taking down (both) Hill Trolls. Ufthak has a well-rounded statline of 2/3/3/6 and he has a special ability that allows him to collect tokens. He gets one resource token from the bank each time he attacks. He then gets +2 attack for each token on him at that moment. This happens after the damage is calculated during the attack, meaning that he will attack for 3 during his first attack, 5 for his next attack, and so on. Save your Feints for this enemy, since he doesn’t get a resource token if he doesn’t attack. Killing him should be a priority before he becomes too big. Use some one-time abilities like Black Arrow and Tactics Eowyn to defeat Ufthak quickly. He will be added to the Victory Display upon his defeat. You should exploit his lack of immunity to player card effects so that you can maximize damage dealt to him, while avoiding his attacks.
- Dol Guldur Beastmaster: The biggest threat of this enemy is that it has quite a lot of hitpoints, making it tough to defeat in the early game. At 5 hitpoints, the Beastmaster can even survive a direct hit from Gandalf‘s damage ability. This means it will be very likely that you are going to have to suffer through at least one of the Beastmaster’s attacks. This can be quite dangerous. Not because the Beastmaster has so much attack, 3 attack is quite standard, but because of the ability on the Beastmaster. When he attacks, he is dealt an additional shadow card. This can be a problem, as you can potentially get 2 shadow effects buffing his attack or doing other nasty things like discarding attachments or raising your threat. To circumvent these shadow cards, you can either focus all your direct damage on the Beastmaster to kill him before he makes an attack. Events like Quick Strike are also a good solution if you can manage to attack for 6 with a single character. Alternatively, you can also make sure that the Beastmaster won’t attack, thereby not triggering either shadow effect. Feint is a great tool for this, but you can also get creative with a Reforged Forest Snare. With 35 engagement cost, you will have some time to prepare for this enemy before it comes down. You are also helped by the fact that the chances of seeing a shadow card on this enemy is relatively low, let alone getting both cards with an effect. But if you are not willing to try your luck, there are several options mentioned earlier that will help you to get around this enemy.

- Eastern Crows: These are about as weak as enemies are ever going to get, but that is not without cause. The Eastern Crows only have 1 threat, 1 attack, and 1 hitpoint, but they do surge into another card and have a nasty recursion effect that keeps putting them back into the encounter deck. If you get this enemy to guard your Guarded X attachment, that’s great! You cannot have a more ideal target. But in most cases you will end up revealing this enemy and having its surge grab the next card on the pile. An interesting combo with these enemies is that if Thalin is committed to the quest, his 1 point of damage is dealt before the surge on the Crows can trigger. This causes the Crows to die, which makes it a free encounter card to reveal. As the gametext on the Crows isn’t in play at that point, they also don’t get shuffled into the encounter deck. This is a combo that should be exploited by Core Set players as much as possible, as it can save you from some nasty encounter cards that might be harmless as shadow cards. With an engagement cost of 30, it can take a little while in this scenario before the Crows come down, but players can always optionally engage them if they want a quick and easy kill. The Crows aren’t a threat during combat, but note that if you take them undefended, some shadow effects become worse, so you are running that risk. The Crows are best defended by heroes like Beorn, who don’t have to exhaust to defend. When the Eastern Crows are defeated, they get shuffled back into the encounter deck. This means that their surge will be added back to the deck, which can be troublesome down the line. In higher player counts, it can be a good strategy to just keep the Crows alive, as they won’t be a big deal to defend, but can be dangerous in the encounter deck. Killing them with Legolas or other cards that benefit players from killing enemies (Blade of Gondolin, Foe-Hammer, Proud Hunters) is still beneficial, especially if you have Thalin committed to the quest in the future. Shadow: The shadow effect raises the attack of the enemy by 1 in the early game. Once your threat reaches 35 and higher, the attack raise will be doubled. This can be quite dangerous as the Crows are common in the encounter deck, especially when killed. So make sure you have a little space between your character’s defence and the attack strength of the enemy to make sure this doesn’t accidentally kill your character.
- Misty Mountain Goblins: While slightly stronger than the Dol Guldur Orcs, the Goblins aren’t a big threat to your deck. They are slightly annoying to have to constantly deal with, so make sure that you do finish them off quickly. The Goblins have a low engagement cost of 15, making them engage most decks from the start of the game. This means that their 2 threat is often removed quickly from the staging area after they have been revealed. While engaged, the Goblins will attack each round with a strength of 2. Their ability also triggers at this point, which removes 1 progress token from the main quest whenever they attack. Note that while the textbox says “current quest” it does in fact target the main quest when the players have advanced from the quest phase. Even if you went up against a side-quest (but didn’t complete it) this round, the progress is removed from the main quest. This is only ever a problem during the middle section of this scenario at stage 2. Progress on stage 1 tends to pile up as players prepare to take down the Hill Troll, and stage 3 doesn’t require any progress to clear. But it can still be annoying to have to remove progress from stage 2 constantly, so you better kill the enemies before they remove more progress next round. With 1 defence and 3 hitpoint, killing the Goblins shouldn’t be difficult. Shadow: The shadow effect on this enemy is the same effect as when the Goblins attack. The attack causes you to remove one progress from the main quest. Should you have taken the attack undefended, 3 progress is removed instead of 1. This can mean in true solo that you might have to spend another round on stage 2, but it doesn’t mess with the balance of combat stats, so I tend to just accept this shadow effect. You can do a lot worse in this encounter deck.

Locations
While the locations in this scenario aren’t the biggest obstacle, they can still lead to location lock during stage 2 if you aren’t travelling or exploring locations every round. Make sure that you have some sort of location control in higher player counts, as that can save you quite a lot of threat in the staging area.
- The Brown Lands: Now that we have completed the easiest scenario in the game during Passage through Mirkwood, the locations start to step up their game a little bit. The Brown Lands is a good example of this, where the threat of the location is 5! This means that just a single encounter card like this can really dampen your progress that round. But there is good news as well: apart from the 5 threat upon you revealing the card, the location is quite tame. This is due to its single quest point, which allows you to easily explore the Brown Lands in the staging area. The best tool for this is Warden of Arnor, as the attachment straight up discards the location after it is revealed. Other good cards to use are Spirit Aragorn and Asfaloth. Do note that Spirit Aragorn will need to have at least 5 willpower to place the progress on this location. If you do not have access to these fancy location exploration cards, don’t worry. The location clears itself when the players decide to travel to it. This makes it the best target to travel to in the travel phase. However, if the East Bight is also in the staging area at the same time, then the players have to travel there first, leaving the Brown Lands in the staging area for the next round. There you can explore it with Rhovanion Outrider or Northern Tracker, but if you cannot clear it or travel to it, then this location will be a big obstacle towards your progress. If you can travel here, do so. It places one point of progress on itself, which is enough to clear it (unless players used Elf-stone or Put Off Pursuit). If the location clears itself, then players are not able to travel to any other location unless a travel action is used like South Away!, Thror’s Map, or Ghan-buri-Ghan. Best remedy against this location is to just have some progress-placing cards ready to get rid of this location.
- The East Bight: The mirror-image to the Brown Lands is the East Bight, which does not have a lot of threat, but does take a lot of willpower to clear. While you would be tempted to just leave it in the staging area, the textbox on the East Bight forces the players to travel there if they have no other active location. This puts a buffer of 6 quest points between the players and making progress on the quest card, so you will need more willpower next round. This effect also blocks the players from travelling to more threatening locations like Brown Lands or Gladden Fields. If this goes on for too long, the players might end up with a location lock because of this. There are some ways that players can get past the East Bight more easily. First is to make progress on it regardless of questing successfully. If you can guarantee placing progress on the location each round with effects like Lorien Guide and Map of Rhovanion, then the quest points become easier to overcome. Players can also find a way around the location by returning it to the staging area and making another location active. This can be done through The Hidden Way or West Road Traveller. This allows players to travel to other locations at the cost of returning the East Bight to the staging area. But since the location only has 1 threat, it is much easier to overcome this way. Spamming out willpower next round can also help, as you will need a big quest push to get through the location in one shot.
- Banks of the Anduin: Out of all locations in the encounter deck, this is the one that you will want to see most of all. The Banks are a 1 threat location that only require 3 progress to explore. The benefit of this location is that when it is explored, it is put on top of the encounter deck. This ensures that you will see it again next round, instead of a different encounter card that could be worse. Of course, this is only valid for solo playthroughs and not during stage 2, but having the insurance that at least one card is an easy location. The Banks of the Anduin can also come out as a shadow card, in which case you get a free pass as well. The only case where this is not beneficial is when Wargs attack. It is important to keep track of which enemy gets which shadow card first in this scenario. Exploring the scenario is not a real priority but if you have no other options, there is no real downside to travelling here, especially during stages 1 and 3.

- Gladden Fields: This is one of the few instances where a non-unique location in the encounter deck has a victory score. The Gladden Fields have 3 for all their stats, including threat, quest points, and victory points. The Fields are a common sight during this quest, but once you explore one copy, it is sent to the victory display. This is a good thing, as it permanently removes a location from the encounter deck. The Fields do not have a travel cost, and combined with their 3 threat, it will be a popular destination during the travel phase. However, the only gametext on the location does make it a less appealing location to have active at the end of the round. That is because if the Gladden Fields is the active location at the end of the round, all players must raise their threat by an additional step. This might not seem that much, but as this quest has some clear threat-levels that you want to stay under, any time you have to raise your threat, is one too many. This makes the Gladden Fields a good target for any effects that clear the location before the end of the round. Regular progress placing cards will do nicely, but if you are really struggling, then Legolas and the Blade of Gondolin will make sure you make enough progress to clear the location by killing enemies. Northern Trackers are also a decent solution to the location, though you will have to stomach the 3 threat for a few rounds if Northern Trackers are all the location control you have. I can also recommend Strength of Will for this location in combination with any other single-progress-placing-effect.
- Necromancer’s Pass: As a 3 threat location, the Pass can have a decent impact on your progress this round, but it could be a lot worse. The best way to deal with the Pass is to clear it in the staging area by placing 2 points of progress on it. Alternatively, the players can travel to the location if there is no other active location during the travel phase. This will demand that the first player discards 2 cards at random from their hand. If they have 1 or no cards in their hand, the players cannot travel here. I tend to clear the location in the staging area unless I feel that I have a high enough chance to discard some cards from my hand that I don’t mind losing. The location isn’t too much to worry about, and you can generally get away with travelling somewhere else. However, if you are in a situation where location lock is becoming a threat, then travel to the Pass if you can, as it lowers the threat in the staging area by a decent amount.
- Enchanted Stream: Out of all locations in the encounter deck, this is the only one for which I would warn not to travel to but instead clear it in the staging area. That is not only because it is quite easy to clear in the staging area, requiring just 2 progress, but also because of the passive rule that is on the Enchanted Stream. While it is the active location, players cannot draw cards. This means that players not only lose the card they get every resource phase, but they also cannot draw from other effects. Card draw events like Deep Knowledge become useless, but even utility allies like Master of the Forge and Bofur cannot draw you specific cards anymore. This stalls your deck’s development unless you have plenty to play from the cards in your hand. Decks that run Erestor (and usually Noldor decks in general) will struggle as they lose most of their hand and cannot draw extra cards. Since this only happens when the Enchanted Stream is the active location, I would suggest leaving it in the staging area, even if it is the only location in the staging area during the travel phase. It is not worth losing your ability to draw cards, unless you can be sure to quest through it before you could draw a card again. With it only having 2 quest points, cards like Legolas and Strength of Will can clear it without costing you too many cards. Blanking the textbox of this card with Thror’s Key can also solve the issue, but only if you really want to. Usually there are enough other options to travel to during the travel phase.

Treacheries
The treacheries in this scenario can be very bipolar. On the one hand, they can whiff (especially if your threat is lower than 35), but in other cases they can be game-enders that you can do very little about. It is advised to keep a Test of Will in hand for some of these, though they become nastier as your threat goes up.
- Despair: It will be a good day when you reveal this from the top of the encounter deck. Not because the When Revealed effect is beneficial to the players, but just so you know there is a lower chance of having this card pop up as a shadow card later on. The When Revealed effect on Despair is quite tame, especially in this scenario. The biggest thing that Despair does is remove progress from the current quest card. It does this to a maximum of 4 progress tokens, or all if you have fewer than 4 on the quest card. Note that this targets the current quest, so if you have 8 progress on stage 1 but have selected a side-quest for this phase with no progress on it, this treachery does not remove any progress since the side-quest is the current quest card. But even without side-quests, this treachery is not much of an obstacle during this quest. In stage 1 you will probably have more than enough progress to take 4 points off while you stall to kill the Hill Troll. During stage 2, this treachery is the most annoying, but it is better than revealing any other card since it doesn’t stick around for long. It is a set-back, but only a minor one if you have enough willpower. At stage 3, no progress is required on the main quest, so this has no impact and is a free encounter card. The lack of surge makes this treachery pretty underpowered and it is often not worth wasting cancellation on. Shadow: That is not the case with the shadow effect though, which has taken the life of many heroes over the years. Despair causes the defending character to not count defense for defending this attack. That means that the damage dealt is equal to the attacker’s attack strength. And if that attacker happens to be a big enemy, you can probably say “goodbye” to your defender, as it is unlikely they have 4+ hitpoints left. If you are comfortably defending with Dain or Beregond that have a ton of defence built up, then it is all nullified by this shadow card and the Hill Troll can one-shot them both with this. Always have cancellation ready for this shadow effect, and keep track of where the two copies are in the encounter deck/discard pile. It just might save your hero from an early demise.
- Driven By Shadow: There are two scenarios for this treachery. Either it does next to nothing, or it is the worst card you could have revealed, making your location lock a lot worse. When this treachery is revealed, each enemy and location currently in the staging area gets +1 threat. This does effect any encounter cards that were revealed before this treachery, but not those that are added after this treachery. Should there be no locations or enemies in the staging area at the time this treachery is revealed, then it surges into the next encounter card (which also doesn’t get +1 threat). The impact of this card scales with the number of cards in the staging area, and it will be less terrible if you managed to keep it clean. However, in higher player counts, this is not always possible and Driven by Shadow can easily add 5+ threat to the staging area. But in higher player counts you will have sent more willpower to the quest, so it usually balances out. It is often not worth cancelling the treachery, but it is often depending on the situation. There is only one copy of this treachery, so you do not have to worry about it triggering more than once. Shadow: The shadow effect on the treachery can be annoying, as it will discard an attachment from the defending character. If this character has no attachments, the shadow effect does nothing. But you will otherwise lose an attachment, which can cause you to take more damage if you have to discard something that boosted your defence. Should the attack be undefended, then the shadow effect discards all attachments you control. This can be devastating for some decks late in the game, and should serve as a reminder to not take undefended attacks.
- The Necromancer’s Reach: This next treachery is probably the most remembered treachery from the Core Set and has been remade in many different formats over the years. But this classic card still invokes an audible grown across the table when it is revealed, followed by: “Can anyone cancel this?”. The When Revealed effect on the Reach is brutal in its simplicity. Each exhausted character gets dealt one damage. They do not have to be committed to the quest but can also be exhausted from triggering their effects before the staging step (Gleowine, Master of the Forge, Bofur) or be exhausted from other effects (Ents that were just played for example). Each exhausted character is dealt one damage, which can destroy lower cost characters with just one (remaining) hitpoint. If these characters were committed to the quest, they no longer contribute their willpower to the quest, and you have to recalculate after the staging step. This effect can lay waste to some decks like Silvans and Hobbits, so it should be cancelled if possible. Getting this card multiple times in the same quest phase is not impossible, as there are 3 copies in the encounter deck in Normal mode. Multiple triggers of this treachery in short succession can often lead to dead heroes and to a reset of the game. Cancellation is important for this one, but another way to avoid having to take so much damage is to ready all your characters before the staging step. Cards like Grim Resolve, Need Drives Them, Free Peoples, and Strength of Arms can ready a lot of characters while keeping them committed to the quest. Healing can also help, provided there is enough time between copies of this treachery to heal everyone. This treachery will be quite common in this scenario, and can combo horribly with Evil Storm if players have a high enough threat. Healing will be inevitable if too many of these treacheries go off.
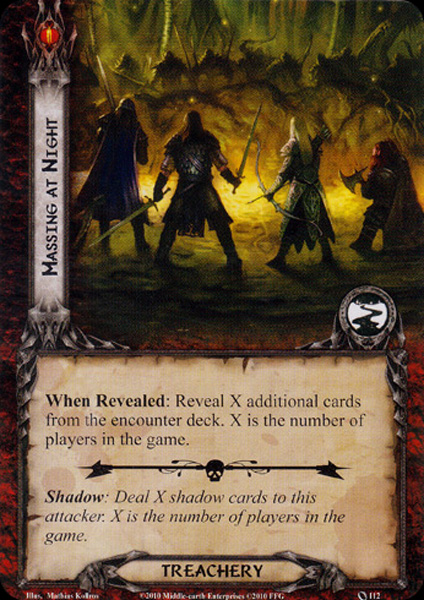
- Massing at Night: This treachery is quite interesting, as it is next to non-existant in a true solo game, but horrible in a 4 player game. When the treachery is revealed, the players must reveal one encounter card per player. This doubles the number of cards they have to reveal during that quest phase, which can be quite a set-back for the players. In solo however, this treachery only replaces itself. It is essentially surging into the next card, with nothing on the treachery itself that is worth noting. So solo players will love this treachery, while in multiplayer, it will be that is worth cancelling unless the players are in a good enough position to take on extra encounter cards. Shadow: The same rule applies to the shadow effect of this card. In solo, the shadow card just replaces itself, but it does help the player if this was attached to Wargs, as they will remain engaged with them. In higher player counts, this shadow effect can potentially stack 4 shadow cards under a single enemy (5 if that enemy is the Dol Guldur Beastmaster). Cancelling this shadow can save you from having to roll the dice on the extra shadow cards you could reveal from this. For weaker enemies, this is probably fine, but if you are struggling to defend a Hill Troll, then cancelling this in multiplayer can save you from a potential +8 attack.

- Evil Storm: If you want another reason to keep a low threat during this scenario, then check out this lovely treachery. While players have a threat of 34 or lower, this does nothing, it doesn’t even surge. However, once any player reaches 35 threat or higher, and this treachery triggers, then they will have to deal 1 damage to each character that they control. While this sounds a lot like Necromancer’s Reach, it also does damage to ready characters, meaning that there is no escape for the weaker utility allies or characters that got damaged earlier and are just clinging on to life with 1 hitpoint remaining. The Evil Strom will deal a damage to all, causing potential board wipes in the later stages of the game. With 3 copies and with Necromancer’s Reach in the deck as well, you can expect a ton of direct damage from this if you are not careful. Keeping a low threat is the best remedy against this treachery, allowing you to save your cancellation for other treacheries that aren’t as forgiving. If you reveal this at a low enough threat, you will actually like seeing this treachery, as it does nothing at all.
- Pursued by Shadow: In a quest all about keeping a low enough threat, the last thing you would want is to suddenly have to raise your threat by quite a large amount. That is what this treachery can potentially do to you. When it is revealed, Pursued by Shadow raises each player’s threat by 1 for each character not currently committed to the quest. Don’t mind cards like Late Adventurer or Hobbit Pony, you can’t trigger those right now. This treachery looks at the number of characters you have left, and forces you to raise your threat for each one of them. This can be very dangerous if this puts players over 30 threat in the early game, as it means that the Hill Troll is going to come down. Even after stage 1, a higher threat can put you within engagement costs of certain enemies and can mark you as a target for Evil Storm and Treacherous Fog. Cancellation is possible, but there are also other options to minimize the damage of this treachery. Free to Choose is not a popular event, but it can neutralize this treachery on the spot for you. The only problem is that you should have it in your hand early. It also only lowers your threat, and not that of your fellow players. To ensure players reduce their threat again, Galadhrim’s Greeting can provide you with -2 threat after staging at the cost of 3 resources. If this puts everyone below 30 again, then it is a good card to play. Double Back is also a great counter to this treachery, as long as you manage to quickly clear it. Cancellation is also an option, but save it for other treacheries if you can. Shadow: The shadow effect on this card is quite unique, as it requires the defending player to return an exhausted ally to their hand. This can be quite bad if your only exhausted ally is the one defending this attack, as that will cause the attack to become undefended. Make sure you always have an ally to return who is not defending, just to avoid a nasty undefended attack of 6 if you are unlucky. Certain decks like the Silvan, Rohan, and Eagle archetype will love returning an ally to your hand, as that can trigger some interesting synergy in your deck. But if you have the option, return the character you either don’t need, or who is easy to bring back into play. Should you have no (unexhausted) allies, the defending player must instead raise their threat by 3. The ally is usually the better of these two, so if you see this shadow coming, exhaust an ally before it triggers to avoid unnecessary threat increases.
- Treacherous Fog: This final treachery is a kind of combination of Evil Storm and Driven By Shadow. When it is revealed, it raises the threat of each location in the staging area by 1. This can be bad if you are already in the early stages of location lock, but if you managed to keep a lid on the locations you keep in play, this treachery shouldn’t add more than 3 threat on its own. The stinger comes in the second part of the treachery, where players with a threat of 35 or higher must choose and discard 1 card from their hand. The fact that players get to choose the card they discard makes this treachery hit a little softer, as players can discard copies of unique cards that are already in play if they want to. It would have been worse if the discard was random. The fact that this also only targets players at a threat of 35 or higher makes it quite a tame treachery that doesn’t do a lot compared to the rest. Only if you are really struggling with locations would this be worth cancelling, just because it saves you from a ton of threat. But even that threat is temporary, making this a better reveal than yet another location.

Worst cards in the encounter deck
Like with the updated Passage through Mirkwood article, I will add my picks for the worst cards in the encounter deck that you can reveal. These cards will be quite the challenge to overcome, but some are part of combos that might not trigger in lower player counts. Regardless, it is wise to be careful around these cards, and have a solution for them should you reveal any of these.
- Enemies
- Chieftain Ufthak
- Marsh Adder
- Double Goblin Sniper in the staging area
- Locations
- Brown Lands + East Bight revealed in the same round
- Treacheries
- Evil Storm when players have a threat of 35+
- Necromancer’s Reach
- Massing at Night in multiplayer
- Shadow effects
- Despair
- Pursued By Shadow
- Massing at Night in multiplayer
- Undefended Driven by Shadow
- Wolf Rider
Tips and Tricks
- Don’t start with a threat higher than 30. Not only will this save you from treacheries like Evil Storm and Treacherous Fog (that start becoming horrible past 35 threat), but it also saves you a couple of turns before you have to engage the Hill Troll.
- This quest is incredibly swingy between questing focus and combat focus. Prepare your board state for the next quest card before you advance. This means having enough willpower for stage 2, and enough defenders for stage 3.
- When advancing to stage 3, prioritize defence over offence. This will allow you to drag the fight on a little longer, but prevents heroes from dying close to the end.
- Always travel, you will get stuck in a location lock if you don’t.
- Try and engage as often as possible during stage 2, this will make the last stage easier.
- Thalin is a good hero to send to the quest, he can kill the crows and deal 1 damage to most other enemies. If you have any other Direct Damage effects, make sure to use them to minimize the number of enemies in the staging area.
- The safest way to not have to deal with the Hill Troll is to not engage him in the first place. Direct damage won’t get you through all 9 hitpoints, but cards like Ride them Down, The Great Hunt, and Hunting Party can get rid of the Troll, allowing you to advance to stage 2 or not have to worry about facing the second copy at stage 3.

- Another safe technique that is used often against the Troll is to have it trapped into a Forest Snare. This does require the Troll to be engaged, but allows you to avoid its attacks until you kill it. If you can suffer the one-time attack, and have the resources for Forest Snare, it is a great solution. Remember that with Reforged, you can play Forest Snare during the combat phase, preventing the initial attack as well. This does require some more things to line up for you, but is a safer solution.
- It is recommended to use the location Guarded X cards here to filter out the nasty enemies and treacheries. Mithril Shirt and the Stone of Elostirion are both excellent cards for this scenario, especially if you can discard several bad encounter cards for their effect.
- If this is your first time playing the scenario after moving on from Passage through Mirkwood, don’t be afraid to lose a few games before managing to get to the later stages. There is a significant jump between the two quests that your deck might not be suited for. If you need help with a deck, I will point you to this decklist, that should help you. It is not a guarantee win though, there are no such things in this game.
Playthroughs
As this is one of the quests that has been played the most by the community, you can imagine that there are quite a lot of playthrough videos to be found. I won’t share all of them, but here are some videos that you might want to see in preparation for this scenario. There are also many videos that are great introductions for new players to the game.
- Progression style, 2 players: https://www.youtube.com/watch?v=Lx5RL9_0yBA
- Updated card pool, 4 players: https://www.youtube.com/watch?v=FG5cPkIujsk
- Dale deck, 1 player: https://www.youtube.com/watch?v=8mKOOq9t-7w
- New players, 2 player: https://www.youtube.com/watch?v=4iLm0OL-ol4
- Progression style, true solo: https://www.youtube.com/watch?v=WWmGLXXzdPw
I suppose the logical thing to do next is to return to Escape from Dol Guldur and do that one next. So expect that one before the end of the year from me, as I try and cover one of the toughest scenarios in the game to this day. A while back I did beat it 3p, but the quest is a whole other beast in true solo. Also be sure to leave feedback on these new articles, as I would like to see if anything else can be added for these definitive articles.

You say here that Ufthak attacks for five on his first attack, but that seems to contradict the FAQ?
> Q: When do “after this enemy attacks” Forced effects like those on Chieftan Ufthak (CORE 90) and Wargs (CORE 85) resolve?
> A: These effects resolve immediately after step 4 of enemy attack resolution.
Where step 4 seems to be after determining combat damage?
LikeLiked by 1 person
Thanks for the feedback. Looking back at it, you are correct. The resource is only placed after the attack has fully resolved and damage has been dealt. The article has been updated, as have all the others that mention Ufthak in that cycle.
LikeLike